THIS is the IDEAL Blade Height

Vložit
- čas přidán 1. 03. 2023
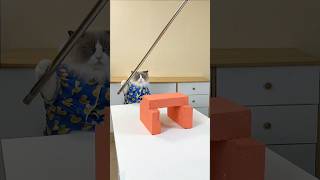
- Everyone has a different idea on ideal blade height, most of which probably stems from concerns of safety. What IS the prime table saw blade height? For the most part, the bottom of the gullet should be roughly at the top face of the material you're cutting. But there are some exceptions, as seen in this video.
www.etsy.com/shop/InspireWood...
PATREON: / inspirewoodcraft
EMAIL: inspirewoodcraft@gmail.com
WEBSITE: www.inspirewoodcraft.com
INSTAGRAM: / inspirewoodcraft
Looking for DOUBLE SIDED PAPER TAPE, DISCOUNTED HIGH-QUALITY PEC COMBINATION SQUARES and overall great savings ALL THE TIME? Shop where I shop! lddy.no/go67
YOU CAN SAVE 10% ON STARBOND CA GLUES AND ACCELERATOR!
Use the code “INSPIRE10” at checkout! www.starbond.com
SAVE 10% ON OLIGHT FLASHLIGHTS, TACTICAL LIGHTS AND HEADLAMPS!
Use the code "INSPIRE10" at checkout! www.olightstore.com/?streamer...
BANGGOOD WOODWORKING TOOLS: www.banggood.com/marketing-Wo...
MY HAND TOOLS, POWER TOOLS, CAMERA GEAR AND MORE:
www.amazon.com/shop/inspirewo...
SOME OTHER VIDEOS YOU MIGHT BE INTERESTED IN:
A NO-NONSENSE WAY TO SHARPEN A CARD SCRAPER:
• The No-Nonsense Way to...
HOW TO MAKE THIN STRIPS ON THE TABLE SAW - • Throw Out Your Thin-Ri...
CHECK OUT MY TAPER SLED VIDEO HERE - • Unlimited Possibilitie...
HOW TO MAKE A MITERED HALF LAP PICTURE FRAME - • How to Make a Mitered ...
VISIT THE INSPIRE WOODCRAFT SHOP: inspirewoodcraft.com/product-...
Adjustable Box Joint Jig Plan: inspirewoodcraft.com/product/...
Multipurpose Shooting Board Plan: inspirewoodcraft.com/product/...
All Purpose Tapering Jig Plan: inspirewoodcraft.com/product/...
If you appreciate this content and would like to help give back FREE OF CHARGE, simply give this video a “thumbs up”, leave a positive comment, subscribe to Inspire Woodcraft’s CZcams channel and SHARE THIS VIDEO with someone who you think would enjoy it. Some of the links that we’ve provided above are affiliate links. That means that when you make purchases through those links, we earn a small commission of the sale at no additional cost to you. While we do use affiliate links where we can, we only endorse products or services that we believe in. That commission is a big part of our income, which also goes back into making more videos, so by using the links you help support what we do and for that we are very grateful. - Jak na to + styl


As a new woodworker I prefer these types of videos. I never had anyone show me how to work wood properly. I watch a lot of videos and a lot of practice being self taught. Thanks for a great video!
As a 40+ yr woodworker, I have always been been taught, and only thought of the safety aspect. That changed, today.
As a 48 year old woodworker (staircases) who was self taught, please don’t shorten the videos.
Those who love the ‘who what when why where and how’ are always better off after watching your full-length videos. 😊
I’m still always learning something that will make me a better craftsman.
Shorts are not good for your brain and development.
❤ from 🇨🇦
Same here brother
Really only applies to cutting laminate in anyway that outweighs the safety aspect.....I have a 2 stitch scar on my fingertip; and my fingertip.......set your height as deep as you want cut and do a little more sanding.......wife and kids gone grocery shopping; wanna deal with wrapping up a wound alone or dealing with dismemberment alone?
@@bugman-ir8cw I used to tell my students there 3 schools of thought. 1/8" above the stock, Freud trained us 1/2 the carbide, or how deep do you want to cut into your thumb. My thumb scar was 7 stitches.
As a pattern maker, I totally agree with your tips 👍
Sometimes I had to deal with meters long sheets of acrylic, polycarbonate and polystyrene. These tend to climb the blade, as you fittingly called it, and then shatter when they get a grip again and slam on the table. What helped me with this, was a c-clamp on the riving knife (the part behind the blade) where the piece is forced to go underneath. You can even make your little top cap for the blade, which keeps thermoplastic droplets from flying in your face.
I hope I used the right term, I'm German and I used an online dictionary for the riving knife.
Andre your c-clamp tip would actually work for any wood, but very well for stuff like 1/8" plywood! Thanks!
Andre: tell your local friends that your 2nd language English skills are quite often better than the locals born and raised speaking English here. It’s always correct and proper…basically everywhere else in the world but English speaking countries. 😂😊
@@ruidadgmailcanada8508 thank you so much ❤
I learned these same techniques years ago and your take is a very good refresher. All make perfect sense and applicable to most every tablesaw user. Thanks for keeping the community in a perpetual state of learning because that's part of how we get better.
You're right. I tend to not change my blade until the wood is smoking.
I’m a semi retired woodworker. Spent 30 years in the craft. These instructions are solid and well explained. One more thing to add would be feed rate. It plays a role in how much time the tool has to do it’s work. With experience, listening to the sound tells a lot of what’s happening.
Great information! Another benefit of raising the blade so the gullet is (just) above the top face of the workpiece is that it helps to clear the chips, reducing heat buildup.
Very useful information, this is the first time I’ve seen someone on CZcams actually explain the reasoning for why and where you want your blade height. Makes perfect sense.
It's always good to refresh the knowlage that one already have. Thanks for this video.
Even when I think I already understand the topic pretty well, I always learn something new from your videos. Thank you for your clear, no nonsense style.
So glad you brought this topic into play I didn’t realise how much of a difference a blade height can do for a better cleaner cut. I don’t think I’ve watched one of your videos where I haven’t gained a better way or skill to improve my woodworking so thanks for doing what you do.
My friend, a HUGE THANK YOU for your videos. In the last 4 days you have helped me out twice on a project that I'm working on and saved me a lot of time trouble shooting. That doesn't mean that you haven't encouraged me to do things I never thought of attempting in the past. You have inspired me a lot to start projects having watched your videos. They are to the point and make my life easier. Keep it up and I look forward to seeing more great content. This video was just in time for drawer fronts where I needed zero tear out. TADA!!! No tear out! The other was your vid on shims. My table saw is a small cheap thing which limits me a lot. You helped bypass this and make some nice shims that I needed. Again THANKS!😃
That makes total sense to me, thanks
Bob
England
That makes so much sense, and is such a valuable lesson. Apart from lessening tear out, I have had the front of the board lift when encountering the blade set to just slightly proud of the board. You really do have a deep understanding of how this stuff works, and I have thought that from so many of your videos. Stumpy Nubs and JKM talk a lot about safety, but they don't make their points as convincing as you.
Great explanation. Thanks.
Great explanation, thank you! I love the visuals, and going into different situations.
Thanks for the advice. I come from a more metal work background, so any useful tips for woodworking are a Big help to me. So, thank you showing what to look for and watch out for. Especially the grain and thickness parts.
Have a great week ahead.
Thanks for sharing that tips and the make!
Great video. I learned a lot today. Thank you for making this.
Thank you. I didn't know this.
Thanks for another useful video. Great reminders.
Well done Jodi - as usual to the point.
As usual, a good explanation of what to do in different situations. I always find your videos educational, and I get to think about what you are suggesting. Thx.
Very informative. Thank you.
Great advice, thanks
Good stuff. Thanks, man.
Great video! You have definitely given me a different perspective to consider. I can already think of the benefits of running my blade slightly higher that I have. Thank you for posting!
Good video. I had thought about the cut depth before, but never thought about the grain direction when making cuts with a tablesaw.
Very informal thank you!
Thanks for another great video my young friend. Much appreciated.
I was always taught the bottom of the gullet is to be at the top of the material.
Outstanding video and much appreciated. When I was being taught how to use a table saw some decades back, the rule was top of the material at the middle of the top tooth. I wish I'd seen this video where you gave an excellent demonstration of when to use a shallow vs. deep cut. Many thanks for the lesson.
Very helpful, thank you
Far from boring. Very precise and informative. I learned a bunch today. Thank you!
This is great. Well thought out and rationale... I completely agree that your safety is a personal thing... meaning it is your responsibility. All said, Well said Brother
Once again, fantastic info....thanks.
I’ve always thought if one understands how something works, one can properly troubleshoot when results are not as expected. Good job explaining blade cutting. Makes sense. Thank you.
Thanks for explaining the why and when. I love this channel.
Extremely valuable information, which I completely ignored. Thank you!!
Cool analysis! Never thought about that before.
Thanks
Excellent! Thank you! 🙌
Virtually everything in life is a compromise, and your method is exactly that. The best compromise. Thanks.
I agree with this set up and it was how I was taught many years back. Thanks again for your excellent content!
Great video! info i didnt realize i needed
Thanks for the great information on this issue.
Your delivery is clear and excellent. I know if I tried to convey the same I'd wander all over the place and take three times longer.
excellent, thank you
Thanks, didn’t realize this before.
Very reasonable and very convincing. great video and information, Thank you
Thank you for some very good info
Good info. Thanks.
Another great video/lesson.
Good tips. I usually run my blade with gullet just above the wood. The only thing I noticed about running blade to high I think it throws more chips back at you as well. I usually use my blade guard for safety and honestly dust collection.
Interesting, thanks
Excellent video. Answered many questions I’ve always had.
Eye opener love it
Very good information. Thanks. Another situation where you might want to raise the blade higher than 'usual' is when you're cutting sheet goods. Melamine and some hardwood veneer plywoods can be very prone to chip-out. Often, chip-out on the 'show side' of the project will all-but ruin a piece, but you can hide chip-out on the non-show side. When that's the case, raise the blade up high.
This is what I was taught as well and the entirety of the tooth, plus just a tad extra, should clear the workpiece. Good explanation.
Thank you for the tips, very good observations 👌
This is the way!
Extremely helpful video thank you very much
Thank you for the video! I don't use my tablesaw alot but it's good to know how to use it right to get the better cuts. Take care and GOD BLESS 🙏!
For your reverse grain, reclaimed-face-saving situation you could also just move the fence to the other side of the blade instead of raising the blade super high. Referencing the right side of the fence would force you to cut with the grain.
Good information thanks
Excellent presentation. I learn something new with every one of your videos.
Excellent explanation on the why and how. I've been a little disappointed with my tablesaw and I think it was because the blade was set too low.
Thanks for such an informative video. I’m retired now and breaking into woodworking. A guy like me needs videos like yours to tell us things it may take us years to figure out on our own.
As usual, a great educational video, keep up the great work. 👏
I'll be honest I came here thinking I wasn't going to learn something......thank you man I actually did and will follow this advice going forward.
I completely agree with your blade height settings. And that is how I setup my saw. Any spinning blade is a hazard regardless of the amount of blade exposed. But I always get good cut quality using this method.
I like your educational videos. ❤
Quality tips trigger there! Thank you. 👍🇦🇺😎
I listened to every boring word. Very enlightening. Thanks.
Another good explanation of something most of us don't think about. I was taught to raise the blade tsothe bottom of gullet was to the top face of the WP, but I assumed it was as low as possible to minimize the severity of an injury while high enough for the gullet to eject the dust. Re raising the blade to the max for any type of cut, I do it rarely but with great fear.
Appreciate videos like this. Thank you!
@8.00 you could use a marking knife to score/server the fibres on your board, and keep the blade hight the same. 👍
Hmmm... Really interesting tips indeed! Thanks, dude! 😃
I'm definitely going to run some tests!
Stay safe there with your family! 🖖😊
Great, no nonsence video. Thanks.
Excellent. I agree with your take on it and follow roughly the same strategy. One point I would add - those who argue fora blade barely poking through the board and no gullet showing - you’re adding unnecessary heat to the equation. Your cutting patch is longer and generates more friction and the blade has less chance to pull cool air through. Getting your gullet open to the top allows the blade to cool more resulting in less burning, less wear on the carbide, and therefore longer life on your sharpened edges. Cheers.
Excellent details.
He is clueless. Using the machine without a sawguard is the first clue. He needs some education before he presents videos.
@@jimpackard8059 I agree that all guards should be fitted. Tablesaws are dangerous machines. The details on tooth height, cut length, logitudinal and vertical pressure are still however interesting details and food for thought.
Thanks! Reading the directions on my Forrest Blade, they state to 'run the blade high for best cut'.
Amazing. Very few, if any talk about the angle of the teeth. This is a outstanding video packed with important information.
A good 4 minute video. Congrats on stretching it out to more than 12!
To minimize tear out you can do a scoring cut then a full depth cut.
Thank you ,I learned more from this video than I did in the last 20 hours on CZcams 😂
Wow, I really learned allot from this. Thanks. But I am surprised that you didn’t mention the heat dissipation with more blade exposed and waste removal. Heating of the blades greatly decreases the sharpness over time. Also less burnt edges to sand out. Good 👍 job explaining.
I just wanted to say, I have heard - for safety, don't have it extend beyond the depth of cut. Safety and accuracy were noted as the blade heats up etc...
I love logic! This gullet method was mentioned by others but the logic behind your approach makes it a slam dunk. Thanks for being you, we really appreciate it!
I use full kerf blades ! In my table saws and Miter saws. I was cutting some 1 1/8 sub floor for my van ( re flooring it) and I was running the thin kerf blade that I had ordered a couple because I thought hey just loping off 2x4 ‘s with it and it cuts clean? Wow it heated up quick and was all over , so much so I stopped my cut thinking wow the blade is loose? Nope just those thin blades!
I say that to say you can follow good practice like you are showing and for yrs I raise my blade up but use the wrong blade and it’s pretty much a small mess!
I was taught this way as a child‘forever ago’ on a very low powered, low end, tablesaw. I can remember the demo cutting through boards with different blade heights, stopping part way through and slipping notebook paper udder the wood to the blade. Gently lifting the wood it was obvious the amount of material left in the gullet when it wasn’t fully clear of the material height. Then cutting through a (real) 2x4, the absolute max saw capacity, and seeing nearly full gullets.
So the teacher (dad) said something like ‘so the higher the better right?’ My response agreeing. Then showing how the low power saw would bog down with the blade too high b/c of more blade trying to move through the material. A lower blade height didn’t slow the blade as much, trip the breaker, or burn the wood. Critical thinking skills when classmates were learning addition tables. Later in life with better equipment realizing that poorly tuned equipment was also a factor.
Limited and low end equipment and a patient father helped me learn physics, geometry and other maths, homeowner repair, plumbing, auto/marine (from ‘paint to propulsion’), masonry, electrical, gardening … from a blue-collar guy who barely made it through a trade high school. Mandatory chores, embarrassment, and a college education flushed most of these practical skills. Until now.
Thank you for presenting some important techniques, quality equipment, as well as fair and safe shop practices.
Really nice man, useful. But I was waiting for you to actually cut this board :D :D
Excellent analysis. In terms of what anyone can do to reduce tear out, I think it does come down to:
- change the blade more often. I would guess that most people delay the change too long. I was asked when should that person change the blade. My reply was about a week before you think you should. I don’t think I’ve seen anyone working with a single table saw change their blades for a single rip or cross cut although they might for a whole lot of cuts. I certainly use a combination blade unless I know that I’m doing a lot of ripping or cross cutting
- all of this applies to circular and track saws albeit the gullet is beneath the work
- have blade raised so that the deepest gullet is just above the piece to be sawn
- different timbers have different propensities to tear out. We use a lot of European oak which is a…. Pig in that respect.
- a table saw with a scribing blade is a great thing in that it reduces tear out on the bottom face of the work. However, it’s not a usual feature on non-industrial saws. If I feel tear out is likely, then I score (with a utility knife) the top and bottom faces of the work obviously on the keeping side of the intended saw cut.
- it’s very rare that the cut edge is good enough to be the finished edge. We always sand our edges after cutting but before use. If the pieces are narrow, then we use our wide-ish (550mm) belt sander with the pieces put through vertically. If the pieces are too wide to go through the sander vertically, then we use a sanding disc in the table saw (we use the one from Mike Farrington which I like because it’s 2 degree taper seems to give the best finish) to achieve what we want. In either case, as you can only take 0.5mm off a face using a sanding disc or belt, it does mean cutting the work slightly over size and potentially running it through several times.
I am not sure I agree with your analysis. Several other trusted woodworkers recommend a different height settings. It might have helped if you demonstrated your position by making some test/demonstration cuts. So as soon as I can get to the shop I will make some cuts and verify for myself just who has the best advice. Thank you for sharing. Have a great day and stay safe.🙂🙂
Even when I was a newbie, it seemed logical 2 me 2 set the blade at the gullet.
Great tip 4 cutting half the distance of a board. I usually didn't even try that b/c of the uncertainty of where the hidden part of the blade was. Exposing the whole blade, brilliant. Duh.
Oh...and Jodie...did u have your saw unplugged 4 the video? Tee hee hee, just messin with ya.
I like this guy
Having that much blade sticking out is such a major safety issue. talking about having the blade all the way up, I was taught 3 teeth showing.
Forrest Blades recommends about an inch higher than your position 'when there is a blade guard'. Their rational is reducing the time the blade is buried in the wood. The difference in temperature is substantial. It reduce burning on difficult wood.
I like your videos. You make a valid point but I think there is more going on besides the angle. What do blade manufacturers say? I'm sure they totally get down to the weeds on this with many expirements.
can you take a smaller cut on weird grain and then take a finishing pass to final dimension to reduce tear out?
I think you make some great points in this video.
Having said that, I wonder if cutting with the full height of your blade also increases the chances of kickback. I think when you increase the number of teeth engaged with the piece you're cutting, you increase the chances that a tooth can snag your workpiece, raise it, ride it up the blade, and kick it back at you. I think minimizing your blade height probably reduces the probability of kickback.
For narrow cuts, I sometimes use a push block with a sacrificial backstop on it to push my piece through. In these cases, I minimize my blade height to minimize the depth that I'm chewing into my sacrificial push block. Yeah, I should probably get something like the gripper for some of these cuts.
In any case, blade height isn't going to be the main thing to worry about when you're planning your cut and mitigating potential for kickback. You need to make sure you're using a riving knife or splitter, and it can be helpful to use attachments like featherboards or blade guards with anti-kickback pawls or fence attachments that press down on the workpiece. Still, I do think that there's probably more safety risk with higher vs low blade height.
Kick back has two causes. The most common is the wood binds at the back of the blade and the blade grabs it and throws it at you. The binding issue will only be stopped by a riving knife or splitter. The second cause is having the blade too low. In that case you've buried the blade inside the material and it wants to pick it up and throw it at you. The higher you raise the blade the less chance of kickback. The chopping force is now down to the table. The obvious issue with raising the blade is the need for a blade guard. In my opinion, raising the blade so that the carbide tooth is fully exposed is the best balance between performance and safety. You want to get the carbide out of the material to cool it down. Heat damages the carbide and causes it to dull quickly. This is obvious when using router bits.
I agree with everything you said, and some content just has to be 'boring' as you describe - but don't stop making it! I think your advice is perfect for new to mid-experience woodworkers, especially in the grain direction area. That said, I've found that there are so many variables (species, saw, material size, blade geometry, grain, phase of the moon, etc., etc.) that you could generate hours of content for every possible scenario... but the gullet rule of thumb is a great one.
Question: you mentioned cutting acrylic, so I'd like your opinion on cutting it blade-normal, or cutting it blade-backward?
@Matt Elias Hey Matt. I cut it normal using a triple chip grind blade with a higher tooth count.
@@InspireWoodcraft Makes sense... I'll keep that idea close. I had a bunch of chipping with a 'normal' crosscut blade, and the backward blade just got messy and it stank... bad.
Question for you - If one considers the hook angle of a specific table saw blade and adjusts the blade height so the gullet just clears the top of the board then is there a favourable range of thickness / thinness of material for that particular blade? The practical and theoretical limitations of wood working machinery is seldom discussed on CZcams. You have opened that discussion.😀
I thought your video on table saw safety was excellent. It prompted me to subscribe. Keep up the good work!
@Gregory MacNeil If I'm reading your comment correctly, I don't think there would be a favorable height to the material because as the thickness of the material increases, the height of the blade raises to match, so the geometry stays the same.