How to Install a Bathtub...American Standard's Americast (Step-by-Step)

Vložit
- čas přidán 12. 05. 2017
- For more home improvement tips visit www.homerepairtutor.com/👍🏼
Princeton Recess 5-Feet Left-Hand Drain Americast Bath Tub with Integral Overflow, White - goo.gl/ns9h3M
Princeton Recess 5-Feet Right-Hand Drain Americast Bath Tub with Integral Overflow, White - goo.gl/Yk235i
clear silicon sealant - goo.gl/spxn8k
Tub Drain wrench - goo.gl/WcSxLG
Pipe Thread Sealant - amzn.to/2hLIn6e
ABS pipe adapter - amzn.to/2hLzEB6
PVC pipe adapter - amzn.to/2iHtRgX
Fender Washer, 3/16 in X 1-1/4 in, Stainless Steel, Pack of 25 -
goo.gl/2LgmC2
Hilti Impact gun - amzn.to/2hJzyKl
Installing a bathtub in older homes can be a pain.
This video shares how to set the tub in mortar, level it, add the plumbing, and get all the shower walls plumb for cement board.
We share a lot of tips you won't see in books or other videos. This tutorial is great for homes older than dirt.
If you want to learn how to install an acrylic tub you're in the right place. This video walks you through our Kohler Archer bathtub installation.
Here's what you'll see
-how to install the tub drain
-how to access and setup bathtub plumbing
-how to set a tub in mortar
-how to level the bathtub
-how to secure the tub to stud framing
This is a pretty darn good tutorial. If you have any questions please ask them in the comments. We'd be happy to help.
Watch our video for all the details
• How to Install a Batht... - Jak na to + styl


Really a well done video. Just the "Nuts and Bolts" without all the hand waving and crud so many CZcamsrs think they need for a "cool" video. I can tell that this guy really knows his stuff. Its nice to see a true craftsman take the time to make a great How to video. Thanks for posting.
Always a pleasure to watch a skilled craftsman. Thanks.
I love how he just throws everything together. Seriously I'm not being a smart ass. Goes quickly and smoothly. I have to contemplate every move as I have not done this before and I have to think about it so I am planning for the next move and so I don't screw it up. Nice to see some of my plans for shimming are also used by a professional. Thanks
+wsvitak Steve doesn't mess around. It's all business and getting the job done the right way
Had me all the way, but choice to fill the gap on water wall nope. You figured it out but short changed on measurement on a wall you built out already. So much to consider in every Reno. 👍
You must have loved that window sill in your way
Like others have noted, you skipped the most important/difficult part, connecting the drain plumbing.
He called a plumber to do that ;)
@@andriyshapovalov8886 there are plenty of videos on that. not a lot that explains the details of how to install the backerboard just over the edge to get a good fit. this is exactly what I was looking for, and confirmed how I need to install my walls.
@@Monuments_to_Good_Intentions I think you were trying to reply to OP, but since you mentioned it, most of tub manufacturers call for backer to be Installed above the edge of the tub....
I found this one more helpful...czcams.com/video/LX4oQHsmdc8/video.html, looks like it was not posted yet when you commented.
Hire a freaking plumber for that part, do u really want to risk it just to save a few bucks ?!
Absolutely amazing video. I would’ve tried to drill right through the porcelain tub. If you pretend to know something and you don’t then you’re screwed up. Lol I had no idea what to do lol. Thanks man.
Great explanation of work, materials, plus both installation and supply options!!
I'd add a few things that may be helpful.
One, from experience, I always wear safety glasses where appropriate (pneumatic nailer/stapler).
Two, I'll always score my shims at least once, more if they are thicker at the snap point, to make sure the entire fastener is supported by the shim.
Three, a lesson several other contractors I know learned the hard way, wear knee pads or you may potentially be struggling if one plans on constructing into their 50s and 60s.
and protect the tub with drop cloth when stepping on it.
@@edmundooliver7584
I WAS FLIPPING OUT WATCHING HIM STEP IN WITH HIS BOOTS! MY OLD SCHOOL BOSS 35 YEARS AGO WOULD HAVE FLUSHED ME DOWN THE TOILET AFTER HE CUT ME UP INTO TINY PIECES IF I DIDN’T PROTECT THE TUB! THAT TUB IS BRAND NEW BOY! DID YOU PAY FOR THAT TUB OR DID THE CUSTOMER PAY FOR THAT TUB!!! DO YOU WANT TO PAY FOR THAT TUB?😂😂😂😂
Great video. Awesome job. Thank you. You guys are the best. I am a new home owner who inherited an 80% complete bathroom renovation with the tub as the last part. It is already installed but it moves a little. Everything else looks good so I don’t want to rip it out. I basically just have to put the backer board on, waterproof, and tile. I was going to use washers to secure the tub and then I saw your video. I am worried about damaging the tub if the washers crimp it. Have you ever used/seen stainless steel neoprene roofing washers? I am going to try those. I wish I had the energy you guys do to make a video. Please let me know.
I think you are right about that mortar. with the fiberglass tubs, I see so many complaints about the tubs cracking after installing all the tile and everything around it. and people having to rip out all that hard work just to have to redo it again. I think it because their contractor's arent using mortar. even if the tub has a built-in level base, things start flexing once the weight of the person and all that water gets in the tub. that mortar helps stiffen things up and if any flexing is going to happen it happens under the mortar.
Absolutely for fiberglass - don’t need mortar for a steel tub - but if you really want extra work knock urself out
You guys are great, simple, no tricks... And you provide all necessary materials needed. For that i would work with you as a token for your good ways to teach others.
Great job!👍🏻
Thanks David
I like that twist and turn drain assembly. I might have to get one of those. I'm redoing a small bathroom that also has a 61-1/4" rough opening. I like how you built out the whole wall for a smoother look. That is how my bathroom was done when it was last done 19 yrs ago. I'm redoing it now and the entire plumbing wall (interior wall) is furred out with 1x2s attached to the 2x4 studs, but the opposite wall (exterior wall) is just 1x3 furring strips on cinder block, so there is almost no insulation except for 3/4" white rigid foam panels. I'm redoing the walls so that the new tub will be shifted 3/4" of an inch towards the interior wall so I can get more space for insulation on the exterior wall. 1-1/2" total of rigid pink XPS foam. Also, doing this on the long side of the tub. Not much, but double the thickness of what it was and a better R value per inch. Having said all that I really just wanted to comment on the mortar bed, but I guess I'm getting excited. I bought a tub that has the leveling pad like this one, but the rest of the floor is a mortar bed about 1-1/2" thick for the tile. (They way they used to do tile floors). So, I think I'll use mortar under the tub, not just for support, but so it doesn't sit too low compared to the height of the tile floor. Anyway, it's nice to see work being done on an old house.
I love ya v
9:02 -- the best advice in this video. I bought a house and the previous owner installed an Americast tub just like this one. After a couple years I noticed after the tub drained there was a depression near the drain where we would stand while showering and water would get trapped. I tore out the tub and found that the black resin on the bottom of the Americast had failed and cracked open. The tub was not set into mortar. I am confident if the tub had been set in mortar it would not have failed.
Sorry to hear that happened, totally stinks. Are you in the middle of a complete remodel?
@@HomeRepairTutor That was part of a complete bath remodel many years ago. Replaced it with a Sterling Vikrell tub and I have no complaints.
@@DownForTheUnity Yes, I set it in mortar. I don't recall the brand but it was one of the readily available ones from the big box stores. If I were you I would put some plastic sheeting down on the plywood, then put the mortar on top of that. I also put very thin plastic film (like what dry cleaners wrap your cleaned clothes in) on top of the wet mortar, then I set the tub on top of that -- easier to pull the tub out that way.
Plastic might be a good idea in case the tub has to be replaced in the future.
Great video, thanks much!! I'm trying to decide whether to have my tub reglazed (again) or pull it out & have the American Standard Princeton 30" wide tub installed. The latter is my preference, but the demo on this old house is horrific, so not sure. One thing, though -- I cringed every time you got into the tub in your shoes -- I'd prefer some type of covering, even a drop cloth, as it seems like it could scratch the finish. Maybe not the finish on this particular tub, though.
I just bought an Americast tub today. The box has a graphic printed on it. Cur this out and place in bottom of tub to protect the finish from scratching with dirty shoes. I guess his box didn't have such directions printed on it.
very nice video and job thank you
Really wish you would have shown hooking up the drain pipes
I Was Hoping to See the Drain Connection !
I look forward to watching the future video of you trying to replace the tub drain. Tub drains wear out over time. You f'd up using silicone to seal it. 5:37
good work
Do you guys have a video showing the way you leveled the floor prior to installing the tub? My floor looks about 1” off level for the length of the tub, so I think I need to use the self lever, but can’t find any videos of how to do it right. Thanks!
Rip a piece of wood the desired thickness and screw it down across the opening. Mix up the leveler and pour it in / let it set and then remove the wood that was used as a stop.
Sawzall, a plumbers best friend. Nice joist hacking.
So you guys run your backer board over the tub flange? It's amazing how certain tile pro's say that is a terrible idea, then others think it's fine. I did my first couple tubs with the backer shimmed over the flange like you did, but the more research I did revealed why this was not necessary and actually a bad idea because the water will wick up into the backer if it's sitting near the deck of the tub. I find it much easier to sit my backer right against the top of the tub flange, then when tiling, the bottom row of tile slide right over the tub flange. This also eliminates most or all of the shimming of studs. I'm in Pitt as well, maybe I'll see u guys around!
+warlok9 good insight, we apply a bead of KERDI-FIX or Wedi sealant to the tub deck and flange then embed the cement into it so that water won't wick into the board. Our preference is to use foam backer boards these days but a lot of folks opt for cement board due to cost and it's easy to find.
Go Pens! Yah, feel free to reach out to us any time 👍
Thanks, and Go Pens! I also have also recently started using Shluter Kerdi for custom showers and although much more expensive, it is so much easier to carry and work with.
+warlok9 cool, Schluter is a great company. Now that they offer thin-set and a lifetime warranty it's hard to not use them. We're hoping they develop a curbless pan that can be recessed into the joists.
Home Repair Tutor Where do u purchase your Schluter products? Is there a local dealer here in the area that stocks most of their stuff? I got the shower kit from Lowes last time, but had to order the niche and the Kerdi fix from amazon. So Schluter sells their own branded thin set now? I used the uncoupling mortar from lowes and it seemed fine, but obviously if u can keep it all one brand that makes it easier. I noticed in your other videos on two different tubs you guys ran the Kerdi to the top of the flange, which is how I do it, but if you guys do it differently now, can you link that?
Thanks for this comment chain, I was just wondering why the methodology difference between this and the video of you guys installing the Kerdi board. Going to stick with Kerdi+KerdiBand above the flange for my shower base in the bathroom reno we just started.
Do you have a video dealing with drop-in tubs, and how to properly frame them out? Your videos have been extremely helpful so far. Might just not have found it yet.
Go Pens...
The rubber gasket on the bottom was your leak protection. Why did you use pipe dope for the metal nut? The metal nut does not stop leaks. It compresses the rubber ring into the top to stop leaking..
This.
Can you leave a gap between tub and studs on non drain end if 1/4 inch and just put cement board on tub lip?
Thanks for the video. Do you remove the screws & washers before putting on the new backer board?
Otherwise wouldn’t the board flair out at the bottom & sit funny over the angled washers ?
The screws and washers stay. You can notch the backer board to fit around the washers.
What do you do if your alcove tub has an integrated 1/4 inch flange , and the hydro ban board you plan to use says you must add firring strips, but by adding said fitting strips plus your board of 1/2 inch makes the shower wall 1/4 inch proud of the rest of the rooms half inch drywall. How do you make the shower wall in plane with the rest of the room if you have to add 1:4 inch strips for the tub flange??
what did you use to level the floor before the mortar?
well done sir!
The regular fuel drills rin screws just as fast or faster than the impacts even with 4" screws and doesn't eat bits nearly as bad
No overflow connection?
How do you trap the hair so you won't fall into the drain and clogs up the drain.
Wow.. I've installed hundreds of tubs as a master plumber in the last 40 years and saw some things wrong with the plumbing installation. You don't screw non tapered threads into a tapered thread fitting. And though it wasn't shown, the p-trap was probably installed with out a vent because I didn't see one on the vertical pipe that it was going to connect to. The horizontal outlet of the p-trap has to have a vent before the line goes vertical. If it doesn't the water in the p-trap will siphon as it's draining or when the adjacent toilet is flushed and you'll have gurgling noise and sewer gas coming up the pipe. Also if you screw the tub to tight to the wall it will squeak and you have a chance of cracking the porcelain (looks like it did at15:30) that's why its not pre drilled from the factory. I always put thin mill plastic or put duct tape between the wall and the tub, and this always prevents squeaking.
Thank you for sharing your experience, we appreciate that - but don’t assume there wasn’t a vent or the tub was plumbed incorrectly, both were done to code. Also, the tub wasn’t cracked at the time stamp you referenced. We put a lot of time and effort into videos to ensure correct installation methods
Add .47 it shows installing an 90 ell on the drain pipe not a tee with a vent going through the roof. So I'm wondering how it was installed to code?
@@CS-rb9jk Looking at the existing fittings you can see that the plumbing is draining from right to left (as we view it on this video). The p-trap was installed CORRECTLY on the upstream side of the vertical vent pipe which is hidden from view by the insulation. Also because it is a 60 inch tub, it can be assumed that the trap was within the maximum distance from the vertical vent pipe.
@@slowlyrusting4044 The inlet of a p-trap should only run vertical not horizontal. If your right that there is a hidden vent behind the insulation, then what was installed is called a
"running p-trap". Those are not approved by any plumbing code. I don't see any vent just a 90 going straight down at 4:17. P-traps don't connect to vertical pipes, if they do it's an
S trap, which is not legal by any plumbing code. The outlet of a p-trap connects to a horizontal line that drains into a tee. The upper outlet of the tee is the vent. The bottom outlet is the drain.
@@slowlyrusting4044 Oh and his home made p-trap at 10:48 shows that he is going to connect the outlet of the p-trap to the vertical pipe going down with no vented tee
Gracias thanks teacher
Did you remove the black resin from the flange around the perimeter of the tub so that the steel tub flange sits against the wall studs and backer board?
Small bathrooms are the worst to work in especially mine it’s a 97 year old row home in Philadelphia that was built without a inside water closet. Originally there was a toilet in its own little room behind the kitchen right before you get into the backyard, it wasn’t a outhouse the 4” extra heavy cast iron pipe is still connected to my main house sewer with the pipe capped at the foundation wall. There was a cold waterline that ran from the kitchen into closet and had a gate valve on the end dumping into the toilet tank that was 8 foot above the bowl with a 2 “ brass pipe connecting the two with some old school flush valve. Some one put in a electric heater before WW2 so u wouldn’t freeze your nuts off in the winter and to keep the room just above freezing so there was no issues when it got below 32 degrees . When it got real cold it the heater wasn’t big enough and everything would freeze if you didn’t shut the cold water off under the kitchen sink and hold the chain long enough so the tank would empty. I don’t think the bowl ever froze according to my grandmother but she’s been dead for 25 years so I can’t confirm that . After WW2 everyone started getting their house remodeled and put a regular bathroom on the second floor, however they originally had a lead shower pan with a wet bed then finished the shower pan with those little 1” square black and white tiles that come in sheets that are 12”x12” and they were nicely built because when I remodeled the house those tiles were a nightmare to get off , I had to beat the tile floor with a sledgehammer and a medium size chipping gun. They also had a large beautiful 7 long 40” deep cast iron leg tub that i still have with all the chrome valves and supply lines . The shower pan never leaked but I wanted a smaller bathroom so I moved the leg tub to future basement bathroom that’s already roughed in and framed but I started getting a small amount of water coming thru the stone wall foundation so I am in the middle of fixing that which is a lot of work . I have to do small sections at a time , remove the old mortar, clean out every gap then put some special mortar that’s supposed to be waterproof , then paint the wall with a waterproofing sealer, and then I can finish the basement. It’s a lot of work each area which is 6 foot wide floor to ceiling takes at least 5 hours to get it cleaned and prepared then another 2 hours to properly add the mortar, and that has to sit for 48 hours before I can move on to the next section. I’m 40% done and was considering hiring a guy but I want a professional job done with everything cleaned out , no dust left in the joints , no air pockets , and a nice finish . The guy I hired who did it for a living on a commercial scale did a half ass job so I tossed him out and payed him for his time but had to remove what he did and I found sloppy work , missed joints where he only removed the top inch of old mortar and this guy wanted 6,000 dollars to do the whole job along with some outside work also but I was like no thanks here’s 400 bucks cash for your 5 hours now bounce .
How did join it to waste pipe?? .. And check for leeks.. All so if theres a problem with the trap in future.. is there any access panel?? Or pull half the wall down and bath out to fix!?
Just curious why the caution to not over tighten the washer and drain. Is it more likely to leak if it's too tight? I installed this tub and followed the direction to hand tighten plus a 1/4 turn and im getting a slight drip leak under the tub drain at the rubber gasket.
When did American Standard redesign the Princeton tub? The alcove tub we purchased does not have an integrated overflow drain.
Do you have video installing a bathtub with jets?
I am planning to replace my bathtub. Do I always need to replace the drain pipe even if there’s no change to the new tub location? Thanks!
Depends on the type of plumbing you have. If it’s old cast iron or galvanized pipe, lots of cases, taking it apart will cause those pipes to crack and leak.
Also if you have an old drum trap, get rid of it. All in all, be ready to update the plumbing. But it’s not required if you’re careful
Thanks for this video-- I have a few questions: Was anything done to reinforce those notched joists? Notching joists is not a good idea. Also, where was the vent pipe for the drain? It looked like it turned downward without a vent after the P-trap (which is a code violation). Will the washers on the flange work for a tub surround/combo thing?
yes, notched joists were reinforced by sistering new ones. Also, there was a AAV for venting, which must be accessible. If the tub is acrylic we'd drill through the flange and then use stainless or galvanized screws to secure it to the studs.
@@HomeRepairTutor Thanks for the additional info. Would you recommend using washers with the screws? Would decking screws work?
Thinking of buying this tub. Has anyone had good luck with the Americast long term and if so how was it installed? Mortar or no mortar?
6:14 do as you say or do as you do? That was 1/4 turn and I would not want to crack the tub.
No plastic sheet moisture barrier?
A good sign that the R/O for the tub is larger than 60" is the use of mud cap bullnose. It allows the framing to be 61" and allow for the tub the slide into the space. Then the tile wall, and board, is 1.25" +- thick on each side. We see this a lot. Of course everyone now wants 12x24 or something that does not offer mud cap and thats when the wall needs to be built out. In a bathroom like this its possible the entire wall would need the be built out.
We’ve not used mud cap in years. The best scenario is when there is a n existing bump wall that can be padded out. If not, You’re right, one wall needs padding to make up the RO properly. That’s usually the easiest wall to do it to!😂
I’ve set my tubs in Durabond 45 for years as it makes 0 noise. Sanded mortar sometimes will make little noises (light crunching sound) when stepping into the tub. As soon as the tub is set it gets vacuumed out and a furniture drop cloth is placed in the tub for protection. I also have a sheet of 3/4” plywood made up at 58” x 28” with carpet glued to it to place upside down on the tub before tile. We install a ledger in a +- location depending on the size of the tile so our rail cuts = same as our top cuts. After this, we remove the ledger and 3/4” ply setup and make our rail (bottom cuts)
I say “I” but it’s really “them” these days as I’m old and didn’t wear knee pads when I was a baby.
@@johnbagewll2321 do they even make it anymore?
@@johnSR32
Absolutely! But it is just about obsolete where I work. We tear it out and modernize the space completely.
@@johnbagewll2321 we dont even mud floors in showers anymore. Only in pre 70s homes do we even mud the outside floor, and thats rare too. I would have lasted longer if foam board and Schluter was around when I started
@@johnSR32
No doubt! We use the WEDI system now. To many problems with shluter and laticrete.
There are still plenty of plaster and mud tear outs to go around for these young lads! 😂
Mortar voids the warranty. What requirements do you have in your state for being a contractor?
Don't you just hate it when you get paint on your hair and you don't know it. I've done it more than once. Nice vid, guys.
Thanks Steven, same with thin-set...and joint compound...and just about anything else, lol
Installed this tub. When you stand in it the tub squeaks since the bottom is made of foam and the bottom is designed to touch
the surface of the floor.
Is your floor level?
Yes, I leveled floor. After use the squeak diminishes, but not 100 pct. There is a forum on Americast brand (American Standard) foam bottom tubs.
They flex even when installed properly. After a few years the tub enamel may experience stress cracks requiring removal. The mfg does not recommend mortar bedding due to heat stress, but contractors say this is the way to go. Other cases have happenned where the foam delaminates from the tube. The instructions recommend silicone beads. www.johnbridge.com/vbulletin/archive/index.php/t-74696.html
Follow-up...I was able to find an adjacent wall to the tub and gain access to the underbelly of tub. I cut open the drywall.
I poured about 25 pounds of concrete floor leveler and spread it around with a make shift wood stick taped to an L shaped end (from a shelf hanger). I pushed the soupy mix around the outside base of tub. I could only reach one side. Then after 20 minutes of setting up, I was able to move the thicker mix on the floor against the under side to push up a ledge of concrete to support the under side next to base. This is only about 2 inches or less space. I checked the tub, and all the squeaks went away!.
Question: Do you worry about the metal threads on the drain shoe causing the ABS to crack and fail? I was always told not to put metal male threads into ABS/PVC female threads
OS&B sells the kits that way, unless you opt for the full brass kit, i used Teflon tape around the metal treads and just dont over tighten and ABS works fine. The nice part is the metal doesn't corrode in the ABS
Wait should the tub be pitched for drainage, oh the tub is pitched already
What fitting adapts the tailpiece to PVC?
Are yinz guys from Pittsburgh. I heard a couple times you were "gunna shim it aht"
I have a tiny bathroom. My tub is not stand 59"-60" long. Its only 55"-56"
Where can I find a tub with those specific ations?
Did you drill the holes on bathtub, my tub didn't come with holes, is that common to do.
we didn't drill holes in the Americast, that would be painful and take to long. Instead, use the washer and screw method, i.e. pinch the washer against the tub lip and stud. Hopefully that makes sense. If the tub is acrylic, then we recommend pre-drilling the tub lip to prevent it from cracking. Then add the screws through that hole and into the stud.
It's the exact tub you are working with, I've installed it with a 2X4 as a support, it's creaking a little bit on the corners against the studs, nothing too major, I'm gonna try the washer/screw method, any specific washers?
If there are no holes you should not drill holes. By the time the tub is set in mud and sitting in the ledger board there is actually no need to affix the tub flange.
that's 5 feet ? it looks smaller. I had a 60 inch tub and a 59 inch opening. Current project involes plaster walls. I hired the wrong guy to do the work, now I am redoing it all, D'OHH. See why education is so expensive ? Other than that, it's rewarding to see progress at the end of the day and that the project is starting to move and gain momentum. Not sure I am going to have it all done in 2 weeks, but got to have a goal !
didn't get to see him reconnect the plumbing though....
sorry about that, it was such a small space that we couldn't fit a camera, hands, and a flashlight.
This was my question and THE crucial concerning I have for installing the tub. How did you manage to connect the drain to the PVC drain pipe? You just put the tub in place and pretended it just happened on its own?
that is very importants
Should have put cardboard before stomping around in a new tub with work boots ju s t saying
Can u give me a link for this tub plz?
Why didn't you put a plastic vapor barrier behind the tub?
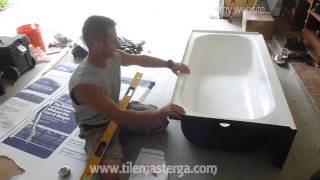
Is that tub all acrylic or the coated steel?
Coated steel, Americast by American Standard
I frequently read of the Americast tubs creaking. Have you heard of this or is this a sign of an installation problem?
We have had 100's installed down here in Florida and I don't remember anyone complaining about creaking?
Instead of mortor what about spray foam ?
What if your opening is 58” and you’re installing a standard 60” tub? What’s the best way to deal with that?
Whoosh!
No vapor barrier?
Depending on your climate zone, you may need one, or you may be advised against one
What do you mean? Ptrap is below slab
Why not plumber's putty for the drain?
How would you remove the tub with the mortar at the bottom?
sledgehammer to know it loose or if the tub is cast iron break it apart in pieces
Hey my tub replacement is 58 inch can't seem to find
Economical and effective
I had this very tub and returned it because the drain came down on top of my floor joist. It looks like you just cut the joist to make room for the black 45°. Can you just cut away part of the floor joist?
Top notching a floor joist is permitted within certain specific limits dependent upon the width of the joist. Anything beyond the limit requires structural engineering and an engineer's certificate if you expect to pass the plumbing inspection.
@@chrisgraham2904 Thanks. This bathroom project is completed and I chose a different tub. But I now have another one to do.
Why do you need floor leveler if your just going to dump mortar on it? Doesn't the mortar level it out?
The mortar isn’t for leveling the tub it’s for keeping the tub from rocking back and forth after a few months after the install. Some use mortar mix but I was taught to use sand mix and lay a it on the subfloor so the bottom of the tub will have something to rest on instead of sitting off of the subfloor . Even if your floor is level there’s always imperfections in the plywood or a joist isn’t sitting right so by putting that layer of mortar mix down you are giving it the best chance to not rock back and forth while you are taking a shower .
The gentleman used silicone for the drain assembly. I thought Plumbers Putty was used in this application?
Plumbers putty is oilbased, its for metal tubs. You cant use it on plastic or fiberglass tubs or you will get a yellow ring around the drain when the oil soaks into it.
bubba gump Thanks for the reply. Americast tubs seem to he both acrylic and steel. I wonder what to use with them. Silicone seems safer, no?
I used plumber putty and luckily i did because i didnt tighten it enough and was leaking. I was able to tighten it some more after the initial water test. Had i used silicone, i would probably had to re move it completely. I think americast has a porcelain finish.
@@rubberystyle No, b/c silicone isn't shit and couldn't have leaked. That's all putty does is leak, so plumbers make more money later.
Can I use this video to help me install my Cambridge americast? Would each step be identical?
What model number is this Americast tub?
When I was an apprentice 17 years ago we used putty for drain. Is silicone better? Or depends on type of tub? Setting a steel tub now
Silicone is very unprofessional and lousy
Putty is the right way to do it
@@yashar7251 Plumber's putty will degrade an acrylic tub. Always use silicone for acrylic....never putty.
I would use less silicone and more vapor barrier :)
Why do you have the blue PEX going to red at the elbow?
+Jeff the color is just for reference but typically red is for hot and blue for cold. We may have run out if red and just used blue
+Jeff I went back and watched the mixing valve video and didn't see what you're referring to. Do you remember the time in the video where you saw that?
Home Repair Tutor You can see it at 6:50. I was just curious about it that's all. I've done then when running out also. Or I've also used white for both
Good video..thanks
good video , but you should at least show how you connected the drain. that is the hard part and need to see. at least draw a diagram or show connectors you used or how you did it? Thanks
A very good upload, thank you. However, if you examine the insulation job, pretty poor. I don't know who installed this mess but someone will be complaining why is my bathroom so cold or hot. If one stuffs and crushes craftsman pink insulation it looses it's R value. I don't mean to be picky, however, it an important part of the job. Once the walls are sealed one cannot go back and fix a. Then it becomes a waste of money. Aside from that a very good instructional for the DIY bathtub installation. Thank you.☺
Not really.
How long does it typical take to install an Americast tub?
Plumber Girl 3 weeks
A couple of days gorgeous
he calls himself a contractor professional yet hes notching out joists to get a pipe drain to fit. lmao
Setting in mortar? All fun and games until someone needs to upgrade the tub later on.
Setting the tub into a 1 to 2 inch thick mortar bed is common practice and critical for some tub manufacturers. A few shock hits to the tub will usually separate it from the mortar bed when it's time to remove it for future remodeling. Then the mortar bed is removed with a sledge hammer.
@@chrisgraham2904 I'm reno'ing my bathroom. House was built in '59. The demo was a massive PITA. Metal lath nailed into studs. Some sort of half inch cement stuck on that. Then an inch of plaster. Then tiles placed on that. That was all around the bathroom. So far the demo has taken 4 days. The original floor tiles sit on a 1 inch bed of cement. The tub sits below that directly on the subfloor. It doesn't appear to be seated in that cement. Should I pull all of the cement; pull the tile and tile over the cement; do I need something like ditra between the tiles and cement?
Wait, did you level out the floor first?
you skipped the hardest part
Yea connecting that drain would be a WHORE
you don't put your backer board on the inside edge of your tub. its suppose to sit on the lip of the tub
I’m not sure if necessary to at all that quarter inch plywood even if there’s a gap to screw in it should be fine you don’t need to bother doing all that shimming
That much water in the mortar and it will shrink to much
that overflow makes that tub no good for slab foundations
well there's your whole problem...a slab
Why? This is the tub my plumber recommended for our bathroom and we have a slab foundation. Should we not get it?
The two white skunk lines on the back of his head
You get dirty when you work for a living.
You should of shown the installation of the plumbing , that was very important for the viewers , plus some other things that was done are incorrect , I know everyone does things differently but for the claim this video ????
I don't think this guy is a plumber and I'm quite sure his installation would not pass a plumbing inspection from the building inspector.
No plumbers puddy??
No, it's shit and fails.
@@TheGuruStud I had bad luck with it, it gets brittle and does fail as you say
You did not show how you connected the tub drain to the drain in the floor. Not helpful without that. Sorry.
and this is why you have plumbers install Plumbing fixtures
+Ben Redelings why?
So pay someone to do it you say? Gotcha
I don't think pipe threads and fine threads match. I would have used a tub shoe and transition coupling.
So at 12.20 you step into the bath and jump up and down with your gritty filthy boots on ? then continue to working whist standing in it.
Really professional....NOT.
А по мне вообще все через жопу сделали, как слив прочистить?, зачем силикон на сливе?
This is my porn. Hot actor too.
I think this is a good video but would be much better if you used a project that was more straightforward. This bathroom is too f'ed up for beginners to understand all that unnecessary improvisions you're doing. They will never confront such. But it's good video nonetheless
Bruh stop putting so many adds please smhh