
- 44
- 620 257
Dan Prudlow
United States
Registrace 1. 11. 2006
Subscribe: czcams.com/users/danprudlow
Just a guy in his garage having fun building stuff. I will post videos as often as I can but project size and my full time job and family will dictate how much shop time I can get in each week.
Hit that Subscribe button so you don't miss anything!
Videos here are for entertainment only. The things I do can be dangerous. Please don't try anything I am doing just because you saw me doing it. Always respect the tools you're working with, focus only on the task at hand and have fun making things within your skill level.
X: @DanPrudlow
How to build a ladder | DIY swing set repair
Want to support the channel? Here's what you can do:
- Subscribe to the channel
- Hit that Like button
- Leave a comment
- Amazon Affiliate: amzn.to/2LaN1Ib
In this video I walk through the steps I used to rebuild the rotted out ladder from our backyard swing set. I used three 8 foot pieces of 2x6 pressure treated lumber from the home center for this project. Let me know what you think in the comments section below.
Makita LS1019L 10-inch miter saw: amzn.to/3y5OxIO
Spax 3-inch screws: amzn.to/44CgEvL
Thanks for watching. If you have any comments or questions please leave them below or hit me up on social media or my website.
Hit that like button and don't forget to subscribe! Thanks!
Subscribe: czcams.com/users/danprudlow
X: x.com/DanPrudlow
zhlédnutí: 382
Video


How to build an inexpensive floating shelf | 1 board and cheap brackets
zhlédnutí 308Před 2 měsíci
Want to support the channel? Here's what you can do: - Subscribe to the channel - Hit that Like button - Leave a comment - Amazon Affiliate: amzn.to/2LaN1Ib In this video I walk through the steps I used to turn a rough sawn board into a beautiful shelf for our laundry room. This same concept could be done with any pre-surfaced boards from the home center as well. Let me know what you think in t...
How I made thousands with my OneFinity CNC!
zhlédnutí 1,5KPřed 5 měsíci
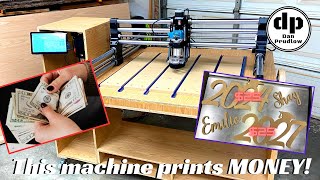
Want to support the channel? Here's what you can do: - Subscribe to the channel - Hit that Like button - Leave a comment - Amazon Affiliate: amzn.to/2LaN1Ib In this video I walk through a simple CNC sign project that has paid for my OneFinity woodworker machine two or three times over. Using inexpensive 1/4 inch MDF from the home center I'll turn $30 in material into $250 in graduation signs. L...
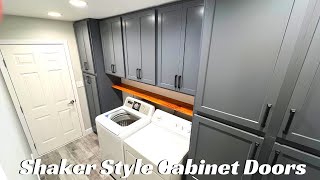
How to build cabinet doors | shaker style using the router
zhlédnutí 199Před 7 měsíci
Check out Pt. 1 (plywood boxes) here: czcams.com/video/trGsIg_D0mM/video.html Check out Pt. 2 (face frames) here: czcams.com/video/FM-vHUX4RqY/video.html Check out Pt. 3 (pull out trays) here: czcams.com/video/vZCh6tgAyOE/video.html Check out Pt. 4 (spice rack) here: czcams.com/video/gNgxr3OD_Jg/video.html Check out Pt. 5 (baking pan organization) here: czcams.com/video/8bDZoL3tkf0/video.html W...
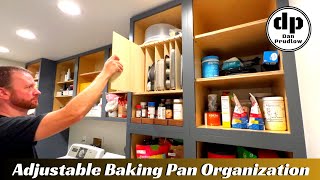
How to organize your panty or kitchen | build vertical baking pan storage
zhlédnutí 1,2KPřed 9 měsíci
Check out Pt. 1 (plywood boxes) here: czcams.com/video/trGsIg_D0mM/video.html Check out Pt. 2 (face frames) here: czcams.com/video/FM-vHUX4RqY/video.html Check out Pt. 3 (pull out trays) here: czcams.com/video/vZCh6tgAyOE/video.html Check out Pt. 4 (spice rack) here: czcams.com/video/gNgxr3OD_Jg/video.html Check out Pt. 6 (shaker doors) here: czcams.com/video/-VTCq2thw5wg/video.html Want to sup...

How to organize your pantry | Build a custom spice rack
zhlédnutí 452Před 10 měsíci
Check out Pt. 1 (plywood boxes) here: czcams.com/video/trGsIg_D0mM/video.html Check out Pt. 2 (face frames) here: czcams.com/video/FM-vHUX4RqY/video.html Check out Pt. 3 (pull out trays) here: czcams.com/video/vZCh6tgAyOE/video.html Check out Pt. 5 (baking pan organization) here: czcams.com/video/8bDZoL3tkf0/video.html Check out Pt. 6 (shaker doors) here: czcams.com/video/-VTCq2thw5w/video.html...

How to organize your pantry | build pull out storage trays
zhlédnutí 732Před 11 měsíci
Check out Pt. 1 (plywood boxes) here: czcams.com/video/trGsIg_D0mM/video.html Check out Pt. 2 (face frames) here: czcams.com/video/FM-vHUX4RqY/video.html Check out Pt. 4 (spice rack) here: czcams.com/video/gNgxr3OD_Jg/video.html Check out Pt. 5 (baking pan organization) here: czcams.com/video/8bDZoL3tkf0/video.html Check out Pt. 6 (shaker doors) here: czcams.com/video/-VTCq2thw5w/video.html Wan...

How to build face frames | Jessem Dowling Jig makes joinery easy!
zhlédnutí 2,6KPřed rokem
Check out Pt. 1 (plywood boxes) here: czcams.com/video/trGsIg_D0mM/video.html Check out Pt. 3 (pull out trays) here: czcams.com/video/vZCh6tgAyOE/video.html Check out Pt. 4 (spice rack) here: czcams.com/video/gNgxr3OD_Jg/video.html Check out Pt. 5 (baking pan organization) here: czcams.com/video/8bDZoL3tkf0/video.html Check out Pt. 6 (shaker doors) here: czcams.com/video/-VTCq2thw5w/video.html ...

How to build cabinet boxes
zhlédnutí 1,6KPřed rokem
Check out Pt. 2 (face frames) here: czcams.com/video/FM-vHUX4RqY/video.html Check out Pt. 3 (pull out trays) here: czcams.com/video/vZCh6tgAyOE/video.html Check out Pt. 4 (spice rack) here: czcams.com/video/gNgxr3OD_Jg/video.html Check out Pt. 5 (baking pan organization) here: czcams.com/video/8bDZoL3tkf0/video.html Check out Pt. 6 (shaker doors) here: czcams.com/video/-VTCq2thw5w/video.html Wa...
SawStop Dado Stack Setup with Diablo Blades
zhlédnutí 5KPřed rokem
Want to support the channel? Here's what you can do: - Subscribe to the channel - Hit that Like button - Leave a comment - Amazon Affiliate: amzn.to/2LaN1Ib In this video I go through my initial setup to use a dado stack on my SawStop table saw. This is my first time using a dado stack so I figured I would record the process. The process was very simple. The switch from standard brake to the la...
How to build a raised garden bed | Easy and Cheap
zhlédnutí 697Před 3 lety
How to build a raised garden bed | Easy and Cheap
Building a Shelf to display my Hand Planes
zhlédnutí 387Před 3 lety
Building a Shelf to display my Hand Planes
How to organize your shop | Building a shelf for my sander and sandpaper
zhlédnutí 405Před 3 lety
How to organize your shop | Building a shelf for my sander and sandpaper
Building Nightstands using the Jessem Dowling Jig
zhlédnutí 7KPřed 3 lety
Building Nightstands using the Jessem Dowling Jig
Building a Floating Shelf from plywood and poplar
zhlédnutí 911Před 4 lety
Building a Floating Shelf from plywood and poplar
Build a Three Cup Turner | DIY Epoxy Cup Turner | Tumbler Turner
zhlédnutí 37KPřed 4 lety
Build a Three Cup Turner | DIY Epoxy Cup Turner | Tumbler Turner
Build a Cheese Board | Cheese Slicer | DIY Cheese Slicer Board | Scrap Wood Project
zhlédnutí 5KPřed 4 lety
Build a Cheese Board | Cheese Slicer | DIY Cheese Slicer Board | Scrap Wood Project
Simple Cedar Planter Box from Reclaimed Cedar Timber
zhlédnutí 48KPřed 4 lety
Simple Cedar Planter Box from Reclaimed Cedar Timber
Building a Bench from Reclaimed Cedar Timber
zhlédnutí 10KPřed 4 lety
Building a Bench from Reclaimed Cedar Timber
Building a Planter Box from Reclaimed Cedar Timber
zhlédnutí 24KPřed 4 lety
Building a Planter Box from Reclaimed Cedar Timber
Building a Mailbox Post from Reclaimed Cedar Timber
zhlédnutí 10KPřed 4 lety
Building a Mailbox Post from Reclaimed Cedar Timber
Build a Keyboard Tray with Reclaimed Hardware | DIY | Easy Desk Upgrade
zhlédnutí 85KPřed 5 lety
Build a Keyboard Tray with Reclaimed Hardware | DIY | Easy Desk Upgrade
Built In Shelves Part 2 | DIY | Build Custom Shelving
zhlédnutí 9KPřed 5 lety
Built In Shelves Part 2 | DIY | Build Custom Shelving
Built In Shelves Part 1 | DIY | Build Custom Shelving
zhlédnutí 33KPřed 5 lety
Built In Shelves Part 1 | DIY | Build Custom Shelving
Build a Patio Cooler | Cooler Box | Outdoor Furniture
zhlédnutí 86KPřed 6 lety
Build a Patio Cooler | Cooler Box | Outdoor Furniture
Circular Saw Guide | How To | Woodworking Shop Jig
zhlédnutí 3,2KPřed 6 lety
Circular Saw Guide | How To | Woodworking Shop Jig
Painted Tile Display | Build a Walnut Tile Display | Woodworking
zhlédnutí 446Před 6 lety
Painted Tile Display | Build a Walnut Tile Display | Woodworking
Build a Waterfall Table | Build a Waterfall Grain C-Table | Woodworking
zhlédnutí 49KPřed 6 lety
Build a Waterfall Table | Build a Waterfall Grain C-Table | Woodworking
Stationary Belt Sander Dust Collection Solution | Woodworking | Shop Built Tools
zhlédnutí 17KPřed 6 lety
Stationary Belt Sander Dust Collection Solution | Woodworking | Shop Built Tools
you go to fast & don't tell how it is made no good.
Creating these videos is a lot of work and good audio isn’t cheap. In my more recent few videos I’ve started adding a voice over to talk through the steps I’m doing. Thanks for watching.
Watching him do this as I literally stare at the slots chevy put in the bed for you to insert boards for this EXACT purpose.... LMAO
Using the slots in the bed can I slide the entire support system back onto the tailgate and better support 10 foot sheets of Sheetrock or other scenarios where that would provide better support? To each their own. 👍🏻
Lol, poor Dan... these people are dense. Clearly the rack is for hauling plywood, not that it's made of plywood.
Yeah…I thought it was an easy concept to understand… 🤷🏼♂️
Please show how dowel jig was clamped down.kindest regards tim
If you check around the 4:30-4:50 mark in the video you can see I have screws holding the jig to the edge of my workbench. I just used a couple of pan head pocket hole screws. In hindsight I should have probably done it a little differently because I had some inconsistent alignment when gluing the frames…but it wasn’t anything that couldn’t be easily sanded flush…just took extra time to do. Hope that helps but if not let me know. 👍🏻
Great job !
Thanks!
Looks great!
Thanks!👍🏻
Check out Pt. 1 (plywood boxes) here: czcams.com/video/trGsIg_D0mM/video.html Check out Pt. 2 (face frames) here: czcams.com/video/FM-vHUX4RqY/video.html Check out Pt. 4 (spice rack) here: czcams.com/video/gNgxr3OD_Jg/video.html Check out Pt. 5 (baking pan organization) here: czcams.com/video/8bDZoL3tkf0/video.html Check out Pt. 6 (shaker doors) here: czcams.com/video/-VTCq2thw5w/video.html Want to support the channel? Here's what you can do: - Subscribe to the channel - Hit that Like button - Leave a comment - Amazon Affiliate: amzn.to/2LaN1Ib In this video I go through the steps to build and finish the full extension pantry storage trays for a set of custom cabinets I am building for our laundry room remodel. I used hard maple for the sides and 1/4 inch plywood for the bottoms. No fancy joinery here. Just glue and reinforced with oak dowels. I used General Finishes water based high performance top coat for the finish. Be sure to subscribe so you don't miss future videos covering other storage setup and the doors. All of the build process for these cabinets could be applied to many other projects such as a kitchen, bathroom, etc. Let me know what you think in the comments section below. 22 inch full extension slides: amzn.to/3DF9F8p Rear slide mounting brackets: amzn.to/3Ynj2Dd SawStop 1.75hp PCS: amzn.to/2X4gWsP Ridge Carbide 10-inch Saw blade: amzn.to/3bATmcp Bosch 18v Drill: amzn.to/2OmrItJ Makita Trim Router: amzn.to/2TZFrcX Bosch 18v Jigsaw: amzn.to/3jDtxOA Bosch ROS: amzn.to/3rxri1W Titebond Wood Glue: amzn.to/2LzTdv4 Bessy Parallel Clamps: amzn.to/2z4LHG3 Bessy 6-inch F-style Clamps: amzn.to/3e3LGl4 General Finishes High Performance Top Coat: amzn.to/3CGhavk General Finishes Extender: amzn.to/3XtttVy Thanks for watching. If you have any comments or questions please leave them below or hit me up on social media or my website. Hit that like button and don't forget to subscribe! Thanks! Subscribe: czcams.com/users/danprudlow Twitter: twitter.com/DanPrudlow
Check out Pt. 1 (plywood boxes) here: czcams.com/video/trGsIg_D0mM/video.html Check out Pt. 2 (face frames) here: czcams.com/video/FM-vHUX4RqY/video.html Check out Pt. 3 (pull out trays) here: czcams.com/video/vZCh6tgAyOE/video.html Check out Pt. 4 (spice rack) here: czcams.com/video/gNgxr3OD_Jg/video.html Check out Pt. 6 (shaker doors) here: czcams.com/video/-VTCq2thw5wg/video.html Want to support the channel? Here's what you can do: - Subscribe to the channel - Hit that Like button - Leave a comment - Amazon Affiliate: amzn.to/2LaN1Ib In this video I go through the steps to build and finish a vertical baking pan/cookie sheet storage setup in our new pantry cabinets. Hard maple is added to the front edge of each shelf and the 1/4 inch dados are cut into the shelves to receive 1/4 inch thick plywood dividers to allow for the vertical storage of various baking pans. I used General Finishes water based high performance top coat for the finish. Be sure to subscribe so you don't miss future videos covering other storage setup and the doors. All of the build process for these cabinets could be applied to many other projects such as a kitchen, bathroom, etc. Let me know what you think in the comments section below. SawStop 1.75hp PCS: amzn.to/2X4gWsP Ridge Carbide 10-inch Saw blade: amzn.to/3bATmcp Makita Trim Router: amzn.to/2TZFrcX Bosch ROS: amzn.to/3rxri1W Titebond Wood Glue: amzn.to/2LzTdv4 Bessy Parallel Clamps: amzn.to/2z4LHG3 General Finishes High Performance Top Coat: amzn.to/3CGhavk General Finishes Extender: amzn.to/3XtttVy Thanks for watching. If you have any comments or questions please leave them below or hit me up on X/Twitter. Hit that like button and don't forget to subscribe! Thanks! Subscribe: czcams.com/users/danprudlow Twitter: twitter.com/DanPrudlow
Check out Pt. 1 (plywood boxes) here: czcams.com/video/trGsIg_D0mM/video.html Check out Pt. 2 (face frames) here: czcams.com/video/FM-vHUX4RqY/video.html Check out Pt. 3 (pull out trays) here: czcams.com/video/vZCh6tgAyOE/video.html Check out Pt. 4 (spice rack) here: czcams.com/video/gNgxr3OD_Jg/video.html Check out Pt. 5 (baking pan organization) here: czcams.com/video/8bDZoL3tkf0/video.html Want to support the channel? Here's what you can do: - Subscribe to the channel - Hit that Like button - Leave a comment - Amazon Affiliate: amzn.to/2LaN1Ib In this video I go through all of the steps to build and finish the shaker style cabinet doors for a set of custom cabinets I am building for our laundry room remodel. I used hard maple for the rails and styles and 1/2 inch maple plywood for the center panels. I used General Finishes water based stain and high performance top coat. Be sure to subscribe so you don't miss future videos covering the roll out pantry trays and the doors. All of the build process for these cabinets could be applied to many other projects such as a kitchen, bathroom, etc. Let me know what you think in the comments section below. Freud Shaker Door Bit Set: amzn.to/3T6bap2 Kreg Concealed Hinge Jig: amzn.to/3T6bh3W 1/2 inch overlay hinges: amzn.to/3uDiiPv Hinge Restrictors: amzn.to/3R938cz Matte Black Cabinet Door Pulls: amzn.to/3uDiAG5 SawStop 1.75hp PCS: amzn.to/2X4gWsP Ridge Carbide 10-inch Saw blade: amzn.to/3bATmcp Bosch 18v Drill: amzn.to/2OmrItJ Bosch 18v Impact Driver: amzn.to/3cxAhJk General Finishes Graphite: amzn.to/3JsQzWw General Finishes Whitewash: amzn.to/3pizkAm General Finishes High Performance Top Coat: amzn.to/3CGhavk General Finishes Extender: amzn.to/3XtttVy Thanks for watching. If you have any comments or questions please leave them below or hit me up on social media or my website. Hit that like button and don't forget to subscribe! Thanks! Subscribe: czcams.com/users/danprudlow Twitter: twitter.com/DanPrudlow
Want to support the channel? Here's what you can do: - Subscribe to the channel - Hit that Like button - Leave a comment - Amazon Affiliate: amzn.to/2LaN1Ib In this video I walk through a simple CNC sign project that has paid for my OneFinity woodworker machine two or three times over. Using inexpensive 1/4 inch MDF from the home center I'll turn $30 in material into $250 in graduation signs. Let me know what you think in the comments section below. 1/16 inch spiral bits: amzn.to/3TLvKvm Makita Compact Router: amzn.to/3NQNkKs SawStop 1.75hp PCS: amzn.to/2X4gWsP OneFinity CNC: www.onefinitycnc.com/ Thanks for watching. If you have any comments or questions please leave them below or hit me up on social media or my website. Hit that like button and don't forget to subscribe! Thanks! Subscribe: czcams.com/users/danprudlow X: x.com/DanPrudlow
Want to support the channel? Here's what you can do: - Subscribe to the channel - Hit that Like button - Leave a comment - Amazon Affiliate: amzn.to/2LaN1Ib In this video I walk through the steps I used to turn a rough sawn board into a beautiful shelf for our laundry room. This same concept could be done with any pre-surfaced boards from the home center as well. Let me know what you think in the comments section below. Shelf Brackets: amzn.to/4aNozZ4 Boiled Linseed Oil: amzn.to/4aNp0Tc Japanese Pull Saw: amzn.to/3w2rr5r SawStop 1.75hp PCS: amzn.to/2X4gWsP DeWalt Planer: amzn.to/4d4DFex Bosch ROS: amzn.to/3rxri1W Thanks for watching. If you have any comments or questions please leave them below or hit me up on social media or my website. Hit that like button and don't forget to subscribe! Thanks! Subscribe: czcams.com/users/danprudlow X: x.com/DanPrudlow
Looks great!!!
Thanks! 👍🏻
Turned out great !
Thanks! 👍🏻
Love it. Great job
Thanks! 👍🏻
Thought you was going to play tic-tac-toe lol
It would have been a good video from a camera clarity and editing aspect. However the 100% blaring rock background music and lack of any viable educational dialog is a great reason NOT TO WATCH THIS FLIC. it was of no educationally value to any one attempting to make a cheese board slicer kit. A waste of time. Sorry for the negative comments, but I hope your next video will understand these comments and avoid such production issues. Try again, better luck next time..
Ok.
Thanks!
I dont understand the concept it's still lower then the wheel wheel wells?
It is just a bit taller than the wheel wells so a 4 ft wide sheet will fit laying flat.
The fire marshall called. He's like to speak with you about all that exposed insulation paper. 🤣🤣
He should talk to the building code folks that allow homes to be slapped together like trash and not finish the walls to begin with. 😁
nice board, but dont have a clue why your using steel wool.
Thanks. The steel wool is to rub the finish. Helps get a very smooth feel by smoothing any brush strokes, dust bits, and other slight imperfections in an oil finish.
Love these so much. They make for sure great photo props for senior pictures and decor
Except it isn’t plywood?
It’s for hauling plywood and other sheet goods. I’ll change the title I guess…
Awesome! Where did you get the text thats joined together so nicely?
The number font is from a vinyl cutting machine’s software my wife has. Same for the names. I bought a SVG image of the graduation hat and tassel and then used the CNC software to merge it all together. I just have the free carbide 3D version so far. It’s limited in its capabilities but has done enough for me so far. Thanks for watching! 👍🏻
@@DanPrudlow Ugh I've been looking all evening for the font on cricut!! Happen to know which ones they are? Its so difficult to find a font that has the letter joined together... Or at least looks good when I do slide them together on aspire
We have a Silhouette machine and their software. In there the name font we use is So Fontsy and the numbers is Srabi Script.
Can I borrow your shop? This is so nice. Your panel size is the same I need. Now to find someone in my area to help my dreams come true. Thanks for the video!!
Thanks I appreciate the compliment! The whole cabinet build was a lot of fun…and I learned a lot too! Thanks for watching! 👍🏻
Hi Dan, thanks for the video. Do you sell the signs unfinished as presented in the final seconds of the video or do you go on to finish them? Also, most importantly to me right now, is how do people find you or how do you find people to sell to? I have a onefinity also and I love the machine but I'm having a hard time finding customers, I have resisted etsy as it feels oversaturated but I'm realizing maybe it's inevitable. What are your thoughts?
When I first made the signs we would paint them for people and charged $30 each but it was a huge time suck so we stopped with the painting. So we ship them out just as you see in the video. As for where to sell so far it’s just been my wife posting them in different FB groups for the stuff we have sold. These in particular have been posted to “senior moms” type groups. Some other items were local “buy/sell/trade” groups. I had an Etsy page at one time before having a CNC but didn’t have much luck with the one item I had. I’m sure it could do better now but I agree it’s very saturated. I’m considering a Shopify or something like that. I have a website too so maybe I could integrate it somehow there. I just don’t have a ton of time to dedicate to it.
You did an amazing job thank you for this!
Thanks for watching! I appreciate the feedback. 👍🏻
why did you handplain if you have a jointer and planner too?
There were a couple reasons. One is just for practice and then also a good sharp blade leaves a really clean and smooth surface that almost doesn’t need sanding where the jointer/planer leave some milling marks. They are also kind of fun to work with. Thanks for watching and for the question. 👍🏻
That’s nice , might be making something like that in the summer ❤
Thanks! It was a fun project!
You already have premade notches in the bed in each corner for boards to slide into that do the same thing but easier and less wood
Nice job! Looks great. 👏👏👏🖖
Thank you! 👍🏻
Awesome ! Love the color !
Thanks!
These are amazing
Thanks!
wheres the plywood?
At the time I built the rack it was still at the lumber store…I needed the rack to be able to pick it up.
He was waiting for lumber prices to come down a little, I think he's got two sheets now.
I actually got 7 sheets of 3/4 for a big cabinet build…and this setup worked like a champ. Also got 10ft sheets of drywall and pulled it out onto the bed a bit to support them.
Excecutioner's choppy block? Not comfy to sit on for long...just time fora big slice.
Thanks for the video. Lots of great ideas here. I especially liked the fixtures that you made to drill the repetitive dowel holes. I have the Dowelmax jig, which is a bit different from the Jessem but now I’d like to make a similar setup for it. I make my face frames mostly like you do, and one thing I’ve had some success with is drilling a pocket hole on the back side of the face frame between the dowels. I like this because it clamps the joint, and with the dowels in there I don’t have to worry about any movement when driving the pocket hole. Thanks again!
Thanks for watching! I like that pocket hole idea…I’ll keep that in mind for next time! 👍🏻
Nice work! I have the same doweling jig. What was the brown bottle of glue that you used?
Thanks! I used Titebond Hide Glue. There is an amazon link in the video description if you want to check it out. It has about a 30 minute open time so it’s a bit easier to get all the joinery together and clamped up before it sets too much. Thanks for watching! 👍🏻
@@DanPrudlow Thanks! I’ll take a look at the hide glue.
Do you offer plans for this, would make building a lot easier?
Thanks for watching the video. Unfortunately I don’t have any plans available. With my day job and family I don’t have enough spare time to make plans for things. Maybe someday.
great video and thank you for sharing. Question, now that your video is 2 years old; how are you feeling about the flexibility of you design? Would you do it again?
We’ll, I’ve never actually flipped the table upright for storage or to gain floor space so I’m not sure that part was worth the trouble. I also think having the machine enclosed would be worth the extra effort and material. It’s a very loud machine…lol. Overall I’m satisfied…it is nice having the overhang on each side to slide stuff under without having legs in the way. The machine itself has been completely worth the cost too. It’s paid for itself twice with stuff my wife has sold on FB marketplace. Thanks for watching!
Great works! I have been looking for a video that uses the Jessem dowel jig and yours looks great. However, could you make a video specifically about the Jessem doweling jig setup that you use in this video? If you have it already, can you share the link? Thanks
Thanks for the comment. I don’t have a video specifically on the doweling jig and I’m not sure when I’ll have time to make something like that as I have a lot of projects lined up. There may be others out there though. It’s a pretty easy jig to use though. Thanks for watching.
Wow, beautiful, 🎉😊😊
Thank you! 🙂
😒 Promo>SM
Nice! Good job!
Thanks!
Great video. Pantry looks awesome
Thanks!
Love this!
Thanks!
Will there be plywood placed on top of the 2x’s?
This is for hauling plywood sheets. The space between the wheel wells is only 44 inches so this raises it up just above the wheel wells so the sheets can lay flat. Hope that makes sense. Thanks for watching. 👍🏻
how is this part that is holding the keyboard called? the wooden thing that you drilled in the table which holds the keyboard tray
Are you asking what that piece of wood I attached to the underside of the desk is called?
@@DanPrudlow haha yea sorry, im not a native english speaker so not sure if there is a name for it... also would it be any different if we just used a slider which is drilled directly in the desk, so we avoid using that underside piece of wood all together
Gotcha. No special name for it, just needed something to attach the slide to on the one side because the desktop is so wide there was nothing there. If you attach directly to the desk that would work just fine. Thanks!
@@DanPrudlow thanks a lot!
Ottimo lavoro. Un saluto👋👍
Thanks!
Check out Pt. 1 here: czcams.com/video/trGsIg_D0mM/video.html Check out Pt. 2 here: czcams.com/video/FM-vHUX4RqY/video.html Check out Pt. 3 here: czcams.com/video/vZCh6tgAyOE/video.html Want to support the channel? Here's what you can do: - Subscribe to the channel - Hit that Like button - Leave a comment - Amazon Affiliate: amzn.to/2LaN1Ib Thanks for watching. If you have any comments or questions please leave them below or hit me up on X/Twitter. Hit that like button and don't forget to subscribe! Thanks! Subscribe: czcams.com/users/danprudlow Twitter: twitter.com/DanPrudlow
Such a great work 👍👍
Thanks!
plywood?
What?