Shower Pan TILE Installation [How to set a shower drain and tile a shower floor with mosaic tile]

Vložit
- čas přidán 22. 01. 2021
- Shower Pan Tile Installation [How to set a shower drain and tile a shower floor with mosaic tile]
Download the FREE Dimensioned Plans for this Bathroom: proud-tiger-97948.myflodesk.c...
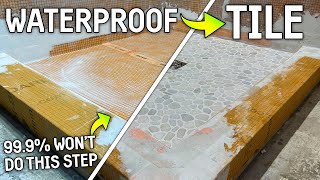
Hey Everyone! This video will show you step-by-step how to complete a shower pan tile installation. Specifically, how to set a shower drain and how to tile the shower floor with mosaic hexagon tiles.
A summary of the video is as follows:
1. How to cut the hexagon mosaic tiles so that you can dry-fit the tiles within the shower pan.
2. How to dry fit the tiles in the shower pan.
3. How to cut the mosaic tiles around the shower drain.
4. How to mix and apply mortar / thin set to the shower pan.
5. How to place the tiles and set them in the mortar
6. Step-by-Step shower pan tile installation tips
6. How to set the shower drain
7. How to adjust the spacing, clean out the grout lines, etc. in preparation for grouting.
Affiliate Links to Products in video:
Blue Hawk Tile Cutter:
amzn.to/3qLrdaC
Dremel Tool:
amzn.to/369YXGO
Dremel diamond blade wheel:
amzn.to/3sPuQ0U
Schluter Kerdi Shower System:
amzn.to/39PgaWX
Schluter "All-set" thinset:
amzn.to/3nXLacd
1/4" x 3/16" V-notch trowel:
amzn.to/3oXvDdT
This is Episode 3 in my bathroom Remodel Series in which I took my dated half-bath and completely converted it into a full bathroom.
Link to Episode 1 (Cement board installation) is below:
• HOW TO INSTALL CEMENT ...
Link to Episode 2 (Kerdi waterproofing membrane installation) is below:
• HOW TO INSTALL CEMENT ...
You might also like my rough in plumbing video that involves cutting cast iron pipe:
• How to Cut Cast Iron P...
Thank you again for watching! If you liked the video or want to follow the rest of the bathroom renovation journey, please SUBSCRIBE to my channel. Thanks!


Thanks for watching! If you want to be notified when I release additional bathroom remodel tutorial videos, please SUBSCRIBE and hit the notification bell!
Time Codes below:
0:00 - Introduction
0:48 - Dry-fitting the tiles
1:00 - How to cut mosaic tiles
2:06 - How to cut our the shower drain
4:10 - Mixing and applying the Mortar
4:40 - Applying the Mortar and setting the tiles
5:36 - Setting the shower drain
6:50 - Installation tips.
8:00 - Tips and Clean Up info.
Thanks again for watching!
What is the name of the glass door that is installed?
@@isidrobautista8580 Hi, it’s a bifold door and a made a video showing the installation here:
czcams.com/video/0aPxJiYp3-U/video.html
Thanks for watching!
your episode 1 and e2 links are the same--they both go to episode 1...
Is the base supposed to be levels
Starting my shower floor redo tomorrow (after nightmare durability from the original installer). Glad you shared this video. It offered some very helpful tips that will be handy for me.
Andrew, great presentation! I like that you took your time to ensure the tile set was consistent and no residue left behind. Everything looks amazing!
I appreciate it! Thanks for watching!
algorithm plus. love this one so much. getting a new shower stall, roof, gutters, fence, flooring repairs. Boy am I lucky!
The part I was unsure of was exactly how to set the drain grate into the tile. Thank you for the very clear demonstration!
Glad it helped! Thanks so much for watching!
Remodeling our old house. So I'm going follow you! Thanks for step by step instructions.
I need all your tile/bathroom videos asap! Gonna give a bathroom remodel my very first try in the next couple weeks. Thanks for the content!
Good luck with your remodel and thanks for watching! Think long and hard before you try anything herringbone 😅. That pattern was pretty brutal.
Since I was inspired by your video on how to make mailbox and a house number plate I learn from you how to remodel my bathroom. It is very helpful. Thank you for your videos.
Glad the videos help, Yulia! I hope all of your projects turned out great!
Anyone can sit around and pick at what you should’ve done or could have done. I will say this, as someone who does tile for a living and has done hundreds of bathrooms you did an amazing job if you are just a DIY guy. I have see “tile setters” not do that well. Using a grout that does not blend with your tile accentuates any mistakes. That was a fine looking job sir!
I appreciate it! Thanks for the support
Great video. I never use that thin of a tile on the floor.same thing happened to me with too much thin set coming through the grout lines. I also never had a schluter drain grate go down low enough for those thin tile. I always use at least 3/8” tile now.keep up the good work
Appreciate it, Gene! Will definitely consider larger tiles next time. Thanks for watching!
Thank you Andrew! You did an amazing job showing us how to do these steps, including how to fix any “oops” (broken tiles) and to be extra careful of not using too much thinset. Btw, the part of applying the right amount of thinset/mortar is crucial, especially with mosaics as we never want too much mortar oozing up through the tight in-between spaces that mosaics tend to have. Like you mentioned, once it dries, thinset can be a nightmare to deal with, and can interfere with the grout application. If you’re like us, you always want your completed tile job to look as perfect as possible.
Thanks for watching! And you are so right - dried thinset where it is not supposed to be is the WORST thing ever lol
A xan l,
@@AndrewThronImprovements
I was observing your job of placing the slabs in mesh for shawer. I always have difficulties...they do not remain level and the mixture comes out between meshes. What do you recommend? Should I use another notched plane?...Thank you
I save old toothbrushes to clean the thinset between the tiles if there is an issue
Great tilework (and patience) everything is lined up :)
I appreciate it! Thanks so much for watching!
Another helpful video! Looking forward to the next one!
Thanks for watching!
Thank you for the refreshing of the tips always good go back to people make sure that know if remember correctly
Awesome! Can’t believe this isn’t your day job. Impressive channel
Thanks! Might have to commission you for a banjo song for an updated intro 🤔
the mosaic tile was a great choice...looks great
Thanks Kelly! Appreciate the continued support!
Thanks so much for sharing Bro... 👏👏...great video. Exactly what I was looking for
Well done - easy to understand, good camera angle. Also love the aesthetic, my new bathroom is destined to be much the same. Nice job, I'll be checking out your other videos.
I appreciate it - Glad you got value! Good luck with your project and I sincerely appreciate the support!
You just saved me a lot of time! Thanks
Glad it helped! Thanks for watching!
Good job. Lessons learned. Thanks.
Great video! Thanks for taking the time!
Glad it helped, Garrett! Thanks for watching!
You were on point with everything you said and how you did everything, except the Schluter I personally don't like their products but that's just me
👌👍💪
I appreciate the support! Especially from someone who really knows their stuff! I'm definitely still learning, but trying to improve with every project. Thanks!!
Thanks for the video. It was well done and thought provoking.
Glad it was helpful!
Wow if only my husband was as handy as you! 😂
😂😅
Great videos man appreciate the great work God bless you
Appreciate it! Glad it helped and thanks for watching!
Great video!!
Thanks for the information. First Setup but im taking my time lol
this channel is gonna grow fast af ! .... this is great stuff! ! !! ! definitely subbed
Thanks a lot! Appreciate the support!
Nice Job! I just did the same with too much thinset. I'm installing black tile with black grout. So I need to get all the thinset out. I just ran to the internet to see what everyone else has used but wanted to know what you used to get it out?
I’m wondering how to handle slope to the drain using a flat kerdi shower pan (which appears to be what yours is). I was hoping, but did not see how that would be done. Any help would be much appreciated. Thanks!
Very nicely done. It's an excellent tutorial.
Thank you very much! Glad it helped
This helped a lot! Thanks.
Glad it helped! Thanks for watching and good luck with your project!
What a nice tutorial! We have a bit different floor waste "Bermuda" It should be installed before tiling and tiles must be laid around it. Can you tell me, whether any gap must be maintained in between the square waste and tiles around it (like a grout), or no gap around the grate? Which level difference must be in between the grate edge and the adjacent tiles? 0.5, 1 or 2 mm? And the last- how to finish this gap around square waste- the same like grout (epoxy)mix, silicone or leave it as it is with some tile adhesive inside? Thank you.
Nice work!
Appreciate it, Doug 🤙🏻 Thanks for watching!
Great advice thank you
Appreciate it! Thanks for watching!
Hi Andrew, Do you have a video on installing ceramic tile directly onto an acrylic shower pan? and is it possible to do it that way? thanks Lanny
WOW looks awesome :)
Thanks!
I did the same thing, had too much thinset or leaned on spots and have a lot of tiles (hexagon polished marble) with thinset in between. I'm using a grout scraper and a few other tools but some of these joints arounds the drain are kinda thin. How do I get it out without damaging the tile? I know I chipped at least two edges already. Will not removing all the thinset be bad? I'm almost to the point of ripping it out, but how would I do that on a schluter foam pad without damaging everything?
Great video, very informative
Appreciate it! Thanks for watching!
Hi, I want to change my shower base to a longer one, what should I do with the drain? Is there a way to have a kind of collector?
Got me motivated
Good info. Thanks
This an amazing job and you are looking for detail
Detail
I appreciate it! Thanks for watching!
Well done
I appreciate it, Mark! Thanks for watching!
Thanks!!!
Greatness.
Someone get this man a sponge! How could you do this with paper towel😂
I heard that the warranty that Schulter is only covered if you buy their product from them directly and that if you buy their product from the big box store its voided from the start.
Helpful hint. Do not use pre mixed mortar when installing the tile, it will not dry. I let my tile sit 2 weeks after installation and grouting. The tile started moving around the drain in about 7 days. I could pop the tiles off and the mortar was soupy. I had to take it all up and start over. So use the dry mortar you have to mix. The guy at Floor and Decor said the mixable dry mortar is what you use.
Thanks for the tip 👌👍 Appreciate you watching!
That’s a freaking nightmare my guy I always mix up my mortar anyway but now I know to stay away from the pre mix that’s just sad. Thx 🙏
Will this work for a tileable shower pan made of fiberglass?
잘만드네요 from seoul
Thanks for watching!!!
Hi Andrew! I am in need of that matte black drain but can’t seem to find it online. I find others that look like it but not the Schulter brand. Would any brand work? Thanks! (I’m not buying a kit because they don’t make one in 36x48 so I am just piecing together all the pieces in the kit)
Lots of people say tiling sucks and they hate it it really ain't that bad when you have done it for awhile its a whole lot easier then say plumbing or electrical tile easssy
Agreed - thanks for watching!
Im doing my shower with kerdi and enjoyed your how to methods
I appreciate it, Mike! Hope your installation goes smooth 👌
@@AndrewThronImprovements just started cutting Kerdi shower pan and fitting in the curb as we type.. maybe get the membrane up tonight or early Sunday
@@awesomemike8219 Good stuff! Trickiest part is the drain assembly!
Well done! What is the size of the shower all to wall?
Thank you.
Glad it helped! Thanks for watching!
Hi what are the rough measurements of this bathroom? Great stuff 💪
Damp sponge would clean that excess on the drain in one or two passes (in case anyone else runs into that issue). Always good to have a small bucket of water and a sponge when doing tile lol
Wow, I'm glad I have a dremel tool! But now I'm wondering if I should just go with a simple 12x12 tile instead of those mosaic tiles! They look like a nightmare to use 😭
Do you tile to the very neck of the drain?
Here to support and to see if I can work on my bathroom...thanks👍🛎
I appreciate it, Tracy! Good luck with your bathroom projects!
Nice
Appreciate it, Allen 🤙🏻 Thanks for watching!
I have bought the same tile for my shower and wow are the slippery when wet I ended up tiling ontop of it with 12x24 tiles that were rated for shower floors great work though
thank you for that info. I just installed those but we messed up on the pan and I pulled them all out before using the shower. the shower is for my disabled mother in law so slippery tiles would have been really bad.
Good job
Does it have to be mosaic tiles?
You are amazing
YOU are amazing! Thanks for watching!
@@AndrewThronImprovements where did you learn to do that? I wish i can learn pls give me information
Hello was this done over an already existing shower pan and if so how did you prep the pan before laying the tile? You did an excellent job.
That looks like a new Kerdi shower tray. They wouldn't be reusable.
Where did you get the tile?
Use a grout float to press the moasic makes for a more even set
Agreed! Thanks for watching 🤙🏻
Great video. Using the same tile for my shower floor. Question, what size trowel are you using ??????
Thanks for watching! I believe that was a 1/4" x 3/16" V-notch Trowel.
please need to help me to understand . bath place you fixed thermocol sheet in ground. then after pvc sheet cement and after Tiles . my question is after some time thermocol sheet will shrink with weight. or something else you can explain me
Hi A Singh - I would love to help, but I don't think I fully understand the question. However, the I don't believe that the Kerdi Shower pan will have any shrinkage or expansion issues. Thanks!
Great video.
Is the drain cover supposed to be flush with the tile or a smidge below the tile?
Flush at the ABSOLUTE highest. Mine is set about 1/32” below the tile. Thanks for Watching!
Good stuff man! One question tho. Did you use calk or grout around the parameter of the floor tile?
Hey! I left an "expansion joint" at all changes of plane and then caulked it. I made a video on the caulking if you want to check it out: czcams.com/video/aEkJYRD66GU/video.html
Do u have a membrane under? Hot mop? Or are you relaying on that caulk joint to keep it waterproof
Hi Rob! The Schluter shower pan/membrane I used is already water proof 👍 At the end of this video I show a water/leak test: czcams.com/video/cKyyEzOYPpI/video.html
Great video Andrew. One question for you. Is grout or the cement beneath tiles waterproof? I am curious if minor cracks on grout and can cause water escaping to below unit.
The thinset mortar isn't water proof and if grout is cracking at all water can leak below the tile def
Hi! The Thinset is not technically waterproof. But I used epoxy grout between the tiles which IS waterproof. Hope that helps.
Hanes!
Hi Andrew! QQ - we have a similar setup in our stand up shower but recently after running the shower for 5-10 minutes the mortar under the floor tiles sound like they are cracking with every step. Thinking water is soaking through the grout of the mosaic tiles. We have a kerdi shower kit installed and we currently do not have any leaks but i'm wondering if there's anything we can do to avoid gutting the floor tiles, etc and replacing them. We've had the new shower for 2-3 years and only sealed it once after installation was complete (thinking this is the root cause). Also tried re-caulking and sealing again but the cracking continues when stepping around the floor pan. If you don't use the shower for 12+hours (or until it all dries) the cracking sound disappears which makes me think it dries underneath only to be wet / loose again.
Hmm.. This may be a better question for a professional tile setter. However, it does sound like it is a water penetration issue through the grout. If that is the case, they make a few tools that allow you to remove the grout (and keep the tiles) and then you could apply new grout (I recommend waterproof epoxy grout). It is a time extensive project removing grout, though. That is my two cents, but I think a professional evaluation is your best bet. Thanks for watching!
Hello do u not grout over top of tile after it is set down?
Hi Angelina! Yes, you need to grout the tile after it sets up. I have a video (below) that shows how we installed the epoxy grout! Feel free to check it out!
czcams.com/video/dX4EDse4ZyM/video.html
Does the drain have to stay below tile mine ended up higher than tile
Ideally it should be level with (or slightly below) the tiles from a drainage perspective
Is that pan sloped? Im trying to figure out how to reconcile tiling with a sloped floor.
The Schluter pan is already sloped - which makes it way easier. Thanks for watching!
How much thinset do you think you used for the shower? For the pan, the waterproofing, the tiles?
Hi Matt! It's been a while, but maybe 3, fifty pound bags? However, I did a lot of the work in iterations, so I wasted a lot of thinset. Thanks for watching.
I wouldn't cut my drain tile like this. I'd cut any tile that land on the drain off the webbing after marking them as he did. Forget about them. Install all the floorpan tile. Come back to the drain and use a tile saw to cut and individually install the drain tile. Always use "square" drains for this reason. If you have to install a round drain then yes, that Dremel will be useful. None the less the end result is exactly as my method would look so to that I'll say great job. It looks very good. I do enjoy certain aspects of the kerdi systems. Other aspects I prefer the "traditional" way.
Hahaha. Man... I've been there before with the thinset pushing through lol and yes... Definitely clean that up when it's wet. You'll be in for a complete shit of a day if you don't.
would have been more helpful if you hadnt sped up the camera during the crucial way mortar is applied, i have seen articles saying trowel should be held at 45 degree andgle?
but the real helpful part was the cutting of tile with the dremel tool, used it also on your example worked perfectly
Thanks for watching! Still learning the best way to present info, but glad you found the cutting part helpful! Glad it turned out well!
Can you tile the walls the same day? Or you usually wait to dry?
I waited a day or two to let the shower pan dry before working on the walls. Below is a video showing the wall installation.
czcams.com/video/IHfl6a66rO8/video.html
Thanks for watching!
Looks amazing!!! Quick question and probably going to get hell from lots of people!!! What is the best way to do the bathroom.. floor tile first? Or wall tiles first? TIA
Hi Jorge - People have different opinions on this. However, I usually install floor tiles first and then walls. But really, it is preference. Thanks for watching!
@@AndrewThronImprovements i did the floor first and not working on the walls!! Great channel
You dont use grout between the floor and wall tile?
There are mixed thoughts on this. Some argue that the wall/floor intersection will experience settling and that grout will likely crack if installed there. If you follow that logic, caulk is a better bet. However, others claim that they have never had issues with grout cracking when installed between the floor and wall tile 🤷♂️ Let me know which alternative you go with!
What kind of material is your shower pan made of? Thanks
It's the Kerdi Shower Pan - It's a type of waterproof foam. Check out my installation video if you're interested: czcams.com/video/cKyyEzOYPpI/video.html
Thanks for watching!
Can someone walk me through everything need to remove my tub and make a stand shower like this? I want to replace shower, sink, toilet and floor.
Yes. First step, higher a professional.
You never talked about the grade. How does it drain?
Rob, the shower pan from Shluter is pre-sloped. Thanks for watching!
Need shades to shower in that bathroom but nice work..
It is VERY white, I’ll give you that 😎
Anyone do concrete floor showers on CZcams it’s always some baseboard vid or whatever it is my floor is concrete
Hey Fabian, never done anything on concrete unfortunately. But I bet you could install a kerdi shower pan on a concrete base as well. Just check with the manufacturer. Thanks for watching!
1:22 cool tool that no one views on this video!
Between the Kerdi pan installation and this video, you didn't address how to set the pan fall, to ensure water drains quickly towards the drain.
The pan has a built in slope to ensure water runs towards the drain. As long as the thinset is put on evenly, there won't be any problem with the water draining properly.
Why not show close ups of the drain or grout lines? A better view of the final product would be helpful..
That's a fair comment/suggestion. I will include some close-ups of the final product on the next video! Thanks for watching.
Why not plug the drain, and tape the drain to avoid thin set in your drain cover?
Hi David! My plumbing wasn't hooked up yet, so I wasn't worried about anything going to the drain hole. I agree that I should have taped the drain cover - would have saved me some clean up. Thanks for watching!
Did you place the tile over a shower pan?
Correct - tile over the schluter shower pan. Thanks for watching!
Should have just removed the whole tiles that were in the way of the drain. Cut out the mesh backing. Laid the sheet around the drain and then cut and places the few individual tiles that needed to be cut around the drain. You had to do that with the broken tiles anyway.
That's a fair point - we got there though. Thanks for watching, Leo!
We’re about to get to this step so I’m glad Andrew showed how he replaced the broken tiles. All mistakes are an opportunity to learn and teach.
Those edge of the floor caulk joints are huge! Maybe it would have looked better to have used white?
That’s a fair point. Next time!
2:00
do you have an instagram?
Instagram is in the works! Will likely be ready by the 1000 subscriber mark. Thanks for watching!