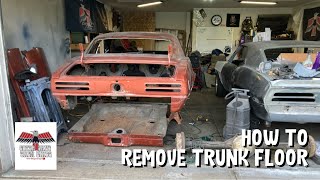
Floor pan installation on 1969 Firebird convertible

Vložit
- čas přidán 14. 12. 2023
- Installing a floor pan and how to get it pulled in tight.
Like what you see? Want to get your own Gotta save them birds goodies? Buy apparel here
Check out our CZcams store or this link my-store-cf6b8e.creator-sprin...
See More videos czcams.com/users/VinylVillag... - Auta a dopravní prostředky


As an ex-automotive painter/estimator/body shop manager, I can tell you this is a perfect example of the energy transfer involved in a wreck. Most people don't realize what is involved in assessing damage correctly, so the vehicle is (a). Safe...and (b). installed back to specification. As we can see, there are clearly people out there that cut corners and dont investigate enough. This car unfortunately, would have probably been a total loss, if blueprinted properly when the original damage occured. Thankfully, for us following...they didn't know what they were doing.
Keep up the great work, Jon
Thanks much appreciated! I knew it got hit before i started but no clue it was hit that bad.
Although my project is a 67 LeMans, I get inspired by all your videos and I'm constantly learning. You make everything look so easy and most of all, it seems your having fun.
That is awesome! And of course always having fun playing cars unless it’s block sanding 😉
These videos are really helping me on my dads 1968 firebird convertible “parts car” that he used to snip parts off for his bird. He sold his and I was able to get a title for the parts car. It’s a rust bucket, and the floor is 60% gone. Most of the convertible suppt structure under the pan is shot too. Looking forward to your videos on this convertible. Thank you for sharing, and queuing in on your favorite tool, the air hammer with chisel bit. Wow that’s a game changer…. No more drilling for days
I LOVE my air hammer, it so much quicker then drilling. It doesn’t work good on newer cars but the quality of the spot welds on these old birds, well they weren’t that great and pop apart easy. You could still damage the metal but it takes a little practice and when mastered totally a game changer.
I’m repairing an Italian sports car so while the specifics aren’t useful, the general methods and advice are very helpful. ❤️🇦🇺
Very cool. Thanks for checking us out.
Jonathan you are very informative and when you're done Mr Cunningham will be very pleased
I hope so too. He will be helping on the build as well. The plan is to drop the trunk floor out this Wednesday with him.
Hey John, I discovered your channel about 5 months ago and I’ve been hooked ever since! The info you share on here has given me the confidence to tackle a lot of my car projects on my own. Keep up the great work making these videos informative and entertaining! Always looking forward to the next video!
That’s great! Thank you for watching
Looks great! Definitely more than one way to do it and the key is plenty of measurements. Its nice to see the twist coming out of it.
I totally agree! So very happy the twist is going away. This poor car must have been hit very hard years ago.
John you do very nice work!! Keep up the vlogs so we can see the finish product!!👍🏽
God willing it will be completed and on CZcams for anyone to see
Looking Gooder, when I was a teenager I would help an old friend up in Michigan and he said used that word just like you brings back old memories he was a very smart man worked for Coke repairing vending machines tough me how to weld the first time.👍
That’s really cool, memories is all we have in the end and making as many as possible is definitely gooder.
@@VinylVillageGarage 👍
absolutely loving these new thumbnails you are doing!
Thanks for the feedback. I was hoping it would work good
It’s coming along nicely great install on floor and components great use of space!!!
It sure is! So happy the car is laying flat now as well
Doing a great job. Been putting cars together for years now, mainly Pontiac's and got to say love learning new ways to make the next one even better.
Fantastic! I hope these videos do provide some help, thanks for watching
Jon you are the man!
I learn more everyday watching your vids.
I will be tearing into my 69 in the spring thanks to you
That is awesome!
Awesome work as usual Jon. I've learned a ton from you. Pretty much every video I pick something new up. I may need to pick your brain in the spring for my trunk floor and rails. I'm missing the front 8-12 inches of both rails so have nothing to reference. Even the lip on the front of the trunk is gone. Only thing I can think of for now is to pull the old rails off the trunk floor. Screw the new ones in place then adjust my floor to them. Then weld in the floor pan and cut the trunk floor out then.
You can assemble the rails to the new trunk floor. The next video covers some of the dimensions. I am certain it should be of some help.
Caught the note -A " J " LOL great video
Glad you caught that one, I thought it was clever
I love your passion! I've almost got the driver's side floor pan installed in my cougar. Maybe tomorrow I'll get it welded in.
Heck yeah! I enjoy the metal
Working part.
Great Video! Love the tips Jon! You are definitely helping me! That torque box area in the drivers front sure is challenging. Replacement panel is definitely different. Brain challenges to "play cars"!
You can do it! The replacement is just a little different most importantly get the height correct then hope for the best with the rest
You have the pedal to the metal on this restoration! Loving it!
Wasting no time. I really like the metal working part.
Simple tricks equal great results. Very nice, coming along. I love this build because all of the panels your replacing is what mine needs also. Great to watch the order of replacement. I want to see the total sheet metal total cost. Thanks for the help.
I purchased all the sheetmetal needed for the body shell including front and rear bumpers as a bulk order to save on shipping. Then total cost to my door taxes and shipping included was $4,000. I purchased it all from summit racing. Classic industries has the lowest price on parts but kills you in shipping cost. The crazy thing is most of the sheetmetal I got has classic industries tag and shipped from address. I still got most things from classic but summit racing shipped it cheaper.
Thanks for the tips very helpful.... good content, looking forward to more.
Glad it was helpful!
Nice technique with the ratchet straps. They definitely help when putting these cars together. Thans Jon. I like the VVG way. lol
They will definitely become your best friends during the panel replacement process
Great tips as always! Your videos are so helpful to my project! Just yesterday I was putting an inner rocker on my 69 and found myself going back to rewatch the video of you doing it on the pumpkin project.
That is awesome! Thank you for watching
Yup. I'm putting the old 40 inch TV in the Garage next year with a laptop connected. My wife is tired of my coming (All Dirty and crummy) in to watch what Jon does in the middle of my doing the same on my car
Awesome content for sure,, really enjoying this build. Just a note though, a squared level frame to attach the car to would make your life so much easier when it comes to keeping the car square and level. You can even have them on rollers. But keep the content coming.
I agree totally a body cart would be great, if and when I upgrade to a larger shop it’s on the list. For now I just don’t have the room unfortunately
Great Jon! It’s nice watching someone build a car without a big high dollar shop!
Nothing wrong with a nice repair shop, I just don’t have one and that’s not going to stop me.
Wow very good info , points out many mistakes I’ve have made , great work like the strap action too
Whatever works the easiest is my favorite way to get a job done.
Some great tips, especially about the bracing. I've been working on F bodies for years and this car is going to be straighter and more in spec then an original. Great video, thanks.
I tried bracing the first few and just fought the hell out of it to line things up. I do minimal bracing now and so much easier to get it together. Flip side loads of reference points and measurements so far so good.
Awesome tips Jon! The Vvg way makes more sense to me.
Thanks, I think It does too!
So many awesome tips!!!
Thanks. Trying to share all
I can. Before I forget it all. Lol
Great job...practice makes perfect.
Yes it does!
Hi Jon, new subscriber here. Like your Mockingbird project, I too have a '69 Convertible that I picked up here in GA about 6 months ago. Was able to grab it from the original owner who bought it in Atlanta back in 69. Unfortunately, it spent many years on the GA coast collecting rust from the salty rain. I've been rolling through many of your videos and have found them extremely helpful and inspiring. Nevertheless, I'm all in. Subframe is out and completely stripped (solid but has a lot of surface rust). I'll take it somewhere to have it soda blasted and sprayed with Epoxy Primer. Once back in my garage, I want to consider upgrading to disk brakes and probably suspension and steering upgrades. Open for suggestions! Engine's on a stand and plan to rebuild using the same block which is original to the car. Goal is to do as much work as I can on the entire car. May have to tap into a shop for body work as I have no welding equipment or experience. I do know that I'm not trying to win an award for the most money spent on a resto. In looking at parts and labor, breaking the bank could be easy. Thank you for such helpful info! Steve
Thanks for watching Steve. I typically upgrade every car I build to power disc it’s a great upgrade for safety in my
Opinion not to mention a nicer diving experience. The kits are reasonably priced too. Doing what you can at home saves money and what you get done is a nice sense of accomplishment too. Getting your hands dirty saving another bird is always fun for me
I love that heater! And this video was amazing. The car scares me, but you show all is possible with these.
Glad to share and looking forward to this car back on the road looking new again.
Great work iam learning alot
Cool. I like idea of this stuff helps.
Always love watching the floorpan go in, I guess I'm weird lol.
I am weird too as well. Lol
New viewer to your channel. Very impressed with your skills and ability to restore these cars. How did you learn to be so good at this kind of work? I wish I had your ability. Love Pontiac. I'll be watching.
Self taught really. Several books and magazines, tv shows and many failed attempts over 30 years. Now it’s just fun to take what a lot of people see as garbage and make it beautiful again
Another awesome video...
Thank you.
Great video
Thank you.
Looking good
Thanks
I am sure you've thought about removing that torque box, welding the floor pan in and then reinstalling it to get the welds in the factory location. That's a lot of work for sure, and probably why you decided to do it the way you did. Put this in the mix though... I've seen a number of cases where various braces are welded in the wrong places on these panels and they have to be relocated. What you find underneath is that the EDP coating is incomplete underneath these braces, bare metal is exposed and likely already rusting. I bet you've seen this too. This could be a reason to remove and reinstall the braces. Or, keep doing it your way and just squirt some paint in there with one of those rattle can hose attachments. I'd do that at a minimum, underneath any brace already welded onto a replacement panel...I can't stand the idea of bare metal hiding out somewhere!
Yes i have seen the unfortunate bare steel and rust already between new panels. I have even found rust under the edp coating! I have had to remove pieces that were not installed well. It’s hard to say where to draw a line on how far you go to seal things up. Spray some paint at the minimum and cavity wax works in some places seems to work. Sadly the entire car from the factory was bare steel too and there will be several panels that I don’t take apart of the original car that I know there is some type of corrosion festering. How I see it do some paint, seal it up and know the car won’t be seeing the crappy elements anymore. To remove all the rust just isn’t practical on these old birds
Yep, that's a perfectly reasonable assessment. A squirt of paint is 10x better than the factory, and these cars still managed to last for over 50 years. A testament to that, my 69 Camaro was put in storage some 18 years ago in pretty rough condition. When I got it back last January, it wasn't hardly any worse than when it went in. I'm not sure why I let those little things bother me so much. For sure, my brain is set to overkill!
Really liking the use of the ratchet straps. Do you have any issues with popping any welds when you take the straps off? The floor pans seem to have plenty of flex, but just wondering. Perfect video for this.👍
I use the self tapping screws down the full length of the rocker panels then remove the ratchet straps, seems to do ok. Haven’t popped any screws yet. Then I weld it up like normal.
hey John, big fan, have a 67 camaro coupe, watched many of your videos! working on rockers and floor pan. big thank you!
i noticed have the car is rachet straped to the floor? whats that round thing with hook called? i noticed the car strapped to that?
I bought them from Menards they are d-rings, I used tapcons to mount them to the concrete it keeps the body still and doesn’t budge.
Hi Jonathan loving your videos.. I am still working on my 67 bird When I got the car it had no floor in it. I watched your video today I have no way of getting a floor reference height. Any way you could tell me the difference between the height of your outer rocker to your reference measurement of the floor ? That way I would know the difference so I could set a threaded rod like you did
I took a straight edge from rocker to rocker. Then measured from the top edge to the floor pan. Not the nut inside but basically the area the subframe mount touches and it’s 1 7/16”
Thank you so much john
@@robinmclean1371 no problem
Great video Jon. Does the new floor pan come with the brackets that the front leaf springs saddle bracket mounts to? I hope I said that right.
Yes it comes with those panels installed.
Should I cut out and replace the floor pan before I cut out and replace the trunk pan and frame rails?
@@larrygonzalez3159 I normally do. I start with good rocker panels and then main floor and work my way
Back.
I wish I could afford to just bring you here to Florida to assist and over see!!!!
I’m the one that sent you the pictures of the 67 we just took apart and the rear end question.
Jon , out of curiosity when you Installed floor bracing did the measurements come out the same as the 68 repair you did earlier ?? My floor and bracing where missing on mine and was going with your measurements on that build ...
Yes they are the same, I even did an episode on locating them too. For the most part the floor pan is stamped for them to really only fit in the correct location. The biggest struggle is to get it pulled uptight to the floor pan. The nut and bolt technique will be very helpful.
@@VinylVillageGarage thanks I did watch that episode and was curious if measurements stayed the same ...
How do you know that the floor panel is the correct width? You are pulling the rockers into the floor pan. Could it end up that the rockers are pulled in too far?
If the gap was 1/2” or more I would be concerned but every floor pan in have installed has been this way about 1/4” gap that’s why I grabbed my ratchet straps before i started. The addition note that is not in the video, the trans tunnel was higher then the firewall until I let the ratchet straps loose then it pulled it all flat. So with that said it most likely returned close to the original distance between the rockers. This is just my experience. I don’t concern myslef much with what the distance is as long as the rockers are parallel to each other when done and I am not trying to close a very large gap. Other than that full send. I bet if you asked people what is the distance between their rockers you would get several answers ranging with 3/4” of highest and lowest.
Great job. Very good information. This should help fire someone up and get their project on course. Thanks for time you put into very educational videos.
💪😎
Thanks! Your comments help immensely
@VinylVillageGarage you bet my friend. I love the content. And I will comment on every one. You are doing a great job
@@VinylVillageGarage also L,M,N,O,P 🤣