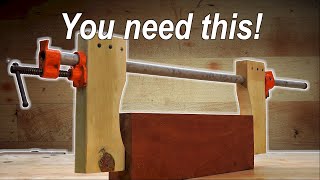
Drill Press Chisel Mount

Vložit
- čas přidán 14. 09. 2022
- Ever need to do some precision cutting with a hand chisel? This ingenious jig mounts a hand chisel to your drill press and lets you use the quill to advance the chisel in perfectly straight path, and then stop it at a precise point. This can be extremely useful for both joinery and inlay. Nick shows how to use the "drill press chisel mount" to clean out a square mortise and create a groove for wire inlay.
We offer the plans for the Drill Press Chisel Mount at workshopcompanionstore.com/pr... .
If you'd like the plans for the Drill Press Table shown in this video, they can be found at: workshopcompanionstore.com/pr...
To see all of our videos and SUBSCRIBE for more, see: / @workshopcompanion .
Also visit the WORKSHOP COMPANION GENERAL STORE where we offer a wide selection of Nick's BOOKS and PROJECT PLANS in digital format: workshopcompanionstore.com/ All our plans are in both Imperial/English and metric measurements. And you can pick up one of Nick’s books FREE just for visiting!
To follow us on social media, try:
FACEBOOK - / workshopcompanion .
INSTAGRAM - / workshop_companion
For our non-English-speaking viewers: Closed captions can be set to any language. Click on “CC” (Closed Captions) at the bottom of the screen to turn them on. Click on the gear (Settings) and a menu appears. Click on “Subtitles/CC” and another menu will appear. Click on “Auto Translate” and a menu of languages will appear. Click on the language you want for the closed captions and you will be returned to the video -- closed captions will appear in the language you have chosen. If these captions cover up some of the action, place the cursor over the captions, press and hold the left mouse button, then drag the captions to where you want them on your screen. Release the mouse buttons and they’ll stay there.
Para nuestros espectadores que no hablan inglés: los subtítulos se pueden configurar en cualquier idioma. Haga clic en "CC" (Subtítulos) en la parte inferior de la pantalla para activarlos. Haga clic en el engranaje (Configuración) y aparecerá un menú. Haga clic en "Subtítulos/CC" y aparecerá otro menú. Haga clic en "Traducir automáticamente" y aparecerá un menú de idiomas. Haga clic en el idioma que desea para los subtítulos y volverá al video; los subtítulos aparecerán en el idioma que haya elegido. Si estos subtítulos cubren parte de la acción, coloque el cursor sobre los subtítulos, presione y mantenga presionado el botón izquierdo del mouse, luego arrastre los subtítulos a donde quiera que estén en su pantalla. Suelte los botones del mouse y permanecerán allí.
Our Music is Licensed through Epidemic Sounds - www.epidemicsound.com/campaig...
And thank you so much for your time and interest!


The author does like to from scratch, czcams.com/users/postUgkxbnOKZBE4evMO5V2vroHeCjq6d_MV6wJO shaping and trimming wood from large blocks into fine finished products. As another reviewer mentioned, most projects require a lot of high-dollar equipment that most of us don’t have the room or budget for. But, knowing how to do these things, even if we won’t be able to practise the full stack project, is still great.
I saw the thumbnail and said to myself "what could possibly go wrong!" but then I saw the old man and said "yeah, this man knows what he's doing"
OUTSTANDING!
My grandfather was a Seabee in WWII and a master craftsman after. He showed me something very similar to your method almost 50 years ago. To simplify matters, I had a machine shop make me a few chisels of various sizes that did not have handles, but instead had 1/2" diameter or smaller shafts a couple of inches long so I could mount them in the chuck of a drill press. I also had a set made for my grandfather who used them quite a bit, and I got that set back upon his demise. I still have both and have used them many times over the last half century.
Thanks for sharing. My very first pass at this jig twenty-some years ago was to braise an old mortising chisel to a 1/2" shank, then re-temper the chisel. Not as sophisticated as your design, but along the same lines.
@@WorkshopCompanion I know carpentry, not cabinetry and other fine woodworking like you do, but I have been a motorhead since JFK was President, so knew and still know folks with machine shops who have done considerable metal work for me. That's why I defaulted to having one of them make the chisels I wanted. Everybody who has ever seen them (a) thought they were miraculous, and (b) wanted to buy a set. It has surprised me that no one has ever produced them for retail sale. Had the idea been patentable, I would have. However, it would not surprise me if a few folks had some made after seeing mine. You might want to see if you can find a machine shop capable of making them for a price that you could sell them at for a reasonable profit without them being too expensive. Me droog that made my sets said they were ridiculously simple and quick to make. Bar stock on a lathe to turn the shank, mill and bevel the flat surfaces, sharpen the cutting edges, and temper to harden. Ta daaa. Keeping the cutting edge on the center line of the shank would prevent most flexing. Given the size of your audience, I'd bet you could sell quite a few. Many folks would just make their own, but they would love you for having shown the idea to them. I Googled "parts of a hand chisel and there seem to be many that could simply be stripped of their handle and ferrule, and shaping the tang on a lathe might be the only alteration required. I'm supposing you encountered a rectangular or square tang when you explored your add-on shaft method. There have to be many brands with a round tang, and making its diameter uniform would take just minutes on a lathe.
Aren't granddads wonderful? I still have several hand planes passed down to me. I do my best to use their strong character as a measuring stick and try to pass on to my grandchildren (28 and growing) the strengths they both had.
@@johntiefel4248 As with every other category of humans, some are wonderful, some are not. I only knew one of my grandfathers. He was of the "not" variety. So glad to know you are one of the other category. You seem to be the sort of fellow who should have created a platoon.
Pretty brilliant. I wonder how some high grade bolts would work if forged square and ground
I laughed so hard when he said to make sure the drill press is unplugged, or things could get "wildly exciting". 😂😂
I have neither a drill press or chisels, but I still found this very interesting 🙂
Me to😢
This continues to be my favorite woodworking channel. I learn something useful every time.
Kind of you to say. We try.
The Mr. Rogers of woodworking. Your content is on it's own level. Your character, delivery, and all around knowledge is of deep roots. I enjoy learning all I can from you, all the while being in trance from your entertainment.
Thanks for your kind words.
3:52 " Just wait till nobody's looking..." very funny!
Great advice. Love the south park style illustrations.
Man you have more useful and practical information in one ten minute video than any other “woodworking” CZcamsr I’ve ever seen on this site.
Love these videos so much. This stuff is genius.
Thanks for the kind words.
Great on the inlay, thanks.
Outstanding!!
I've watching thousands of wood working videos and thought I'd seen every "genuinely" useful workshop tips this is something thing will most definitely build
Okay that's really clever.
The magic of a perpendicular
Clever , very clever!
That's so clever I'm surprised I didn't think of it. 😆🤣😂
I sincerely love everything you put out.
Well, you did it again. You keep piling on to my inferiority complex. 75 years old, 60 years in the construction industry, and I would have never thought of using a drill press like that. I can use this tip today.
Sorry about that...but glad to have been of some use.
thank you great idea will make mine
Nick is a great teacher. This is coming from a teacher, so you can trust me.
Thanks.
Thanks for bringing smiles to the woodworking community.
You guys are a great audience.
sweet jig man. I knew there had to be more I could do with my drill press.
👍
Very clever!
This guys a maverick.
I still don’t understand why this channel doesn’t have over a million subscribers. Probably the best educational woodworking channel i’ve come across yet with extremely valuable info. great production quality too, but the knowledge shared here is invaluable
Nice of you to say, but don't worry -- we're on our way.
Mind = blown!
This was terrific.
So glad I’ve found this channel. Thank you!
Most welcome.
Great video.
Fantastic!
Now I really need to come up with a need for a mortice. 😀
If you have a collection of round pegs, they're always needing square holes. Or is it square pegs in round holes...;-)
Pretty cool, thanks
"...the round and round part..." -- I actually used that phrase when at a loss for words in a discussion about my drill press with my wife... LOL
Absolute Genius! Love to watch Nick performing creative magic ....
And we love to have you watch. Thanks for saying.
Nick you are fantastic
Keep up the good work
Thanks for the kind words.
I'm from the UK thanks Nick always informative and great tips 👍
Most welcome.
Thank you sir for someone who shies away from mortise and tenons because I am not very good at it ,this is a fantastic idea. Keep up the good work, and thank you for the way that you teach. 👍
Most welcome.
That's an amazing idea, you have a very flexible mind to come up with something like that.
My wife would agree. She often tells me I'm bent...;-)
2:20 wildly exciting 👍😂
I've had a Shopsmith for 40 years, also I have many of your books... I'm more a fix it, build it, repair it guy with some wood working skills. In my old house I had a pretty good shop, but now I'm in a Shop/Garage atmosphere learning to make it in a smaller space. I use my Power stand more than my Shopsmith mainly bandsaw, Jointer... I got a second hand Rigid Table saw and spent time tuning it up and it works like a charm. I do enjoy your "you tubes" and learn a lot... it's good to now tie your books to a face... keep up the good work!!!
love the south park style of animation for you and your dog!
Thanks -- we have it done in Ukraine!
Cleverest jig I have seen in a long time. Impressed!
Thanks.
This press has worked like a charm for my projects czcams.com/users/postUgkxajoEbapTfqWaadnqb04h6U576yxXp-FE . I didn't even secure it to my table top, mainly due to the fact that I was using a 15 lbs drill vise. It's not flimsy at all as to what others have claimed it to be. Make sure the locking nuts and levers are secured and there won't be any issues with light pressure and patience. I was able to drill through aluminum, plastic, and steel (steel took a while) with no problems at all. Yeah it took a little longer than a regular drill press, but I don't have the space OR the money for one.The instruction manual was worthless, but luckily assembling the press was intuitive. However, the manual would be good for ordering replacement parts if needed. There is a nice breakdown of the parts that are included in the kit. Before ordering, make sure it is compatible with your unit, it is clearly stated what models the press is compatible with.This was an excellent purchase for $40!!
Neat jig Nick. Your videos are always so informative and user friendly to watch. Bit of humor is great also!!
Thanks.
You are so good teacher ! Also funny at the same time. Regards
Thank You.
I was skeptical of how it was going to work at first, but alas, as always - Nick does not disappoint. This is a pretty great way to cut mortises. I'll give it a try next time I need to make some.
Thanks for saying.
I've supposedly been doing this as a hobby for a few years now. I'll be damned if this didn't humble me! Thanks so much for these awesome videos!!
Most welcome.
I removed the handle from a chisel with round tang instead of a socket, and then chucked it up in the press. It worked for me. Also, for the cloisenne wire, one could substitute guitar fret wire, which has tangs to grip walls of the groove.
Fret wire would give a different result. It would stand proud of the surface because it is T-shaped.
Brass shim stock is available in a variety of thicknesses, and widths. None as narrow as the "wire" that he displayed, but if you intend to do a lot of inlay work, a roll might work out cheaper than the wire. You might also be buying a lifetime supply in one stop.
I was thinking about doing that too.with some old chisels of mine.but wasn't sure if it'd work.glad you helped me make up my mind.ill do that.thank you 😉
A chisel chucked in the drill press would cancel any wobble also... I like it... God bless
I was lukewarm on the idea until the wire inlay piece. Now I'm sold on building one.
Genius.
Never to old to learn new things. Thank you so much. Love it... Best regards from Norway.
First video from this channel that I've seen. Thank you CZcams algorithm.
Good info, great presentation; and obviously loves dogs. So I subscribed.
Thanks. Bella says welcome.
Fantastic! I wish I knew this about 3 weeks ago!
Brilliant
This is absolutely brilliant
Best drill stand trick ever, Thanks
Best woodworking video I’ve ever seen, hands down. Entertaining and informative. Love it!
Thanks.
You certainly have a wealth of knowledge under those gray curls. Thanks for the information
Most welcome.
Great cartoon transitions !
Thanks.
Very interesting stuff, thanks for upload.
Cheers from Poland 🍻
Cheers back from Ohio.
Everytime I watch one of your videos I learn something new. Thank you (and your team?) for your experience and your love to share all this knowledge.
You're right, I have a team. Couldn't possibly do this well all by myself. Our producer and editor is Travis Blair, who in addition to being a dynamite filmmaker, is a gifted craftsman in his own right. Heather Knopp is our marketer, and Mary Jane Favorite is everything else. Then of course, at the top of the ladder, there's Bella, our shop dog. We all say sincerely, most welcome.
I will certainly sharpen my wood chisels and blow the dust off my drill press now. Ingenious, Thanks
Most welcome.
This is a stroke of genius
Thanks.
What a wonderful idea. Making one tomorrow
Great idea, Herr Engler!
Seems like a perfect job for the old hand press/arbor/keyway cutter.
Less spinny things to go wrong
True. If only old hand press/arbor/keyway cutters weren't as rare as hen's teeth these days...
Very cool!!! Never would have thought of that. Love the South Park character of yourself!
Thanks!
Just learnt I can lick the plug to ensure all the electricity is out! Great video!
Thanks. Be sure to wash your plugs from time to time.
thats an interesting way to use a drill press, i have never seen it used like this
Genius!! Thanks for the tips!
Now that is trick. Thanks for posting that.
Most welcome.
This channel is always a goldmine of information, delivered in a refreshing way which helps embed the learning.
Good of you to say.
Nice jig!
Every time I watch your videos it brings me so much joy. It's a true pleasure to learn from your years of experience. Thanks
Most welcome. Those were very kind words.
Just found this channel, thank you all mighty algorithm. Very cool video!
Thanks.
😊 I want to tell you how much I appreciate your instruction. "I appreciate your instruction!"
I just had surgery for trigger fingers, carpal tunnel release, and triangular fibro cartilage complex repair. I have a small drill press and some 1x4s which need a mortise! Now, I have a trailer to which i can store my tools...
I can say now, "Have tools, and I can do anything, anywhere!!!!"
Thank you!
I feel your pain. I've had nine of my ten fingers surgerized. Carpal tunnel seems to be a common ailment among long-time woodworkers.
this is interesting but I'm old school. I actually enjoy doing joints by hand. I will admit that I do have a mortiser in my shop but I rarely use it.
That is an awesome little jig!!! 10/10
Thanks.
mate i can listen to you for hours you make amazing videos and you are one hell of host thank you
Most welcome.
What a cool channel! How have I missed this? Subscribed!
You have
E always been one of my favorite wood workers always new ideas
Thanks for saying.
fascinating and informative sans fluff and gimmickry. Keep up the great high level content!
Will do.
The fact you use southpark art style for your transition is god tier
Another option would be to get a few chisels in choice sizes .without the handles that don’t have full length tangs that could be mounted directly in the chuck.
I was thinking the same but the tapered tang might not satay firm. You might have to turn it parallel first somehow.
Thank You very much! 😊😄
You're welcome very much.
That is just downright brilliant!!
Interesting,I finally got a drill press after only having a belt sander for many years. Its lots of fun. 🤗
It's absolutely vital to make sure all the electricity has leaked out before using this jig. Safety first! 😊
Make sure you wipe up the puddle on the floor. You don't want to slip. Safety First.
I have a special insulated broom just for these sorts of clean-ups. There's no more annoying shop clutter than stray voltage. As always, safety first.
I hope there is no capacitor in the system. The result could be shocking.
Great video.
Thanks as ever for sharing your expertise. The new animations made me chuckle too. Cheers.
Cheers back.
MIND BLOWN!!! thanks for sharing this.
Most welcome.
Great idea !
Wonderful presentation! I really enjoy your pacing and script. Also I'm aware that a Travis Blair is your editor and if they're behind the South Park graphics in the title cards then I'd like to give a huge shout out as those made my day! Looking forward to the next video.
The animations were Travis' idea, and they are produced by an artist in Ukraine.
I love watching your videos. Thank you.
We love having you watch them. Most welcome.
Cool thanks!
Love this crazy idea, have to check whether I can lock the chuck on my fancy plastic Bosch as you did with that shim.
@@Nitecrow314 I totally get what you mean, but unless I make the rear end slide up and down the pillar, this won't work. And if I do make it slide, it might wobble around and be imprecise, or even get stuck occasionally.
@@Nitecrow314 it's not so important :D
Suggested upgrade: to keep the chisel from popping out upwards, modify the jig with wood screws and a piece of hanger strap to go around the handle at its narrowest point. Protect the handle with a piece of garden hose or other sheet rubber.
One of the most clever ideas I have ever seen. :)
Thanks.
I was a big fan of the Flying Mortise Brothers Band, including the lead singer, One-Eye Larue.
Good tip Buddy!
Thanks.