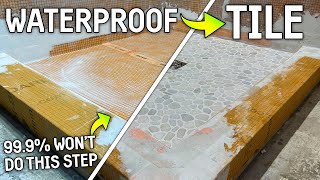
HOW TO BUILD a PERFECT Shower Pan PRE-SLOPE (Great for DIYers)

Vložit
- čas přidán 22. 02. 2022
- Hey Gang!
First we want to shoutout @TileCoach if you aren't subscribed to his channel, make sure to show him some love. / 916tilecoach
We're really excited to bring you this video, we feel like it's a fool proof, DIY friendly pre slope method that can help tackle one of the most intimidating steps on a shower project. All you need is some foam board and a saw and you can make a slope that would pass as professional any day of the week! If you have any questions feel free to drop em down below. Stay tuned for our next video where we waterproof and tile our floor, LOTS of good stuff in that one. Thanks for watching and we'll see ya in the next one!
Studpack.com
If you're curious what the old shower looked like, check it out here
• THIS TOOL PAID for ITS...
Contact: Studpack225@gmail.com - Jak na to + styl


Great tips and strategy. When my wife asks if I can do a project for her, I always say,”Yes, but I’ll need to get a tool.” That’s how I build my tool collection.
Lol....
I have been doing it so long , I say I got to get a better tool ,upgrade time. ;)
Lol same here justifies it everytime 😂
Literally just did this yesterday haha. Slowly adding to the collection
You should be allowed Home Depot credit for all the money you save doing diy
I've been building houses for 25 plus years now and for some reason I still come home after working all day and watch your videos, lol. I guess it's just nice to see somebody who knows what they're doing, there are so many "I are a carpenter" CZcams's. Thanks for the very Informative videos..
When you’ve hit the age when home projects are all that’s on you feed. Feels good.
Paul and Jordan your videos are awesome. The way you guys joke while teaching just shows how much fun you two have working together. The way you explain the details is great, you really do teach us DIYers that we can do this type of work. Thank you for the videos on your CZcams channel!
Paul you've heard it before, but let me echo what a great instructor you are. Doesn't really matter the topic, your ability to speak and explain clearly and succinctly is great. Technical content great, too. I'm no professional tile setter but I've done 20 showers over the years and always learn something from you. Oh yea, Jordan is a great wingman for ya, too :)
Awesome so appreciated 👊👍
WEll said. I totally agree. I was very intimidated going into this when facing my own project. Stud Pack you guys made me a believer in my DIY effort. Thanks for caring enough to share.
Wow, your video, out of maybe 50 videos that I've watch in the last 3 days, has given me more than enough confidence to tackle my 1st shower pan. Thank you for your time and willingness to teach. Thanks
I've been out of the remodeling business about 14 years its nice to see the new products used properly. So many things have changed for the better. Just being able to buy a niche is a huge time saver.
Nice work I'm enjoying your channel before starting a few projects.
As someone who has done similar showers and worked with a complete schluter system with a heated shower floor, this is a great tip and very professionally done. Nice work.
Absolutely appreciate your knowledge and willingness to share. I am now, thanks to you, 100% confident to tackle this step of our shower renovation. Also enjoy watching the father and son relationship and dynamic in these videos. Great job.
Ditto that. Those words perfectly well said.
Watched this video a few times during my current bathroom remodel. Used your technique for the slope and it turned out so good. Thanks for the tips and great videos!
Watching these videos have given me the confidence to tackle my own shower, i enjoy how you slow it down, show materials, show tools and how some tools do the job but some do it better!
Great tip! The hardest part of doing a dry pack is keeping the edge uniform and now I know how to do it perfectly.
When I was still able to do work, employment at a nearby commercial nuclear power plant I owned several rental properties and the only thing I never took on was roofing. Too much work for a body worn out too young and tired. I had two kids at home, an automobile for each and each neatly always needed or at minimum could stand some maintenance or repair. I got to where I absolutely hated needing work done and unable to find someone that could do the job and do it correctly without supervision from maintenance in an auto to house repairs. I got tired of going behind “professionals” only to have to fix something behind them or rework what they had done long before such rework should have been needed. As such I found it easier to do it my tired and aching self than pay and then fix or redo. Paul, you are a guy any person could hire and expect a job to be done correctly with minimal to no collateral damage from the activity. Great tips. I have never seen a dry pack done that dry, that is an unusual product. Hope it lives up to expectations.
Recently stumbled upon your page. Fellow contractor here. I already have my 3 year old daughter helping me (when it’s safe and age appropriate of course). Great seeing you pass on the knowledge to your son. My old man could barely swing a hammer lol. Thanks for the knowledge and all the hard work you guys put into these videos.
My twin boys are 3. One more year I’m giving them until one chops my mud and the other grouts it out! I didn’t name em grout and trowel for nothin!!! Lol… right on brother
Did dry pack (mud pans) for 20 years. Kind of used a cheat like you did and never had one fail. Great tips on all of this.
I miss my tile days when I was younger. Very rewarding when it was all done.
Awesome video!! I've seen you do this differently in an older video with a bunch of small sticks and now you've gone way past that. I love it!! Keep learning and sharing! I appreciate you.
You remind me so much of my mentor when I got into the business 15 yrs ago. I still learn something new everyday. Love this channel, forever fan.
I've been a Carpenter for 40 years and Continue to TRY to learn something New Every day. There are so many New methods and products being developed Every day it's Impossible to "Know it All"! Each situation in construction is Similar but NOT identical. Always keep an Open mind.
Okay, you got me. I finally subbed after months of watching your videos. With over 37 million CZcams channels available, I simply choose to be exorbitant in what I watch and follow. Thank you for the time you and your son put into the vids, most are very helpful to my personal needs. If I may lastly say, what really got me was the playfulness and love you clearly throw your sons way; it's a beautiful thing.
I agree that I really like Stud Pack. They get it more right than not on their installations and their relationship is absolutely amazing. 😙👍 I do encourage people to do their due diligence of what the specifications of the manufacturer are. Schluter has their own CZcams channel detailing the specifications and installation of their product. They have free workshops nationwide, representatives that will help you plan your projects and are there to answer any questions you have along the way. I attended 2 of their workshops. They taught from the TCNA handbook what the minimum legal standards are and had instructors there to help you learn how to install hands-on. Not just classroom work but hands-on training too! The experience was invaluable. I encourage people to go and decide for themselves. At minimum check out their CZcams channel. I hope this helps. Thank you!
Thank you again for your knowledge. I love the example you set for fathers and working with their sons. I didn't expect to get that gift, but thank you. May you continue to be blessed!!
Sweet thx 👊👍
I used this technique yesterday on the new shower in our cabin. What a great tip! Between you guys, Jeff Thorman and Isaac Ostrom, this thing is going to turn out great!
Nice trick. I did the same things with a curbless shower on a slab but I lined with cement bricks and mortar for a perimeter.
Love this. I did a similar pan. I made a gage 1/4" per foot out of a small piece of plywood. Kerdi drain and Michigan mud. Love Schlueter products
I was happy to see another mud pack pan done as you did in an older vid. I myself, like this method because it allows you to get it right when the base isn't! Why fight it? Just custom fit it! Can't wait to see the rest of this shower pan. I hate Stud Pack withdrawals.
Thanks Studpack! Super thankful for all the teaching you guys do :) Helps me have confidence that I'm doing good work for the folk's homes I get to work on. Appreciate you guys
Wow! Thank you for this video. I'm remodeling a bathroom and I was stumped as to how to form my own custom shower pan. My shower dimensions ended up being 48" x 46" so getting a pre-formed pan was not an option. Plus, some of those pans just don't look elegant. Anyhow, I was dreaming up how I should add the curb to my 1/2" waterproof hardibacker floor when I discovered this video. I was so worried about how I was going to slope the floor but I've watched this video a few times and now I get it!
This was the video that put me over the top with the confidence I needed to get going. I sub'd your channel and am a new fan of the Stud Pack! Thank you! I can't wait to water test my pan when I am done. I think a water test should be a requirement for everyone that makes their own custom pan, regardless of local codes. It just makes sense. Why not? Thank you!!
Always love the videos, and learning new ways of doing things. We ve always done cement board on the shower floor when on plywood and used sand mix from home depot. I will definitely try this out next time i do a shower like this
You are an excellent teacher. I'm watching your videos as an aspiring DIYer. Your explanations with specific details are a game changer. I'm excited to gain the confidence to tackle some projects around our home. Keep up the great work. God bless you, Sir!
Fantastic team, great work as always! Gives me confidence to tackle my 1990 fiberglass shower 😉
I used 3/8 plywood screeds around the sides cut so they laid directly on the floor; upper edges laser aligned of course. They're NOT fastened to the wall in any way - just fitted tight - and are to be removed after the deck mud is fully screeded in. To make the plywood screed pieces easy to lift out, simply put a screw in their top edge which can be grabbed with pliers. Just give them a little wiggle and they can be lifted right out, before the mud is set up. Then just fill & tamp the 3/8 gaps around the edge left by the removed screed pieces with more deck mud. The end result is perfect - fully filled with deck mud no perimeter pieces left in at all.
I've always left the plywood in there. The whole thing gets covered with Kerdi anyway, so it really doesn't matter.
Those strips are a great idea and a time saver! It beats having to recheck your lever line around the perimeter 100 times.
Great video! My wife has been asking a lot about replacing our shower insert in the Master Bath with a real tile shower. Now I feel like an expert. I fell like I'm back learning from Norm Abram.
Great job! Thank you for the mention 👍
What about Strips of 1/2 hardi board if you are doing entire shower and curb with cement board and using multi max lite for joints and then hydro ban as the finisher? Leaving in the screwed in hardi board screeds.
Love the smile when you get it sloped! There’s just something so satisfying about a job well done.
Thx Kristen 👊👍
Hey guys appreciate all you share with us.. Been a couple tested since I watched your videos. I wanted to give you props because you are so polished and smooth. Continued success to you’re team.
I just found you guys a few weeks ago. Life savers! Already got a new backsplash and kitchen floor in because of you guys. Now I'm starting on a bathroom remodel. Thanks for everything you guys do!
Awesome thx Trevor 👍👊💪
Stud Pack tends to get it right more often than not but I would highly recommend (regardless of the channel) checking out the manufacturer specifications. Schluter has their own CZcams channel and through their website you can get free workshops that provide all the meals and hotel if needed nationwide. They teach from the TCNA handbook what the minimum legal standards are, send you home with a bunch of resources, (including the TCNA handbook), provide hands-on training in the workshop to install their products and their representatives and instructors are extremely passionate to listen to your individual project(s), sit down with you and help you plan it out. I attended two of their workshops and I discovered this company last in my research. My experience with them has been second to none and their warranty is the same. I hope this helps. Thank you!
Your morning video drops are a sure fire way to kill productivity on a rainy, cold Wednesday! As always though, time well spent. Now if I can convince my my wife I need another table saw so our pizza boxes can fit in the fridge😊
Great video, Stud Pack. Using your tips is going to give me the confidence to tackle my own bathroom/shower remodel. Thanks guys. Keep the fantastic videos coming!
RIP
I absolutely love your content. I’ve done some DIY previously and I’m about to do some massive DIY on a home I just purchased. You’re giving me the courage!
Perfect how-to video. Now I feel confident that I can build a pan and finish it with tile instead of having to go with a pre-made one. I can't wait to give it a try.
Wow this is what I needed to know 10 years ago it’s such an easier way, looks awesome
Well guys. I am slowly building my confidence. I am still studying this project. Going to rip out the unused garden tub and build the 4 by 6 shower. Plywood base so I still have some decisions to make. Thanks you both for the education and expertise you bring
Awesome thx Keith 👊👍
If you have a plywood base I recommend that you seal it and use a stapled metal lath over top of the plywood. Don't forget to check for deflection as any movement will crack your tile and grout lines. Definitely put kerdi membrane over the top of the dry pack base as someone else recommended but bring the membrane up the wall at least 6 inches, sealing the corners as well. Watch the tile coach YT channel if you need more info.
Overall good information but better yet… go to the manufacturer’s CZcams channel for official installation videos. I have seen Schluter installed in various different videos and there are videos that did a pretty good job but there are many videos that missed details that the manufacturer specifies. Stud Pack tends to get it right more often than not. However you should confirm the details yourself.
Schluter also provides free workshops across the country with hands-on training, free hotel if needed and all meals are provided. They also teach from the TCNA handbook what the legal minimum standards are for installation. Invaluable experience. 💯🏆 I hope this helps. Thank you!
I have done a ton of DIY, from tile to cabinets, cement, bricks etc. This is one job I never felt I could to. You make this so simple and easy I now know I can do it following your video. You guys rock!
Much appreciated 👊👍
Great video!! I was able to do my own walk-in shower thanks to you. One tip for mixing the mud, you can use a contractor trash bag and mix it much easier. Just pour in the bag and mix the water, splash it around and voila. Thanks for your instructions and help!!
Very important tip I learned from this video -- if you are considering using a pre-sloped foam shower pan, you have to make sure the floor is flat and level. Made perfect sense after you mentioned it. I've been going back and forth between mud bed, Schluter pre-formed pan or a pre-fabricated shower pan (fiberglass or steel.) Mud bed is least expensive, but more labor intensive. Pre-fabricated drop in shower pans are very expensive. So, pre-sloped foam was what I was planning to use -- only I know my concrete floor isn't flat or level -- so that brings in using self-leveling compound (SLC).
I am doing the same with foam base.
I hate Shluter because they fail every time and I think they are complete crap.
Ditra shluter NEVER.
Foam bases never fail.
Formula for "dry pack" mortar is simply 1 part Portland cement to 5 parts sand and is ridiculously easier to mix in a small mortar tub or wheelbarrow with a hoe, shovel, or trowel than with a drill mixer.
If stucco lath is not locally available, chicken-wire lath is usually everywhere as a reinforced bedding stapled to tar paper on plywood subfloors for dry pack mortar.
Stud Pack explains well that the dry pack creates the necessary slope-to-drain, but still needs an additional Schluter-Kerdi membrane top liner over cured dry pack, before final tile install.
If water ever penetrates floor tile grout, the Kerdi underlayment membrane directs penetrating water to the drain.
Good stuff thx torchup 👊
Prefer 4-1
@@TheTechGuider 4 to 1 is a better ratio, gives much better results. I'd love to build a sand castle with this stuff and watch the local beach bully try to kick it over..... he won't do that ever again. ;-)
@@northernlightsrenovations1710 that's awesome! that's the evilest thing I can imagine xD Instant karma
It's actually 100% easier to mix it in a 3mil or 4 mil contractors garbage bag..... No mess, and throw the bag away!
I have been watching dozens of these videos on diy shower pans. FINALLY a video that explains it concisely and intelligently. You guys rock.
Much appreciated James 👍👊
Great job. Learned a whole lot in a very short time. I love the fact that the cameraman asks questions I would have asked. Great video. Thank you for your time and work.
Best way to mix the mud bed is with one of the contractor trash bags, measure out your water and put it in the bag then add your whole bag of mud bed and shake back in forth 10 or so times and it’s perfect ever time. Been doing it for years.
Wow that would save so much hassle, never thought of it, thanks!
That’s the only way I mix it and save me from carrying that buck where am at I just take the sks of floor mud where am working
Great project for DYIers. Jordan - your cinematography skills are getting very good. Awesome slow pan and slow zoom in to add interest to the shots.
My sister installed Schluter in 2 bathrooms with no prior experience. I highly recommend checking out the manufacturers website or CZcams channel when available to ensure proper installation. Schluter does have a CZcams channel with installation videos. Stud pack often gets it right more so than not. But everyone should do their due diligence regardless of what product they are using. I hope this helps. Thank you!
Very informative! My wife and I are building our own house, and I just wasn't satisfied with the fiberglass shower floor pan we bought at the home store.
We're going to follow your process and build our own.
Thank you for the videos.
This was the one part of doing my own shower that gave me pause to take the plunge. Now I'm confident about starting. Thanks.
New subscriber here. Seen a lot of your videos, I even watched one of your first videos where you were installing a 3" pvc under a 4' concrete slab. Nice job, I liked the way you stayed with it even though it was not easy. Well done Stud Pack !!!!!
Keep the videos coming.
I always set the screed in dry pack but I'd use wood then pull the wood out and fill the trench. I love the advice to remove the ends of the level. Thanks!😃
Cool removing wood screeds is a great idea 👊👍
Instead of wood, use a mason expansion joint and leave it in.
You drill to concrete ?. Or how do you pull the screws out
@@howtodoitdude1662 what's a mason expansion joint?
@@youngsavagegotdastrap1564 The curb is made of kerdi board too so he is screwing foam to foam. I assume the screws are only needed to keep everything lined up while the glue is curing.
The nuts and bolts detailed approach is really appreciated.
Wow....I feel like I just got my PhD in shower construction. You guys are running a tuition-free construction school and it's pretty damn awesome!
Paul, you and your son do great work my man!! I love the content you guys put out with great attention to detail, the work you all give your customers is exactly the kind of work i give to mine or I atleast do my best to do so. You and your son are an inspiration to me and more im sure, ive got a 9yr old girl and im hoping one day maybe she will be willing and want to do some jobs with her ol dad here😁 I like that you mentioned tile coach tho because between his channel and you guys is where most my you tube views are going so you all keep up the great work my friend, much respect to the 2 of ya💯‼️
Thanks Matt! Appreciate you bud 👊
So detail oriented. You guys are the third part of the German Schluter, Bosch and then StudPack Team! Great Teachers!
Paul, My family and I love watching the channel, but when we saw you cutting the pizza box we were both perplexed and amazed. Keep up the good work!
Excellent tutorial, exactly what I was searching for. I'm about to tackle an upstairs bathroom remodel.
I can't count hiw many home owners have come to me sbout a walk in shower that leaks. I am excited to use this system in our personal shower project . Thank you for your video and the style that you use in the communication that is easy to follow. Keep up the good work fella
Great tip. I'm going to need to do this and I was worried about the slope. I'm going to do it this way. Super helpful
Check out Schluter’s pre-sloped shower pan. They can show you how to customize almost any shower pan they have to fit your shower project. I took their free workshops and learned how to cut down their shower pan if needed. Really cool and easy! Check out their CZcams Channel for manufacture installation videos. I hope this helps. Thank you.
The thing about having a low side with the prefab pan is you can build up the low side with a half inch notch trowel and feather to a 3/8 notch trowl then set the pan and level accordingly. Time is money and this works quite well. To add another quick tip use red guard to coat pan, corners and 6" up the wall as cheap insurance to protect against leaks. You may also run the red guard up past the valve and cubby if you want to be extra safe against leaks.
Are you suggesting you do the red guard before or after you build the mud base?
@@csbarbourv before, two coats
Thank you!!! You rock! I have a small house with a small shower and I have to replace the shower insert as the back wall broke.. I have no idea how to build a pan as the pre made ones will not fit. My house is old and I been searching CZcams so glad I found you! Again THANK YOU!!! 💕
Im an apartment maintenance man (retired) and this was an excellent video on shower pans.
Every project I start requires buying a new tool! woo hoo!
Foam floor disadvantages include being stuck with the drain placement, and the cost. One with the drain placed where you want, expect it to run around $400, versus about $30 for dry pack (though it requires waterproofing). I just went through this myself. For leveling the sides, I drew a line around the wall that is at the top of a 2x4 when the bottom is at the correct slope height. This makes it easy to tap it down until the line appears, setting the perimeter, then free-forming the slop between that level and the drain flange like he does. There's a million ways of doing this stuff.
Yea if that drain gets cracked or leaks you have major issues.
Love finally someone that knows what are doing and taking pride in their work keep making the videos you guys rock.
Perfectly explained. Watched so many videos and yours made it look easy and simple. Now I know what I’ll need to do with mine. Thank you.
Hey Stud Pack! for My fix and flip properties, I always consider buying steel shower pans rather than incur the cost of Schluter but use backer and nice tool on rest of shower. The shower pans almost totally remove any issues with water leaks to subfloor.
Yep those sure save a lot of time 👊👍
Great video, but one question -- is there any concern about the exposed foam on those shower curb off cuts? Normally the Kerdi foam is covered by the orange outer layer (I don't know what that layer is made of but assume its something waterproof), so when you take those pieces and turn them 90 degrees and the foam is exposed like that, just wondering if that creates an issue for the waterproof-ness of the final shower pan. Thanks
It all gets covered with Kerdi in next video 👍
@@StudPack Can't wait!
The other aspect is strength, but as long as it's no thicker than the tile and thinset, there's no way to put pressure on it.
You guys are like me, I like to reuse pieces from old jobs to make odds and ends for a new job. I really liked the mud pack job, it was on point.
Great job, the right way the first time! Anxiously awaiting the finish! Such a pleasure watching your information filled videos. I am an old retired plumber, and was one of the best lead pan installers in this area. Your quite a craftsman, and enjoy seeing all he new products that are not available 🥲! Your customers are lucky to have you on the job!!👍✌️
Lead pans wow that brings back memories. Torn a bunch out years ago when galvanic reaction destroyed the lead at the cast iron drain. Much appreciated Dennis 👊
Yes, Paul, most every lead eventually failed when we transitioned from soldering 2” lead pipe to the pan to using mechanical cast drain assemblies. Plumbing today is a lot easier, everything is so light! From extra heavy cast pipe and fittings, CI bathtubs, cement laundry trays, and sheets of lead, lead pots, running road, packing irons and on and on! As an Apprentice if you couldn’t carry a cast tub up a flight of stairs by yourself you couldn’t make it in the trade. Such great technology in materials many, PVC, and PEX will last forever, and so easy to work with! Never forget the first time using PEX on a job in a nickel mine in Marquette MI., then in a Pfizer Pharmaceutical technical development facility! Amazing materials! Thanks for sharing your videos! They help thousands of people! I have suggested to many Plumbers to watch your videos! Thanks again Paul! God Bless you and your Son! Be safe!
I love watchin you build, on this video my critique is that those foam cleats you pre cut to screw & glue to the sides are really not good practice for 2 reasons. First is that the screw/glue in a moist environment can fail and compromise the pan. Second is that is a lot of unnecessary extra work which can easily be achieved by packing the perimeter with mud pack to a laser line, once a 2 inch perimeter is established, then filling in the space to the drain is an easy job.
I think the thinking here was that everything will get kerdi band and the membrane in the next step. Those screws should never see moisture in the install final. They also look like exterior rated grk screws. I just use the mud as the perimeter gauge as you mentioned also. Good thoughts to present the readers in your comment. Take care!
That's how I always did it, start with 4 corners and then connect them all level, then fill in with trowel and level/screed. Although I'd always used a pvc liner, and 2x4's for the step. My stomach was twisting seeing screws going into it without any redguard or similar covering it. Had so many jobs where a homeowner tried to diy and low screw holes turned everything to mush.
@@captron420 yup I cringed too at the screws into the curb. Here in Florida we have to use vinyl pan liners by code. I'm going to see how Paul puts in the membrane on top. Could be interesting to see new products being used
@@mikewithers299 That's funny, I'm from Florida as well. Never knew it was code tbh, it's just how we always did it and it never failed. Was so strange seeing him use sand topping right on the slab as well. And packing in the weep holes in drain, just red flags everywhere.
@@captron420 yes in Miami it was code to use a pan for every shower we did. The sand topping or dry pack became part of our plumbing inspection back in the early 2000's up to today. We didn't have to bond it to the slab, but it had to pitch and have no standing water after it drained. Test ball installed below the flange to test our glue joint.
I think this might be a bad idea. The exposed wide edge of that strip at the bottom of the bed in the corner is just a foam. Which might absorb water and take it all the way down to the slab of the house. Which will lead you to the bottom plate of the walls. I don't know if schluter makes the foam waterproof?
There will be a waterproof layer on top of everything. The industry has really embraced this method in the past couple of years.
Check out Schluter’s CZcams channel for installation videos and website. Stud Pack is a good channel but it is good to check out the manufacturer specifications for yourself to ensure the accuracy of what you are looking at. I have found that Stud Pack gets it right more often than not but there are some details that I might question or disagree with. Each person should do their own due diligence. I hope this helps. Thank you!
Even if the foam is waterproof he still screwed into the schluter system around all 4 sides and he said you pitch a quarter per foot thats wrong you pitch an 8th of inch per every 3 feet crazy part is you look in comments and now u have 800 people listening to this guy
Best instructional video I have viewed for a DIY shower pan. You've produced an excellent video... the videos quality, your scripting and narration, the tips & tricks discussed, and the references given were flawless. I'm now confident and anzious to get started on my walk-in L-shaped two-person steam shower. Thanks
Glad it was helpful!
Just stumbled across you guys and I must say it's nice to see someone that enjoys their vocation and most of all takes pride in their work hats off gentlemen keep em coming u have a new fan a fellow builder
Thx Matthew 👊👍
Once again, you guys are just too funny. At 10:25, Paul: "We're gonna just dump it in the wheelbarrow and use a hoe." Jordan: "I'm a what?" Nice video again. Great info.
You’s a what?
I caught that too. 😁😏👍
the dad joke game is strong with the son!
Great video, easy to follow and to the point. I am in the process of flouting my 3 showers, thank you very much.
Metal Shower receptors have given me plenty of work over the years with the moisture wicking under them
Wow, wish I would have done this floating technique on my shower... Great job!
This is awesome. Much less intimidating to do for a newbie like me than some of the other ways to build a pre-slope. Thank you for your work, Stud Pack!
Our pleasure Daniel
💪👊👍
@@StudPack Great video, but now what? Does that get tiled on top? Or do you just seal it and that is going to be your shower base?
Appreciate and enjoy all your videos from another gulf coast resident. Keep up the good work!
You speak my language. Honest, simple and non pretentious. Liked , Subscribed and MOST importantly, to Me, saved to my private library for on demand future reference. Thank you.
You do a fantastic job at explaining the process. Thanks for your videos
Ray
I'm installing a shower in my basement. This video was a huge help! Thank you.
Thank you for being such a great educator! Beautiful work, I am going to try this out on my own house!
Love this! Will be doing a complete bathroom remodel in the future.
I am hoping to create a pretty large area that a big tub will also fit. Kind of a small wet room requiring no shower door just a half wall maybe with drain in the middle. And because we have a small farm a place where I can wash dogs, and hose off everything afterwards.
I’m still in the researching process.
The most compelling home improvement channel on YT. You guys rock.
You make it look easy Paul. I know that it's not easy to build a shower because I did it for a couple of years back in the mid 70's. Great job guys!
Thx Alan 💪👊
Simply awesome. You do an excellent job of explaining which in turn makes learning so much easier. Great Job. Thanks.
Thank you so much for the video it gave me more confidence to tackle this for the first time ever very appreciative of your time and sharing of your knowledge God Bless you.
Was going go buy a shower pan, but I really wanted this more. Now I know I can do it myself. Thanks.
i have seen a great deal of video of doing a shower pan thank you so much for shooting this in 4k, really shows great detail of steps , great job !
Thanks for making the comment about waterproofing with Kerdi in the next step. As you were drilling through the curb I was hoping you were going to do that next.
Once again great video. You are such a natural teacher, this is your calling for sure. Thanks for your hard work. I look forward to all your videos.
Appreciate that very much Donald 👊👍
Thank you very much!! You have a way of talking that is understandable and clear. Keep up the good work and I'm going to push on follow so maybe this hard head might learn something!!
No questions here, just a thanks for putting your trade secrets and helpful hints in all your videos. Thanks again!
This video increased my confidence 3 fold. I'm ready to get mine going.
You are doing a great job. Articulate, concise and encouraging.