The Secret to Fixing Epoxy Resin HOLE

Vložit
- čas přidán 9. 07. 2023
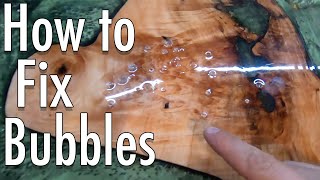
- Let me teach you the secret to fixing the hole on your epoxy resin jewelry. You take 24 hours to make a beautiful Epoxy Resin jewelry earring or pendant and when you demold it you find there was a small air bubble hidden at the top and the whole piece is ruined. I used to throw my resin piece away when that happened BUT NOT ANY MORE!!!
What you will Need:
TOOLS
UV Flash Light - amzn.to/3W1JJKU
UV Resin Light - amzn.to/3GcAwtq
Round Nose Pliers
Long Nose Pliers
(If you want to purchase the same tool set I use: amzn.to/31N5Yhz )
MATERIAL
Jump Ring
UV Resin - UV Resin - amzn.to/3WOIS1z
WHERE ELSE YOU CAN FIND ME
My Website for beads and jewelry: www.DessButlerJewelry.com
Facebook: DessButlerJewelry
Instagram: DessButlerJewelry
TikTok: www.tiktok.com/DessButlerJewelry
I wrote a book "One Yes" about my journey as a missionary for Jesus (Sailing on World War II ships, Giving distributing 3 million dollars worth of food to the poor). Here is the link to purchase the eBook verse:
amzn.to/2KwLXTV
DISCLAIMER: Links included in this description might be affiliate links. If you purchase a product or service with the links that I provide I may receive a small commission. There is no additional charge to you! Thank you for supporting my channel so I can continue to provide you with free content each week!
#resinjewelry
#epoxyresinjewelry
#uvresin - Jak na to + styl


So far I've ONLY used uv resin, but my boyfriend bought me a coaster making set from Michael's for Christmas, which came with a 1-to-1 epoxy resin.... he didn't realize this was something I'd never done! But I'm honestly a bit excited about it, albeit a bit intimidated.... but I love that UV resin can even be used to fix epoxy issues, like these holes or any surface air pockets... so I'm glad to at least have that knowledge under my belt! :)
Love it. Thank you for sharing ❤️❤️❤️
Omgosh, you're like a sister from another mister! I love your hilarious & joyful personality 😅🌸
Great tip!
I have been looking for this fix for FOREVER! I searched and watched, and no luck! You are saving my life right now (kinda). Thank you so much
Oh yay I am happy to hear!!! 😆 your comment cracked me up!!! ❤️ You are so welcome!!!
Thank you for the tips. I get that sometimes too or I get one right on the edge of my earing but a big enough bubble that even filling it, it shows. So now I just cut them up and put them in other projects 🥰
Okay tell me more about cutting them up and putting them in other projects. I find that fascinating. Can you see them. Is it to save on resin and you can’t see the cut up pieces in the new piece?!?
Oh Yes Dess!😁 I've done that a few times and yes people, it works!!! 😁👍
Oh I love that you have done this!!! And you can attest that it works. Love love love it!!! ❤️❤️❤️
I love your dorky, silly personality.
😆🥰 thank you so very much!!! Your comment made my day!!!
Thanks for this tip.
I made a tray and I have a small indentation. I believe it is because I used UV resin to attach the handles after doing the first coat of resin. Can I use UV resin to fix that small spot or do I have to put a new layer of resin on the tray?
Great tip!
Thanks Daddy-O I always love your comments. 🥰❤️
I just had this happen yesterday and tried this trick.
I have a question is the epoxy resin supposed to be completely hard when you make earrings. Mine are still kind of bendable, which is why I needed to mend my hole. When I try to put in my jump ring, I tore the opening because it was pliable. I am completely new to this craft.
So it can mean one of two things. You didn’t wait long enough for it to cure/dry. Or it was not mixed properly.
It should not have ripped. It should get so hard that if you put a jump ring on it doesn’t tear.
How long did you wait for it to cure?
All learning. You are doing great. Keep going. So much to learn with resin
@@DezyJewelry Thanks 😊
❤️