TerranScapes - Cavity Pour Mold Making Overview

Vložit
- čas přidán 30. 07. 2024
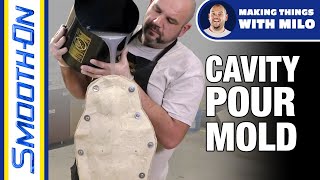
- This is a brief overview of how I use the cavity pour method to make molds of buildings. I also include some discussion of the casting process. Some materials are mentioned and it is strongly recommended you view the Smooth-On video describing the process if you want to attempt it. This method of mold making is not an introductory-level process, but is useful for larger models and has some advantages over brush-on mold making. This is not the only method or list of materials for reproducing these types of structures.
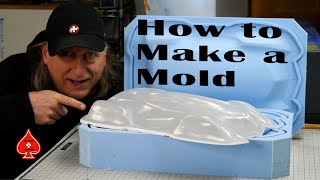
How to Make a Cavity Pour Mold - • Mold Making Tutorial: ...
Intro/Outro music: Army of Darkness
by Phoenix Music - czcams.com/users/PhoenixMu...
For more information visit- TerranScapes.com
Visit the Newsletter for information on current TerranScapes developments - terranscapes.com/specials/news...
Hear terrain tips from me on the Painting Tabled Podcast - www.paintingtabled.com/ - Hry


It worked! Thanks very much for the tips. I was able to cast all sixteen pawns. Now im going to do the same with the remaining 5 major pieces. The mold wasnt as tough as the pure silicone mold but it is still a workable mold. It smells abit like the thinner but its bearable. I must admit i was tempted to cook the cornstarch as a pan cake if my epreriment didnt worked but it did. Thanks a lot for the tips.More power to you sir! Again thank you very very much. Now my original chess pieces can take its place at my cabinet of fame.
Awesome! I'm glad to hear it was a success. :)
It always Kills me with laughter that someone will take the time to give a tutorial like this a thumbs down. OMG this guy takes the time to help us have a great fun time making stuff and someone has to troll.
This was awesome. Thank you. Thank you. Thank you. For sharing your knowledge and experience. Wish I could give 2 thumbs up lol
Have a great day.
41point2 I appreciate that. Looking, I see it has 13 down?? That might be a record for a vid for me. Perhaps it's because some viewers don't think the content is relevant to them? Hey, who can tell. And if that is the strongest trolling that my channel gets, I'll take it gladly. ;)
***** great attitude. keep your head up. this is a wealth of knowledge. now that i think about it you said jesus christ and thats the only thing i can think of that religious people would flip their stuff over.
Kevin Deleon try the word fuck next time. apparently that gives a great positive youtube response these days haha. this generation -_-
Kevin Deleon Rumor has it I left an F bomb somewhere in some video. ;) I just bleeped one out in a recent video. *grin* I try to be professional, but sometimes you just gotta get out the frustrations.
haha agreed
Super job on this video. Very interesting, to the point, clear sound and just all around great job. Thanx.
Thanks for explaining that process. That answered quite a few of my queries with regard to reproducing pieces and especially void casting.
Excellent overview! Now I understand how you did those. Thanks!
Awesome tutorial. I have done some tuf-stone casting. Your are right about the chipping, I have started using pigments with my casts and that has helped. I use Douglas & Sturgess here on the west coast for my supplies, Tuf-stone and Smooth-On. They okay priced, knowledgable and have seminar from time to time. You vids save me an hour and half drive. Thanks again.
Sweet! Thanks for sharing your experiences!
thats a great overview, really sums up the process, thanks for posting!
another great video
the mausoleum looks magnificent, i really like it
Excellent video! Very informative and interesting. Thanks very much for the upload!
Glad you found it interesting. :)
This was a really interesting video. Thanks for posting it =)
I'm glad you found it interesting. :)
this is pretty amazing. a lot of work but definitely a good way to save cost while casting but definitely more work than just filling the whole thing with resin or something.
Very informative video ... not much new for me, but I did learn a few things! Always enjoyed your work, good luck with these models. This model in particular is very very nice. I must get my hirst molds out again ... always enjoyed playing around with them.
Very awesome work sir thank you for taking time to share your knowledge.
My pleasure.
As someone who is trying to start making money off of the terrain I’m building, I found this video, and the linked video, incredibly helpful. I’ve never done any casting myself, but everything in the accompanying turtoial seemed fairly easy to follow. Didn’t really understand the keys until I saw what you were doing with your mold.
I'm glad you found it helpful!
Good job and great information
Excellent work boss! I like the money saving tips!
Glad you found it helpful. :)
Excellent video thanks!
Good tutorial. Thanks
But as always I love your videos, your work, and constant unyielding quest to improve the art
Geez that is crazily laborious. I am glad that I have no need to make that many of the same building.
Thank you very much for the reply. im using an RTV silicone with a catalyst which cost very much lower than the smooth on. You were right!. It does take a lot of silicone to pour on the whole 16 piece set. So what i did was to mix the same amount of Corn Starch with the RTV 585 Silicone, poured a few teaspoons of Paint Thinner and 5ml of the RTV 585 Catalyst and mixed them together. I was able to save on the Silicone Rubber but the drying time took almost 10 hours for the silicone to dry. Then poured a plaster of paris to the top to serve as the clamping wall for the fisrt part ill,be doing the same for the second part (Im am now on the second part of my two-piece mold. And following your tips i hope i could complete it. my first try was a failure since i was not able to seal the molds properly with the resins flowing out though :(
Joseph Theman Probably a little late to give advice, but hot glue is really helpful for sealing mold boxes. Hope it helps the next time. :)
My first casting was done with playdough with a lego frame and I used Hot Glue to fill the mold.. Actually turned out pretty good lol. Thanks for the video I love your work.
really enjoyed it. yeah thats pretty much how ive been doing it too although i build in another lip into the rubber so you can turn the mould without spilling the resin.- requires a little clean up but you dont spill the resin out. so instead of the flange going outwards mine goes inwards about 5mm to create that spill proof lip if you know what i mean..and also if ive got trouble areas i set the mould on its side 1st and let it set before pouring the rest of the resin. great video
Thanks for the great upload. What sort of density foam do you recommend for this, ive seen they have soft, medium and hard available. Cheers!
How many of those buildings do you have to sell to break even for the time and material cost of the mold?
Can I ask where you got the small angels from which you used around the building?
Can you make a fleshlight with this?
My friend wants to know.
I laughed my ass off at your comment and gave it a thumbs up. I had no idea what a fleshlight is. My friend told me.
*chuckle*
well thare me seen all on tap platic i got get some molds and i like do some butt dont trust my self to do right did ever think of rock hard putty ? thanks
please tell me how can i get this cathedral or its mold?
great vid and overview; it gives a great idea on what is needed and involved in making molds and casting, thx for sharing ;)
i only had some experience with plaster molds for pouring latex halloween masks and that sort of stuff, and although the basic principles are roughly the same, these kind of molds seem to require quite a bit more attention and precision to assure a nice result.
Thanks this was a good video. I am looking to get into using molds to build a fantasy tavern (or town). I think it is worth mentioning though, there are some restrictions in the Hirst Arts legal requirements where if you earn more that a set amount per year, you need to purchase a licence from the mold copyright owners.
Thanks for the video. This is a very complex cast, I may have to try this, my Hirst Arts models
get pretty beat up using just hydrostone. Thanks again.
Blood For TerranScapes, nice vid by the way :)
Looking forward to the Castle and Imperial Sector
Yes, excellent TY.
Hey so I just ordered some casted crates from a terrain specialist and he used wall filler to cast the crates. How can I make the wall filler more sturdy as it just scratches away? Ive tried adding a thin layer of watered down pva but that doesnt work. Thanks
man, always wondered how those great buildings are made.
when you lock the mold together with the straps. Their is a easy way of doing it. where your seals are where it joins all together, drill about 4 holes and get yourself some wing nuts and bolts. and bolt them all together, so much easier and holds together very well.
+james gray I've done that with other molds. It's sort of easier, and sort of not. For larger molds, I completely agree. I've found bolts are the way to go. This mold is probably in the middle somewhere. :)
Which Hirst molds did you use to build that?
Mike, the silicone product was that Mold Max or Mold Star. I thought the Max line was tin and the Star line was platinum cure? Also, why did you choose to do the cavity pour vs. the brush-on method?
Granted you not pouring anything as rough as a silicone mask but I've got experience molding and casting by doing that. Not sure how strong the plastic shell you use is but you can also make bolt holes in addition to the mold keys in the shell and use bolts and wing nuts to make sure the mold lines up and there are no gaps before pouring instead of strapping. We use shellshock from smooth on.
Great point. I actually have bolts on a larger 4 piece shell mold. I find them fiddley though, so if I can just get away with straps I prefer to go that route. Still, bolts give more control over seams. :) Mask casting.. Sounds fun. :)
Oh, this shell is Smooth-On Plastipaste. Very strong. I've seen shell shock, and a smooth-on rep suggested trying their Free Form® AIR Lightweight Epoxy Putty as well. When I run out of plasti-paste, I might give it a go. Seems much easier to apply. :)
Hi, would you be able to pour platinum silicone into that silicone mold if you use release agent? Also, I like how you explain the process. Your very thorough, thanks
You could do that. You just need to make sure you use a release agent that will release silicone from silicone. Check the descriptions of the release agents carefully.
Nice tutorial been subscribed to your channel for some time now an just came across this video.
What do products do you recommend for your resin and expanding foam I'm looking at some doing some smaller terrain piece molds of my own and just wanted to make the finished pieces lighter.
Thanks.
I would take a look at Smooth-On products and their videos on CZcams. They have a wide variety compounds. They have trial sizes that are good for hobbyists. If you look at their range and have some specific questions, I'm happy to help. :)
Thats right! For single production it will not work! But if you go further and find a manufacturer - it would be great to let him make molds for his machines from your scans! I do not know from which quantity that you could get a reosonable price!? But on the otherhand - if you have realy good terrain models - they sell! For example the GW plastics are very nice kits in very high quality ... In other model branches it is also common - just look at the range of model houses for train scenery ;-)
Hey Mike, I love watching your videos. You are extremely talented. I have a question for you on this one. What kind of resin are you using? I bought Task 2 from smooth-on for something similar but just didn't seem like the right thing.
+The Tabletop Spot I'm using Smooth Cast 321 mainly these days. Taking a look at Task, I think it should work fine. It has good numbers.. I might start using it myself. :) It has a higher viscosity (but still low) so that is a factor that could contribute to bubbles. There are a lot of things that can go wrong with urethanes - mixing, high humidity, moisture contamination, etc. Your trouble may be related to technique rather than material? What is the problem you are running into?
What do you think of spray on rubber coating? So you think it's possible to use for molding?
I don't see why not. Smooth-On has some spray-able materials, but they require specialized (expensive!) equipment. As long as you have the right release agents, I expect it would work. Might depend on the material's viscosity to make sure it picks up all of the small detail.
@Terranscapes What material did you use for the mold? Not the silicone, the hard mold on top of the silicone. Thanks!
That was plasti-paste by smooth-on, if I remember correctly. :)
Just curious. Rather than doing "clay barrier" with the PlastiPaste shell, couldn't you just do a brush-on silicone mold with PlastiPaste shell? Seems like that would be simpler, and possibly better at getting every last detail since you would be brushing it onto the surfaces.
You are correct. That is an alternative method that will work well.
The advantage of the cavity pour is that it is faster. With a brush on mold, several layers are needed.
I also think the brush-on mold is actually more likely to entrap bubbles. However, brush-on molds allow you to coat undercuts more effectively. But with brush-on molds, you have more concerns about thin spots. It depends on the fastidious of the mold maker of course.
So really, it depends on the caster, and the master. (unintended rhyme) For this building, I think it was a little risky doing a cavity pour considering the alcoves and their recessed 'roofs'. I thought I could do it though, and it worked out o.k. I did give a little sigh of relief when I demolded it however. :)
Could you please tel me if you still recomend Mold Star 15 vs Mold Max 30 ?
I want to cast my first mold and i dont know which silione is the best.
Thank you so much for these cool videos !
+mike wazowski I would recommend both. :) The hardness depends on what you are looking for, but both work well for most applications.
Thanks !
Great vid. I was wondering about the resin layer - how thick does it need to be before doing the foam layer? Is there any risk of it cracking from the expanding foam? Also - are there any downsides to using thixotropic additives to the resin itself ? I would imagine it would make a process like this much easier.
The resin layer is actually quite thin in spots. It's nice to have an even layer, say 1/6" - 1/8" thick, but it is quite hard to get that thickness on the inside corners for instance. However, the layer doesn't need to be very heavy. The resin won't crack from the foam since the shell prevents expansion - assuming you have it strapped down tight. ;)
Additives to the resin to get it to cure faster would make the process a bit easier. I don't believe that additive would be thixotropic, since I believe that is a thickening agent prior to curing. I might be wrong, and I guess thickening it would help. I don't know of any true thixotropics for resin. If you know of any, let me know. :)
***** Thanks for taking the time to reply :)
I have yet to try any of this, but I am amassing all the theoreticals ;) before I start doing my own stuff so any and all info is greatly appreciated.
As for the thixotropic agent - yes it's a thickening agent thought I have not seen or read about anyone using it in our hobby, but I imagine it would be perfect for this type of stuff since it would pretty much stay in place once you brush it on. I found this www.meondirect.com/thixotropic-agent-resin-thickner/ but the reason I ask that I suspect maybe it might also make it harder to get into all the areas without trapping air. I suppose a normal layer the way you normally do it, followed by a thicker layer would be a good combo?
basement.dweller
Oh, you just reminded me that Smooth-On offers a similar product.
www.smooth-on.com/Urethane-Plastic-a/c5_1119_1214/index.html
I have used it in the past, but forgot about it. :) You are right however, in that it would require an un-thickened first coat to ensure good coverage on a mold like this. Thanks for reminding me about the fillers! :)
Incredibly cool video! I really like the idea of the expanding foam in the center to reduce the cost and weight of the buildings. The plastic resin is great for capturing the detail but you are right that it is very expensive. Did you look at polyurethane resin as an alternative? If so, will you share your reasons for going with the the plastic resin/expanding foam? Thanks! 8-)
Will this work on more complex item with lots of places for air wholes?
Silver Tweet Well, it depends on what you mean by holes. :) If you are talking about indents, then it would be possible to use this method but it might depend on where they are - undersides of projections will be difficult. If you mean holes that go completely through the piece, then it really isn't the best choice. You would do better by making multi-part mold so you can fill one side of the hole by filling the other half with clay. Then you remove the clay and flip of the master and pour on the other side, filling the void. It's a little hard to explain clearly here. I would check out Smooth-On and BrickintheYard channels. Look over the pieces they are making molds of, and find one that has features similar to your master. Smooth-On has their thumbnails showing the part involved. Both are great resources. :)
Awesome Video! But you have to construct very solid models to make molds from?! That is something to think about ... Very interesting! All thumps up! Do you thought about using 3d scanners or companies which offer services like this and figure out if that is a reasonable way to get molds?! would be great to have a 3d vector file from a scratchbuilt!? best regards Lenny
one thing i thought about which im sure you have already is that putting too much weight on the top board near the end of the process could cause the internal blue mold to compress internally distorting the end cast by looking like its bulging from the internal pressure. has this ever happened?
Kevin Deleon This really couldn't happen. The shell keeps the silicone from distorting too much, and the rubber itself isn't that thick so compression won't be too much. Still, if you are looking for very precise unions between pieces, it could be an issue. However, if the foam is expanding too much, no matter how hard you weigh down the back plate, it will push it up. I've stacked over 60lbs of weights and it lifts them as much as it needs. :)
oh ok
Hello, Awesome. Where can I get the rubber molds at. Is there a website? and also can I use Hydrocal
The molds for this building are from Hirst Arts.com There is a wide selection of quality molds and great tips on how to get the most out of them. You can use hydrocal, but its not a great choice. On the site are some suggestions for better plasters.
Hope that helps a little. :)
Could you have done it the opposite way by brushing on the silicone mixed with a thickener and then attaching an all in 1 plaster shell.I would asume the silicone would eject from the casing just as easily.
Oh yes, that is another option for sure and I have done that several times. The advantage with the cavity pour is that it is faster as applying the thickened layers is more time consuming. But for some applications, a brush on mold is a better method as well. There are a lot of ways of mold making. :)
Could you point me to a video of the particular building you created in this video? I would really like to see it with color.
Sean Kellogg
Thanks. :)
I can't remember when I heared a fixed line telephone rang last time!
Hi, not sure if you have a video op for this specific topic (you do have lot of vids) but seeing it's related I thought I'd share this with you and all the viewers: I recently made some small moulds (very small, like a door perhaps or an infestation marker from GW's Tyranids) with some Silligum moulding paste (Gedeo). Normally I use it to pour resin or plaster but when I saw my mums silicone baking moulds I thought 'hey silicone moulds can go in the oven' so I tried this: fill the moulds by pushing in oven baked modelling clay (I used Fimo soft by Eberhard Faber or Steadtler, bakes at 110°C/230°F for 30 min) and bake it. It's a lot cheaper and less messy then pouring resin and the strength of the material is similar. I've gotten some great results so perhaps there are other, better silicone based mould making products that pick up even more detail than the one I'm using...
That is a nice method. I would suspect that if the master had thin delicate areas the putty might deform the mold, but that would depend on the type of rubber used as well. :) I think it's a great way to quickly make small objects. Most silicone rubbers can take quite a bit of head as well.
***** Well, if you push it in the smaller details carefully with smaller pieces at a time using a sculpting tool you're able to keep the distortion to a minimum. I used this method to recreate small footholds that clip under a children's soccer table (to be placed on a tabletop, not a big one like you find in bars) and it gave a perfect match!
why dont you number or color code the mold support, so for example the join of top left and top right could on both sides be labeled 1 or have a green dot, and the join for top right and bottom right 2 or blue etc
+Suiseiseki Rozen That's not a bad idea. Thanks for the idea. :)
always glad to help, upon reflection though, you would only need to do one corner, thought of this while i was sleep deprived hence the inefficiency
+Suiseiseki Rozen Sleep deprived.. :) **as he stares bleary eyed at comments at **12:15** am**
Sir Terranscapes, I wanted to make a plastic molding of my chess set which was given to me as a memorabilia many many years back. But the pieces started to wore out (breaks in corners and material deterioration) since the chess pieces where made from brittle ceramic type of material. I really would like to make a replica of my chess set so that i could use the plastic replica and keep the original one. Could you make a video on how to make a molding for one whole chess set?. And is it possible to make a molding of the entire chess set or maybe just the 16 pieces all at the same time (placing the 16 pieces on a flat stand and pour materials for molding) and not individually?. And how should i do it? thanks very much. Ill be looking forward for your reply and your video. I hope to watch the videos from you soon. Once again thank you very much
I'm not able to make a video on it right now, but perhaps I can help you somewhat here.
There are a lot of considerations for that mold project. I'm not sure why you want the cast the whole set at once. It might be more efficient material wise to cast them individually, but perhaps not. If the pieces have wide bases you could be pouring a lot of rubber. Instead you could pour tapered mold boxes for each piece allowing you save a lot of rubber overall. Some sets have elaborate pieces and pieces like the knight might have some deep undercuts. But, setting all of this aside you could rack them up, build a box around the set and pour them all at once. It's a basic mold making process and I would take a look at one piece mold making videos from Smooth-On and Brick in the Yard. Both have very good explanations of how to do this kind of mold.
I would recommend using Oomoo from Smooth-On for the mold. It is a low cost silicone rubber, and since you won't be making many casts it will perform well.
I hope that helps get you started. If you look at a few videos and have questions on specific steps, feel free to ask. Happy to help. :)
*****
Thank you very much for the reply. im using an RTV silicone with a catalyst which cost very much lower than the smooth on. You were right!. It does take a lot of silicone to pour on the whole 16 piece set. So what i did was to mix the same amount of Corn Starch with the RTV 585 Silicone, poured a few teaspoons of Paint Thinner and 5ml of the RTV 585 Catalyst and mixed them together. I was able to save on the Silicone Rubber but the drying time took almost 10 hours for the silicone to dry. Then poured a plaster of paris to the top to serve as the clamping wall for the fisrt part ill,be doing the same for the second part (Im am now on the second part of my two-piece mold. And following your tips i hope i could complete it. my first try was a failure since i was not able to seal the molds properly with the resins flowing out though :(
Joseph Theman
Hmm.. I haven't heard of adding Corn Starch before. I hope it's working o.k. :)
On the pricing, Silicone with a catalyst is typically lower in total volume than a two part mix so that can affect the numbers. (Of course, it may still be cheaper.)
The plaster backing sounds like it will be helpful. To get a good fit between the two halves, remember to add plenty of keys, pour a thick enough mold you can clamp it a bit without distortion and make sure to clamp it. For a large mold like that you may try Quick-Clamps, or a tie down strap. One consideration is that if the plaster backing is not thick enough it could crack under the pressure. Press the two halves together as hard as possible without deforming the mold.
Good luck. :)
How much would you sell on of the foam modal for
At the moment, I'm moving in a different direction and not selling the casts anymore. However, there has been some interest in them, so I am considering some kind of 'special week for unfinished casts' or similar down the road. I can't promise anything, but it is a thought. :)
You said that the 15 was better than the 30 can you elaborate any on why its better.
When I made this video, I believed that 15 had a higher tear resistance. In discussing this with Smooth-On, they indicated I wasn't mixing 30 properly. I still think 15 is a bit more tear resistant however, but it does seem to perform better for me now. Improvements aside, I still would recommend 15. :)
Thank you for your info...
i would also use a piece of lexan or Plexiglas to cover the bottom (like a window) so you can roll it completely on its side while it is curing so it don't leak out that would reduce the time you spend brushing
I'm not sure what you mean?
Terranscapes, I think he means when you add the resin in, clamp some plexiglass on the base so you can rotate it completely like you do with the towers. You would have to drill a hole in the (now resin coated) base to pump the foam in.
Alexander Veitch Oh, that makes sense. One problem would be ensuring the bottom plate makes a tight seal. It's likely to leak plastic resin very easily and that is an expensive mess. :) But the plate over the cavity is how you fill the void with foam. It creates back pressure on the foam to ensure a complete seal. Works great for foam but not so much for the resin coating.
YOU COULD USED SILICONE WITH A BRUSH, SO BRUSH ON SILICONE TO MAKE THE MOLD WITH SEVERAL LAYERS, TO REPLACE THE CLAY FUNCTION
I understand it took a lot of effort to make this and I appreciate your time but wouldnt it have been easier to make a 2 part mold with the parting line on the roof crest? The pieces that stick out I have called Gables most of my life. Thumbs up even though you should tell people why you chose this process over others. Wing nuts on the flanges are easier by the way and registration is easier too.
It's a good question. The first reason I chose this method is that it uses the least amount of casting material. You don't need to fill the entire volume with foam, but I should admit that the amount of foam saved is relatively small. The second reason is that judging the appropriate amount of foam to pour into a two part mold can be difficult. While the excess foam can escape from the pour spout, it doesn't quite work that way.
As the foam rises it begins to skim over and by the time it reaches the spout it has a more difficult time flowing out the small opening. Any excess foam expansion then begins to put considerable pressure on the mold causing it to deform. A very substantial shell to resist this expansion would be needed. The force of the expanding foam is very high. The alternative is to leave the cavity exposed as I have done and then apply a back plate with vent holes cut in it. The back plate applies pressure to ensure the foam fills the mold and multiple vent holes allow for better escaping of the excess foam.
I have used a back pressure plate on several molds and I have found that you still need to hit the amount of foam poured just right or during expansion it begins to cure against the back plate before full expansion has been achieved. Then the foam lifts the back plate and you end up with a lot of foam that needs to be carved and sanded away. I've tried placing over 60 lbs of weight on the back plate in some instances and the foam lifts it like it was 6. :) It's not an easy process to get right and by slush casting the foam instead, you can more easily avoid problems.
There are many ways to cast and each has its advantages and disadvantages. And your suggestion is completely viable, perhaps with better end results, but requires more skill to manage.
On the wing nuts, I now do this. :) This mold was made in 2012 *Yikes!* and I've learned much more since then. But, I would still use this process for casting for a similar mold I think. I'm always learning though, and that could change as well.
Thanks again for great questions!
Oh. Gables. I've figured that out since I've started studying architecture this year. :)
Прекрасно! Лайк. Но было бы более зрелищно и увлекательно показать процесс создания мастер-модели и формы по ней.
С тех пор все изменилось, и сейчас я показываю больше процесса. Я надеюсь тебе понравится.
You´re very lucky with that Method.
For Objects with such high Details a Cavity Mold should not be made.
Rebound 25 is better for something like this.
Than a Mothermold out of PlastiPaste.
Also i would NEVER use liquid Foam for such detailed Molds.
Only SmoothCast 65D or SC320.
A Roto-Mold would be perfect for this Buildings.
You fill SC65D in it, close it and let the Roto-Machine (DIY Machines are very cheap) do the Rest.
Very much Luck that it gets out so detailed!
Why are you brushing polyurethane resins into the upper parts?. A sure fire way to induce poor castings and poor thickness.
You already made a void mould for the exterior detail. Do the same again using the clay on the inside, make a thin case. Then make another board, and pour in a cheap resin and attach the board to the resin. Use screws to secure once dry.
Remove the board and resin Inner mother, and remove clay.
Now you can insert the inner mother, and pour in your plastic resin, slush cast it without fear of it sloshing out, and get a good even coverage,
Then you can fill with your expanding foam afterwards.
You are correct. I should be using an insert in the mold. It would solve a lot of problems working with it. Thanks for reminding me of that technique. :)
porch
ooohhhhhh 💩....!!!!
too much talking..!!!!