🚀 How to Repair Holes in Drywall Panels: Tips and Ideas 🔧 Plasterboard Repair

Vložit
- čas přidán 10. 02. 2024
- 🔥 Tricks and Techniques for Working with Drywall 🤜 pladur
• 🔥 Tricks and Technique...
Discover clever tricks and creative ideas for repairing holes in drywall panels in this comprehensive tutorial. From simple fixes to more complex solutions, we'll guide you through the process of plasterboard repair step by step. Whether you're a DIY enthusiast or a professional contractor, this video has something for everyone looking to master the art of drywall repair.
✅ Drywall Framing Course for Partitions
Visit tutorialcreativo.com/escuela to master the installation of drywall framing from scratch. I'll be waiting for you inside!
🔴 Book a personalized consultation with me at: www.tutorialcreativo.com/consulta
🔵 Guide to help you analyze the budget: www.tutorialcreativo.com/guia
Tools we usually use:
A level: amzn.to/3BgU8cD
Laser level: amzn.to/3rGZqK2
Laser level: amzn.to/3rGUQeD
Chalk line: amzn.to/3rmnLVu
Tape measure: amzn.to/3etCB7h
Utility knife: amzn.to/2VS7xrb
Pencil: amzn.to/3zbzI2P
Drill: amzn.to/36IMtFJ
5mm drill bit: amzn.to/3eRsU2P
Screwdriver: amzn.to/3exW4nmpol


The first example seemed to be the best method in my opinion.
This guy is a hack
Nice work showing different techniques for different applications!
I had to do this myself and followed your step by step process.My daft next door neighbor thought he found a secret room at his place. It was my apartment he found. 😂
😅
Thank you for calming me❤
This is like the ASMR of building works - just amazing, and I've learnt so much. I love channels that enhance positivity and education to help the masses. Thank you! Psyche aka Psyche Thompson UK 🌹
Thank you for all the different techniques😊😊😊Great video
I had not seen the third technique (tape behind the patch). Thanks for teaching me something new!
Satisfying, thank you.
nice, thank you very much for the tips and tricks 👍😊
He is a Master of drywall repair 😊
Thank you for this video. I'm ready to fix my wall now.
God bless you.
Muy buen vídeo felicidades 👏 👍 gracias ahora boy aempesar a reparar los hollos k iso mis hijos
He's been at it a while is what I learned. He's good at his trade. I've done pretty much or seen everything he showed but I'm not as skilled. I don't do it for a living either. My past was in remodeling but that's been a while . Pulling the back off and leaving the paper to make a patch works great.
As an expert in wallboard, do not learn from this guys videos. Nearly everything he did was wrong and/ or hacked. The first patch was the only decent one, but even there he put 3 screws on patch sides and only 2 on the wall holding the strapping. This guy is a taper at best. Definitely knows little about board hanging. If u did any of those California (paper held) patches on my company, you'd be fired immediately. I do high end properties and this guy would not last a day. The patch he did where he put tape into it and let it curve back as a backing will 100% fail and move in. That will not look like a smooth wall.
All viable techniques for peculiar instances, ive done many of these on tight budget jobs
Great tut thanks
I just subscribed😊 thanks
To me, this is amazing!
Very helpful video
Excellent video.
Some of the ruffis work i seen
Good job, thanks
Interesting. So many different ways, kinda like putting a band-aid on it 👍
I love the doorknob repair
The last one is all I needed
Wow this is cool😮👍👍
You D MadMan indeed!
Fein gemacht.
Impressive!
The last one, you pre drilled the holes. Removing paper on the top surface. Was that to decrease torque from the screws so that they wouldn't strip the drywall being used as a backing?
merci
génial lol merciiii😮
Cold blooded isn’t even the words. Respect.
Pretty cool
thanks
Excellent demo! Thanks
Ok that works for unpainted and untextured drywall. How would you patch a hole that had been painted and had knock down texture?
Stick of dynamite
Start over
The same way... But then put a little knock down texture on the patch when it's done.
@@AOMartialArts it never seems to be a good match it always stands out
Different techniques.
Takes finesse and lots of practice. Very hard @@kamelsr
Merci pour ce partage👍❤️.
Options 1 and 4 look good.
Well you sure made it look easy! Do you live in the LA area
Good video
Love the sound of the rain
That second one (where I stopped) is a joke... Try bumping into it or later hanging something off that peice lol
Cool video. I could never work that fast 😢
he does lot more work then it need to
What is that large skiming board called that’s often used to finish the work.
Exelente ...
I've done some of that😊
Damn! Nice professional work great job! 👍👌
Interesting how those bubbles just disappear with no knife work at all, so what are you editing out?
Sanding after it dries? Heavily edited. Maybe he didn’t show that.
I'm no expert at all but I know I learned a lot just to fill in those holes. I'm not too worried about the bubbles at the moment. I just know I have a few holes to fill in before the landlord comes over 😅
No!! tape then 5min hot mud sorry your Drywall skills suck
Nothing was edited out I spent 20 years doing drywall Mix your mud correctly and you don't have an issue You really don't know what your talking bout
@@larryhullinger4141 Lol, it was OBVIOUSLY edited, bubbles can be fixed, sure, but they don't just magically disappear between strokes
A couple of those were destined to crack soon. A few good examples too
A very entertaining and interesting video, the methods are different but the results are the same and this video provides useful knowledge 🎉🎉 👍🏻👍🏻
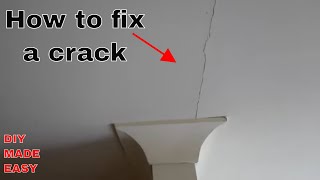
Merci pour votre vidéo, je me demande comment réparer des fissures sur un mur ?
Easy enough....first carve out some of the drywall on both sides of the crack so it now looks like a "v". Mix up some 20 minute setting compound (also known as "hot mud") and fill in the crack and a couple of inches on either side of the crack. Then cut off an appropriate length of paper tape or Fina fuse (as this guy did) and put it over the entire length of the crack and bury it as the video shows. Then finish it off with regular joint compound after the hot mud has hardened a bit. You can start the job with a 6 inch knife and finish it with a 10 or 12 inch knife. Just make sure you finish it wide like 10 to 12 inches, otherwise you're going to have a hump in your wall.
The best drywall video I seen 👍
This guy is very professional nice work
Many ways to do that. I use the hot patch method. It’s quicker. Uses less materials.
Very smart guy! Thanks for sharing your experience
Anyone else find these videos oddly relaxing? ☺️
Quite the opposite, it's very stressful. As someone who is in construction industry the techniques and execution is very shady. If I did this to any paying customer I would consider myself a scammer or at the very minimum ripping the customer off.
What state do you work in Or country.
Been doing this for decades pretty simple after you do it enough times
I feel like the 1st and 4th method was the best but missing a step of drying and sanding before doing the last step where you're adding the finishing paste and spreading across an area 2-3x the size of the whole to make it all blend.
Trust me on this Nothing was done incorrectly I did drywall for 20 years This was all good work
@@larryhullinger4141
Some people have to put their noses into business that they know absolutely nothing about
Looks good. 🎉
Wow, great demonstrations . Will come in handy one day . Thanks
Ouch, bad air bubble there. That’s happened to me 🤷♀️
You are a legend bro.
Appears to me the smaller holes are harder to repair. Is it smart to create a larger hole to repair it easier?
When they come back to hang a towel rod. The stud finder gonna throw em for a loop.
I've not seen your second repair done before. Learnt something new! 👍
Impressive how you show a bunch of different options, but I can’t imagine a reason to do a circular patch if you didn’t need to. Just make the hole square and cut a square patch.
Circular holes because if you're fishing a wire, you can make it with a holesaw and you get to use the plug to plug the hole afterwards. Also, I could be wrong, but I'd guess you're more likely to get cracks on a square patch than a round one maybe?
I have a circular hole from a heel going into my dry wall🤷🏾♀️🤦🏾♀️🤣 kids
To be honest, second is definitely the most critical.
What's the recommended Mud for these type repairs ?
The one you can get off the job for free
Breathing hard 😂
Wow amazing
Been doing this for a long time. It's easier to make the hike fit the patch than the other way around. But I also agree with the other poster who said if it's this big then go stud to stud.
Great work! I have never seen some of those techniques before.
Its bad
Easiest. Fastest simplist way to repair drywall is to just CALL THE DRYEALL GUY!!
Excelentes técnicas de fazer reparos no Drywall, parabéns pelo vídeo.
What should you do if you don't have any drywall to place in a small hole? Are there patches?
There are some "patches" however I would not trust those products. Just go buy a sheet of drywall for 12 dollars and do the repair. Now you have extra drywall for larger holes and smaller holes alike.
There are mesh screen patches but places like Home Depot and Lowe's also sell 2ft by 2ft pieces of drywall if you don't want to buy a whole sheet. Make sure you get the right thickness though.
Show it with textured walls
I get my share of chairs and “hey can you refinish this?”
Excelente
Sometimes i use blowout patches..
What if that has asbestos?
Fantastic, quick and varied fixes to play with. Cant wait to try. I'm gonna go punch my walls now! 💪😊👍
Great patch work sir 💰
I'd use stud adhesive behind the plaster insert
Just use the same mud .
Tiene luz el taladro 😂 que cura
Inhad to reread the title. After watching i, though, it was how not to repair drywall.
This is great!
I want to know is this a wall or what? Because I know that the wall is made of concrete and very strong
Can you punch a hole, and then repair that? That video would get tons of views😂
You're a master
Let's be real here, the first method is the best one!
It’s funny that mesh tape has an adhesive on it so you can apply it before you mud it. Also buy a dimpler so you do break the drywall paper when installing your screws.
The pros I've worked with always used paper tape. I think it's faster if you're experienced with it. Objectively, you're right that mesh tape ought to be superior in preventing cracking and saves the step of mudding prior to applying it, but I just don't see it used that often.
They use paper because it's cheaper.
The mesh is ok in my opinion, but the adhesive-backed holy paper is the money maker!! Perfect for seamless finishes, in my opinion.
In the UK they used to use hessian, now they use mesh tape... but we tend to have a skimcoat of plaster on the whole wall, rather than just mudding the tape joins.
@@edwardholmes91 we're doing a lot more of that now. The trend is a smooth finish in the US now instead of texture.
@@jdraven0890
Texture was only used originally to hide the sins. I never cared for it myself
Dam bro your technique is one of a kind.
Go drywall boy
Got to get some drinks before too late.
I used every one of these methods and they all work well. The hardest thing to learn is when to stop . One more pass is usually one too many
❤amazing work, thank you I learned something to make it easier
I can't see the second method holding up
You'd be amazed how many people don't know you have to mud, then tape, then mud again !!!