How To: Samsung Washer Spider Arm DC97-16509C

Vložit
- čas přidán 23. 06. 2024
- How To Replace: Samsung Spider Arm DC97-16509C www.appliancepartspros.com/sa...
Symptoms: excessive vibration, noise, smoke, no spinning.
Tools: plastic mallet; Phillips screwdriver; flathead screwdriver; small flathead screwdriver; pliers; side cutters; zip tie; penetrating oil; heat gun; socket wrench with extension and 19, 13, and 10mm heads, DC60-40137A Bolts.
This Samsung made Washer Spider Arm replaces the following older part numbers on Samsung Washers: PS8764217.
Buy the new Washer Spider Arm DC97-16509C here: www.appliancepartspros.com/sa...
Most orders delivered in 2 business days or less.
If you enjoyed this video, please click the like button. Subscribe to this channel for more appliance repair tutorials.
If you need any more technical advice, call us at 1-877-477-7278 or chat with us on our website www.appliancepartspros.com/. We're available 7 days a week.
For more appliance advice, information, and tips, follow us on social media.
Facebook: / appliancepartspros
DIY Repair Group: / fixmystuff
Twitter: / applpartspros
00:00 - Introduction & Safety Precautions
00:40 - Tools Required
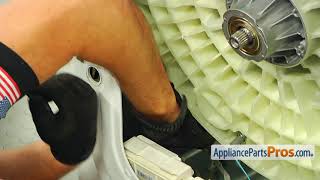
01:22 - Introduction to the Spider Arm and its Importance
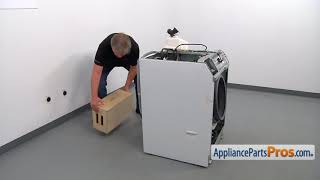
02:04 - Preparing the Washer for Repair
03:08 - Removing the Outer Boot and Door Switch Assembly
04:09 - Removing the Dispenser Housing and Control Panel
05:14 - Removing the Drain Filter Door and Tub Housing
06:01 - Accessing the Front Panel Screws and Removing the Front Panel
07:05 - Disconnecting Hoses and Wires from the Tub Assembly
08:03 - Removing the Brace and Front Counterweights
09:06 - Removing the Stator and Rotor
10:54 - Removing the Rear Access Panel and Bottom Counterweight
12:00 - Disconnecting Shock Absorbers and Control Board Assembly
13:55 - Removing the Inner Tub from the Outer Shell
15:37 - Installing the New Spider Arm and Bolts
18:08 - Securing the Outer Shell and Reassembling the Tub
19:52 - Reconnecting Hoses and Wires to the Tub Assembly
21:48 - Reinstalling the Counterweights and Shock Absorbers
23:33 - Reassembling the Control Board Assembly and Wiring
25:20 - Reconnecting the Dispenser Housing and Vent Hose
26:19 - Installing the Front Brace and Harness
27:23 - Reattaching the Door Switch Assembly and Tub Samples
28:15 - Reassembling the Rear Tub Housing and Pump Assembly
29:48 - Tightening and Securing all Parts
31:51 - Installing the Suspension Springs
33:07 - Placing the Inner Tub and Securing the Rotor
34:53 - Securing the Front and Rear Outer Shells
37:01 - Final Reassembly and Connecting Hoses
38:51 - Completing the Installation of the Tub Assembly
40:46 - Securing the Counterweights and Front Brace
42:46 - Reconnecting the Wiring and Heater
44:51 - Attaching the Vent Hose and Final Adjustments
46:57 - Securing the Rotor and Testing
48:47 - Final Assembly and Installation of Door Switch Assembly
50:53 - Final Touches and Completing the Repair
52:44 - Reattaching the Front Panel and Pump Filter
53:49 - Connecting the Front Brace and Hose
54:47 - Completing the Final Assembly and Testing
55:47 - Finishing the Installation and Reconnecting Hoses
59:59 - Conclusion and Summary - Jak na to + styl


Did this job today. Had my spider arm powder coated. Hardest part is taking screws off and realigning the shock bolts. Just time consuming.
I video taped each step so I could get it back together. Used vinegar to clean the stainless tub outer, and the inside of the plastic out tub. Also the rubber door ring.
I lifted the tub out with two ladder opposite and a rope on the center handle. Pulled it out like an engine from a car. One man method.
This was fantastic, thanks! I've never done this job, but I think my spider might be broken.
Muchísimas Gracias excelente guía, Decidí hacerle el mantenimiento yo mismo porque me gusta reparar electrodomésticos
Sería formidable si los subtítulos estuvieran en español.
Thanks for this DIY repair video. Especially the putting it back together part. I had way more trouble getting the shocks out of the housing and out of the way than you did but I managed in the end. Is there any need or advantage to replace the rubber seal between the 2 tub halves or the bearing the shaft rides in. My spider looks like the aluminum has rotted after 5 years of operation. Could this be from using a tub cleaner once a month on the tub cleaning cycle. 5 years seems pretty short a life span to me.
I came across the same thought the spider arm on my Samsung Flex looked like it was 50 years old . All 3 arms had corroded off I tool mine out in 4 pieces and the manufacturers date on it is 1/4/2017, not even 7 years. The new one I put in I made sure to paint with some rustoluwm paint. Maybe I can get 15 or 20 years out of my new shoe arm.
This video does not show how the left over screws were removed from the spider arm. I have broken bolt and could not remove the spider arm
33:03 glory glory alaluya
Your just repairing JUNK, I'm a Service Tech with over 30 yrs. Exp. Do not poor money into this Junk, Go out and buy a used W/P or Kenmore Direct Drive Washer with a Mech. Timer
I wish I'd know when I bought mine in 2010. Just replaced my spider arm. Part was $80, powder coated it for $25. Took me over night to let wd 40 soak the bolts, then cleaned the tubs with vinegar an hour. All told cost me 5 hrs. of my free time mostly removing bolts, screws. But I got it done. $105 to keep it going another decade.
@@jeebuscrise4482 maybe 5 years. I'm learning all about this big beautiful expensive piece of crap
Because was made in China. I think Samsung learned the lesson.
Kenmore? Rebranded clone? Maybe MIELE, with $4000 ticket for the set? No thanks.
And one more point. This "junk" is washing perfectly clean and almost dry laundry ready for short cycle in the dryer for (at least) the first 7 years before any mechanical problem occurs.