Front Load Washer Repair (Samsung or Kenmore): How to replace Spider Arm and/or Bearings

Vložit
- čas přidán 24. 03. 2020
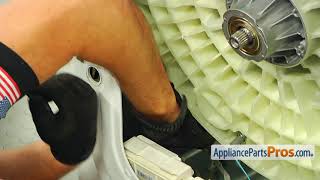
- This video will guide you through the process of repairing a Front Load Washing Machine similar to "Kenmore" or "Samsung" brands and shows how to replace the "Spider Arm" assembly and/or the tub "Bearings".
Most front load washers use a spider arm bracket which is commonly made of aluminum while the internal drum and spider arm shaft are made of stainless steel. Galvanic interaction between the two dissimilar metals cause corrosion of the weaker metal (aluminum spider arm) and soapy water (as well as detergent that sticks on the spider arm) supposedly magnifies the problem. Using "Washer Cleaner Tablets" every 30 cycles is supposed to help control this problem but I believe most washers will likely need to have the spider arm replaced every 6-8 years (depending on the frequency of usage) because of the inherent design flaw and issue with Galvanic Corrosion.
The difficulty level of this repair is higher than most simple repairs in that there are many steps and things to take apart, however it is also not that difficult if you follow the steps and take care to properly keep track of all fasteners and parts by putting them aside and labeling where each part/fastener came from so that during the reassembly the proper parts are easier to find and install.
The repair will require some assistance for removing the main tub/drum out of the washer frame and then to reinstall it back into the washer. The rest of the repair can be done by a single person.
Good Luck with your repair.
Vito Mike Casola, P.Eng.
Fix It Yourself.


Great video just fixed broken spider arm. it is nice to have a great reference to fix something instead of experimenting and breaking it worse. lol, Thanks.
Thank you John, Thanks for your comment and positive feedback. It definitely is a fix that requires a bit of confidence and some help to lift the drum out of the washer housing but definitely worth the effort. Thanks for supporting my channel. Vito Casola - FIX IT Yourself!!
This was the BEST repair video I have seen on this topic. I am currently doing this repair for the first time in my life. It's fun and challenging. I didn't have this for the disassemble part, but you can believe i will be consulting with you for the reassemble part.
Thank you Rich, This definitely is a fix that requires a bit more confidence and some additional help to lift the drum out of the washer housing but definitely worth the effort. If you look at the comments below you will find that someone (David Hannigan) recently wrote that they found the spider arm part on ebay for like $75. I haven't confirmed this and I have asked him if he could provide the link to the add so others could take advantage of this great price for the part. Anyway very glad this video was or will be helpful for you and thanks for subscribing. Vito Casola - FIX IT Yourself!!
Thank you very much for your attention to detail. After watching your video we found we were missing the small washer that went over the O ring on the spider shaft. We are working with a Samsung washer but it is identical. Your video was the only one that I found that pointed out to reuse the washer from the old shaft and how to place it on the new one. I had no screws left over, fingers crossed it all works out. Oh by the way thanks for the tip on keeping the screws organized. I found using small snack sized zip lock bags helpful as I was able to label the bag with a sharpie as well. Great work by you and your videographer 😀.
Hi Marcus, Thank you for your comment and positive feedback. I'm glad to hear that the effort I put into making this video is still helping many people such as yourself to fix things themselves and avoid throwing out an appliances that otherwise may have many good years of service left. Good for you for having the courage to take on this project and I hope you will have many more years of usage from your washer. Vito Casola - FIX IT Yourself!!
You did a nice job, thanks for making this video.
Hi Bernhard, Thank you for the comment and compliment. I'm glad you found the video helpful. Vito Casola - FIX IT Yourself!!
Thanks for the detailed instructions. I had the same problem and fixed it with the help of your video. I have a samsung wf4488 but it is almost identical inside.
Hi Brian, I'm glad to hear the video helped you fix your washer, even if just to give you confidence to go ahead and fix it yourself. Vito Casola - FIX IT Yourself.!!
Thank you this video was great👌
THANKS A LOT for the detailed video. I replaced the spider arm on my Kenmore (Samsung) front load washer today. The steps to disassemble everything may seem overwhelming but they are not difficult. Initially I thought the shock absorbers were faulty but then I saw another video which indicated the issue could be with spider arm. Turned out that the spider arm was corroded and cracked. Everything is back to running normally now. Additionally, I also applied Loctite to all screws and bolts which had the blue marks on threads.
Thanks for your comment, Glad to hear you managed to repair your washer and I hope this video somewhat helped you with that. Vito Casola - FIX IT Yourself!!
I had to perform this same repair on My Mom's Samsung front load washing machine back in Dec 2018. Very Challenging, but I knew I could do the job. Got the spider arm from Parts DR for $120.00 which also included new bolts. My Mom was so happy I saved her a ton of Money. I know this repair would normally run above $500.00 since You have to gut the machine. Good video by the way.
Thanks, Glad to hear you think it was a good video. Feels quite rewarding to hear comments like that. Hope you LIKED the video and subscribed to my channel as it help improve overall recognition of my channel. Your spider arm was a good price. Perhaps you could post where you found yours so others could look at purchasing from same place as an option. Vito Casola - FIX IT Yourself!!
Thank you very much for the information.
Hope it was helpful and gave you the courage and confidence to go ahead and make the repair yourself!
Vito Casola - FIXIT Yourself
This is an AWESOME VIDEO! It goes through in painstaking detail how to diagnose and repair both a bearing and spider arm malfunction for a Kenmore Elite (i.e. Samsung) front load washer. It is the EXACT same model as mine and it is exactly what I am experiencing. I watched this video from start to finish and the take home message for me was to just buy an new machine because for me the washer was over 10 years old, the repair is quite involved (but doable) and the part might be hard to find and it is definitely expensive. The other major take home is to CLEAN YOUR MACHINE every 30 cycles or once a month (and thanks for the recommendation of "affresh" tablets), which is something we also did not do but definitely will do with our new machine. Big THANK-YOU to FIX IT YOURSELF for putting out such an informative and well produced video. CHEERS:)
Hi TRF, Really appreciate the great feedback. It does take some effort to first make the raw footage during the repair and then to edit all the raw videos and text etc. Glad you found this helpful if not to in doing the repair yourself at least in helping you determine that for your 10 year old machine it may not be worth the effort. Hope you clicked the "LIKE" button as it helps improve overall recognition of this video, making it easier for others to find. I have about half dozen new videos I need to finish up and upload as soon as I get some time, so if you subscribed to my channel you should get notifications when new videos are published. Take Care and good luck in your new washer purchase. Vito Casola - FIX IT Yourself !!
By the way, one of my viewers recently posted that this part could actually be purchased on eBay for about $75 so I asked him to post a link but he never did. I also did a recent search and came across this one for $93.50 plus $68 shipping, so about $160.00 with the bolts (not too bad). Maybe you might reconsider trying to fix your old machine after all. Vito Casola - FIX IT Yourself !!
Thanks for the info Vito, it's still more than I want to take on though. I figure 10 solid years is not bad plus it's basically in our bedroom so don't really have the space to repair and I'm too much of a weakling to take it to the basement! Thanks again!
@@trfdcpt8591 I understand. Hopefully with a little better care your new washer may outlive this one. Thanks again for the positive feedback, really appreciate it and it inspires me to keep on making more good videos to share my experiences with everyone. Vito Casola - FIX IT Yourself!!
Great vid ,buying a new washer but this will help the person I give the old one to lol Cheers
Good job there 👍. Nice work.
Hi Eddy Lee, Thank you for your comment, it is much appreciated. Love your name, you only need to add the letter "G" to your name and you'd be my favorite rock star, Geddy Lee (from Rush). Vito Casola - FIX IT Yourself!!
@@FIX-IT-Yourself never thought of that!! I'm a huge Rush fan and was so saddened on the passing of Niel!! An Amazing drummer! He and Alex Van Halen are the reasons why I started playing the drums. He'll be sadly missed
@@eddylee587 Haaa!!! If you're a huge Rush fan then you're joking of course!! Yes the passing of "Professor Neil" really hit us hard too last year. He will be sadly missed for sure, but didn't go without leaving us a multitude of variety in music that was his genius and legacy. I now live at 218 Goulding Avenue, in North York, Ontario, which is one street south of where Alex and Geddy grew up. I once met Alex's mom in a hospital when she worked as a nurse (told her I was a huge fan of her son and Rush). Take Care Eddy Lee, Vito Casola - FIX IT Yourself!!
Awesome video
Thanks, really appreciated the positive feedback. Vito Casola - FIX IT Yourself!!
Thanks for the video. Always helpful when someone else has the same make and model to follow along with. I had the same issue and replaced the corroded spider arm. Just finished putting it all back together (I recorded almost every one of my dismantle steps to put it back together as well as following your video). However my machine now gives the nF error code during the wash cycle. The error guide indicates no water is getting in, however, I've proven it does at the start during the "pre-wash" phase (I can see water filling in as well as pulling out the detergent tray and seeing water flowing into where the pre-wash tray would sit). I noticed that it's the following cycles that requires water (like when it wants to push water into the detergent tray for example) where it seems no water gets in and gives the nF error. Anyways, I will need to dismantle again to recheck all the connections etc.
**Update** So luckily I was able to find the obvious issue after simply taking the top of the machine off. For some reason I had disconnected one of the water inlet electrical connectors (clearly before I found and started following this video) at the back of the machine. I reconnected the electrical connector and was able to get a wash cycle cleanly completed. Just thought I would add this update in case anyone experienced the same situation as me.
Hello. Thank you for your comment. It's a pretty intense repair isn't it, but doable (with a little help to get the drum out and back in). Sorry to hear you are having the issues with an error code now. Yeah go back and double check all the hose connections to make sure you put back each hose exactly how it was removed and it should fix the problem. I had an issue as well when I reassembled my unit and had water leaking on the floor when I first turned on the machine and when I took the cover off and inspected everything sure enough I had forgotten to reconnect the fill hose. Reconnected the fill hose and everything was good. It has been running smooth ever since. Vito Casola - FIX IT Yourself.!!
Thank you!
Thank you the spindle diagnosis. Just recently having replaced the bearings and spindle/basket of a 20 year old Kenmore
with the same problem of disintegration as your model. On the web someone posted that using HE detergent is necessary
so as to prevent the suds from contacting the spindle shaft area. The regular detergent creates higher suds and can be
more detrimental to long term wear effects. I had never given a thought to washing machine cleaners until now.
The spider arm assembly must be bought with the basket in older Kenmore machines. By looking at Frigidaire model
basket and spindle assemblies, I was able to find something that would fit a Kenmore machine without purchasing
the back plastic cover also. The challenge of keeping an antique running may not be worth it for some people.
Thank you for your comment and description of how you tackled your repair. I hope this video helped you in some way, if only to show how much is involved in the process of disassembly and reassembly. Hope your repaired washer will last many years to come. Vito Casola - FIX IT Yourself!!
should be covered by lifetime warranty as the spider and drum only has one part number
Thank you
Thanks for the video, it helped me disassemble my similar samsung washer to change the spider arm, unfortunately I stripped one of the plastic tub bottom bolt hole so there’s a small leak, but I’m sure I can still get a few more years out of it, it’s already 10 years old but other than that everything works well. I suggest looking at other videos to put back the front panel door seal bracket.
Thanks for your comment. Glad to hear the video helped you with tackling you're fix. Vito Casola - FIX IT Yourself!!
You’re welcome! I can say I learned quite a bit about washing machine functioning along the way! Hopefully the leak stays mild hehe Cheers!
@@ianjanesdiary Glad to hear it was educational. I guess you tried applying some standard silicone where the leak is to try to minimize it? Good luck and hope it holds out for a good while. Vito Casola - FIX IT Yourself!!
@@FIX-IT-Yourself I have not but I will try that thanks for the tip, it seems to be leaking exactly where the bolt is, the bolt already spinning so won’t tighten and I don’t wanna risk taking it out
Thanks for the in-depth video! I have your exact model.
Can someone explain to me how this happens? The metal turned into ceramic and breaks apart? Or is this even a metal part? All I know is that my moms 40 year year old washer is still working.... garbage.
Thank you for your comment. I have seen articles that would indicate the problem is associated with galvanic corrosion caused by dissimilar metals. The washing machine drum is made of stainless steel and so is the main shaft that drives, however the spider arm is aluminum and is between both the shaft and the drum. The corrossion is also accelerated by the presence of leftover detergent which over time adheres to the surface of the spider arm and base of the shaft. It is recommended that a special cleaner tablet, "AFFRESH" or equivalent brand, be used once every 30 wash cycles to help reduce the buildup of the detergent residue on the spider arm and keep the inside of the washing machine cleaner. Hope this helps. Good luck with your repair, if you are planning to undertake to repair your machine. Thanks for supporting my channel. Vito Casola - FIX IT Yourself!!
Thanks for the tip on the tablet cleaner. I will look into getting some of these. I have it all torn down and my part is on order. @@FIX-IT-Yourself
Excellent video! I’m having a loud noise during spin cycle and my drum has the play like yours. Not sure if the bearings are bad or my arm is broken. My washing machine is a 2005 Kenmore HE2 purchased from Sears.
same model I have and having a rough time finding the spider arm only, Sears says they only sell the entire basket which is $400, might as well buy a new laundry at that price.
Hi Vinh, I bought my spider arm at a local parts supplier. Sears is out of business in Canada for several years now. My cost was around $250 Canadian when you include the hardware (shown on the receipt in the video at 15:20 mark). Have you tried google searching the part number or also searching on Amazon / eBay? Vito
Hi C P, It's most likely the spider arm. The design is bad because the spider arm is made of aluminum while the shaft and the drum are stainless steel and the dissimilar metals causes Galvanic Corrosion which corrodes the weaker metal (in this case the aluminum). You won't know the condition of your bearings until you take it all apart but I'm pretty sure your bearings are fine. I was convinced that it was the bearing at first and I bought the bearings in advance cost me $80. I couldn't return the bearings and I still have them (so no point buying the bearings until you are certain that you need them). You will need to take the machine apart anyway regardless of what the problem is so my suggestion is to go ahead and take it apart and then determine what the issue is and then only buy what you need. Good Luck. Vito, Fix It Yourself.
Fix it Yourself
Thanks again! I will disassemble it and see what’s going on hopefully. It still works fine but, sounds like there’s an imbalance at high speed.
Looked everywhere for the spider arm for he2, they don’t have a new one but found one on eBay but it’s used $240usd. Great video regardless thanks for the help!! Part #8540957 is the spider arm for he2.
the spider arm is aluminum and the tub is stainless. It is a design flaw.
You got it!!! Inherent failure is purposely designed to ensure a new customer every 5 to 8 years. PITA but that's basically what it is. Vito Casola - FIX IT Yourself!!
How old is your washer and how long does it take you to do the whole job? My Samsung washer was bought in Nov., 2011. Sometimes it kept spinning in the end of wash circle and I had to reload the clothes. The front door seal gasket has two small cracks and there are rubber wears around the door. I think the root cause is the spider arm. Does it worth repairing since it is almost nine years old?
Hi Christine, sorry for the late reply. That's exactly what happened to me. At first the machine kept spinning in the spin cycle, because the onboard computer thinks that the problem is likely imbalance laundry load it is programmed to stop the spinning and then try to rotate the drum a few time one way and then the other hoping to re-balance the laundry load (again because it thinks the problem is too much heavy clothes on one side causing the imbalance, when in fact it is the broken spider arm). Absolutely it was worth fixing because in the end it cost me about CDN$250.00 with the arm and the hardware. My machine was only about 7-8 years old (I think we bought sometime in 2013) so for sure worth fixing. It is a little unnerving and does require some help and muscle but if you follow the video any competent person with a helper should be able to do it successfully. Good Luck if you do decide to give changing the spider arm a try.
Thank you I got same problem but samsung discontinued making that part .
You should be able to find the part from any local parts store. Just need to look a little harder. Don't give up.
Can you show me the different bolts for the shocks and weight balancers?
Hi Chan, Sorry but my washer is all assembled now so I can't really show you the different bolts. You will be able to see for yourself once you take the washer apart that the bolts are very similar BUT different so be diligent about carefully identifying them when you take them out marking clearly where each came from. I did suggest this in the video several times that you should keep track off (by labelling) all of the hardware as you disassemble components so you will be able to identify the required hardware at each step of your reassembly. Vito Casola - FIX IT Yourself!!
Well the issue is I already took them out and mixed them. The “fatter” bolts fit into the front absorbers but did not fit in the back. That’s when I realized something was wrong.
Great video! I am in the USA and found the spider arm on-line from Appliancepartspros
www.appliancepartspros.com/
SAMSUNG Flange Shaft Assembly: DC97-15491A (AP4458785) $170.05 (USD)
Bolts: DC60-40137A (AP4203183)
(order 6) $6.45 (USD)
Tub Seal: DC69-00804A (AP4212809)
$14.11 (USD)
My machine is a Samsung but other than the front control panel it looks 100% identical to the one in this video.
I am in the process of replacing the parts and about half-way now. It takes time. The 6 bolts that hold the spider arm in place refused to come out and I even managed to round the heads off trying to get them out. So it took hours to remove then the hard way. Anyway now its time to clean up the tub parts and re-assemble.
Edit: The good news is that my washer now runs perfectly, just like new!! All in all you probably should plan on an entire day if you take on this repair. It looks pretty quick in this video but I can assure you it is not, especially if you have frozen bolts to remove and if you take the time to thoroughly clean the drum and tub parts.
Thanks Martyn for your comment and for sharing your parts supplier information, which others may find helpful. Hope your repair went well and this video helped you in some way. Vito Casola - FIX IT Yourself!!
Um...editing mistake?
30:38 - 31:08 is re-routing/attaching the air pressure hose with the front panel OFF, even though the front panel was put on (with eleven screws) ending at 30:22.
Totally love this video, but now I'm going to take the front panel back off... 😆
Hello, we had the smoke and loud noise problems on our front-load Samsung. We replaced the spider arm following all these steps. Now the washer will vibrate but the drum does not spin and still doesn't work. Any ideas? Much appreciated.
Hello Frank, All I can think of is maybe your bearing might have needed to be replaced as well. Our were fine so I never changed them but in hindsight I probably should have because it was quite the effort to take everything apart and put back together that I really should have changed the bearing once I had it all apart. Now I still have the bearings I bought and I'm storing them. If and when I ever have to change the spider arm again then I will be sure to change the bearing as well. The other thing could be the four shock absorbers and whether you put them back together properly. Hopefully didn't mix up the bolts that hold those shock assemblies because if any of them came loose then that could be the issue, or maybe one or more of those shock have had so much abuse when the spider arm broke with all the vibration before that they now need to be replaced. Without looking at what's actually happening I can't really be sure enough to be able to tell you for certain what the issue could be. Best of luck. Vito Casola - FIX IT Yourself!!
@@FIX-IT-Yourself Thanks so much! The shock absorbers seemed fine, so I think it must be the bearing. I'll try replacing that next.
i would coat spider with a good non corrosive paint before installing
Who can tell me what the spider arm model number is for (Kenmore Elite HE3T 100 44936 200) or equivalent.
My first comment is why don't all the manufactures build these spiders out of stainless steel so this is not such a common issue ? Spend well over a 1000.00 dollars on a machine and it's all cast parts and plastic!
Hi BA, I know right. Maybe it's done on purpose (designed obsolescence) to ensure most customers will have a reason to buy a new appliance every 5 to 6 years. Still better that Apple who are notorious for designing obsolescence into every iPhone. I have two kids that have had numerous issues with different iPhone models (two iPhone 5's that died on my daughter and then an iPhone 7 that wouldn't make calls or text anymore which was replaced under warranty withing a year of purchase only to have the 2nd one do the exact same thing). Guess it's part of life as a consumer and only thing we can do is become more aware of this and hopefully find ways to repair items (whenever possible). Vito Casola, FIX IT Yourself !!
You are definitely spot on with the iphone issues, my family cant leave them alone but I bought one of those off brand bullet proof phones 5 years ago - it still works.... I also see Samsung no longer makes my spider DC97-19266A for model # WF50K7500AV/AZ anyideas where to find one? Thanks for the help and videos
@@bryananderson75 Hi Bryan, You're welcome, I hope it was helpful. Actually you will notice that David Hannigan just wrote a comment earlier today that you can get this part for $75 on ebay with bolts included. I haven' verified this but if it's true then it's your lucky day cause I paid way more than that. Let me know if you do manage to find it on eBay and what the total cost is. Vito Casola - FIX IT Yourself !!
Here's one that fits many Samsung models. It has a list in the description.
www.amazon.com/dp/B083LCRNVH/?coliid=I1TINUJ7K9FNID&colid=OI9L38JIYS01&psc=1&ref_=lv_ov_lig_dp_it
Thank you James. I'm sure anyone that views this video and looking for options on where to purchase a spider arm will really appreciate this option. I did notice however it mentions that it is USED. Unless the spider arm is not used very much and does not show any visible signs of corrosion I'm not sure if I would want to do all that work to disassemble the washer to install a spider arm that could fail again in any time period less that what it failed when the washer was purchased new. Vito Casola - FIX IT Yourself!!
@@FIX-IT-YourselfIt's brand new, just did this last week.
@@jamesmott5181 Oh, okay that's reassuring that it's brand new. I sure wish I knew about this option to purchase instead of where I went to buy the spider arm, then I could have saved myself more money. Just goes to show you got to shop around to find the best price cause parts vendors make a living profiting from those who are not able to shop around and find a better price. Anyway thanks for the input, I'm sure others will find your post very helpful and should appreciate very much your link if it can save them a lot more money on purchasing the part. So I'm curious how your repair went. Did you manage it okay. Did you find the video helpful to disassemble and then reassemble everything? I sure hope it did. Vito Casola - FIX IT Yourself!!
Is it true it cost 800 to fix this issue? That's how much I was quoted
Hi Gabriella, I think I paid around 275 for the part, the spider arm and mounting bolts. I did the labor myself and it is a bit of work. I don't know if 500 for labor is reasonable but I guess because it may require some help to pull the drum out it becomes a 2 man job. If you are handy and or know a handyman and you can tackle this yourself then it would should just be the cost of the parts. Vito Casola - FIX IT Yourself!!
@@FIX-IT-Yourself I made another comment referring to the part for my specific washer and I can't find a spider arm that will fit it. I'm not sure which one will. I can't find the specific one.
Looks like you can get this part for $75 on ebay with bolts included.
Thanks for the comment David. Would you be able to post the link to this eBay add so others would be able to find it should they wish to purchase at this price. Thanks, Vito Casola - FIX IT Yourself!!
I don't buy the galvanic theory. It's straight chemical corrosion. And it's not necessary it be replaced every 6-8 years. It can last 10-12 years too. So why the difference between those two ranges? Not necessarily usage but operating procedure.
Running tub cleans each month, every month with citric acid or oxygen bleach cleaners helps but there is more.
Not using the wrong detergent or overdosing.
Not doing express washes which lead to undissolved detergent caking up the spider.
Not doing only cold washes which lead to residue building up.
Not leaving the door open after every wash allowing the machine to dry and slows corrosion.
Not overloading which also leads to undissolved detergent.
Anyone who loses a spider in 6-8 years or sooner isn't running hot water through the machine often enough. It's OK they don't tell you any of this in the manual. Some do most don't. This is user inexperience seen in North America where front loader are a recent introduction. Not so in Europe that has used them for half a century now.
Spiders are made of aluminium cast alloy for decades now. You can't prevent corrosion but it's certainly possible to delay it with good practices. Yeah, more TLC needed with front loaders than top loaders.