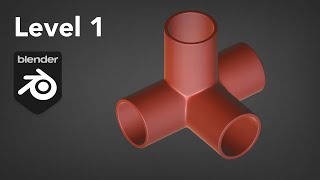
Building Basics: Ep 5 - Metal Clip - Blender How To Modeling & Animation
Vložit
- čas přidán 14. 02. 2023
- In this episode we Model, Animate and get to a final result. Learn basics ideas of Blender and grow your skills. Follow along each episode to gain more confidence and feel more comfortable to create your own ideas. Feedback is welcome. Let me know if you have an object you would like me to model or animate.
Music by ItsWatR from Pixabay
Blender Basics Tutorial: www.youtube.com/watch?v=R2RtK...
Blender: www.blender.org/
HDRI Haven: hdri-haven.com/
Metal Clip ref: images-na.ssl-images-amazon.c...
Metal Clip ref: sc01.alicdn.com/kf/H79ab5496b...
#blender #blendertutorial #blendertutorialforbeginners #animationtutorial - Krátké a kreslené filmy


thank you for your video and compliments on your calm voice. for a newbie like me it would be important to understand why and how the order of the modifiers is chosen by you.
Thanks for your question Mulli!
Modifier order is an important concept in Blender, as it helps to determine which elements of a 3D object will be affected by a certain modifier. By changing the order of modifiers, you can create a wide range of different looks for the same object.
Know that the modifier at the top of your list gets visualized first.
Give this example a try. Create a Cube at world origin then add an Array modifier. Give a value of 2 for the Factor X under the Relative Offset. Now add a Mirror modifier. You will see 3 Cubes at this point. By changing the order and placing the Mirror modifier at the top of the list we go back to having 2 Cubes. The Cube is still mirrored but no longer takes the Array offset into account as that operation comes after the Mirror. The Cube is just mirrored on top of itself and then offset by 2 units because of the Array.
Hope that helped you! Your question gets me thinking about making a short video just on this topic. Thanks again!
Nice work ❤❤
Thanks majid va!
thank you for this tutorial❤❤, i have only one question, why do you rotate first and last handle in graph?
Thanks :)
Good question! When creating a cycle the last pose feeds into the first pose as the cycle starts again.
By grabbing the handles I am affecting the curve so that the shape of the curve at the end of the cycle flows into the same direction of the curve at the start of the cycle.
If I left the handles flat the timing of the animation as it's cycling would be rougher as the curve is flat and interrupts the flow between cycles.
Sometimes it's so small you would not notice. Other times if the handles are left flat and you have a flowing curve you would notice a jolt in the movement as you start the cycle again.
Hope that helps! Thanks for the questions!
@@alexonstory thank you so much ❤
Hi Alex
Thanks for your explanation
I have a request it's about gear animation here is a good example : czcams.com/video/CWulQ1ZSE3c/video.html with some parts that appear at different time.
Is the animation made separately with rotation and translation apply on different parts or is it made with constraint ?
Hey nikolas!
For sure:)
To make sure I am understanding. Your questions is about how the different objects appear on screen at different times? How they fade in?
If so. The objects are rendered on separate render layers. Then composited and adjusted to reveal the objects at different times.
Let me know if that was not what you wanted to know.
Thanks!
@@alexonstory Thanks I wonder how we can make an animation that have an impact on another animation for example in the video example the turning gear make the two piece pushing back and foreward.
@@nikolas4749 It's a combination of things that can get you those results.
First likely case is a Driver. If you have 2 cubes in your scene. Select cube one and in your Item Transform on the right side when hitting "N." Right click on rotation Y and Add Driver. In the pop up window, under Object pick the other cube. In Type pick Z Rotation. Now select the other cube and rotate it on the Z axis and the will drive cube 1 on the Y axis.
Second option, play with Copy Rotation under Object Constraints Properties. That constrains the rotation of an object to your selected one. By placing the Owner to Local Space and rotating your selected object on a different axis you can now get a different rotation direction.
Lastly, there might have been some old fashioned key framing in parts of it.
Great question! Will make example videos of these types of constrains/drivers that can help out our animation.
Hope that helps!
@@alexonstory A Huge thanks
@@nikolas4749 For sure :)