Ghost White Toner System Real Life Review

Vložit
- čas přidán 31. 07. 2018
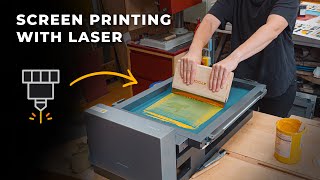
- In this video I try out the Ghost White Toner System using a HP Colour Laser Jet Pro M252dw Printer. Its similar to the Forever Transfer papers using an A + B Paper to create the full colour and white transfers for dark garments and other media. I did have issues as shown in the video but i'm sure the suppliers will hopefully answer the questions to the problems I experienced. I wanted this to be a real life test as a beginner might experience so I turned down their offer for training. This is the package I was testing out www.ghost-white-toner.com/sho...
-----------------------------------------------------------------------------------------
Get my training course online at www.udemy.com/how-to-start-a-...
------------------------------------------------------------------------------------------------------
Mug printing tutorials online at www.udemy.com/how-to-start-a-...
--------------------------------------------------------------------------------
Galaxy Heat Press amzn.to/2C7aMNY
Epson Eco Tank Printer amzn.to/2QuQByG
Cutting Mat amzn.to/2C9mHe8
Silhouette Cameo Craft Cutter amzn.to/2CVoG7D
1 Meter Steel Ruler amzn.to/2SMiCny
------------------------------------------------------------------------------------------------------
Music Kevin Macleod incompetech.com
Track - Garden Music
Licensed Under Creative Commons By Attribution 4.0
creativecommons.org/licenses/...
---------------------------------------------------------------------------------------------
Twitter at / martinbutleruk
Video ident graphics: www.graphicstock.com
DISCLAIMER: The product links in this video description contain affiliate links, which means that if you click on one of the product links, I’ll receive a small commission. This helps with my channel and allows me to continue to make videos. Thank you for your support.
Martin Butler
MMXVIII
All Rights Reserved - Jak na to + styl


I absolutely love this tutorial! Thank you for showing the mistakes that we all make in our day to day operations!
This 1 video answered 53 questions I had. Lol THANK YOU!!!
Thanks so much for the honest everyday average joe video, it gave me so much information that you normally don't get from a youtube video. I think I may go with the oki because of the software when I do make my purchase. Thanks again👍🏼
Stumbled across you video researching an HP printer to make transparent water slide decals.
Not what I was looking for and only watched a few minutes but, I was impressed that you've figured out how to use Photoshop to fit you needs and you just seem like a really nice person. Thought I'd leave you a little pro tip that might help you out.
Short cut to select your artwork when it's on a transparent background...hold down on the Control button (on a PC) and with your mouse, click on the layer you want to select.
Then, click on "Select" in the top menu, then scroll down to "Modify", then scroll over to "Contract"...there you can enter in a pixel measurement to reduce your edge more accurately (enlarge will increase the selection if you want an outline). The way you currently do it softens the selection, the way I explained will be much more precise (if you need it to be)
Anyway, hope it helps you or someone else. :~)
Brilliant & Honest as ever Marty, Thanks 👍
Thanks for a great HONEST review Martin. I think this is a completely impractical method to print t shirts regarding the amount of time involved. A lot of people forget to factor time when costing. Definitely would give this a miss.
Thank you for making this video I have been so disappointed Iv had so much trouble trying to do this and this really helped
thanks for your honest demo of this product. I'm gong to seriously think twice now.
Wait till I do a few more tests bud.
This is such a helpful video! Thank you Sir!!
Great video. Thanks for your knowledge!
That splattering effect comes from your selection tool, increase the threshold, for the wand tool. and you should get a cleaner selection.
Hi Martin.
Thank you very much for sharing this helpful information - especially in the second part (czcams.com/video/SDFm2wsJUfM/video.html) where you show us the five years' worth of prints (with no peeling!). That was very informative and helpful. Thanks again, mate!
As I mentioned below that video, there's just one little (yet very important) point in these two videos that needs rectification in order to further enhance the success of us all:
@Nesto P.'s comment here (to increase the 'threshold' of Photoshop's magic wand tool) is correct and many people have upvoted it.
The image problems (jagged edges and related mess / 'splattering effect' or 'halo effect' as you say) were created before printing. They were caused by a combination of low-quality-JPEG compression artefacts in the Lion Bar image from the internet, followed by incomplete selection of the 'white' surrounds [not all of the pixels were exactly 100% (FFFFFF) white] by the magic wand tool in Photoshop.
In Photoshop, so-called 'marching ants' appear around pixels that are 'at least 50% selected'. Therefore, when using the magic wand tool (or 'Select Colour Range..' or similar), the 'marching ants' do not guarantee that all of their contained pixels are '100% selected'. Likewise, nor does an absence of marching ants guarantee that those pixels are '0% selected'.
Unluckily, not all pixels in the 'white' surrounds of the Lion Bar image were 100% selected when 'delete' was pressed.
Unfortunately, when using the magic wand tool, or selection by colour range, 'marching ants' cannot be relied upon.
SOLUTIONS:
THE BEST SOLUTION:
A) Use a vector image.
If that is not possible:
B) Use an image that was never combined with a background colour and still has completely transparent surrounds; or
C) Use an image without image-compression/file-compression artefacts.
D) If the only option is a JPEG with compression artefacts, here are the SOLUTIONS:
To SEE the problem:
- On your computer monitor:
Put your eyes near the bottom of your computer screen and look up at it from an angle. On an LCD screen, this often reveals (to our eyes) the dirty compression artefacts hidden in compressed white backgrounds and around image outlines.
- In your Photoshop selection (made with the magic wand tool or similar):
Option 1 (BEFORE you press 'delete'):
If you've used the magic wand tool, save your selection, deselect it, then view that new 'alpha channel' (AKA 'saved selection') that you have just created (viewed in isolation, in greyscale). You will then clearly see any jagged outlines or other partially selected pixels that were hard to see against the chequered backdrop.
Option 2 (if you ALREADY pressed 'delete'):
Make a new layer and fill it with a colour. Put it below your newly 'deep-etched'(i.e. 'digitally weeded' / 'transparent-surrounded') image. Any jagged outlines or other partially selected pixels that were hard to see against the chequered backdrop will now be much more easily visible.
To FIX the problem:
If Option 1 (above) was used:
Then delete the channel and fix your selection by (at least) increasing the 'threshold' of your magic wand before selecting; OR: Don't delete the channel and instead adjust the brightness & contrast OF THE CHANNEL to 'crisp up' the saved selection, then load that selection and proceed with deleting the surrounds.
If Option 2 (above) was used:
If mess is present, go back in your 'history' prior to deletion and fix your selection; OR (not recommended): 'Load Selection...'> '[That] Layer Transparency'> 'OK', then 'Save Selection'> 'OK' and proceed as with Option 1 (above).
I know you're busy, but if you find time, please reshoot these two videos, address the small misunderstanding (we're all learning together) and perhaps use a crisp vector image from Illustrator next time (just draw a few coloured rectangles or something),
[...and always remember to insert the white toner cartridge BEFORE pressing 'print'. Ha ha. 😉 Cheers, brother.]
Thanks again for showing us the procedures, results and longevity after washing - it's really valuable information for us all to see. Keep up the great work, Martin! 👍
Under select, there should be an option to expand or contract the selection. Not sure where in your version of PS but it should be in there. Once you find it you can select your black layer and contract by 1-3 pixels. The big benefit is the contraction is done by pixel and won't round off corners or smooth the edges like your smoothing process.
Thank you so much! Excellent review!
Glad you enjoyed it!
Great review, I'm going stick with the Oki White Printer for what it's worth.
Magic Touch supplied mine and they have been great with Technical problems and some training. Plus they supply good software which helps with using their other Transfer Papers. Maybe look at reviewing their stuff next?
Thanks again, I really enjoy your honest reviews and I have learnt stuff too, keep up the good work.
To reduce the black layer after refining the outline selection at 6:50 simply invert the selection and then delete the excess. You were only a few clicks aways to doing that in the video.
You will also get cleaner edges when selecting around images by making sure that anti-alias and contiguous are selected then increase the tolerance value. This should help with the fuzzy edges that are being printed.
what language are you speaking!? lol
That’s my problem it’s fuzzy around the edges I don’t know how to take it out.
.
@@DevinsJackson To get ride of the fuzzy edges the image needs to be a vector.
Thanks Martin! Clear review. Both OKI and HP printers have pro's and cons. For now i would also choose hp. Thanks for sharing!👍🏾👍🏾
Hey I was looking at oki c332 or the hp M254dw white toner any suggestion out 2
My friend I’ve seen a lot of videos but none like this, I own the icolor 600 and the program is definitely different but the way that you explain how you do what you do with this program and process is amazing. Now that’s the way to do it. I’m sure everyone appreciate that. You are very good at doing this. Very well done video. So THANK YOU. 🙏😊 happy holidays 🥗
Glad it helped
...So Im watching your video to see how the Ghost Toner project came out as I'm very interested in trying it myself. As I'm watching it you showed me a trick I have been trying to master all week with my image editing software - how to use the Magic Wand. Man, I cant tell you how many searches I did trying to figure that out, using the scissor tool & doing node cut-outs and the like... Im SOOO SOOO Happy I stumbled across your video - 2 THUMBS UP !!!!!!
thanks and glad it helped.
very honest review good one martin
Thanks Chris
thank you Martin, I was looking at the Ghost white printers to ado my business, its what I can afford at the moment. i think I will be buying it now with your review of it! thanks again!
I don't use this system.
@@reviewthat what system do you use?
Wow that has a lot of steps. Thank you from Canada.
Good detailed video. Thanks.
Martins, always the best!
One quick question, did you get rid of the additional "print" dirt marks that apear once in a while?
Considering a CMYKW printer costs about 16.000€, this method is great and afordable. Thank you so much for documenting it.
Hi Martin! Thanks so much for the video. I love your realistic testing. Not only is this HP system cheaper than the OKI system, this company also makes sublimation toners for the same printer that can be swapped back and forth seamlessly. I'm surprised they didn't give you those cartridges for a demo since you also sublimate mugs. I would love to see a demo from you for that.With their sublimation toners. you don't even need sublimation paper, you just use regular copy paper. If the sublimation system tests well, (durability, etc.), that would be an improvement over using somewhat costly sublimation ink systems and make this entire system a win-win.
Interesting, I didn't know that.. i'd like to see it in action.
yep those splatter marks are from leftover when doing selection and inverse.after select then use very large eraser, its ok to go over image lines as it won't remove the image part.
hey Martin great videos, thanks heaps...grateful subscriber from Australia
Thanks bud.
There are some good comments below on the dodgey white edge you found, these are common with JPG images.
These were just unselected areas, because they were not the exact white you clicked so not selected when you used the Magic Wand tool (as in a comment below you can reset the wand's tollerence to a higher number or retouch the Alpha refered to later in here).
As a check, if you zoom in after selecting you will see running ants around the stray pixels too. "Inverse select" and use the "eraser" taking care not to erase any image you want to keep. You might also want to increase your image dpi as 300 pixels per inch is quite low these days (this should help when creating your "Black layers" "reduction" as there are more pixels for PhotoShop to work with so more accurate.
Select as you you did, after removing stray pixels, with the Magic Wand. Invert and reduce the area (as you did in your video) then use "Select > Save selection". Next to the word "Layers" (above the layers are "tabs") select the "Channels" tab (can be hard to see). This will have saved your selection on an "alpha" layer.
Select the "Eye" on the Alpha channel so you can see the black & White image (will show as a transparent Red at this point) then turn off the RGB or CMYK (the eye) depending on your image type (The Alpha will now be black and white). If you see any white dots on the Alpha (dogy areas) colour them black in the Alpha channel (they do show up quite well on an Alpha). Press [Ctrl]+[a] or use "Select all" from the menu and copy [Ctrl]+[c] the Black & Whiter Alpha channel. Then turn on the RGB or CMYK eye so you can see your image again and turn off the eye for the Alpha channel.
P.S. If the area, in the Alpha Channel, you want black is white return to layers "Select > Load Selection" and pick the Alpha, invert and re-save.
Back to the layers tab and paste the black image on a new layer.
HTH.
It’s my understanding that Ghost White makes the toner and Forever makes the transfer sheets. Ghost just rebrands the sheets. They even have the same name, ie Flex Soft (no-cut) and Laser Dark (no-cut). Here in the US the packages typically include the printer, the Ghost White toner and the Forever sheets.
appreciate your videos which I have just recently discovered
Thanks Ken.
Since I'm not proficient in Ps. I found what worked for me in 'choking' in the white toner layer was to work in Silhouette Studio BE and add internal offset, delete the outer cut line, increase transparency then overlay it on the color layer to visually see how much I needed to adjust the offset.
I was just watching recent videos posted by PhotoZen which showed his process for choking in Ps with success results and will be trying his process.
could you bring the size in by using a 1mm internal offset? (silhouette studio). seems to work for me when I am doing layered HTV/vinyls. Best hands on practical review of Ghost White on youtube. Nice one Martin.
Hi martin, thanks for the video. May I suggest another way of contracting the selection. After inversing it, go to Select> Modify> Contract. That way there won't be any feathering at the edges and you will get sharp edges.
Thanks bud, I'll try it.
I'd much rather spend around $600 for a printer that has one or two extra steps than the $3000 printer that has about the same beginner issues. Thanks for the video!
Exactly, I just need to iron out these teething problems.
@@reviewthat i just bought the HP printer for 120.00
In the case where you have gotten those little smudgy parts outside the image you don't want transfered, could you just physically scrape that off the paper?
Hi MARTIN, very interesting video.
Still issues to iron out though Dave.
Martin, why not put a black stroke around your artwork to trap the white basecost underneath?
So I seen in another video with using the forever transfers with the OKI it is best to place a few sheets of copy paper so it can pick up the transfer paper
Just before you create a duplicate layer
• Hover mouse over the mini image to the left of the Layer 1 text
• Right-click, and choose SELECT PIXELS
• From the SELECT menu at the top Choose MODIFY---CONTRACT and enter 3 or 4 pixels. (This will shrink selection)
• Create New Layer (LAYER - NEW)
• Fill the selection that should still have marching ants with Black (EDIT - FILL- CONTENTS - BLACK)
Looking forward to seeing a review of wash tests on Ghost and Forever Flex systems.
At the moment I use your recommended brand of transfer paper, I love the results on the white. But need a better solution than the opaque version of it for darks (not too keen on that).
Keep up the great work.
Yes I agree Ken we need a decent solution for dark garments and i'm hoping this one works.
Hi Martin I've watched a lot of your videos .? How does it look after a few washes.
And no tumble dry was mentioned in one.of the videos by the ghost people.
Have you tried to tumble dry your t shirt with the ghost transfer ?
Great video. Nice to see someone keeping it real and not deleting their mistakes. Did you ever get a response back from 'Ghost'
Not heard from them bud. Cheers
Martin
Very good video tks. But I have an issue : my printer does not recognize the ghost white toner...i tried many settings but did not find the good one. May you help me ?
All you need to do is use the magic wand on any empty part of the design which will make your design highlighted then just colour it in totally with black ... job done (making sure you have an exact copy of the design in full colour)
I notice in your video that you were having trouble reducing the image for the white toner mask. Apparently in Photoshop you go to SELECT - MODIFY - CONTRACT then reduce it as many pixels as you wish but normally 3 is sufficient. Hope this was helpful
Mate you are a god!
With the black layer content selected go to select > modify > contract. On the subject... seems complicated and time consuming. I dont see the advantage of this white toner over an inkjet printed dark transfer and cutting it with a cameo to shape. Any thoughts on this comparison?
Have you tried adding a white stroke on the inside of your black layer?
is that black layer "bitmap" or "vector graphics" and how did you create the black layer?
How about a white stroke on the black layer, set to center? Would that work? customize it's size as necessary. It shouldn't print since it's white, and you trick the printer to print black with the white cartridge installed.
sometimes when you get an image off of the internet you'll have the problem of the image not being clean. you can simply erase it in photoshop
The "splatter" marks are JPEG artifacts around the edge. Increase the threshold of the magic wand tool then hit delete to remove the background. Add a new layer beneath the image and fill it with prostitute pink. If you zoom right in you'll see if there are any stray pixels left around the edges. Use the eraser to get shot of them. Delete the pink layer.
Is there a way to rasterize on a normal printer with the ghost system? Or will it not line up in a Hp or canon printer?
How do you fix the offset? I can't get better then 1/8"/ 3mm off a shift when I switch from black to white toner. No matter how careful I am to line up the paper on the 2nd pass, very frustrating...
That's why I never used these papers.
Hello, I do the edge on the same level you set the background to black. I put a line of 3 px and put it inside . Make the line white and there is notthing to print, because the white toner will print the black as white
Simpel and very smart
Hello Martin, first of all I want to thank you for makeing these videos! You help us a lot!
Please tell me what kind of laser printer do you recomand who can support a white toner and from what company do you buy the white toner and do you know also a A3 format laser printer?!
For FOREVER Flex Soft (no cut) foil do I need a special laser printer with a front feed because the foil is to thin? Or can I use a normal laser printer?
Thank you so much!
Forever recommend a £3,000 printer. I don't use these papers.
What maximum paper weight is for this printer pls? Im interested in priting on a cardboard paper, is that possible?
I have got an HP M254dw and I had no idea you could use white toner in it, so this video has been informative! My only criticism is you tend to speak a bit fast and use terms which you do not define. Was it "marching line" you said? Different terms are used by different software packages and I didn't know what that meant at first...Thanks for taking the trouble to make this video.
What heat press is that? Looks nice
I use coreldraw x8 what is the fix with the rugged edges while in corel draw for fix so that the excess is not around the image when ghose toner goes in
Why do we not use a same brand mono printer for white instead of changing toners for each print?
Hi Martin how can I get a text transfer like you have in this video . Thank you .
Which did you find better Martin thiss or the OKI setup & papers. I actually have a million questions. Great vid again though
Both in my opinion are not 100% reliable so I am sticking to my normal inkjet transfers
I have to say thank you for your job, all you do help us a lot. I have a question, is that laser printer a regular office laser printer or is a sublimation ink?. I have clear the change black and white, i understand that part
Just a regular office laser printer
An alternative to using Forever Laser Dark No-Cut is the iColor standard A-B sheets which are used with the UniNet printing systems. Price is more affordable than Forever. I order from Johnsons Plastics.
Nice info bud. Thanks
Any update on the issues you were having with the Ghost System Martin. Have Ghost got back to you regarding the masking issue and have you been able to tried it through the wash a few times. Great vids, keep up the good work.
i'll do an update vid soon.
to choke your white down there is an easy trick.
1)Make the design all black like you did
2)Add a stroke on the entire design, but make it go inward instead of the default outer direction, and also make the stroke white. I usually have it about 2-3 points thick.
Great how would you inward stroke please in photoshop cc please
Love the video. Can I use the printer to print on waterslides, and other images for tumblers, or other projects? Is it only for shirts?
Yes you can! I have a video on printing stickers.
Hey there, thanks for the great knowledge. The parrot with full color looks much better than the lion. What paper and printer did you use for the parrot?? Thanks again, love the video!
1 more question,
How well do these products wash and hold up??
I didn't print the parrot. The Forever people sent me them.
Thanks for your great video! It answered many questions I had, one remains however do you not need to clean your drum when inserting a different color toner? Im thinking of getting a new c332 and replace the black with white toner cartridge before using it, im told however I would still need to clean the drum. Any chance you could enlighten me on this?
Sorry, I don't know.
@@reviewthat No worries I figured it out, these HP printers have their drums in the toner cartridges. Thanks gain for your great vid!
@@warturkey_yt I was same decision on getting M254dw or buying oki c332 in converting it to white
If u buy oki c332 in switch to white how would u get black to produce
Great review! I have the same problem when printing on the A-sheet I work with the same laserprinter. When I print on a normal sheet of paper or print on a transferpaper for a white t-shirt it looks perfect. When I print on the A-sheet the edges are terrible, I'm very curious to the answer from ghost.
I have the same problem when printing on the A-sheet also using the same printer. Have you found any solution to the problem?
Hi Martin I was talking about the parrot or the splattered bird transfer..
Ahh, I got that from the Forever transfer people as a test sample
Hi,
If I was to purchase the standard HP printer and then ordered the Ghost White Toner, will this still work? For example, if I purchase the HP through the HP company themselves and then purchase the Ghost White Toner separately from the Ghost White Toner people?
Yes it will.
Hi Martin Butler so is the other ink cartridges just regular they don't have sublimation toner in it is it just the white one with sublimation in It thank you for the video as well great video
This is a laser printer. I don't do sublimation on t shirts. I normally use inkjet transfers and Dye based inks.
can yo not do it in silhouette software with an inner offset? I mean you can print in silhouette as well and you have a trace function as well.
Yes that what I use
I love your heat press. What brand is it..?
This is a Galaxy DP200
I love the idea but seem like a lot of messing around for 1 tshirt it would take so long to do say 5 tshirts transfers are cheaper and easier to use I would think
hello !! can someone please tell me if i could use the ghost white toner on HPcolor laserjet pro M255DW ??? i need help
Hello I'm from Brazil, please answer my comment. Which printer did you use in the video ?
I used a HP M252DW bud
Hi Martin, great and honest review! I have the same problem when printing on the A-sheet. I work with the same laserprinter. Have you found any solution to fix the problem?
Check out my latest vid with the superman transfers Dan, they said they found the reason.
Okay thanks! It was pretty hot in the last couple of days! I'll try to fix the problem by printing in an colder environment!
Tried it again in our basement (temperature was at about 23°C) and still had the same problem. Could you fix the problem by reducing the temperature?
leave a message on their vids, they have their own channel
Okay thanks! I was just curious if it worked out for you?
I have one question, did you use HP CMYK originals toner or did you use ghost toner for CMYK too?
Just the original toners
@@reviewthat Thank you for the reply.
Can you tell me wat kind of paper you use? Above the transfer paper? Is that somekind of baking sheet?
There is another tutorial for the Ghost White Toner where they use only "Parchment Paper" he explained that Teflon doesn't allow enough heat to get thru which is what Martin seems to have experienced.
Great video Martin. Have you ever thought about printing money.
Its illegal
@@reviewthat No, I meant to use a 5 or 10 note as a test. To put it on the press to find out that you're using the right amount of pressure. When you open the press if the note is curled up on the corners you know you've got the right amount of pressure.
Hi! Can you use the HP Laserjet with these Folies on white tshirts? I didn't find a tutorial for white tshirts..
I think its what they recommend.
Can't see this being a big seller!
Thats a lot with the ghost write paper Martin. Shit is scary....
hello did you find a solution for those halo rings around the design ?? please let me know what it was
They said it was ambient room temp was too high. and humidity
When i put the white toner in it make alot of loud clicking noise... did yours do this too
No it didn't
I had the same "static" problem when white printing. I just purchased the ghost white toner, already tried it out 5 times with the same result. I did a test with construction paper to see just the layer of my image which I'm trying to white print with perfect results. I think, it may be something to do with the forever laser dark paper that I'm trying to use. If you have an answer to this problem, let me know.
Hey I got a hp printer that’s uses ghost toner it came with regular toners so to use white toner I just need to buy the white one
I mean a test transfer like you have in this video. Thanks
I got this image from Google images.
Hi which printer would you recommend for the self weed transfer and which self weed transfer do you prefer I'm starting up and confused on which printer to get. Do I have to invest in a sublimation printer all I want to do is print on mugs and t shirt please help
Check out my other vids for my view on this biz after 13 years.
Select the second layer black and hit stroke one point done...
hello again martin, can we know the washability of this? cause some say it only takes some washes to crack & fade the design . thanks
I haven't tested it yet but I will be doing plenty of washes in a future video.
What program are you using to do the images?
I use photoshop CS3.
are you still using ghost toners or have you moved on to different method ?
Never used them.
Did you know that everytime you change the paper type the laser printer will heat up differently, from a paper to a film. Once you get it all dialed in, it works great.
Yes I did know that.
Any more updates ?
Hi Martin, I have your udemy course. Not surprise seeing you in youtube for T shirt printing business. I am interested on the ghost white toner system. I am wondering, how efficient on your business with this system as the time needed on switching between black and white toner need a significant warm up time. And how’s the costing with the toners? As I could not purchase it in my country I also wondering if this is a good solution for me rather than the ink jet heat transfer. thank you for your reply in advance, cheers.
I am not using that system bud as it still needs refining in my opinion and it needs to prove its self.
Do these toners only work with hp laser printers? Would it work with a cannon laser printer?
Don't know, sorry.
www.ghost-white-toner.com/ghost-white-toner-for-your-printer/
Meticulous explanation Martin.Re Gina's comment I'm kind of in the middle. I thought what a lot of faff, but when you explained about it vs transfer paper I thought that's maybe worth it. When it calibrates, does it use additional toner ? I wonderWould be a good shout Martin if you can give us an overall cost idea of what switching to this setup would cost, including a laser printer, paper, inks. The concept seems good but the waiting and switching and all the little bits involved seem to push me towards disregarding this currently.
This package including the printer cost £500. The white toner is £200 on their website but i've seen it for £150 on Ebay. The other toners are around £50.00. It is an addition to my normal system as there is limitations with vinyls and my normal dark t shirt transfers regarding weeding out small stuff and this eliminates that problem. Also the foils are great as well. If I was starting, I would tailor my t shirt designs to suit these transfers but i'll use it as an addition to my business as I already use the other media as well.
Where on eBay is the white toner at can't find it
select all the black, select->modify - border 2px, and hit delete. Thats one way of doing it.
Nice info, I've tried it and just doing a video on this procedure. Thanks
Martin
@@reviewthat Or select/ modify/ contract 2px.
Then you can fill a new layer with black.
@@1notnilc Yes, there's a few ways.