MINI D2S 5.0 PROJECTOR RETROFIT | SJ (14-16) SUBARU FORESTER XT | FULL TUTORIAL | NUT & BOLT METHOD

Vložit
- čas přidán 3. 07. 2020
- How to retrofit Morimoto Mini D2S 5.0 projectors into SJ ('14 - '16) Subaru Forester headlights.
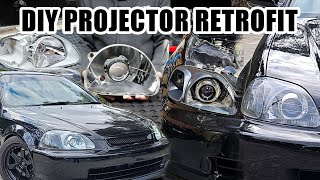
0:16 Before / after output shots using same camera settings
0:25 Bumper removal
1:00 Headlight removal
2:05 Preparation for baking
3:00 Baking / opening headlights
5:00 C-light removal
7:00 Reflector removal
9:35 Nut and Bolt method explained
13:33 Projector mounting w/ angled spacers
13:51 Projector alignment
16:08 Custom wiring adapter
19:43 Find exact centerline of vehicle
23:06 Aiming / assembly complete
24:30 Rubber sealing cap details
25:01 Mounting shrouds
25:39 Trimming bezels
28:10 Pro-tip sealant channel prep
28:39 Morimoto Retrorubber installation
29:40 Reassembly
32:14 Wrap up / Glam shots
This particular vehicle is a 2016 Forester XT Touring, which just means it has an integrated factory C-light and stock D4R reflector-based HID headlights. The retrofit steps should be nearly the same for all models in this body style.
Projectors are mounted using the nut and bolt method with angled nylon spacers and JB Quik. Projectors are nearly fully recessed, with the exception of the thickness of one inner alignment nut. There is plenty of clearance between the projector and the lens. The Threaded shaft method wont work in this application because the projector will protrude forward too far with the D2S 5.0 projectors. The projectors need to be recessed further back then allowed by the threaded shaft method. No trimming is required for the shrouds, but you will have to trim the bezel.
I hope this tutorial helps people wanting to do a full projector retrofit. Questions are welcome. I had a tough time finding info specific info for retrofitting this vehicle, so I'm happy to be a reference having gone through the process.
Retrofit kit:
www.theretrofitsource.com/bix...
Projectors: D2S 5.0 round
Ballasts: 35W
Bulbs: XB 5k 35W
Shrouds: Iris (No trimming required)
Harness: Not used (Vehicle has stock HIDs). Necessary if vehicle uses stock halogens.
Adapter for stock 12V input:
www.ebay.com/itm/Alternator-S...
Rubber end caps (110mm):
www.ebay.com/itm/2pcs-110mm-R...
Some decent threads I found online for this specific vehicle. Not much in the way of a full tutorial, but some good info:
www.subaruforester.org/thread...
www.subaruforester.org/thread... (Thx Masticator)


As a professional retrofitter, you did a fantastic job. You did exactly what I would do for any customer and did a great job explaining it all.
@koolkevin1107 hey how much you charge for this setup plus the C lights
Is it ok to bake the headlight with clear plastic cover instead of glass? If yes, what might be the temp? Im planning to diy retrofit my hl. Thanks
@@royaprilsobre video said 250F for 8min, but others have experimented with different settings. No need to worry about the plastic lenses
@@nolantsuchiya6602 ty so mch for the info sir.
@koolkevin1107 Hi can you give an advice because I have an old Ford everest 2018 trend variand suv. What is best type of lamp can you suggest?
How this video only has a couple hundred likes is beyond me...
I found it to be suuuuper helpful! Definitely makes the process seem less intimidating. I'm puting together materials for my first retrofit now!
Thank you for sharing your knowledge! 🙏🏽
Ha, thx. Glad it was helpful. Not expecting a ton of traffic on this channel as I don't regularly upload. If it helps a few people, I'm happy.
Just in time! Glad I've found this video before my retrofit kit arrives :D Subbed!
This video gives me so much more confidence in doing my own retrofit.
Wow, this is the best retrofit video that I’ve ever seen, I’m going to do my first retrofit headlights and definitely I’ll be doing it based on your video! Thanks!!!
Bro that was a super clean work 😻❤️
Looks very OEM. Fantastic retrofit. Also you did a great job showing the process of retrofitting.
Best diy retrofit videos i seen so far and even show and explain the nuts and bolts methods which i was struggling to find a videos of
Same here, that’s why I tried to show the nut bolt method in detail. Hard to explain without good video
Best retrofit I have seen
This is so technical.
I love it
Awesome job! I replaced old projectors with new ones in my BP Outback, however that was an easy job - it had projectors already. But I am looking at upgrading my SG Forester, which has only reflectors and you'll be my guide :-) Thank you!
Wow great work !
You are awesome. Thank you for sharing your retrofit in detail. It is very helpful. God bless you.
Good video, explained everything 😊
looks neat nice job
Excellent Job!
Great 👍 job! I've done some retrofitted for my friends and mine car's too
This is gold 👌
Happy retrofitting
great tutorial
Great video
Great video explaining the nut and bolt method, not a common video, greatings from mexico
Thanks! It does seems tough to find info on it.
Tip: when splitting the light if there is loads of glue strings, get an old drill bit on eletric drill and just spin it and drag it thru it all, will collect it all on the drill bit, can put something else in there like a stick or something if you don't want to ruin a drill bit
Also search clip removal pliers or Trim Removal Pliers they are exactly the same, and like $4 rather than paying the $17 or whatever they are
thats nice man
Very nice Professor
great work! you can even do a quad setup to make it insane!!
Direct to the NASA.
Very interesting clip for whom that want to DIY.
As a mathematician I congratulate you on the geometry tricks! 👌
I enjoyed your total retro-fit projection very nice and clearly demonstrated. I currently own a 2018 Toyota Camry SE. Now it has an LED low beam/high beam single projection system. However, I would like to convert the DRL reflector section to a laser beam or another LED, projector install. So, if you were to look up the 2018 Camry headlights you can see what I am describing to you. I think what I would like to do is get an extra set of headlights for this vehicle and try it on there first in case there may be some issues I'm not left without any headlights. Also, I was anticipating some night shots of your end results that would have been cool to see the outcome in night conditions. Otherwise, great content
Amazing video! Curious - it looks like you only used the nylon spacers on some of the bolts on the inside of the bowl, but not others - was there a reason for this, and how did you decide which ones? I'm guessing this had something to do with adjusting the position of the lights, but I didn't pick up exactly how you did that . Thanks for making this video - it's really great, and your work was super clean.
Man we need a tutorial on wiring, That is the part that is tricky in my opinion.
You forgot to mention that while the headlights are baking the wife better not be home 😅
That’s a projector retrofit done right:
-looks better but still OEM like
-properly fitted
-wider brighter and more focused beam pattern
-improves visibility and aesthetic while reducing glare
Right on
Great job! I'm using this video for my retrofit! I've got a couple questions, I've ordered the iris shroud as well and am wondering if you had to do any trimming of the shroud? Also did you use the inner clips of the shroud to snap onto the projector, or did you cut those off and recess it even further? Much appreciated! :)
Hi nolan why you didn’t t put the headlights in the ovenn after applying new butyl sealant?
I learn something good
I’m looking for a kool upgrade for a 2001 dodge van,, yall got any ideas
Hi Nolan! Nice Video. I love your XXR 530 Rims, I'm thinking to buy ones for my Forester XT 2017 but I'd like to know the wheel and tire size you have on your car. Thank you
Where do u put solenoid cable,if i use only for low beams,its not necessery to put it,right?
Thank you Nolan for the video! Great work! Just wondering if the 4 bolts will hold the weight of the projector over time, considering the Forester is driven not only on asphalt but on trails (light off-road/vibrations). I would appreciate your comments about this.
It’s a year later now, and I’ve had no issues. I hope to never need to open these again. No condensation or anything so far
You can use Plastic wrap the outside plastic to protect it when working with it :)
Hey... it's the bike guy....what don't you do :)
Dumb question can we instead just buy the 2018 forester headlight assembly will it not fit a 2014 sj forester?
hi good day really nice your video, can u please tell me the name of the glue you use for sealing the headlight,
Look on theretrofitsource.com or lightwerkz.net
Its a butyl rubber sealant
From where did you get the nylon spacers, and what sizes did you use?
Just hardware store.
GO SHARKS
Nombre!!! I wouldn’t take the time to bake and cut up the stock light fixtures. I’d really f__ that up!!!
I feel more comfortable upgrading the stock halogen fixtures with the better OEM DRL projector light fixtures, rewriting, hacking, and re-programming electronic modules & sh_, just to be able to power those high end luxury light fixtures. I would’ve been researching which body control modules are high end, and if they can be re-written with my car’s vin, then getting the necessary wires, harnesses, housings, tools, relays, wire picks, etc.
You can use a heat gun which can be bought for cheap.I've done a bunch of retrofits in the past and the baking method rarely works like the heat gun method
So, Geometry has practical uses after all.
Try going back to oem ballast
Check out: Subaru OFFROAD Australian Sand
I have questions! This is an awesome job! Mind if we get in Contact!? I plan on doing this with my 14 FXT touring model!
Sure. You can connect through nolantsuchiya.com
Nicely explained! If I can only hire you to do it on my '17 premium! Hit me up! Lol
Wish I had the time.. Ha!
@@nolantsuchiya6602 Believe it or not im actually doing it. Just started on opening the headlights. Hows your d2s 5.0? did you get the CBI 5500k as bulb? hows the output as of now? your video is really helpful.
The bmw e46 was easy to open it don't have a seal like this and never gets water in it not sure why other car companies make it like this?
You u don't need to drill nothing if u was using the retrofit minih1
It would have been perfect had you shown the projector in action.
Uh he did at the beginning. Look again.
Taking shots at Subaru for those mediocre projectors
The lights are getting ridiculous. Just blinding everyone on the road.
When this is done right (and he did this right) this creates no more glare to incoming traffic than a stock vehicle