Portable Bluetooth Speaker Build || HOW TO

Vložit
- čas přidán 2. 03. 2018
- Check my Etsy store 👉 etsy.me/42k2v4Y
Free build plans, wiring diagram and in depth build tutorial available on my Instructable! 👇
www.instructables.com/id/Port...
🎁 $5 OFF your first App order on AliExpress - a.aliexpress.com/_mPN8FLo
Parts:
1.5 Inch speakers - bit.ly/3XsYPu0
Amplifier - bit.ly/3GEYoWI / geni.us/wOpMh
Passive radiators (40x78mm) - bit.ly/3ZBn6Aa / geni.us/WZxqbZv
12V Latching LED switch - bit.ly/3XcIgCs / geni.us/4pbi1
3S BMS board - bit.ly/3Q85BmI / geni.us/E30JaSC
Bluetooth audio receiver - bit.ly/3VZ6LSK / geni.us/KBHU
3S Battery level indicator board - bit.ly/3W90Nyy
DC input jack - bit.ly/35s1rxq / geni.us/Hbs3uD
Audio input jack - bit.ly/3GMsgly / geni.us/BNMj
B0505S-2W isolated 5V converter - bit.ly/3nefFLb
Step down converter - bit.ly/3eSKu9t / geni.us/PcR1Je4
Momentary Push Button - bit.ly/2q8FJPU
555 Timer Chip - bit.ly/3ll4Pm8
Resistors - bit.ly/37Ukr9Q
Foam gasket tape - bit.ly/3hXlrnu
2mm Red, Green and Blue LEDs - bit.ly/3k7gU2B
12.6V 1A Charger - bit.ly/3X0263S / geni.us/Si0zNc
M2.6X12 screws - bit.ly/3CvFPmO
3X 18650 Cells - bit.ly/3J3KCNl
Adhesive rubber feet - bit.ly/3X1nPsG / geni.us/VkuJ
Faux leather vinyl - bit.ly/3IKlspM / geni.us/dqaM
Tools:
TS101 soldering iron - bit.ly/3hQm4PP / geni.us/owyDm5G
Multimeter - bit.ly/3VOFjYv / geni.us/UmrhyYk
Hot glue gun - bit.ly/3QdYfhg / geni.us/1dwxqIM
Wire stripper - bit.ly/4dG6Jt2 / geni.us/6epIs
Cordless drill - bit.ly/2UiMSbL / geni.us/A5AZi
Jig saw - bit.ly/3GpY8w6 / geni.us/D8GC
Drill bit set - bit.ly/3S3i6zC / geni.us/ktAK1M
Step drill bits - bit.ly/3eM5GtB / geni.us/xYRx7J
Forstner bits - bit.ly/35snpjW / geni.us/F6it
Hole saw set - bit.ly/3YZU8tg / geni.us/hONP
Wood router - bit.ly/3I7Aplm / geni.us/6okRl
Roundover bits - bit.ly/3ijBZWU / geni.us/cc82
Center punch - bit.ly/3xslc8u / geni.us/o5WBEwB
Helping hand - bit.ly/3B9mIgt / geni.us/Yyqyte
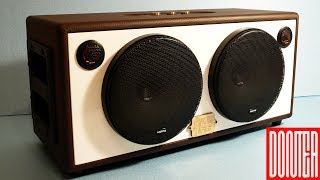
Hello everyone! In this video I will show you how I built this Portable Bluetooth Speaker that sounds as good as it looks. I have included Build Plans, Laser-Cut plans, all the links for products that you would need in order to build this speaker by yourself and the Wiring Diagram is free download and you can find it at the end of this intro or in the Electronics Step. Make sure to zoom in to see the connections up close!
Music:
Diviners feat. Contacreast - Tropic Love [NCS Release]
JPB - Get Over You (feat. Valentina Franco) [NCS Release]
Lensko - Let's Go! [NCS Release]
Lensko - Circles [NCS Release] - Jak na to + styl


Entre todos os vídeos de fabricação de caixa de som com Bluetooth o seu trabalho foi o melhor!!!! Como vocês diriam "good Job" !!!
THAT WAS A CRAZY BUILD! I LOVE IT!
Excelente, realmente muito bem feito, é uma terapia fazer estas coisas. Good job!!
the most goodlooking diy speaker i've ever seen here in youtube
Thanks, that means a lot!
czcams.com/video/nYqqceqxQb8/video.html
Kirby meets audio !
it s definitely beautiful about this kind of artwork, i totally respect
Another great project with superb documentation! Making smaller doesn't make things easier, but harder. Great work and thanks for sharing the details.
Thank You! True, the size of the project does not necessary resemble its difficulty!
Finallya found a video where i have the full list of parts that actually combine well. Just ordered all the parts, now im drawing the enclosure (becausei dont want mine look like crappy version of soundlink) and designing the board to connect all the parts via pcb.
Une réalisation parfaite !!!
Bravo !
.
A perfect realization !!!
Bravo!
best small sized bluetooth speaker build on yt so far, best finish, has actual construction and not just wood+hotglue the crap out of everything, amazing!!
Thank You so much!!
@ Donny Terek you don't need to thank him cause its your work and your know how ...
but at all its really good work thumbs up
Encantadísimo del resultado final, realmente un excelente trabajo, felicitaciones 👌
Ça c'est vraiment du très très beau travail. Chapeau 👍
That's some damn fine craftsmanship if I've ever seen it.
Wow, thanks! That means a lot to me!
Good job bro
Added to 'to do list'
Thanks bro!
Feel free to write me a personal message to my channel!
Wow this is AMAZING good job 10/10
Отличная работа!
Kualitas'nya lebih baik dari pabrikan,,luar biasa👍good jobb salam dari indonesia
Nice build and plans!
Our man that box of the hour made serious much more top with the passive radiator system you go away friend hug my name and lucas and I'm from Brazil congratulations
Wow ! Marvelous Craft, guy...
Masterpiece!! My favourite Bluetooth speaker of all time
Thank you!!
😊
Nice job! It looks very professional!
Thank You!!
Bravo. Super.
Fantastic work
Great job
A very nice high quality build !
Thanks!
The makita is back!!!!😀
Cool design.... great !
Greetings from CHILE.
Thanks!
A beautifull speaker
You made me subscribe because of that project.
Nice work! Very precise and meticulous approach to business. Just a pleasure to watch! What kind of idiots put dislikes???
Thank you very much, highly appreciated!
Very nice Project dude! Awesome work
Thanks!!
truly inspiring! great job;)
Thank You!!
Thank you very much for this guide. I'm inspired and about to build my own speaker. Almost everything is clear except the step down voltage board how to configure it right and if any way how to test it before soldering to the Bluetooth module so I won't damage it if voltage is not ok. I would be nice to include these steps (those included in the video I'm just not 100% sure what to do) on the official guide you provided on the webpage so this guide won't be 99% but 1000% complete. Thank you once again
Hi Stanislav!
Thank you so much for watching and being interested in building your own. The main purpose of that step is to reduce the voltage from 12V to 5V. In the video I have used a power supply that can supply 12V, which I connected to the input of the step down module and connected a voltmeter on the output of the step down module. By turning the potentiometer I adjusted the voltage so that the voltmeter shows 5V on the output. After that you can solder the step down module's output to the isolated converter. It is not necessary to use a 12V power supply to adjust the step down module's output, you can solder the output from the BMS board directly to the step down module and do the adjustment of the voltage then.
I hope this helps! 👌
Wow im so impressed
Well done
Thats awesome bro!!!!!!!!!!!!!!!
Thanks!!
Buen trabajo 👍🏻
Nice work 👍I like it😎
Parabéns Belo trabalho
Nice! The wooden buttons are a great idea I have not seen before. You have a laser? The laser cut parts really make this build shine. Also, it's nice to see the use of epoxy instead of dreadful hot glue, love it.
Very very good 👍
Very good job!
Thank You!
you are a genius!!
Thank you! 😀
Clean job. Great work.
Thanks!
Полярность подключения динамиков перепутана, если мне не померещилось. Колонка и работв великолепны.
Respect! 👍 👌 ✌
Thank you for No Music!👍🏻👍🏻👍🏻👍🏻👍🏻👍🏻 An realy nice
Thank You!
Nice dude
Thanks!
awesome !!
The only thing missing is the EQ settings you can program to the CSR chip. that would make it even better/worth the effort.
the best !!!!
Ficou muito linda 👏👏👏👌👍👍
Verry verry verry nice build!
Thank You!
*Good job* 👌
Thanks!
Donny Terek can i ask for dxf file please? With screw hole on the back panel, the dxf file you uploaded are differnt with this video, please share the new dxf file, i want to bring it to the local cutting laser store, thank you, i love youre project
Donny Terek sory for my bad English, hope you understand for what i mean, thanks
nice job bro
nice nice nice... u r the best man.
Thanks!
So Very very good
Great work and great plans! Will make it sometime. But 1 question. Are the 1 uF and the 470uF capacitors with the items?
Nice!
Would it work as well as it does now with let's say, JBL xtreme drivers, mines broke but the driver's still work so I took it apart. So, could I use those and the parts in that to make a slightly bigger version of this?
Keep it up, really liked your video)))
Thank You!
Great Build! Do you happen to have a link to the passive radiator? When you click it, it takes you to the little board instead.
Thanks Donny, this is the wiring diagram I am referring to. I took it from your Instructables page. I am sitting between all components momentarily to plan the construction of your speaker.
Nevertheless, I still see a difference in the way you make the connections in your video and in your wiring scheme (both from your Instructables page).
Can you explain the difference or point out which is the right one?
bestttt !!!
A beauty
I will buy that!
incredible, you are a master, i start looking for a tutorial for change battery and speackers of my clone sound link and find this video, i will tray to get the parts on the links. Thank you for share this. All my respects for you.
Thank you so much! 🙏
Feel free to reach out to me if you have any questions, will be happy to help. I may do an updated version of this speaker.
So nice👍👍👌👌👏👏
nice build
Thank You!
Bose soundlink homemade
wooooow nice man!
Thank you!
Donny Terek Passive radiator helps a lot in sound quality!
nice looks like the bose sound link mini
Great jod!!!!what is the 2 capacitor that you use?
you very smart man.....
hi Donny Terek tengo una pregunta, estas bocinas dicen que trabajan de 5 - 10 w pero el amp 8610 trabaja a 15w a 4ohm , la speaker no se rompe?
Felicidades por sus trabajos, pero sé que a sus suscriptores desearían aprender cómo se diseña las cajas y en qué programa los hace, gracias
I could just watch it over and over
Ha! Thanks!😁
does it support aptx? I'm intrested in building a just like this, but upgrade tto BT5.0
SUPER)
įjungimo mygtuką reikėjo iš galo montuot, gadina estetiką :D bet šiaip super
Ačiū! 😁 Kitą kart kogero taip ir darysiu.
i love you 👍👍👍
good 👍👍
Thanks!
Nice Man ;)
Thank you!
The result was qyite beautiful in my opinion
Thank You!
nice
Can i ask for the last dxf file please? With the same size of front and back panel & panel holder, thank you
Why not give away one for me coz I seriously love all the videos 😍😍😍😍
Hello friend, how are you? is very neat your work and is beautiful in the finish of your portable speaker .. my question is ... how much battery autonomy and what amperage has the batteries type 18650 for how long has the pam 8610? I wait for your answer friend .. greetings
So if i want to use a BT board that supports 3-30v input, that means i can ignore the step-down module?
Yes, you are correct!
Nice
does the pam8610 distort at high volume?
Would love to build it. 😀
круто сделано!чуток надо было отшлифовать корпус !немного проглядываются неровности!
ALEX SOUND как приятно когда ты встречаешь русских на иностранном канале!
Very nice!!!
Thank You!
Keep on building and filming speakers!
I sure will! 😄
If you want to, you can watch my DIY 360 Degree Bluetooth Speaker on my channel!
I saw that one! Truly amazing work, Philip! 👏
Hindsight is 20.20. could have just cut all the verticals on the laser and use contact cement to glue em. Nice build too. Might employ this technique soon!!
Thank you!
Can you give me full project image of these?
I love the case!
P.S. but I don't think that is a good decision to use both channel with the same passive radiator
keren.. klo ada yg dah jadinya aja ..
another great work!!
Thank You!
Dang that one sexy speaker!
The Harman Kardon company should hire you.
Harman Kardon Terek Studio DT10.