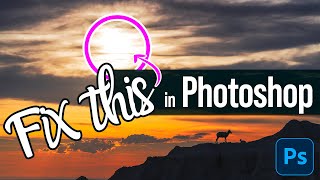
Fix Landscape Highlight Blowouts with Selective Color in Photoshop

Vložit
- čas přidán 5. 08. 2024
- Let's face it: no matter how good you are or how many landscape photos you've taken, you WILL face highlight blowouts. It's not a matter of IF, but WHEN!
Ideally, we want to get everything perfect in camera, but if we don't, we no longer have to throw out those photos. There is a straightforward fix for them, and it comes in sn odd package... Selective Color.
Yes! A tool we typically use for color grading can also be used to fix highlight blowouts and it's actually pretty simple to do. Once you get the hang of it, you'll be fixing highlight blowouts in seconds, I promise!
Chapters
00:00 Quick Intro
01:04 Quickly Explained
03:25 Slower Explanation
06:42 Refining the Adjustment
07:16 Fixing LARGE Blowouts
09:20 More with Selective Color
_________________________________________________________________
Do you like the videos I make on CZcams?
Want to grow your photography exponentially?
1. Subscribe! subscribers see the content first and are the most likely to succeed in Photoshop
2. Head to the f.64 Academy website and get registered on my subscriber list. I deliver all kinds of extra tips and subscriber-only live events!
f64academy.com/sign-up/
3. Become an Elite Member! I take Photoshop to levels you will never see on CZcams for the members of f.64 Elite with courses, critique sessions, members-only events, a community forum, and big discounts on my most premium courses.
http:/www.f64.co/elite


I love the sarcasm! Can't please everyone, so have a little fun with it. Great job sir!
Yep! Lol 😁
Wow! You said "pretty impressive isn't it?" I actually said out loud "YEAH!!!" That's it man, you're getting me to sign up for the Elite membership. I've been on the fence for so long I've got splinters but this has done it for me. See you there! (No, folks, Blake did not pay me to post this comment 😂truth!)
:) If you think this is good, phew, Elite will open your eyes to a "Whole New World". I make a YT video here and there, but I produce at least 3-4 hours of content a month for Elite! You'll like it, its all good and goes even deeper than I do on YT. I'll see you in there!
@@f64Academy Yep, all signed up for Elite and used this very technique to remove a niggling little blown highlight in some water just now. Looking forward to watching the critiques amongst lots of other goodies I was exploring yesterday. Thank you!
Thanks so much for this selective color process. Saved some great images from the trash bin!
😁 love it!
Thank you Blake. This technique is allowing me to salvage many photos that have blown out highlights.
Excellent tutorial of an adjustment layer that I’ve never tried before.
This is one of my favorite Adj layers, so powerful in so many ways and this one... geez, I've been using this tool for years and just now figured this out. I am wondering what else I am missing there... hmmm?!?!
LOL!!! Not long ago, I stumbled on your original video on getting rid of hot spots using selective color.... I've been using selective color for decades cause I can't get ahold of curves for some reason - which most people use. When you went to the white section of selective color and fiddled with the colors to remove the flash highlights, I felt like an idiot!!!!! I have lots of facial shots with those highlights and as much as I am familiar with selection masks, never thought of getting rid of those using the white segment........It's simply brilliant! Don't anyone think you know it all cause someone like f64 will eventually come in and prove you wrong... MANY THANKS FOR THESE TIPS!!!
😁 that's a good story 🤣 I just experiment a lot. No biggy 😁
And I indeed did use it in my workflow today! Thanks for this quick tip Blake...
It's my sincere pleasure!
The more of your videos that I watch. The more selective colour is becoming my favourite tool.
I've spent the last month driving very deep into this tool and I freaking love it! Thanks for watching 😁
You are the master of PS but you have the added bonus of also being a master teacher.
Also you picked the right photos...thought I'd comment on that.
Phew! I did something right 😁😂🤣 I appreciate your very kind words!
Fantastic... Your videos are always very informative and useful. Thanks a ton for sharing this.
My pleasure! I appreciate you for watching it.
Thanks Blake, excellent tips!
Thanks for this! I have a few photos from past years I will go back and try this with.
I think you'll like your results!
Very very useful thank you very so much Blake
Brilliant!
Many thanks from Argentina, and of course subscribed!
Woohoo! Thank you from Kansas City, Missouri 😁
This is awesome! Thanks! I'm going to look for some blow outs in my catalogs!
I know the feeling! I am revisiting images like crazy!
Great tip, thanks for showing your workflow. Really appreciated.
Absolutely!
AWESOME STUFF!! Keep up the great work!! I genuflect in your general direction....
Thank you :)
Super grateful, I haven't seen this technique anywhere, simple and effective solution to a very common backlit landscape problem. Thanks!
You won't find it anywhere else ;) Glad I could help!
Blake. Thank You Thank You Thank you. I saw your first video on this and have been practicing it. I was able to save some photos that I prolly would have trashed. I have actually applied this technique to some of my Wild life images and was able to bring them back to life. I can't Thank you enough. You Rock as always.
YES! That's the best to read after putting out this series :) I'm glad these videos have helped!
You are a unique and exceptional trainer. I enjoy all your videos.
Thank you very much 😁 I really appreciate it 😁
Great technique, great examples!!! Thanks
Glad you thought so, phew!
Great fix, and yes, key is feathering it in nicely. I know I probably have a ton of images that I could use this technique on. Thanks Blake!
Definitely feathering it in is the key, especially with big ones!
works out pretty well, will give it a try on some hot spots! thanks so much Blake
No doubt, we know we all have some images we've saved that do indeed have those blown out areas. A great way to salvage what otherwise would have been a written off print. Thank you.
For sure! Even the best shots can be difficult to shoot without some form of highlight blowout.
Excellent! Many thanks for your precise explanations (as always...) - simple and understandable even for us foreigners 🙂🙂
I really appreciate it! I love what I get to do for a living!
Excellent tutorial, many thanks
Certainly! Come back for more 😁
3:50 - As so many photographers say, you take more bad shots than good. This technique, you can do something with the bad one to make them good. And no, even with the blow out, this is a great shot. This is why we have post editing.
I'm right there with ya! But dang, the internet loves to chew you up and spit you out for your mistakes versus your successes.
@@f64Academy Which is something I don't quite understand. I mean I do understand, but you give us free help and some next level techniques. If anything, I want to give you tips. Maybe I'm defective. OK, you use two spaces after a sentence, that is now considered wrong. Yay, now I'm like everyone else. But in all seriousness, I'm glad you don't let it get to you.
Absolutely brilliant process for these types of blowout and the presentation technique of the video was first class way to learn, using a gradual build up of how and why, following after an opening demo.
(Time to revisit and redo some old blowouts in landscapes.)
Thank you!!!
Very much appreciate it :)
Brilliant tutorial thank you!
I'm glad you liked it.
Awesome tip, thanks!
My pleasure! Glad you enjoyed it.
Great info, many thanks 👍
Many welcomes 😁
BRILLIANT!
Thank you 😁
WOW, very impressive! Great video...
Thank you!
Lovely! :)
Have a good weekend!
Thank you, you as well :)
Fantastic, Blake! And I DO know what you are talking about (5:09). Not good!! GOD bless you, my brother!!
Excellent
Much appreciated!
I didn't like this effect only on the first image, but it was amazing on all the others. thx!
All good, then use it in other ways, it's about the tutorial not the images, as I said 😉
Excellent idea. I also always add some noise to the blown-out areas....easiest and best is ACR: add grain; subtle but visually noticeable @ 100%. Overlay noise OK too. All to give some texture; like a real photo image printed on paper and to match the grain/texture of the image instead of pure smooth.
Yeah, I like that direction, but adding Grain is a global thing in ACR unless you are using ACR as a filter and then masking, but that's a lot of work! I have used hundreds of methods to try and fix blowouts over the last 13 years of teaching. this one, that I just discovered, is by far superior to any other method.
Thanks for that. It is interesting. I still think that for me, overall, the easiest way to deal with something like a sun blowout is to create a darken layer, sample the yellow I want and paint it in then use the same graduated brush technique to pop in a more subtle sun. I will definitely use this technique though.
The beauty of Photoshop, 500 ways to do the exact same thing 🤣 we all have our preference.
I'm hoping I can get this to work for glare on metal. As a metalsmith, when I photograph work in progress shots at my benchgmetal are can be a real issue. Sigh... If you ever have the time to do a video correcting that issue it would truly be appreciated by at least me. Thank you for your excellent videos!!
I'm sure you can match it with this. It might be less based on color and more based on tonal correction though.
Thanks for sharing alternative way to fill the empty white area with selective colors. Just want to share another alternative: pick colors value nearest to white (lets say nearest hotspot skin ). Create New layer, brushing with 'darken" blend mode. Adjust the opacity until it matched to values near the hotspot.
That is definitely an alternative. Although, I won't be using it much anymore since this one is surgically accurate. No need to worry about masks, picking the right color, etc. I used to use that method, but those one is my go to now.
@@f64Academy Awesome, thanks !
Hello Blake! Really great video. I follow some of your content and it is really great.
I'm just wondering something about this technic: MAYBE (just maybe, hehe) in some cases the color tone to fill white pixels, could not be a pure and only one tone of color. For exemple, in your second image (that one that have a boat), maybe we could have a better results with a gradient "yellow" to "blue tone" on the upper area. What do you think? something very slight of course.
furthermore, congrats for your videos and your content. You are an inspiration to me, to produce content about Photoshop and image editing.
Thanks! I appreciate it!
That suggestion could work, it doesn't really fit the mold for this specific technique, but it could work, I'd need to experiment with it.
In an abstract way, Relative vs Absolute kind of sounds like Vibrancy vs Saturation. Saturation/Absolute just sort of affects it all in difference of what is present, whereas Vibrancy/Relative is more surgical about what is there and adjusts more carefully.
Very similar, I like the way you think, but also different :) Vibrance is for pushing colors that are not as saturated, so Ps analyzes the presence of color and boosts the Vibrance of the colors that could use some help. In this case its about the math and the presence of color once mixed. But, I like the way you think because it is much easier to explain :)
@@f64Academy Thank you, and thank you for that explanation.
Maybe I'm overthinking this (something I do too often, I overthink overthinking), but does Absolute have to do with the color cells for each pixel, the RGBG, whereas Relative works on just the pixel layer (the mixing of the four cells)?
Great video as always. Incidentally, what colour mix would you use to fix a blowout in a grey sky?
Grey 😁
@@f64Academy 😀Thanks - I presume that by grey you mean neutrals. Have tried it with little success so will look at another option. I may appear a little dim to you but I was hoping that your 'sun' and yellow blowouts formulae could be used in other scenarios, namely fixing over exposed areas in a grey sky. Sorry, I was wrong.
@@geoffreykingston4866 no, you'd still go into the white area, but you'd make the whites grey. I'd then mask it with a textured brush to make it more realistic looking. If it's grey, I wouldn't add color to it in the neutrals, it'll look hideous because the viewer will know what a grey shot should look like because their brain will pick up on that
Hey Blake. I watched both your videos on how to use Selective Color to fix blowouts. I wander if I can apply this method (or a similar one) on my old Macro photos where I've been using a flash without any diffusing. Thanks.
Probably. All you have to do is open one up and experiment 😁 it's your turn now 😁
Arrivederci!
Brilliant, Blake. Excuse the pun.
How to fix blown out strobe lights on products?
... EXPERIMENT... lol. Try this technique. I use it for almost every blown highlight.
Hi Blake, hope you can help me. I have done the Zone system 7 course, which is excellent by the way, and also watched lots of your youtube tutorials. In one of these you show how things that are done with masks in Lightroom or Raw can be replicated in Photoshop. My problem is I can't remember which tutorial this is part of. Id be grateful if you can you tell me where I can find it. Thanks in advance.
This is new. It's not a part of any course
@@f64Academy I wasn't talking about this one. I remember seeing you use a black and white gradient on a mask in Photoshop, to emulate using a gradient mask in RAW; among other things. I just can't remember if it was on one of the course lessons or a tutorial on here.
@@the8show77 hmm, I honestly don't remember. I produce at least 4 hours of content per month and that doesn't include courses. Been doing that for 13 years... Lol. So I can't recall the exact video, my apologies.
@@f64Academy no probs, thanks anyway.
So is there a Selective Color panel in the works?
There already is one in PS 😁 everything you need is right there 😁 maybe a course, but not a panel. I think that might be just reinventing the wheel.
Another form of solarisation perhaps?
Possibly, but solar curves are a nightmare, this is simple and easy.
@@f64Academy - Precisely. That is why I use this method that you describe above, Blake.
Blake - instead of 'Blend IF' you've invented 'Blend WHEN'!!
:) I like inventing things :)