5 Slicer defaults I ALWAYS change

Vložit
- čas přidán 8. 06. 2024
- Slicer defaults are handy, but are they the BEST settings for your 3D Printer? These are the top 5 settings I change first when using default profiles. Don't miss number 4!
Join the Maker's Muse Community - www.makersmuse.com/maker-s-mu...
Prusaslicer - www.prusa3d.com/page/prusasli...
TIMESTAMPS:
0:00 Intro
1:10 Downloading Slicer Profiles
3:08 Perimeters
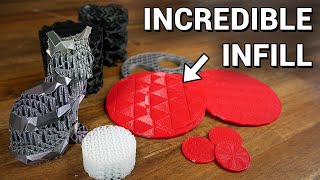
4:52 Infill
6:58 Elephant Foot Compensation
8:44 Seam Placement
11:36 Ensure Vertical Shell Thickness
14:58 What settings do you change?
3D Printing Quick Start Guide - www.makersmuse.com/fdm-fff-3d...
3D Printer Buyers Guide - www.makersmuse.com/purchasing...
3D Printing Essentials - www.amazon.com/shop/makersmuse - Věda a technologie


I got a job at a facility where we prototype and manufacture medical products using FDM and SLA 3d printers. I can honestly say I wouldn't know the slightest bit of what I'm doing at my job if it wasn't for your channel. my very first day on the job, I was tasked with repairing 5 broken ender 3's. I repaired 2 the first day. I literally play with 3d printers for a living now and am in love with my work.
How did you get that awesome opportunity for the job?
@@pcdc1337 I have a buddy who already worked for the place as an engineer and he asked me if I'd like to come check it out and possibly work there as an engineering tech (basically his assistant). I have no degree and no prior experience otherwise. I just love 3d printing and watch a ton of videos about it.
I work at a biotech company and it's so cool to see the instrument prototypes 3D printed
@@TheLazzarus101 Goodluck it's indeed a good opportunity !
Man's living the dream.
Another one to save your bacon in case you use variable layer height is minimum shell thickness. If you reduce the layer height of the top of a dome for example, you might only have 3 top layers at 0.1mm which is very thin, but the rest of the print is at 0.2mm so 3 layers is plenty. setting minimum shell thickness to 0.5mm will ensure that if you reduce the layer height anywhere you don't accidentally create holes. Otherwise it changes absolutely nothing, so no hurt in enabling it just in case.
In Cura:
The Cubic support can be done in a similar way with essentially any infill using the infill subdivision feature. A separate setting also works on supports that get denser at the top (not roof, the support structure itself).
Starting with a version several months back (I think 4.11), seam placement is (finally!) also nicely visible.
Seams: nothing like the aligned that I know of, but sharpest corner+smart hiding works quite well most of the time. In some cases, I set my own seam coordinates. Still, seam painting in PS is clearly superior.
Settings I changed in Cura:
(Ender 3, but most apply anywhere)
Infill - grid is fine for visual parts, cubic or gyroid anywhere else.
Connect infill lines (for prints that I want strong), sometimes I drop in infill line multiplier too (IMO works better than high infills >30%).
Initial layer line width to 150% for materials where adgesion is notoriously poor.
Combing - on, but with max comb range 10mm and "not in skin" setting.
Regular fan speed from 3. layer (2. is then 50% of set fan speed), minimum layer time 6s.
Low jerk on first layer (10, with some materials even 5). Helps prevent ripping of at sharp corners etc. Acceleration tuned down a bit too.
Increased travel to 200mm/s, including on first layer.
Support density 15% (but depends on project), support roof 100% density concentric, 1mm thick. Z gap 1-2 layers depending on model needs (1 is fine under flat surfaces but can be hard to remove on complex shapes).
Support brim on.
Support overhang angle 50-60° (but can go to 70° in some cases).
Support skin fan speed 100% (cools stuff above support so it can be easier removed, useful when your base speed is not 100%, like PETG etc).
Often Conical supports or even tree supports can work wonders, reaching over structures to support stuff above, without building supports on top of parts of the model.
Unless brim needed, skirt with just 2 lines.
Huh, that was quite a lot :-D
Man that was a lot. I would love to see a video from you describing how you came to these settings and what made you pick the numbers you did. I got pushed into cura when I bought a new 3D printer Qidi i-fast. I'm really not thrilled with their version of it and so I'd like to build my own profile but I'm scared to death of all the settings.
This is great information, thanks! I just got an Ender 3 V2 and am working on tuning it. My prints look pretty nice so far, but I want to push it to print a bit faster if I can without compromising strength and appearance.
Do you know what the insure vertical shell thickness is in Cura?(Nevermind, found it. It is "Skin removal width" in the infill advanced settings. I increased it to 3mm and all of the extra infill on the slanted walls disappeared. Took my time down from 1hr 44min to 1hr 27min. Only 1 gram difference but it's not that much infill, just takes extra time.
Hey I am very very interested in your comment because I am relatively just staring out with an ender 3 on cura but it is really hard to follow your writing and obtain the great information your sharing. If you wouldn't mind could you make your info in more of a list format, I thank you for sharing this information in the first place the community is only benefited by people like you spreading knowledge and wisdom
You know what man I'm sorry I read your comment back again except this time on my desktop and it was way easier to follow. Before I was viewing on my phone and it was very hard to tell where you were stopping one setting and starting another lol disregard my original comment, thank you again man this is great knowledge
Really helpful video!
Quick suggestion: it would have been very interesting for you to show the cube printed once with the default settings, and once with the improved settings at the end.
i agree, I was hoping to see that too. At least we saw the the aligned difference
Agreed - Please
Bit late for this at this point 😂😂😂 From my own experience up to now though, everything he says works exactly as he says it will
Miss these tips and tricks videos, Thank You, always learning new helpful concepts and approaches here!
Hope to keep making them ! Thanks for sticking around :)
@@MakersMuse is nossel clogging common
@@Randomperson0467 it happens for me lol
@@Randomperson0467 but my prints turn out just fine!
Ok
Instead of a third perimeter I like to use Cura's "Connect Infill Lines" feature (probably available in other slicers). This greatly strengthens infill by linking sections together where they connect to walls, reduces the number of retractions you need to make, and provides a modest improvement to wall strength without printing a full third perimeter. For a similar reason I also use the zig-zag top/bottom pattern instead of lines; I don't have the equipment to measure improved mechanical strength, but logically it should be more robust to have a single undivided line of extrusion rather than many separate ones.
Another option is Cura's "Alternate Extra Wall" feature, which adds an extra wall every second layer. I don't imagine this is very useful on its own, but combined with "Connect Infill Lines" it uniquely sandwiches infill and perimeters together, noticeably improving strength. On some occasions I've used these two features together and only used a single regular external perimeter. For my parts at least, this is obviously stronger in the hand than just having regular unconnected infill with 2 perimeters, while printing much faster and using less filament. Cosmetically it won't be as attractive though since the infill will show through.
To both make my seams less noticeable and improve print speed, I print external walls narrower (and a bit more slowly), say 0.44mm for a 0.4mm nozzle, and internal ones wider depending on desired strength. 0.8mm or even 1mm is fine for a 0.4mm nozzle. This technique doesn't harm external appearance in any way I've been able to notice. Printing wider than your nozzle opening (but no wider than the nozzle tip) is a good way to improve layer adhesion and strength, as it sandwiches the plastic together across a wider surface and forms a *much* stronger bond to the previous layer.
Wider infill can also a good idea for reducing print time without sacrificing strength but it's not always practical, it depends on the structure of the part you're printing. Sometimes you want lots of small supports in thin spots, while other times you have a big space to fill and printing wide infill has no downside. If you use a low infill percentage this may not be beneficial as it greatly increases the gap between infill lines.
Before using wider extrusion you should check to see how fast your hotend is capable of melting filament or else you could have hidden underextrusion in your internal walls.
Also when using wider top/bottom lines, I recommend specifying a custom top skin line width and selecting 2 "top surface skin layers". In Cura this is an experimental feature and I use 0.4mm. It greatly improves surface finish, ensuring the top of prints are as flat as possible with virtually no blobbing.
I don't use it very often since it leads to an inconsistent and unattractive surface finish with glossy filament, but if that doesn't matter I like to use Adaptive Layers. I normally use 0.24mm base height with 0.08mm variation in both directions, so when I'm printing an angle or a curve it's smoother (0.16 layer height), but if I'm printing a flat section it's much faster (0.32 layer height).
Yep 👍
i think it is always-on in prusaslicer.
I wonder if this is the combine infill every X layers setting in Prusa
@@shanold7681 it is.
prusa do that by default
Vertical shell thickness!
I’ve been wanting those purple lines to go away.
Thanks again Angus.
Im REALLY surprised. I finally bought feeler gauges (after blindly using whatever is preset from facrory in sparkplug world
Really great tips! I love how the advice on this channel is always so practical. The seam in particular is one things I've tried to adjust a few times and was never happy with. Interestingly I've actually never considered setting to "aligned", thinking it would show up and I could just hide it by using random. It's not hidden… now it's much harder to clean up since there are bits sticking out everywhere.
It's stuff like this that makes this channel the gold standard for 3dprinting videos for me. Keep it up.
The seam in cura recently is really cool. Its called smart hiding and it aligned for the sphere like in your example but instead of protruding outward in goes in like a nice zipper and I find it a step better and smoother. Thanks again for your tips.
Thanks for these videos. I purchased a Bambu Lab P1S last week and your content is incredibly educational. The printer itself just worked out of the box, but learning about print settings has been so helpful. In one of your previous videos you discussed overhang angle vs layer height and it has saved me so much time and material already. Thanks!
The "ensure vertical thickness" algorithm has changed recently in PrusaSlicer (I think in either 2.6.0 or 2.6.1). Instead of all of the short moves perpendicular to the perimeters, they are now generated parallel to the perimeters. Much less print-induced vibrations.
You also can't remove them now...
This is EXACTLY what i am looking for. A to the point explaination of each setthing to take notes for myself. Thx!
Thank you for this, and all your videos. I've been printing for about a year now, and have learned everything I know only from CZcams since I'm not part of a local community of print enthusiasts. Thanks a ton!
Love it!! I agree with so many of these, including the vertical shell thickness, HOWEVER there are times where the vertical shell thickness is worth it. Models that are more anatomical tend to benefit to leave it enabled so you do not lose detail near the head. Great vid with helpful tips!
WOW!!! What valuable resource for beginners. I recently got a Prusa and have been printing a week now and this is exactly the material I needed to take it to the next level of my fast track crash (and i mean CRASH!) course through the basics. Can't wait to see the difference!
I especially love the explanations as to "why". Great job and thank you VERY much!
I can't adequately express how helpful your videos have been! I've been trying to figure out what the white dots are, and how to get rid of them, since I began printing.
Would have been great if you had printed both and shown the differences in quality between the default printer settings and your custom defaults.
These “Tips” videos are sooo appreciated and extremely under rated. Thank you so much for all your help
Thanks! Plenty more to come.
I really appreciate you explaining why you choose your settings, it helps understand why and when these settings are better
Just an fyi for those who may not know, support cubic is now adaptive cubic.
I like me some Cubic, but man, Gyroid is SO NICE.
Cubic vs Gyroid fight!
@@MakersMuse if you don’t have silent steppers, gyroid sounds like you’ve stepped into an ‘80s arcade when it gets going. That alone endears it to me. :)
gyroid for life
notes for myself 😊
number of walls :4
cubic infil 20%
elephant's foor compensation 0.2
alligned seams
ensure vertical thickness : disable it
This has been the single most useful 3D printing video I’ve ever seen. Seriously! Thank you so much!
I always come back to your videos, well explained, easy to follow and most importantly actually useful. Great job
I've been printing for about 1 year and it's amazing (insane) the amount of i fo I get to pick up on on a daily basis. This was very helpful! 🎉❤😊
Dear Angus, you are so kind regarding empowering us with technology. Thank you. Also I am a 3 perimeter person.
Personally I have found that each different print may require some tweaking of the settings, one setting never does it all.
I do agree the "3 wall parameter" setting is a great over all setting, that I don't mess with much.
And on a side note, I'm really impressed how many options and how great that Prusa slicer works. I've been a hardcore Simplify 3d user, but slowly starting to switch over now
I knew simplify3D had fallen behind but I didn't realise how far, wow. I've really only stuck with it because of how much i paid for it. But I do agree, every print is different and you are always tweaking settings to get the best print for the application. No two prints are ever the same.
Check out the new Cura 5 as well, that really improved my prints.
S3D is really outdated, I wouldn't use it anymore..
Great tips for general printing. I generally use 3-4 perimeters, and I always find myself adjusting the default speeds! Some of this info will likely need updating when the new public version of PrusaSlicer comes out. I think it will be a game-changer. Thanks for always producing useful content!
I really enjoy your videos and your enthusiasm. Very informative and engaging. Well done! Thanks
Your videos are very helpful. It has made my introduction to 3d printing much less painful. Thank you.
I'm considering buying my first printer and this type of video is invaluable. Thanks for taking the time!
Dude, this video was insanly helpful. I struggled for months with elephant foots and didn't even know there where a setting to prevent it. Thank you so much for the Other Tipps as well.
Awesome! Thanks for the comment, glad it helped. Elephants foot was so frustrating to figure out when I first got started too.
"Ensure vertical shell thickness" is now called "Extra perimeters on overhangs" and is off by default as well as being marked as Experimental.
good tips. Thanks. Its good to know your preferences as we know they come from experience
Great video as always 👍
Great tips. I often used adaptive infill.
Thanks for sharing your experience with all of us 👍🙂
3D noob here - and I appreciate this video. Thanks!
Very educational.
That's pretty much my settings on Cura apart from the 3 walls. I've only ever used 2, but after seeing this video I will definitely be changing to 3 walls especially to hide infills.
@2:00 had to rewind because it was too epic to miss. Good one. Thanks for the laughs!
Being fairly new in the 3d printing world, this was absolutely amazing. Cheers.
Future 101 idea, “Detect Thin Walls” , fight with this detail when building my own supports or small details frequently, if done correctly it allows some overhangs that waste far less plastic and time.
I wish the logic inside prusa slicer could handle overhangs better for circle based geometry, struggle with single orientation layers when it could bridge easily by a “spoke style” layer, it requires overprinting edges to get enough support on DIY scaffolding like referencing the above.
This, this 1000x this. When you don't want it creating a bajillion artifacts, 'detect thin lines' is the bane of my existence. when putting in supports, or designing breakaway interfaces into a part, to interface with supports (especially nice, when working on rounded overhangs or other things that BEG to curl / print poorly) it can be a lifesaver.
Definitely one of those 'great power, great responsibility' things.
Thank you, your fine details are explained very clearly. You're including the why with the what & how which makes it make more sense.
You have become my favorite 3-D mentor.
This was really helpful. I've been 3D modeling and printing for years, but I've never really focused much on the slicer itself. Thanks for making the video
Been printing for about 1.5 months and only now brave enough to escape the presets. This was a great video, thank you
Now start designing your parts that actually fit together and do the job YOU want them to do. When I started I soon got fed up with printing someone else's stuff off say Thingiverse and finding that I spent more time making the bits fit together than actually printing them. Want really strong parts? - fabricate them with internal hidden voids to make them even stronger. Walls matter more than infill.
Great tips and great video, now all I have to do is try to remember them and see what happens. I like using 3 parameters and 25 percent infill. It works for me. Thanks for everything 👍
Great video with very clear explanations. I look forward to seeing the differences on my prints. Thanks for sharing.
Great video! I'll try out disabling that vertical thickness setting! Thanks for the tips as always Angus 👍
Thank you for sharing your experience with all of us! this video is really helpful!!
Oh! Thank you for this, I'm still learning and this has addressed multiple issues I've not known how to even research, lol. Excited to give these changes a try!
Excellent tutorial on PrusaSlicer.
Thanks! Just after a few testprints i am convinced to switch from Cura to Prusa Slicer. It just works so much better for my Printer
I use the CHEP super fast profile in Cura which is fantastic. And I've always used triangle infill as CNC kitchen found this to be very good for strength
yet another clear, understandable video. Great job and keep it up!
Great video many many thanks for the seam tip !!
A lot of your parameters tips are corrected by default in the fork SuperSlicer ! But your video allowed me to learn a lot about all these parameters and will allow me to improve the quality of my prints so thank you very much !
Such a helpful video!
I just got a 3D Printer, and didn't know about any of these settings.
It is very helpful. I am glad that I clicked on it!! 🙂
Missed this tutorial. Great channel
This video is top quality content, awesome job Angus!!
Everything is well explained. Thanks for sharing such effective video👍👍
These are really good tips. I'm going to have to try disabling "ensure vertical thickness". I usually pull infill down to 15%, and change the bottom layer to 5 for strength and stability. Some adjustments I make in CAD, though. I normally put a shallow radius on the bottom to eliminate elephant's foot and give a consistent finish, at least with PLA. To make the sides stronger, I'll print the sides at a 3mm or so width. That makes for a hollow exterior wall with the infill, and it's quite a bit slower, but it's very light and strong. A bit like making the side walls of a print with balsa core plywood.
Amazingly helpful video! Thank you!
Amazing video! Wish I'd learned these tricks earlier. Will definitely use them from now on.
Im late to the 3D printer scene but there is SO much information in this one video. You sir, get a sub.
Excellent video, so much useful information for someone like me that is just learning 3D printing and setup.
Thank you!
Angus, as ever your videos are fun and informative - I use Cura, but I completely agree with your observations about seam positioning, I do a lot of repeat printing of the same parts, as I make 3D prints commercially, putting the seam in the same place every time removes those seemingly random blobs from surfaces that should be smooth, walls too - many of my parts are handled by customers, one part in particular was breaking until I increased the wall count to five and the top and bottom thickness to 1.6mm - its a handle for a lever arm, and people turn it, so we had a few breakages in the early days, not any more. No amount of infill solved the problem, I hardly ever use infill at greater than 30% - and gyroid is my go-to. As for elephants foot, everything I print has a 45 degree or steeper chamfer at the bottom, and if its a cuboid, every edge has a chamfer, same with cylinders and holes. The finished parts look way better and take a lot less finishing. As I use OpenSCAD its just been a question of building / finding the right code to do the heavy lifting..
Great job.
I usually go with 80% infill for mechanical parts, I‘m gonna try thicker walls next time and less infill
I change the layer with for the perimeters so they are wider except the external perimeters. So except the outer perimeter if have wider layers. I don't think I loose quality but it goes faster to make the print stronger.
When I want 100% infill, I just print a very large number of perimeters.(Mostly on a tiny part of the part)
The chamfer trick is also a good one. I think Angus also mentions the chamfer one in off his design vidoes.
@@83darksteel yeah, definitely came off one of Angus' videos, along with thin elements to provide support, although I avoid printed supports like the plague, I'd rather chop a model into three and fabricate than print supports. Bitter experience of a model needing 'Everywhere' and then being unable to get the support off without destroying the part.. I use a combination of solvent welding or blunt point self tapping screws depending upon the application.
What's the name of your business? and what are your products? Thanks
@@martyboi We make 3D printed Circular Sock Knitting machines, based in the UK, you'll find us with a swift Google. We could make other stuff of course, everything is made in-house, apart from the metal bits.
I alway learn something new with your videos, thanks a lot :)
Thanks for this info. I am new to 3d printing and this video was helpful and informative.
Just go my first printer. So much useful info. Thanks!
This was an excellent lesson. Thank you.
Great Video, will definitely be using some of these on my prints.
Also to note about the Seam Placement: PrusaSlicer has a paint on seams setting where you can literally tell it exactly where it should place the seam. That way you can place it on the back of models or in internal corners to hide them much better.
Prusaslicer 2.5 hides it so insanely good. Definitely a big upgrade and time saver.
It has hidden the seams better than what I could do after over an hour painting seams on it.
However it might still put them in front instead of the back if the back is a slope (seams on slopes are not good)
As usual thanks for sharing this video and information.
Great and well described tips and tricks 👍!
thanks, always I learn sonething from your videos
Greetings from the Galilee.
Thanks for the little detailes. Very helpful.
This was super useful thanks! Would love to see a part 2 someday!
Thank you for pointing out Seam Placement. I always wondered about these pock marks on my prints.
This was just great and super informative!
"Back in the dark ages of 3D printing..." And then Angus shows a clip of my printers! I still love these old Wanhao Di3's - Modded and refined, tweaked and tinkered over the last decade, they produce some amazing results.
One thing is for sure, I need to look at these new slicers. I'm still using S3D. Thanks for all the hints and advice over the years!
When I make my millions....im going to seek you out. You have been a big inspiration when it comes to engineering......like nikola telsa inspiration. Thanks
Excellent suggestions…thanks so much
thank you verry much for this 5 tricks, you make my day.
Great information! Thank you. I enjoy this style of video.
You hit the exact ones that I change to, right down to the maintain vertical shell thickness.
Thanks Angus, this is great. I like Prusa slicer and appreciate you explaining what the features do. This is great list. I haven't used it enough to recommend any setting tweaks.
Thanks Robert! Glad you found it useful.
Thanks, will try these out.
super handy video. thanks for sharing. this helps a ton
This is fantastic info. Thank you.
I'll definitely keep a look for the vertical shell one, always interested in saving some time, and since i usually increase perimeters too might be a good idea. It would have been really nice to print both the before and after to show the differences on the actual print other than in the slicer, it would have been interesting to see some measures to show the accuracy isn't really that affected.
Awesome vid. Thx for sharing 👌🙌
Just getting into 3d printing and I love your videos! Keep up the great work. 🇦🇺 👍👌👏👏👏👏
I just recently did a print that took 12 hours on my old settings. Out of curiosity I re-sliced the model using these new setting tweaks and it would have taken 7 hours!! I'll definitely be using these from now on.
Thanks for sharing that, you're a champ!
Thank you for sharing your insights 😊
Great advice! Thank you!
FYI: SuperSlicer 2.3 equivalent settings are:
Infill
Infill -> Support Cubic -> Connected
Perimeters & Shells
-> Advanced -> Seam -> Seam Position -> Aligned [Default is "Cost Based". Have you tried it?]
-> Quality -> Avoid Crossing Perimeters -> Uncheck
Cannot find any setting for "Elephant Foot" in SS.
Your experience on "Speed" and "width & Flow" settings will be a great future subject; maybe?
Cheers!
You missed the last one.
Perimeters & Shells -> Quality -> uncheck Ensure Vertical Thickness 14:42
Appreciate your video as I'm still in the 'try it and see how it prints' camp using prusaslicer.
Thanks a lot Angus for sharing this.
Moved from Cura to Prusaslicer tnx to you, and I think it has a lot more settings availible
This is why I love that my printer has community driven profiles for it in prusaslicer which always gives me optimal prints
Great video! Great tips! Thank you👍