Square Knurling with no Knurling tool?

Vložit
- čas přidán 1. 07. 2024
- Want to create Square Knurling but have no Knurling tool? Today I show a technique for creating square knurling on a shop made hand wheel that does not require the use of a knurling tool.
Spindle Indexer video;
• Making an indexing att...
Support the channel;
/ joneseymakes
Buy project plans, 3D printable items and merch!
www.joneseymakes.com/
Check me out on instagram;
/ joneseymakes
Timestamps
0:00 Introduction
1:25 Making a hand wheel
1:47 Making the nut
2:15 Knurling
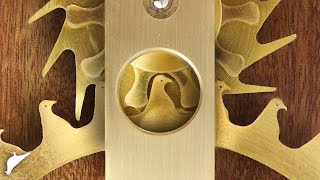
2:44 Square Knurling
3:17 Indexing head
3:50 Clean up surfaces
4:08 Cutting the horizontal grooves
4:57 Cutting the radial grooves
5:42 Facing/Deburring
6:09 Decorative recess
6:32 Parting off
7:55 Laser engraving
8:02 Finished knurled handwheel


Do I have the patience to cut 120 grooves like that? Errrmmm, NO. Hats off to you Jonsey.
Put the radial grooves in first, removing most of the material by machine power. Cut the horizontal ones in one pass, any crap left in the grooves can be re-machined out radially.
Haha, cheers
soo many cuts!!! Looks gorgeous though!
@@joneseymakesworth a sub for the patients to do a fine job indeed.
Errrrm what the sigma
I’m a sucker for knurled knobs. When I was a child I loved the knobs and switches on my father’s Pentax camera.
My dad had a Pentax too, I’m with you on that one!
"I’m a sucker for knurled knobs."
Quote of the year there...
@@ColonelSandersLite LOL!
Everyone loves a good sized knob
Using a lathe as a shaper - nice
That camera stand went from being expensive to now costing a fortune
That came out fantastic!!
I'm sure Artisan Makes is proud of your hacksaw skills...😁
Indeed! Thanks for watching.
Beautiful! Reminds me of the knurl look of camera lens grips. Thanks for sharing!
Thanks for watching
Good to grab with oily hands. Easy to reef down. A little heavy for the app. Jammed up blades are no fun. I like your work. A little light oil constantly applied to the kerf would make parting of a little safer. I mounted my blade upside down and reverse spindle and let gravity help a touch of light oil and feed in slow. Nice work on the Math to result in even no. of spaces. great, short and inspiring. Thanks for your time.
Thanks for the feedback, much appreciated.
Beautiful work. I had a job a few years back making 2000 stainless rods that were 8mm dia, with a 100mm section in the middle knurled like this. I built a fixture for my lathe. It used a single wheel cut knurling tool to put the axial grooves in and the fixture held it vertically, above the part. Then i used a helix knurl cutting wheel that looks like a gear with straight teeth. I mount the wheel horizontally and held it so it could freely rotate. The teeth would cut the radial grooves and as the carriage traversed, the wheel would follow along like a pinion. The cycle time to do 100mm of knurling in 1 shot got down to 1m30s, which was good for 2000 parts
Sounds brilliant. I'm really interested in setups that save time for multiple parts on production runs like that.
@@joneseymakes Yeah it was kind of hacky but did the job. The 'proper' way to make this geometry quickly is to form it with a flat die thread rolling machine. Realistically the dies would need to be EDM'd and would be very costly, so only worth doing if the qty is really up there. Then you'd pop a part out every couple of seconds
@@lawmate Sounds cool
Definitely a solid take-away in this one! Thanks for posting.
Thanks for watching
Perfect job, beautiful results!
Thank you so much 😀
That looks great.
That was awesome 🙏
Thanks man! Much appreciated.
Beautifully executed. The end result looks great. Well done indeed 👏👏👍😀
Thank you! Cheers!
Very nice, I'll have to give it a go!
Thanks!
Very professionally done...❤
Thank you! Cheers!
this knob is amazing, simple but amazing !
Thanks!
Great example of some of the universal uses of a threading tool. :)
Thanks!
Very nice, very clean work. 🙂
Thank you! Cheers!
Nice work! 👏
Thanks!
Those Knipex wrenches are the best!
Yes indeed!
Man that looks so damn clean! Well done
Thanks!
nice i might have to try this
Fine work.
Thanks!
Looks exceptionally beautiful and functional, that's not always an easy feat.
Thanks!
thank you Jonesey.....I bought one of those came clamps
that you are using on the articulated arm [made by Manfrotto in Italy]
all the way back in 1977.....they were marketed by a company in the
USA called Tekno, the distributors of French made Balcar Strobe lighting ...
Tekno called them 'Super Clamps' and they sure were....it was probably
10 more years before Manfrotto started marketing their product here...
Tekno also sold their light stands.....amazing products....cheers, wonderful video...
Paul....in Florida ...I think I paid $29 for the 'Super Clamp' back in 1977...
that would be $150 today...I used for many years as an advertising photographer...
interesting, I didn't know they had been around for so long!
I think the only thing that would make this better is if you took it back off and laser engraved some kind of Easter egg on the back side of the knob for someone in the future to find. Something that will make them scratch their head.
That would be funny :-)
If anyones breaks a replacement knob is £2.30
Thx for the vid.
Impressive
Looks splendid. I think I'd have to anodise it and dye it bright blue because, well, Reasons. You've given me a crazy idea about scripting some G code so I could create an insert and mandrel, then fit the workpiece in a collet on my new CNC mill 's spindle, and mount the tool in the vice. That should make it a very quick job of doing the shaper cuts and the turning. Might even be able to fit two tools in a gang mount to do both operations without re-orienting the tool. Zero fun though, your way is much more satisfying
That sounds like a project I'd like to see!
Yay first ! That wheel is just MASSIVE, but having it be so beautiful its really worth it😂
Thanks, much appreciated!
Nice vid, Cuz 😊
Thanks!
I'm going to use this idea for little finger wheels for very small taps
Good idea.
Nice actually, very nice.
Thanks!
Very nice , I,m thinking shaper , dividing head , got both never used the latter, one day!
one other note Jonesey, they used those articulated arms on the Space Shuttle,
with custom locking knobs......they were for holding cameras and other items ....
they probably have them all over the Space Station........an off the shelf item for space exploration
Very interesting, thanks for sharing!
I made a similar knob for my 143 camera arm, which is the same as yours but has a lever lock instead of a knob. I wanted the knob because you can control how much braking force you apply, while the lever only has two states.
I turned the whole thing from a single chunk of aluminium, and put a thread straight into it. Hasn't given me any problems at all for over 2 years now.
Mine is definitely not as wide though, so i can't gronk down on it hard enough to strip the threads even if I wanted to.
Good job, sounds like it works well
The brass nut *is* an obvious point of failure, but let's steel-man it for a sec. That knob is getting twisted a million times by anyone from Einstein to Frankenstein levels of intelligence and strength, and it is likely to be a point of failure no matter how it is designed; if the nut is brass, then the failure point is replaceable. If the threaded rod failed, you need to throw out the entire device.
Nice
Thanks!
This is exactly the kind of thing that a 3D printer would be brilliant at including the hexagonal hole for a standard nut, as well as a knurled outside. Or even an outside shape like the original part.
I mean you can just drill out the original thread insert with a drill press, and epoxy a hex nut in there. If you can put some grooves into the side, just with a triangular file or with a dremel, for epoxy to hold, it'll be perfect. Not to say i don't love 3D printing, i mean i have had a printer for a long time myself.
When parting, you can step left and right in the groove to open it wider than the parting blade. Also, to remove the little burrs don't use a brush, use a Kratex stick.
Good idea, thanks.
i think it is possible to replace the nut it seems to be either press fit or heat set so if you got a soldering iron you could heat up the nut and slide it out with minimal damage. Then get a new one and heat set it back in and I would recommend adding a helical groove to the out side to give it better grip with the plastic. But the wheel is good too.
Good advice, thanks.
Think I'd have helocoiled it . Nice work
Interesting. Hadn’t thought of that.
Where is the fun in that?
0:58 You answer your own question. It is obvious point of failure since they don't want you to strip the male thread which is more embedded to the arm. Thus the brass nut was used in the knob to fail first if that would ever happen.
edit: However nice work on the knob!
Why brass nut in a knob? In part because it's a standard part. The thread is a heat set insert, they're made from brass so the press tool can get them in quickly and easily by heating the core. Thermal conductivity of stainless steel isn't so high, so it doesn't work nearly as well, but it can be done if need be.
You can get one of these exact knobs in just about any (Chinese or European) hardware store, and brass is guaranteed not to go distorting and shaving the threads of the shaft, as opposed to steel. So it's a good mode of wear.
Very interesting, thanks for the info
The only things I would do differently Jonesy, is to use WD40 as a lubricant. I then think you would need less lasses on the horizontal side to get to your depth and you will get a cleaner looking cut. Also I would grind a dedicated tool with equal side rake, and have a top rake of at least 10 degrees and keep it level horizontally, so it cuts equally and gives a good finish. Great job though!
Great tips, thanks for that. I will try next time.
Usually you can just stick a soldering iron into the stripped nuts that manufacturers put in those knobs. It breaks the glue after a moment and you can just thread a nut in, pull out the stripped one, and put in another nut.
Interesting, thanks.
You can use a soldering iron to remove the old brass nut from the original wheel and then use it again to push a new one in.
Thanks. I’ll give that a go next time
in gunsmith work we use a checkering file and i believe this would help a lot with the lateral lines...you just cant chose the width of lines but much faster.
Thanks, I'll check that out.
gun smith checkering file seems like the go for this
Nick, I'm always so impressed with your aesthetic builds. Very clickspring-like watching experience(that's a compliment of the highest order, by the way)
One thing I must ask - where did you get that camera arm? I've been looking for something like this for months now and only come up with cheap amazon versions.
Thanks, much appreciated! It's a Manfrotto arm. I think this is the one;
www.wexphotovideo.com/manfrotto-244-variable-friction-arm-with-bracket-1540551/?cpgnid=17870678074&adext=&account=853-353-2386&campaign=&group=&mkwid=_dc&pcrid=&kword=&match=&plid=&pgrid=&ptaid=&si=&gad_source=1&gclid=CjwKCAjw0YGyBhByEiwAQmBEWvOHGmJMtwliFldO9cIO_ky3jy4Inx1KQI2tzd7xHqN_MhR8OOedDBoCV5MQAvD_BwE
well done. I suggest an anodic treatment, to make the surface harder.
Thanks, I’ll have to research how to do that!
Where did you find that camera arm? I use the same setup for phone filming but haven’t found one hefty enough for a dslr.
www.wexphotovideo.com/manfrotto-244-variable-friction-arm-with-bracket-1540551/?cpgnid=17870678074&adext=&account=853-353-2386&campaign=&group=&mkwid=_dc&pcrid=&kword=&match=&plid=&pgrid=&ptaid=&si=&gad_source=1&gclid=CjwKCAjwl4yyBhAgEiwADSEjeFuyT2ViFzWjNujOx-pq78T3MHcuUwOBgNG3tH7cGeuomWrh0FUgzBoCjDkQAvD_BwE
Or use the right tool for the job? Saves time and money.
Maybe hollow it out to save weight?
Not a bad idea, it's not super heavy as it is but that would be worth doing
I have the same lathe. First time I have seen another one! Put some good soluble oil in the coolant tank and run it onto the parting tool. Feed it like you mean it and it will cut fine. The worst thing you can do with a parting tool is be too cautious. The rpm was probably fine given it is a carbide tool, just need the appropriate feed and tons of love juice on it.
I’ve never set up the coolant, I should get that going. Thanks for the tip. How do you find the lathe?
I bought mine new in about 1997. It is still as good as the day I got it! Definitely not the most rigid machine out there but a good combo of size vs capability. The coolant tank is really handy, problem is it sprays fricken everywhere if you get it on the chuck! Make sure to use a modern coolant like the stuff for cnc machines. One time I used some old soluble oil and it left rust spots that are a constant reminder to me! Modern coolant wont cause rust, I use it in all my machines.
@@ashesman1 Thanks, I'll try the modern coolant then, which brand do you use?
I use cimcool cimstar 585P. But there are a lot of personal preferences and depends what is available locally. I use it on my manual mill and cnc tool. Lasts well, doesnt get alge in it. Makes your shed smell like a cnc shop.
@@ashesman1 Great, thanks for that.
Looks very nice, but I probably would choose it a bit smaller and hollow it out for less weight. Unless of course you rarely need to transport it around.
Thanks. Good suggestions
Nice job, and patience on those groves. What is your Laser?
Thanks, it’s an EM Smart. There is a video on the channel about it.
Sodium hydroxide makes a good enchant, the corrosive action as well as the gassing will munch into the burrs. Maybe even a precursor to anodising , but not with the steel insert.
Thanks for the tip John
@@joneseymakes try it on some test pieces. The more fizz the better, so hot if you can!
If you have a shaper you could do he horizontal groves with a rotary table
Very true, a shaper is on my list of wants!
That's great, would it be better to mill recesses in the back to make it lighter so not to overload the arm?
Yes, a good idea, thanks.
Hi Jonesy.... I've only just come across your channel and I'm hooked!
You do some really good work and you're not ashamed to highlight your cock-ups. But I do have one point to address?
That is when doing hand file work, you do not always use a file handle. I'm not singling you out, I have noticed a lot of You Tubers doing this too. All well and good, right up to the point when you have to visit A&E to have a workshop tool removed from your wrist!
Keep up the great work & content, but most of all..... STAY SAFE
Thanks, and yes, I have now fitted handles to all of my files. Many thanks.
Great vid, thanks. You might like a video by a guy called Pask Makes (maybe your brother?) with a bunch of bandsaw upgrades including how to clamp different size parts.
Thanks, I know of Pask Makes (he's not my brother!) I'll check that video out. Thanks
7:23 If you'd have made the mandrel a little sooner, could you have maybe held it in the handsaw vice and finished at least most of the cut that way?
I tried that, but unfortunately it still wouldn't fit.
You need one of those Evolution Saws with a cutting aluminum blade. It’s a chop saw in miter and non-miter versions. Or you can get a Milwaukee metal cutting radial saw. Or floor-standing band saw. Porta-band by Milwaukee is an option as well. In the next Jonesy video, I will show you how to add a horizontal table to my bandsaw!
The square knurl looks awesome, I dare say I like it more than the traditional knurling. 👍👍
Do I sense there's an upcoming project in a future video, like a new movable guide for your band saw? 😂
Good idea!
What laser did you use for the logo? Logo looks great!
It’s an EM Smart. If you look at my channel there is a full video on it.
The reason the manufacturer designed the original part that way is so that if it breaks the average person will be forced to buy a new one, means they make more profit
The brass nut failing is a feature, not a flaw. In industrial design a weakest link is made into a product to serve as a mechanical fuse. If excess force or wear occurs, the cheap and/or easy to replace part fails as a way to protect the mechanism. As experienced here, the nut failed and the arm was reusable once the nut/knob was replaced.
Makes sense
Nice work! Reminds me of Technics feet :) Could you not hold the part in a toolmakers vice, then hold that in the band saw jaws?
Thanks. Yes I remember those Technics feet, so cool. I probably could have in hindsight yes, but didn't think of that at the time.
Put a bolt into the brass nut and apply heat to it. Once the brass nut is hot, it will pull right out of the knob. Replace it with a steel nut with heat or epoxy and boom, problem solved. Or spend many hours machining a prettier one. I would do A because I'm lazy.
The method could be used to cut splines into a raised band at the center of the threaded insert to stop it spinning.
Good idea!
Man a checkering file would even be faster than turning your lathe to a rose engine 😂
I get it. I live for the tedium too
Maybe so! I’ll have to get myself a checkering file
I know this is super late but, since you needed to use the mandrel to face the back side, couldn’t you have used a square mandrel (tapping the end to fit the hand wheel obviously) and then use that to mount the part in the vise on the bandsaw? Or would the part have been oriented so that it would have unscrewed? I don’t actually do any of this stuff myself but I hope to someday 😂
Good idea, but the odd shape of the part meant that wasn't an option.
Lovely
Thanks!
好手藝
謝謝你
I know it's not original, but you could benefit from a camera gantry system similar to IM's. 🤷♂️
Still tho, awesome knurling technique, I will definitely be using it on some of my projects :)
Yes I could do with one of those!
Next project: Microprocessor controlled indexing tool!
Good idea!
Definitely needing a cut relief at the end, otherwise it's easy to destroy the cutter in the back pass.
Lots of work, but really good end result.
Planning of a correct diameter, is crucial I guess otherwise it's not fun when you end up doing the second last line, and it ends up too close 😮
Have you any experience using those aluminium inserts on steel ? (I have a small lathe, and regular steel inserts generates pretty big cutting forces)
I use those aluminium inserts on steel but only for very light cuts. You get a great surface finish but they don't last long
@@joneseymakes OK, thanks, might try them !
I woulda just superglued a cut-down scrap box-end wrench to the nut, but I guess that's why I'm not an artist. XD
You can replace the nut without destroying the knob; it's doable, but it's painful, though...
At 0:53 you ask why the manufacturer made this design choice, and then you IMMEDIATELY answered your own question: because it's an obvious point of failure. It inevitably fails, then the customer has to buy a new one.
mechanical poetry with some bumps down the road
edit: question though: even the brass grooves were worn off. aluminum being a softer metal won't it cause any problems in the future? maybe embed a steel nut instead of tapping the aluminum?
That’s exactly what I did. Didn’t want it to strip again.
lil piece of advice, dont pour the lube on top of the cut when parting, its gonna get blocked by the chip, and wont reach the edge
Ok thanks
You really need a hand band saw 😂 that hack saw looked unfun af
Indeed!
How long did it take to cut all of them cross cut grooves?
It seemed to take ages at the time, probably 90 minutes, something like that.
Wow, I’m not sure I’d have had the patience to do that.
You turned your lathe into the world's slowest shaper!
On the plastic knob, did you try screwing a bolt into it, heating it and pulling it out? Then epoxy a new nut in and Bob's your uncle. If you are going to make a new one, then you might as well try.
I didn't try heating it up no, I figured I'd destroy the plastic knob.
I've noticed if you over tighten those indicator arms you can eventually cause flat spots on the wedges inside the mechanism and it never works properly again.
Potentially made so the thread would strip long before you do any damage inside?
Or it's just a rubbish design like you say 😂
Good point, I'd not thought of that.
Класс!!!!
Спасибо!
Oh god, no, I would have gone insane
What laser are you using ? ^^
EM Smart basic one. There is a video on my channel about it.
@@joneseymakes Thanks !!
Nice part, perhaps obvious but you could've mounted the mandrel into the bandsaw.. 😂
I tried that but it still wouldn’t fit!
Does anyone know the generic name for these kinds of mounts? In the film industry the informal name is an “Israeli mount”, but surely this type of device has been around longer than the 1940s, right?
8:18 almost every row of knurls is a different width
1:16 wie wäre es mit einem schraubenschlüssel
4:08 how much time take this
It took about 90 minutes
Planned obsolescence is when products are engineered to be replaced for repeat purchases.
True!
So have you tried getting like 6 nuts in a row and then just weld them together?
The problem is the leverage. You need quite a good sized wheel to get the purchase on it when tightening by hand.
I would have just welded a big ass wing nut, but then we wouldn't have a cool knurling video now would we
Indeed! Why do something easy when there is an opportunity to needlessly over engineer it?!
I’d just weld two wings to a common nut, make it a butterfly nut. Easy peasy.
Now you have an oversized knob with a camera stand and a video though…