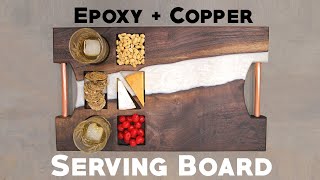
Quick how to make an epoxy resin board like a Pro with a coffee shop vibe

Vložit
- čas přidán 4. 05. 2024
- #Epoxyresinboard, #coffeelover, #epoxyresinart #diywoodworking
In this video, I’ll do a quick run through of how I make epoxy boards with a couple of tricks to help with epoxy resin pours.
I’ll also go over a different technique I use to finish my epoxy boards giving them a mirror-like finish. Handles are optional.
I apologize but I did lose some video of me sanding the bottom edges of the board after the flood coat. I just started back with 80 grit and worked my way back to 320 and finished the bottom with mineral oil.
These make great gifts for any occasion!
If you have any questions don't hesitate to ask in the comment section below!
I go over how to drill holes for the handles in this video: • Walnut and Epoxy Resin...
(Skip to 11:12 to see handle install)
If you enjoyed the music in this video and would like to use some music of your own check out Epidemic sound! www.epidemicsound.com/campaig...
Level up your SEO on your social media platforms using the link below!
vidiq.com/greentree
-Links: (As an Amazon Associate I earn from qualifying purchases.)-
► Dewalt Planer: amzn.to/3Nl5aTZ (Amazon)
► Starbond Adhesives: amzn.to/3qwT8xm (Amazon)
►High grit sandpaper: amzn.to/37vymaq (Amazon)
► Kreg Handle Jig: amzn.to/3uqOW35 (Amazon)
►2:1 Epoxy used in this video: amzn.to/3iy6wwE (Amazon)
►1:1 Table top Epoxy used in this video: amzn.to/3DTEe9E (Amazon)
►Clamps: amzn.to/3JEwfPS (Amazon)
►Mixing cups: amzn.to/3DWXLGn (Amazon)
► Black diamond pigments
blackdiamondpigments.com?sca_ref=839379.uW7R34l4Ek
For help growing and making the most out of your youtube channel check out these guys at the link below
► TubeBuddy: www.tubebuddy.com/greentree
-Non Affiliate Links-
►Crafted Elements 16x12 mold: craftedelements.com/products/...
DISCLAIMER: This description contains affiliate links, which means that if you click on one of the product links, I’ll receive a small commission. It does NOT cost more money to use the link. This helps support the channel and allows us to continue making videos. Thank you for the support! - Jak na to + styl


Give us a follow on instagram and facebook: linktr.ee/Greentreewoodworksco
Great Video
well i have watched so many vids on epoxy/cutting/sanding, I cant count.... but I have to say I so so enjoyed this... me being a wood novice this is so easy to understand and feel I can achieve this, you are now my go to... the best I have seen...thankyou so much please don't stop the vids they are great.....👌👍
Gorgeous! I need to make this!
Thank you so much! Yes I would recommend everyone capable of making these to make one. 👍🏻
First time watcher. Thanks for your time and teaching, I’ll be watching from now on. Thanks🤠
Thank you! 🙏🏼
Turned out great!
Thank you so much 🙏🏼
nice job, board looks great.
Thank you! 🙏🏼
The rice trick is such a good idea. Thanks for that
Not a problem! I can’t take full credit for it though. I saw it on a video somewhere in the past but don’t remember who posted it.
That’s brilliant!
I’m still kinda confused on the rice. How do you get the ratio, Volume, you need for both parts. So for the question, I’m new at this. And don’t have a clue. Thanks@@greentreewoodworks6172
The rice trick is solely to get the total volume needed for the project. After you have the total amount you can divide up the ratios
1st, I love your planer sled.
2nd, that rice trick is neat!
3rd, how hard is epoxy on planer knives?
4th, people on CZcams being judgemental??? NEVER! Ha ha ha 🤣 😂 😆
Haha thanks. Epoxy is definitely worse on the planer knives than wood is. I guess it’s just part of the cost you have to factor in when making these.
Judgemental people don’t bother me, it’s just part of posting on social media haha.
That wood is beautiful!
Yes, I love Olivewood!
Nice .. amazing work
Thanks a lot!
Looks really great 👍
Thanks 👍
I love epoxy so much❤everything related epoxy is amazing. Good luck new Friend.
It is! I appreciate it!
Beautiful design work sir 👍👍👍
Thank you! 🙏🏼
Fantastic, love the rice trick, I always wondered how to guestimate the volume of epoxy. Thanks 😊
Lol I’m still confused on the rice, was he measuring for the whole thing? And how do you know how much harder to put in versus the epoxy. This is all new to me. And just get confused on how to figure how much is needed, and if I measure in Oz, Vol, Etc.
@@jamesbarlowjr.3762 pass lol
Good question! So the rice trick is one method of estimating volume. When doing this you’re measuring for that specific layer you’re about pour. Different types/brands of epoxy have different ratios. In this case I’m using “Super Clear Epoxy”. If I was using “table top epoxy” the ratio is 1:1. So I would take the volume of rice that I used (add 10% to make up for the air gaps rice has compared to a liquid) and divide by 2 to give you the amount of hardener and resin needed.
The deep pour I use is 2:1 so you would do the same except you would divide by 3. But now we’re getting into explaining how to add/subtract fractions which can be a confusing topic lol.
@@greentreewoodworks6172 Good Morning. Now your explanation works for me. So the rice is just giving you the total amount needed as if it was resin and harder.
Is the rice a pretty accurate way of determining the total amount needed? Seems like a nice trick! And again Thanks for sharing that trick, cause like I said I have never worked with it. (It’s like a little handicap) I like it! And just kinda nervous and don’t want to waste material or wood if it’s not right. I hate throwing things away. Lol. I purchased the Total Boat thick set. What do you think on that brand? Hopefully it’s user friendly. Thanks so much for responding and clarifying. That helps a lot. 🤝
Yes, the rice is for the total amount needed. I understand not wanting to waste any. I’ve had/made coaster molds on stand by for any waste. As far as total boat goes, I can’t speak for it as I’ve never used it. But from my understanding Total boat and Super clear are the 2 most trusted brands in the business! I do think total boats pump system they have is genius 👍🏻
Hi excellent superb job. Very well demonstrated. I have one question. I have heard on you tube , if you sand beyond 400 the surface become so smooth that top code will not stay. How did you do that ? I appreciate your input.
Спасибо за идею. Работа и полученный проект просто шикарны.!!! Дальнейших успехов в творчестве
Thank you 🙏🏼
Nice tutorial. My advice to you is to handle epoxy wearing gloves, protective glasses/face mask... anything that prevents direct contact with your skin really. I underestimated the dangers of it and ended up suffering a serious allergic reaction (swollen eyes, itchy dots all over my body,...). This doesnt go away on its own either but had to be treated with different pills. Stay safe!
When you did your vinyl coat of resin, how did you protect the underneath?
Very helpful video. The content you share and the guidance provided are truly beneficial. I've watched many videos on this topic, but your content is truly excellent. I believe the knowledge I've gained from your video will be very helpful for my upcoming project. Thank you so much. Wishing you and your channel continued growth.
Thank you so much! This is very motivating! I enjoy making them!
We just moved and started building a new house but hopefully I can get some more videos out soon!
Really great tutorial and finish piece. Could this be used as a working cutting board? I have a few projects in mind but the majority of the surface area would be epoxy. Subscribing for sure. Thanks.
Thank you! I never recommend using an epoxy board to cut on as it will scratch the epoxy. However, I usually tell people you can use one side to cut on and then the other for display (for the ones without handles).
I suppose if you have the means to make one then you are able to sand and buff the scratches back out though!
If you food coat at the end of the project, you did not hve to sand it to 4000. You could have stopped at 320
Fantástico
Thank you!
Great video. Thanks. Do you have to seal the wood with anything before pouring? I guess you have to get rid of all the dust and loose particles etc.
You do. I didn’t seal the wood on this tray but some go ahead and take a small paint brush and seal the wood with a thin coat of quick drying epoxy before laying it in the mold. I guess it depends on how porous the wood is. It does help with those micro bubbles. Thanks for watching!
Beautiful, unique work. I was curious how the handles were attached from the base of the board. Simply countersink?
Yessir!
What router bit did you use?
Do you throw away the mixing cups once used?
9:06 like the rice trick.
Thanks!
What mold did you use?
Will you add a link to where you got wet sanding pads with that high grit?
Glad you said that. I meant to and forgot
Thank you for sharing the video. The board is beautiful.
I am new to this world and I have two doubts:
1. After the last application of Epoxy you don't do any polishing?
2. Where can I get the silicone molds? I can't find any molds larger than 30 x 20 cm (11.8 x 7.9 inches).
Thank you!
1. On this board I used Olive wood which is very tightly grained, combined with fine sanding it was very easy to get a smooth finish on it. I have to polish with other woods and sometimes up to 4 top coats of epoxy to get it smooth.
2. I get my molds from a company called Crafted Elements. They are located in Canada but will ship them to you. I think I have a link to their website in the description of this or another video. You can also look up “Backyard resin” they sell molds as well.
I’m not going to lie, I’m confused, the board is super nice, but why sand that high only to add epoxy. The point of a top coat is to fill in any abrasions.
The way I look at it is the smoother it is the smoother/flatter/clearer the top coat will be. Since it was that smooth beforehand there was no need for buffing or sanding afterwards like some do. Either way works.
I was mainly going for maximum clarity since it is clear resin.
you don't need to sand that high if your just gonna pour another layer. you could stop at 180 then pour
I believe this way works on resin with pigment I’m just not sure I’ll achieve the same clarity with clear but I’ll give it a try on 1 of the other boards I’m working on now. It’s already at 220, but same difference.
@@greentreewoodworks6172 I was going to ask the same question. Why sand to 4k if you were going to add a final layer of epoxy. you said you will try adding the final layer after sanding at 200, please tell us how it turned out. And yes. The board looks amazing
I did sand the other board to 220 before applying the final coat and I did have to sand/buff afterwards.
I had to get new editing software so once I familiarize myself with it I’ll post my results. Thanks for the questions though, I’m always looking for more efficient ways to achieve the same final result.
nice! but you don't need to sand to 4000 if you're going to put a top coat on it, save yourself some time and be done at 320, if anything the top coat should be sanded and polished.
When you saw it was wobbly and ran it through the planer, how do you know you're done?
If you flip it over and lay it on a flat surface (table saw is usually a good reference for “flat”) and try to wobble it and it doesnt move anymore then it’s considered flat.
After you’ve ran enough boards through you can usually look at a planed board and tell when it’s flat just by looking at it. Haha.
Nice piece. Do you have to remove the bark?
Yes if you don’t remove the bark the board could separate at the bark seam.
Do you have problems with micro-bubbles?
When you do final coat of epoxy, Do you do both sides?
It depends on how much work you want to put into it. Usually I just put mineral oil on bottom but I have done epoxy too. It’s just unnecessary.
How do you address the exposed beans? This could become an issue down the line if left exposed.
Good question! To remedy this when I did the top epoxy coat I made sure the exposed beans were coated well. Otherwise you just place them in the mold in a manner where they won’t be exposed.
Why do you use a sled in your planer?
Did you let the epoxy dry at all between pours at the start between the pearl white an beans? Or was it all one pour before drying. Thanks!
In this video I did the pearl white as one layer by itself using Super Clear epoxys 2:1 “deep pour”. The coffee beans were a layer by itself as well using the deep pour, and the final layer was just clear deep pour. Each layer required 3-4 days of drying time. This was a personal preference.
You can get by with using the table top 1:1 mix epoxy and you’d only have to let it dry 24hrs between layers. It’s a preference. Good question!
Thanks! Good to know!@@greentreewoodworks6172
Did you have to use the starbond since you were covering in epoxy?
You don’t have to but it’s helpful. The more you fill beforehand the less bubbles you’ll have to worry about later.
@@greentreewoodworks6172 makes sense. Thank you
After you poured the tabletop epoxy as a final finish, did you sand that through all the grits as well? BTW, the board looks amazing
No, after I poured the tabletop epoxy I left it alone to cure other than popping any bubbles with a heat gun that showed up on the surface. I did have to sand the bottom. I lost that video though.
Do you use any kind of resin release?
I did not. But the more you use your mold the harder it gets to come out so I’ll probably start using a mold release soon.
If i may ask. What is the point of multylayer epoxy in this case? I saw some epoxy which will thicken up to 5 cm. I mean i understand the first one, so the beans get sticky but the other ones i dont get.
So the 2nd pour was a deep pour epoxy to fill to the top of the wood. The 3rd pour was table top epoxy. The table top is optional. Some just sand/polish to a shine. I do a table top epoxy on all my bean boards since I have a few exposed beans along the sides. And I prefer the shine on the wood almost like a clear coat. Hope that helps!
Question- you drilled the holes prior to pouring the epoxy, how much epoxy did you lose when it leaked through the holes?
It’s probably about a teaspoon or so. I lose way more epoxy off the sides than I do through those holes. I just don’t like the idea of clamping my handle jig down onto a finished piece and chance scratching it. You do have to clean out the holes with the drill bit again but the bit will follow the holes that are there.
just a quick one really. Im wondering why you bothered to sand up to such a high grit level before using tabletop epoxy. was the tabletop epoxy an after thought after the finish wasn't quite what you wanted?
the only reason I say this is that potentially if the board is bashed around a little, I.e dropped accidentally, the brittle tabletop epoxy doesn't have a strong mechanical bond to the highly sanded epoxy below, potentially allowing it to chip off the corners etc. Nice looking board though! Ive never used Olive wood before. Its on my to-do list. Good work dude
I never considered the bond between the epoxy and a smooth surface. Good point. I’ve answered this in another comment on here but I guess my thought is “The smoother you make it up front the less sanding/buffing you’ll have to do in the end.”
Which that olive wood is so tightly grained that that board might have just been an exception. Walnut and other woods that are more open grained doesn’t seem to finish as smooth. I have to do 2 sometimes 3 coats of table top epoxy on them.
What finish did you apply to the bottom side
I lost the video of that but after I sanded the drips off the bottom and got the bottom back to 320 grit I applied food grade mineral oil.
@@greentreewoodworks6172 thanks
I’m a rookie and want to start to making these. Quick question, why do you put your piece on another piece of wood before throwing it through the planer ?
It’s a planer sled I made. This is a popular technique that allows you to make one side flat if you don’t have a jointer. Technically you’re supposed to lay the piece down, shim it, and hot glue it down. But on this board I had one side that was already flat.
Once you have one side flat then you can take it off the sled and flip it over to plane the other side.
@@greentreewoodworks6172 thank you!!
Why do you send it through the plainer over and over?
With the planer you only want to take about a 1/16th to 1/32nd off at a time sometimes even 1/64” especially when working with epoxy. If you have about a 1/4” worth of material you need to remove in order for it to be flat you’re going to have to make multiple passes or the planer will bog down. An example would be cutting extremely tall grass with a lawnmower bogs down the lawnmower so you have to make multiple passes sometimes.
I recently bought my first piece of "real" wood. The only thing is it does have some splitting. Will the resun fill that in or do I have to do something special?
The resin will fill that in as long as it’s not part of the bark. I would recommend cleaning it up as much as much as possible. You could use a piece of sandpaper to get down inside the split, or dremel tool, air compressor, or really anything you have just to make the split clean.
@@greentreewoodworks6172 thank you
Why do you have to remove bsrk from live edge?
The bark can fall off or the board/table will separate at the bark-sapwood joint unless it’s prepped and cleared. I would like to make a table keeping the bark on one day.
Very nice. Did you apply a finish to the epoxy? Or just wet sand to 3k?
I wet sanded to 4k and no the final finish was the table top epoxy. Sometimes I will buff with a compound with a non woven pad but on this particular board it wasn’t necessary.
Did you prep the coffee beans? I blotted them dry with a paper towel.
I’ve seen different ways of adding coffee beans. It’s probably over kill but I grab small hand fulls at a time and blow the coffee bean scraps/small broken pieces and dust off. I don’t like anything but the coffee bean itself in there.
After that I just mix them into the 1st clear pour when the 5 min of stirring is up then I just stir them until I think they are saturated enough. I then pour the bean and epoxy mixture in and let it dry on its own. Be sure to watch it over the next 12-18 hours (for the 2:1 ratio, 1:1ratio would be 30min to 1 hour) and pop any bubbles that appear.
@@greentreewoodworks6172 thank you ….. mine floated up after I poured the clear epoxy. I took a syringe and remove it. I am letting it dry thoroughly then I will pour a layer of clear. Hoping that works! Thanks for you feedback……
Can you tell me the size of the slab you used and where you bought it?
The slab was 5/4 thick and maybe 5ft long and maybe 2ft wide at the widest part but Olivewood slabs are normally very oddly shaped.
I bought it from a local hardwood supplier called West Penn Hardwoods. You can usually find a hardwood store within 30 to 45 minutes of any major city. That I’ve seen anyway.
@@greentreewoodworks6172 Thanks for the info!
What was the thickness of this board?
Final dimension was 1”
Nice board but you didn’t need the rice to get measurements for epoxy. Just take average from distance from side and height and length. I use liquid glass also. Good stuff👌🏾
Thank you! And I agree, I actually just heard about that formula yesterday off of one of Blacktail studios videos haha. This is one reason I make these videos. I personally learn so much from my mistakes and in this case better methods of getting the same result.
@@greentreewoodworks6172 great looking board keep sharing videos when you can
When all you had to do is topcoat so why so much sanding?
Where did you get the mold?
I got the mold from a company called Crafted Elements. I think I have a link to their website in one of my videos.
I have a legit question, from one maker to another....maybe you can shed light on: why would you sand your piece to 4K grit and then flood coat the whole piece with resin? I've never worked with olive wood, so I don't know if the wood is too porous to take a proper finish. I'm not the biggest fan of total high gloss resin flood coat finish...I will do it if my client requests it or if I'm using a very soft/porous timber, like box elder. However when I do use a flood coat technique, I'll only sand to 220/330 grit so I get a good mechanical bond. Personally, my favorite combination is to polish the resin to a mirror finish and keep the wood a satin or semi gloss finish. I like the contrast. I was just curious about your technique my friend... God bless...
Good question. So olive wood is actually a very non porous dense wood. However it’s pretty expensive and I wanted to protect it as well since the board itself is designed to have bowls, plates, cups whatnot sliding on it. I’ve sanded olive wood to 320 grit then flood coated it and it had bubbles in it like other woods. To be honest, it was unnecessary for me to sand to that high of grit for an epoxy top coat but this was actually a last minute experiment for me that just happened to turn out right. My goal was to achieve the desired look with only one epoxy top coat and I thought maybe if I went ahead and sanded it to a higher grit it would work. I found that with olive wood it seemed to work but not with Walnut or other similar woods. Hope that helps!
Why do you have to wet sand?
You don’t have to wet sand. It’s usually used in the polishing stage. I just tried to do the “polishing stage” before epoxy coat to keep from polishing. Little bit of an experiment.
Watching the video, you sent ypur wood through the planer multiple times before your next step. Why?
I’d make one, if I had $10,000 dollars worth of professional woodworker tool’s.😮😂
I mean…minus the $500 planer, I used maybe $400 worth of tools in this video. I wish I had $10k worth of tools!
Noooo, sanded that far, could have gotten it crystal clear with a rubbing compound and then polish
I agree. I wanted the epoxy coat to give it an extra layer of protection though and in my personal experience other boards I’ve made that were sanded to 220 or 320 I’ve had to pour multiple coats to get it as smooth as this one.
Olivewood does have a tighter grain than a lot of other woods though so it’s possible this could be the reason.
Painful watching you sand to 5000 just to cover it with Epoxy again, completely defeats the point, you could have stopped at 220-320
Lol I know I know. You and about 15 other people have said the same thing. I was somewhat experimenting. Trying to reduce the coats needed/little to no polishing.
My conclusion was that it did work but only with Olivewood and possibly other woods that are comparable. Walnut, maple, other common woods…no it didn’t change anything. I’ve since been stopping at 320 grit.