2003 - 2008 Toyota Matrix Corolla 1ZZ-FE Timing Chain Tensioner DIY using the Toyota FSM Technique

Vložit
- čas přidán 5. 05. 2023
- This video shows the Toyota FSM technique for replacing the Timing Chain Tensioner (and O-ring) on late 1ZZ-FE engines ('03 - '08 Corolla and Matrix). This technique is the most conservative and "fool-proof" method for this repair and requires removing the Valve Cover, which is shown in the video. Check the Pinned Comment or below for more info:
Timestamps, Part numbers, Torque values:
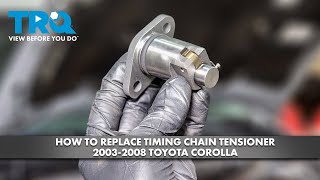
00:27 Timing Chain Tensioner location and oil leak pattern
01:27 Explanation about the variety of methods for this repair
04:19 Why the Tensioner must be extended properly
05:03 Why some mechanics charge for a Valve Cover job with this repair
05:41 Differences in this video versus some other videos (FSM technique)
09:03 Begin Removal of the Valve Cover, make a bolt template
10:37 Disconnect the electrical connectors for the ignitors
11:48 Remove two fasteners for the electrical harness (10mm)
12:18 Remove four bolts for the ignitors (10mm)
12:39 Remove the ignitors
13:35 Disconnect the breather hose
14:04 Disconnect the hose to the PCV valve
14:44 Locations of the Valve Cover fasteners (ten 10mm, one 12mm)
16:06 Slip the harness off of the three brackets for easier access
17:22 Remove the Valve Cover fasteners
22:17 Tie up the electrical harness for easier access
22:47 Remove the Valve Cover
25:12 Turn the crankshaft clockwise to TDC/Compression (19mm)
27:25 Detailed view of turning clockwise to TDC/Compression
29:02 Detailed view of timing marks
32:04 Demonstration: making another two crank turns to show how the
camshaft timing marks align every other crank rotation
34:03 Clean up the old gasket maker/RTV at two spots on the head
36:31 Remove the Timing Chain Tensioner (two 10mm nuts)
39:26 Don't turn the engine with the Chain Tensioner out
40:02 Chain Tensioner on the bench (Toyota 13540-0D010) and O-ring
(Toyota 90301-22013 or JIS P22.4)
42:12 Remove the old O-ring (if just replacing the O-ring)
42:46 Experiment: I treat the new O-ring with Dow Molykote 55 O-ring
grease
43:25 Install new O-ring to the Chain Tensioner (use a sleeve if possible)
44:54 Retract the Chain Tensioner piston onto the little hook for install
46:36 What's inside the Chain Tensioner?
50:19 Install the Chain Tensioner (80 inch-lbs)
53:29 Review of Toyota FSM procedure for extending the Chain Tensioner piston/plunger
58:38 Slide of the FSM procedure
58:41 Boroscope view of Chain Tensioner
1:00:07 Using the FSM procedure to extend the Chain Tensioner
piston/plunger
1:03:41 After extending the Tensioner piston/plunger, verify tension and
timing with two clockwise turns
1:07:35 Slide of the FSM Timing Marks note
1:07:47 Note about using a screwdriver to release the piston/plunger
1:08:10 Remove the old Valve Cover gasket (Toyota 11213-0D040, or Fel-Pro
VS 50542 R)
1:09:18 Install the new Valve Cover gasket
1:11:00 Clean the Valve Cover gasket mating surface
1:11:20 Apply FIPG/gasket-maker/RTV onto two places on the head (I use
Permatex Ultra Black RTV)
1:13:30 Install the fasteners for the Valve Cover (Perimeter bolts/nuts: 96
inch-lbs; Center bolts: 80 inch-lbs)
1:17:04 Reconnect the electrical harness to the brackets
1:17:50 Re-install the ignitors and bolts (80 inch-lbs)
1:18:13 Re-install the electrical harness fasteners (80 inch-lbs)
1:18:40 Reconnect the electrical for the ignitors
1:19:06 Reconnect the two breather hoses
1:20:14 Allow the RTV to cure then start the engine
1:20:54 Clean up the oil leak (if applicable)
This is the experimental JIS P22.4 75 Durometer FKM O-ring I used in the
video:
www.oringsandmore.com/fkm-o-r...
minimum-3-pcs/
This is the experimental O-ring grease (Molykote 55):
www.amazon.com/Corning-Molyko...
Lubricant/dp/B01HEC1W3A/ref=sr_1_6
I hope this video was helpful for you.
Thank you for watching, and good
luck with your repair! 👍 - Jak na to + styl


Timestamps, Part numbers, Torque values:
00:27 Timing Chain Tensioner location and oil leak pattern
01:27 Explanation about the variety of methods for this repair
04:19 Why the Tensioner must be extended properly
05:03 Why some mechanics charge for a Valve Cover job with this repair
05:41 Differences in this video versus some other videos (FSM technique)
09:03 Begin Removal of the Valve Cover, make a bolt template
10:37 Disconnect the electrical connectors for the ignitors
11:48 Remove two fasteners for the electrical harness (10mm)
12:18 Remove four bolts for the ignitors (10mm)
12:39 Remove the ignitors
13:35 Disconnect the breather hose
14:04 Disconnect the hose to the PCV valve
14:44 Locations of the Valve Cover fasteners (ten 10mm, one 12mm)
16:06 Slip the harness off of the three brackets for easier access
17:22 Remove the Valve Cover fasteners
22:17 Tie up the electrical harness for easier access
22:47 Remove the Valve Cover
25:12 Turn the crankshaft clockwise to TDC/Compression (19mm)
27:25 Detailed view of turning clockwise to TDC/Compression
29:02 Detailed view of timing marks
32:04 Demonstration: making another two crank turns to show how the
camshaft timing marks align every other crank rotation
34:03 Clean up the old gasket maker/RTV at two spots on the head
36:31 Remove the Timing Chain Tensioner (two 10mm nuts)
39:26 Don't turn the engine with the Chain Tensioner out
40:02 Chain Tensioner on the bench (Toyota 13540-0D010) and O-ring
(Toyota 90301-22013 or JIS P22.4)
42:12 Remove the old O-ring (if just replacing the O-ring)
42:46 Experiment: I treat the new O-ring with Dow Molykote 55 O-ring
grease
43:25 Install new O-ring to the Chain Tensioner (use a sleeve if possible)
44:54 Retract the Chain Tensioner piston onto the little hook for install
46:36 What's inside the Chain Tensioner?
50:19 Install the Chain Tensioner (80 inch-lbs)
53:29 Review of Toyota FSM procedure for extending the Chain Tensioner piston/plunger
58:38 Slide of the FSM procedure
58:41 Boroscope view of Chain Tensioner
1:00:07 Using the FSM procedure to extend the Chain Tensioner
piston/plunger
1:03:41 After extending the Tensioner piston/plunger, verify tension and
timing with two clockwise turns
1:07:35 Slide of the FSM Timing Marks note
1:07:47 Note about using a screwdriver to release the piston/plunger
1:08:10 Remove the old Valve Cover gasket (Toyota 11213-0D040, or Fel-Pro
VS 50542 R)
1:09:18 Install the new Valve Cover gasket
1:11:00 Clean the Valve Cover gasket mating surface
1:11:20 Apply FIPG/gasket-maker/RTV onto two places on the head (I use
Permatex Ultra Black RTV)
1:13:30 Install the fasteners for the Valve Cover (Perimeter bolts/nuts: 96
inch-lbs; Center bolts: 80 inch-lbs)
1:17:04 Reconnect the electrical harness to the brackets
1:17:50 Re-install the ignitors and bolts (80 inch-lbs)
1:18:13 Re-install the electrical harness fasteners (80 inch-lbs)
1:18:40 Reconnect the electrical for the ignitors
1:19:06 Reconnect the two breather hoses
1:20:14 Allow the RTV to cure then start the engine
1:20:54 Clean up the oil leak (if applicable)
This is the experimental JIS P22.4 75 Durometer FKM O-ring I used in the
video:
www.oringsandmore.com/fkm-o-ring-22-1-x-3-5mm-jis-p22-4-
minimum-3-pcs/
This is the experimental O-ring grease (Molykote 55):
www.amazon.com/Corning-Molykote-Ring-Grease-
Lubricant/dp/B01HEC1W3A/ref=sr_1_6
Here's a short video about why this Matrix has a milled cylinder head:
czcams.com/video/IgpU2OPWd20/video.html
I hope this video was helpful for you.
Thank you for watching, and good
luck with your repair! 👍
Thanks for the great DIY video. I believe I'm experiencing the same problem that is addressed her. I would like to ask if you may have seen oil elsewhere due to Chain-Tensioner leak? I myself had oil all the way up to right side of radiator on the splash guard, on the CV Axle and on serpentine belt. No leaks near filter or pressure sending unit. Nor on the valve cover gasket,etc. I do see oil on the back side near chain-tensioner and below it. Also, how has your chain- tensioner replacement gone? Did the experimental seal replacement seal better? Thank you for your time and I look forward to your reply.
@@UnifiedPeoples So far, so good on my repair, but I really haven't driven too much, so I'll need probably a few months to really determine if the Molykote 55 and alternate/harder o-ring will do anything to prevent the leak.
As for the leak - this leak can make a huge mess, to include the big mess you're describing. However, if you're not sure where the leak is originating, drive the car up on some ramps and slide under with some Super Clean (or other cleaner) and a roll of paper towels, and clean up what you see. Try to get it rather clean - it is worth the effort, and I know it is a pain in the neck cleaning under there! Clean up around the tensioner itself, then check back after a few drives to see if you can definitively locate the source.
Another spot you can get a messy leak is from are the o-rings on the VVT solenoid and camshaft sensor - check out the video link below to see those items (they are super easy repairs, luckily!). Basically, if you're not sure where the leak is originating, it really is worth the time and effort to clean up the oil leak and try to find the source. I hope that helps : )
Here's the video on the other o-ring oil leak sources:
czcams.com/video/ZiRoBR22d6g/video.html
مفيد جدا شكرا لك❤❤❤
شكرًا لك! @@husein7287
I have been an aerospace educator for over 40 years, I rebuild Porsche 911 engines as a hobby. These are far and above the absolute best automotive repair DIY videos I've ever seen. Teaching/educating is solidly in your DNA! GREAT JOB! Keep it up.
Wow, that's a very kind comment - thank you!
And thank you for being an educator for over 40 years and teaching so many people what you've learned - you've made a wonderful contribution to the whole world! There must be aerospace people all over the world who have learned from you - how cool is that?!
Thanks for watching : )
This is the best repair video I have ever seen! Great videography (picture in picture), easily understood explanation with documentation, thoroughly detailed, narration was pleasant, the pauses with highlighted annotations, time stamps, listed part numbers & you did not talk down alternative ways shown by others on CZcams. You put a lot of work into this video! Bravo!!!! I really enjoyed watching it. I didn't skip forward at all while watching this video like I usually do. 😃 I am a subscriber for sure.
Wow, thanks for your comment, and thanks for subscribing! I try to put lots of detail in my videos. Thanks for watching! : )
Agreed 100%!! Informative, great cam work, and great little tech tips.....d.i.y.'rs don't understand what damage can be done when messing with timing components. Great job explaining how to get it to cyl #1 TDC BEFORE removal and the detailed camera work showing the timing marks on the crank pulley.....are you really a videographer or an auto tech??.....a bit of both huh?😊 Best repair vid I've EVER seen. No bs!!
Wow this is so amazing, great video , thank you so much,!!
I whis there was honest mechanics like you in my area😊
You have made one of the best repair videos I have seen on this platform. Fantastic attention to detail. Great job. 👍👍👍👍
Thank you, and thanks for watching! : )
This video is freaking FANTASTIC!! From the narration, to the camera work, to the pauses w/circles, arrows and text..... pure master class in how-to / tutorial videos! Love it! Also, cool tip for putting the new O-ring on! Toyota and Snap-On probably make a special $300 tool for that - LOL!
Wow, thank you for your comment! Haha - there probably is a special tool, you're right! Thanks for watching : )
I was saying the same thing to my friend about the Producer L35
The tensioner is a culprit on the 2ZZ GE (Celica) engine and the O-Ring leaking. However, many replace the O-Ring and/or tensioner and it still leaks. Usually the timing cover gasket is the culprit then. The gasket dries out and cracks and leaks oil. However, always make sure some RTV is applied in key areas according to manufacturer tech book and correct torques when refitting timing cover. Otherwise the leak can come back. Brilliant step by step video here. Wish many people took the time like you have to explain clearly.
Yes, unfortunately that is a fairly common problem on the 2ZZ-GE engines as they get older. The 1ZZ-FE has a form-in-place gasket (FIPG, gasket-maker, RTV) for the timing case cover, and it seems to be a bit more durable as timing cover leaks are less common on the 1ZZ-FE. Thanks for watching and for adding your tips! : )
Thank you for making your video so detailed, and relieving my anxiety of doing this myself. No I know that I can do it my self
That is my goal - lots of detail so we can all see what's going on, and why! Thanks for watching! : )
I’ve been watching Toyota repair videos for years, this is the best one I’ve ever seen, very detailed and easy to understand, thank you so much 💙
Thank you, and thanks for watching! : )
Bravo! I already know how to do this on my Vibe ( same engine) but I learned several things and heck was “infotained” for an hour. I will use this as inspiration for a video in my line of work to teach people who already know how to do something their way ,how to do it the right way going forward. And why it’s important. My multi billion dollar business could learn some best practices from you!
Thank you! That's great that you're making a video to show the proper techniques for your field's applications: I'm a big fan of detailed videos, especially for technical operations because technicians can watch and re-watch a detailed video as a sort of practice for the real work ahead. A good video can give a technician more confidence for executing a new operation, and for common operations, a good video can explain why a certain technique/step is necessary even when it is not apparent why it's necessary, and may even seem like "a waste of time".
That's basically why I did this video - I noticed many people wondering online as to why a conservative mechanic might price this job higher and coupled with a valve cover gasket replacement, while many other mechanics don't. Some people mistakenly thought that the first mechanic was just "ripping me off!" because they didn't understand why he'd remove the valve cover when they've seen several videos on CZcams of regular people doing the tensioner replacement in 15 minutes, without removing the valve cover and "everything was fine".
So, I just wanted to explain that while, yes, it is possible to do the job in 15 minutes without removing the valve cover (as shown in many other videos, and as even often done in shops by technicians, including Toyota techs), ultimately the person paying the bills and making the decisions needs to know that executing the repair in that way ("blind") comes with the very low-probability but very high-impact risk of timing chain skip on an interference engine, which typically causes catastrophic engine damage when it occurs. Here is an example, with a picture:
www.toyotanation.com/threads/broken-cam-chain.1466994/
An average DIYer might not know that such catastrophic damage is possible from "such a simple DIY on youtube", but a technician or mechanic ought to know. A conservative tech or mechanic is simply not willing to risk chain skip on an interference engine, period, so he will spend the extra time and gasket to "just do it right" and simply remove the valve cover so he can see what he's doing, confirm tensioner release and double-check timing, and therefore eliminate the risk of catastrophic damage. Conservative mechanics also prefer to resolve doubt as much as possible/reasonable rather than to rely strictly on chance, so the visual confirmation resolves the doubt, too.
So - anyways - a big thanks to you for making videos for your people, too, so that they can do their operations well and understand why they're doing what they're doing! And thanks for watching : )
This is the golden standard for DYI videos. 👏
Thank you, and thanks for watching! : )
I am Iraqi and I do not speak English well, but this video is very good, rather excellent, and even those who are not fluent in English understand it, and I understood 90% of it. Thank you very much and keep broadcasting
Wow, that is super! Thank you for watching! : )
I love your attention to detail!! I wish I could find a mechanic like you here in Waco Texas. I am disabled in a wheelchair and I take my Toyota Sienna to the dealership, but I always worry who is working on my van. I enjoy all your videos!!
Thanks! : ) I know what you mean about shops: it's difficult to find a shop to trust, unfortunately. I'm not familiar at all with the Waco market: you might be able to find some suggestions in the Sienna or general Toyota forums about independent shops that people in Waco trust. Hopefully your Sienna doesn't require too much repair - they are reliable vans that last a long time!
Thanks for watching! : )
The very best, clearest, concise instructional video ever ! Please do a rebuild on this engine .
Thank you! I have rebuilt this engine, but didn't record video because there is actually already an excellent bolt-by-bolt by another youtuber here:
czcams.com/video/A595LR4SQpI/video.html
That video is outstanding: there are a few little differences since he's working on the oldest version of the 1ZZ-FE (for example, you wouldn't hone the cylinders on the later version 1ZZ-FE found in the Matrix), but overall it is a gem video. I hope that helps - thanks for watching! : )
Alot of editing and documentation work on this video! Very detailed, thank you!
Thank you, and thanks for watching! : )
Subscriber for LIfe! You are absolutely the BEST teacher on the internet. Thank you so much for all of your hard work and effort. You are much appreciated!
Thank you! Thanks for subscribing, and thanks for watching! : )
Great video. Many thanks. If you continue offering us this kind of video lectures many of us will rather spend our weekends working on our cars. I really appreciate what you are doing. We need more teachers like you, honestly. Regards from Florida.
Thank you, and thanks for watching! : )
And Merry Christmas!
I'm doing DIY repairing my corolla. At first time, it started cleaning manifolder intake, and then I am getting disassemble the engine, and need some information how to set up crank and camshaft, your video clearly shows how to set up crank and camshaft, I am searching another video how to remove engine block...LOL. Thank you for your video. 😀
This below is one of the best videos I've seen on the 1ZZ-FE - it doesn't show the block removal, but it shows a lot of other great info:
czcams.com/video/A595LR4SQpI/video.html
There are some differences between the early 1ZZ-FE (like the one shown in that video) and the newer 1ZZ-FE (for example - you don't the cylinders on the newer engines), but overall that video is a real gem, if you haven't seen it!
Good luck - sounds like a fun project! : )
Thanks for watching
Excellent Video , I am 65 tomorrow and did my first Timing belt at 21 years of age ., I still have cold sweats about Timing Belts at 3 am in the morning , I'm a worrier 😩, but your step by step guide is the best on the Net. At the moment I drive a Honda , but I am looking to transition to a Toyota later this year , so I like to do a bit of Engine research etc , so there are no disappointments , or wrong choices . Best wishes from Scotland .👍
Best video so far I have seen about Toyota Celica tensioner reinstallation/reactivation, detailed and explained clearly why Toyota procedure calls for counter-clockwise procedure! Well done!
Thank you, and thanks for watching! : )
Wow, this is such an amazing video! Thank you for this. The explanations and demonstrations are very clear. I've watch quite a few videos on this repair and nothing compares on the detail and articulation as what you have done. I'll definitely give this a try for my '07 Corolla. Thank you very much!
Thank you, and thanks for watching! : )
Thanks for making this video !!! Chain skip is a really big risk for people who have older Corollas with lots of miles on them since the timing chain will be more stretched and have a much greater risk of having the chain skip a tooth. I have a slight leak on my tensioner and instead of changing the O-ring I simply added a 236 ml bottle of 'AT-205 RE-SEAL' to the engine oil when I changed my engine oil and that seems to have fixed the oil-leak problem for me.
If I had teachers like L35; I would be in a better position today. Fantastic illustration and presentation. 👏🏼
Thank you, and thanks for watching! : )
You have explaind far batter than our car mechanic teacher at college. Thanks
Thank you, and thanks for watching! : )
This is the best video I have ever seen. Can't imagine how much hard work you put into making this. Many thanks to you.
Thank you! This video did take a lot of time, LOL - my videos tend to take me way longer than I ever expect them too : ) Thanks for your comment, and thanks for watching!
Your instructions are spot on. Very thorough and concise. Excellent camera work and tutorial. Its like factory training. Thank you.
Thank you! I appreciate that : ) Thanks for watching!
Holy crap! This is the best DIY car repair video I have EVER seen on CZcams. Thank you SO MUCH for putting the time and effort into making this. The notes and annotations we super helpful. Yeah it's long, but 100 out of 100 times I'd rather be able to fast forward the parts I don't need than have incomplete instructions. Please keep making these, especially for 1ZZ-FE engines!!
Thanks, and thanks for watching! : )
Thank you for your repair videos, they are very informative and professional, this is on the top level of CZcams repair content!
Thank you! And thanks for watching : )
I have looked for a through video on how to fix oil leaks on my Corolla. I’m glad I found you.
You’ve got a new subscriber.
Keep doing a great job. 😊
Thank you - thanks for watching, and thanks for subscribing! : )
Great video with great illustrations, references and in depth explanations. Best video(s) that I have seen.
Thank you, and thanks for watching! : )
You explained this so, calm and collectively. Excellent, really easy to understand. Thank you.
Thanks, and thanks for watching! : )
Brilliant! A lot simpler job than my last chain + tensioner job (2010) on my OM603, 6cyl Benz Diesel. Thanks for great tips.
I am amazed, proffesional work and videoedit. I just did the same on my mini 3ZZFE engine and it was pleasure to follow your instructions :) Greetings from Prague.
Wow, outstanding job on your DIY! Thanks for watching -- and all the way from Prague! : )
Excellent video. Thanks for all the details and comments for the repair.👍
Thanks, and thank you for watching! : )
What a fantastic and detailed video! Very nice work and thank you for taking the time to create that for us.
-Cheers
Sam from Keystone, Colorado 😊
Keystone, CO - nice! I was driving Loveland Pass last week!
Thanks for watching : )
Excellent video, like I’m sitting in classroom watching your explanations. You earned my subscription.
Thank you! And thanks for watching : )
Thank gou so much for this outstanding video. Everything about it is top level. Production values are above and beyond. Referncing, specifications, explanations, options, tips and tricks, every checkbox ticked and exceeded. All delivered in a clear, concise one hundred per cent understandable manner. Thank you, thank you, and thanks again. Very best wishes 🙏🏼😊
Wow, thank you so much - and thanks for watching! : )
Detailed video with good tips. Thanks! Also, some people use a thin coat of RTV on the tensioner O-ring to help prevent future leaks.
Yes - some people do use RTV: I haven't heard of people using it on the o-ring itself, but on the flange I have certainly seen that. Personally I don't use RTV because it just tends to make a mess for the next person. Here's the perspective from a Toyota tech on the matter:
www.toyotanation.com/threads/diy-2003-2008-corolla-matrix-pontiac-vibe-1zzfe-timing-chain-tensioner-replacement.1255385/
I hope that helps - thanks for watching : )
Great attitude & video! My 03 has 260K miles and I'll soon be opening it up to check valve clearances. Six exhaust and two intake valves needed adjustment at 170K. Those last two exhaust valves are a concern since you can burn a valve if you run them too tight for long and they usually get tighter as the seats wear. Glad I got lucky when I replaced the tensioner over a decade ago.
Thanks, and thanks for adding your tips! : )
Amazing video. Hands down the best DIY repair video I have ever seen.
Thank you, and thanks for watching! : )
I want to congratulate you for this video. It is amazing what you did here. Attention to detail, knowledge. My respects. Subscribed😊
Thank you, and thanks for watching and subscribing! : )
Wow, super explanation on this entire process, really enjoyed seeing your video. Very meticulous, thanks so much!!
Thanks, and thanks for watching! : )
Your explanations are very detailed and your videos help me learn new knowledge.❤
Thank you, and thanks for watching! I love to learn new things too : )
The best repair video I've ever seen, thanks
Thank you, and thanks for watching - Happy New Year! : )
Wow. Very impressive video. Toyota really needs to hire you to make videos for their service people. Well done !
Oh wow, thanks! And thanks for watching : )
This is the work I need in my 2006 Corolla with 285K km…the engine is soaked in oil from behind by where the timing chain tensioner and wet oil on ignition coil so valve cover gasket needs to be replace for sure, I’ve notice when I replaced the spark plugs….after watching your video I’m less intimidated to do it myself….thanks for your video.
You can do it!! Thanks for watching, and good luck! : )
you made the best one ever to repair and install chain tensioner
Thank you, and thanks for watching! : )
i love it, you did a great job, very well explained.. thanks for explaining every tech detail..(you are really patient)
Thank you, and thanks for watching! : )
Very informative. Thank you for posting this video.
Thanks, and thanks for watching! : )
Excellent video and process description. Thank you!
Thank you, and thanks for watching! : )
Very detailed video, big thanks!
Thanks, and thanks for watching! : )
Kudos again for such a very detailed video! Thanks much for your effort into making this video! Thanks thanks!
Thank you, and thanks for watching! : )
Wow I'm so impressed this is the most detailed video I've ever seen in my life that's absolutely freaking amazing thank you for producing this amazing video I will share it with everybody I know who has this engine are you a master mechanic you should teach shop class definitely
Wow, thanks! But I'm not a master mechanic by any means - I'm just a shade tree but I like details and lots of extra info : ) Thanks for watching!
Wow.... I'm impressed. Beautiful job... well, everything was explained fantastically. Thank you.
Thank you, and thanks for watching! : )
Fantastic work!
Thank you, and thanks for watching! : )
What a well documentated and beautifully executed tutorial. Love your video style and your calm soothing voice narration. Subscription worthy 100%. Very surprised it leaked again....what is going on with Toyota quality? At least that tensioner doesn't require a grenade pin and doesn't require Herculean pressure to push it back in like some Subaru ones.
Haha, yes this tensioner is much easier to work with, and it is nice that it is accessible without removing the chain cover. As far as the o-ring leak - I'm not sure what's going on, but unfortunately it has become a common issue. From what I understand, the factory installed o-rings (ie, installed in '03 - '08) lasted quite a long time and typically didn't start leaking until 10 years or more later. But at some point, the quality/supplier must have changed, because these o-ring leaks too often. I hope my experiment works! : )
Thanks for your comment and thanks for watching!
Thanks for this video. Everything is well explained and illustrated. You put in so much effort into this video. New subscriber.
Wow - thank you for your comment, thank you for subscribing, and thanks for watching! : )
Lovely voice, I must say. Great and informative video. Whilst I have the 2ZZ GE engine, the tips are awesome.
Thank you, and thanks for watching! : )
Excellent video, extremely detailed which is what I wanted!
Thanks, and thanks for watching! : )
Awesome instruction!
Great video inspection very well done, ty and God Blessed you
Thank you, and thanks for watching! : )
The most thorough video ever....
Thanks, and thank you for watching! : )
I teach, you sound like you do too! Just brilliant.
Thanks! I myself don't teach, but I have taken lots of courses over the years on different subjects, and I highly appreciate a good teacher! : )
Thanks for watching!
GOOD JOB, I really liked your video!!! Thanks
Thank you, and thanks for watching! : )
Great job!! Excellent video!!
Thank you, and thanks for watcing! : )
Such a GREAT VIDEO. MY 2012 COROLLA AT 176K MILES HAS THIS ISSUE. I PERSONALLY GAVE MY CAR TO MY MECHANIC AND GAVE HIM YOUR VIDEO AND SO I AM SURE HE WILL CHARGE ME FOR THE valve head gasket replacement I should have got that, bummer. But I did buy a new timing chain tensioner and gasket from Toyota OEM PARTS.
My wife and i just visted Colorado over a month ago. We had a blast. Beautiful State
Thanks, and thanks for watching!
oh my!! excellent video!!!!!! all your videos are amazing!!!!!! excellent detail also!!!!!!!
Thank you, and thanks for watching! : )
Great Video very in detail..
Thanks, and thanks for watching! : )
Very nice presentation. Toyota should hire you .
Thanks, and thanks for watching! : )
Thank you. I like the cinematography.
Thank you, and thanks for watching! : )
It's been a year since you posted this video but thank you very, very much for doing it. I followed the video's fantastic directions and installed a new chain tensioner last weekend with no drama. I opted to use a screwdriver to release the chain tensioner, which was very easy and guaranteed no chain skip. Please let us know if the O-ring you installed with the moly grease is better than a Toyota O-ring.
It's relatively still new but, if possible, please post any videos on how to do maintenance on a Toyota's hybrid system and the A25A-FXS engine.
Wow, that's great - nice job on your DIY! As far as my o-ring with the Moly - so far, so good. Thanks for watching! : )
Ultimate video on TCT
Thanks, and thanks for watching! : )
Thank you so much !!
Thank you so much for your great video🌹👍
Thanks, and thanks for watching! : )
Such a great video, youre amazing, wish there was more honest mechanics.. i want you in my area.. macon ga 😊
Thank you, and thanks for watching! : )
Thank you for the nice video
Thanks, and thanks for watching! : )
OMGosh!!! This is THE BEST DIY video on the entire CZcams! Detailed, thorough explanations, great editing, great filming, lighting, graphics. Not only the how, but the why and the why not! I came here because I have a P0016 code--"crankshaft position camshaft position correlation bank 1 sensor 1". My Autel code reader gave some possible fixes. I have replaced both crank and cam sensor (because they were easiest to do). Next is replacing the chain tensioner (its leaking oil also)--and while I do the procedure so expertly detailed in this video I can check timing and whether the chain skipped a tooth. Any additional suggestions? Do Toyota timing chains stretch/wear after 200k miles? Thanks again for the video!
You should teach astronauts how to fix things in space. THE best video I have ever seen.
I'm sorry that I missed your comment - thanks, LOL! I'm glad you liked the video : ) Thanks for watching!
Great teacher
Thank you, and thanks for watching! : )
Thanks for sharing. That was a great and thorough tutorial. I wish you have one like it on an 2Z-FE or 1Z-FE engines that have the chain tensioner inside the timing chain cover. I need to know the minimum things that need to be removed to reach the tensioner and replace it
Do you mean 2A-FE and 1A-FE engines? If so, those have the tensioner accessed from the outside, like the 1ZZ_FE. What is the application (model & year)?
Best Greatings from Poland❤❤❤
Thank you - Happy New Year's to you in Poland! : )
Thank you…much appreciated!!!
Thank you for watching! : )
Question, am I correct to use brake cleaner on the inside of the valve cover? If so, should I then give it a good rinse with water and dry? Thx
Great video! Very instructional! The videos that I have seen show tensioners being installed with a gasket in addition to the O-ring on newer models. Question is why is there so much pressure at that point?
Awesome video - first class! :0)
Thank you, and thanks for watching! : )
You should be an instructor. your video is like magic. Bravo!
Thank you, and thanks for watching! : )
Thank you for your diy tutorials. I watched your other video on how to fix oil leaks on the solenoid and camshaft positioning sensor and it worked great. Unfortunately I watched someone else’s diy video for this and didn’t mentioned about TDC. You think I messed something up not following the instructions about the TDC? I will be replacing the tensioner itself in hopes of fixing the rattling engine noise and hopefully will be able to duplicate what you did from setting the crankshaft to TDC to releasing the hook. This noise started just last week about 2-3 months after replacing the o ring and was wondering if that has something to do with not setting the crankshaft to tdc before removing it?
what you do with the timing chain tensioner was the great help I know you change the timing chain itself on that motor I can use all the torque specs on it I would appreciate it
Thanks You.Best Video like i see.❤❤❤
Thank you! : )
hola buenas noches excelente video bien explicado me ayudó mucho saludos Venezuela
Gracias - y gracias por ver! : )
This video is number one
Thank you, and thanks for watching! : )
At first i was like "this guy has a very soft girly voice during the intro then i realised it was a bad ass woman with excellent explanation video tutorial! 😎
Haha, that's funny!! Thank you, and thanks for watching : )
Hey, thanks for going into it with so much details! Why are we aligning it with the TDC of cyclinder 1? What happens if the crankshaft is off by 1 revolution instead? I was wondering if this replacement can be done with the valve cover on and just aligning crankshaft pulley with the 0 mark without checking the intake-exhuast sprocket mark alignment to check if we are in the right cycle. Thanks
Wow that was nice
Thanks, and thanks for watching! : )
Great video! My mom was a master teacher and it was a joy to listen to her teach...same goes for you! I'm wondering if you have had any oil leaks since you did this repair...an update on the O-ring experiment would be great! There are some people who've had success using a slightly fatter O-ring (the size that is a standard measurement which is slightly thicker than the one you used). I'm curious what your thoughts are on that. Also, do you have any advice about how to troubleshoot if the timing chain seems a bit slack even after the tensioner is changed? Thanks! 🙂
So I went counter clockwise 20 degrees like you said then forward till the piston compression was fighting 4x
Car runs good
After the Counter clockwise motion going forward I heard it zip and ratchet a little bit
Great job on your DIY - thanks for watching! : )
Thanks
Wow! Thank you so much for the SuperThanks! : )
this is the best video that I have ever seen . i have a 2002 toyota corolla with the same engine it has a misfire on cylinder 1 and 3 I have chandged everything coils ,injectors,spark plugs,check for vacuum leakes, and redid timing change I have fuel and spark and I still have the same problem please let me know if you have any idea on what it is thanks
Aw man, I'm sorry that's happening to you - have you checked compression on those cylinders?
Excellent work, this level of detail gives DIY’ers the confidence to get these jobs done right. Would you recommend cleaning out the valve cover gasket with brake cleaner or degreaser before reinstalling?
Thanks! If you mean cleaning out the channel where the valve cover gasket fits with brake cleaner, then yes, you can do that. If you don't have brake cleaner you can use degreaser, or even just a paper towel to remove the old oil before installing the new gasket - just something to get it clean so you don't mistake old oil as a new leak after the repair.
If you mean that you're re-using the valve cover gasket (like I do in the video) and you're asking if you should clean the gasket itself - then, no, I wouldn't use brake cleaner or degreaser on the gasket itself. Instead, I'd just wipe the gasket with a paper towel, and clean the channel where the gasket fits. I wouldn't put any chemicals on the gasket itself, as chemicals might degrade it's durability/make it brittle.
I hope that helps - thanks for watching and good luck! : )
@@L35inColorado Thanks for your response! I just meant the inside of the cover itself (definitely will clean the channel/not clean or reuse the old gasket). For instance, some shops throw them in their parts cleaner tanks before applying the new seal. As a DIY’er I was curious whether it was safe (or necessary) to clean out old caked-on oil with brake cleaner or whether that would affect the oil in the engine in a negative way, even if it was dried with a shop towel, etc..
EDIT: didn’t mean to say “valve cover *gasket*, just “valve cover”, my bad.
Waooooo u are outstanding
Thank you, and thanks for watching! : )
What would the difference between the 03' and the 02' 1ZZ-FE could be? I've recently noticed some chain slap when accelerating beginning in the 2k-3k RPM range, hoping it is just the tensioner and not the chain. I have a valve cover gasket leak, so while I'm in there replacing the gasket, I will probably replace the tensioner as well if the chain isn't noticeably stretched. Is there a website where I can view the guide to replace it?
so the oil line mark on the tensioner would be directly correlated to how stretched the chain is right?