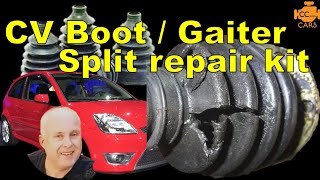
How to fix a Split CV Boot!

Vložit
- čas přidán 31. 05. 2024
- In this episode of Lock your Hubs 4WDing we check out how you can fix a split CV boot at home using simple tools.
Ball Joint Tool amzn.to/3XJYjbo (Amazon Affiliate Link)
CV Band Tool amzn.to/3Zb4C9i (Amazon Affiliate Link)
Timestamps
00:00 How to repair a CV Boot
00:12 How to Secure the Vehicle
00:44 How to remove the Brake Caliper
07:24 How to remove a CV Joint
08:12 How to remove an Old CV Boot
10:45 How to install a CV Joint on Driveshaft
11:50 How to install a New CV Boot
16:08 How to reinstall the Driveshaft
22:19 How to reinstall the Brake Caliper
23:23 How to reinstall the CV Nut
24:42 How NOT to operate an Ugga Dugga!
The "victim" is a 2011 Hyundai i30
Patreon:
/ lockyourhubs4wding
Facebook:
/ lock-your-hubs-4wding-...
Instagram:
/ lockyourhubs4wding
Twitter
/ l4wding
#LockYouHubs4WDing #DIYMechanical #CVBoot - Auta a dopravní prostředky


What DIY mechanical projects do you want to learn about?
How and why to change power steering fluid.
It’s one of those jobs , thank goodness it’s done 👍
Fitting front windscreen trim to scuttle tray. I've got an old golf mk3 I'd like to repair and the old rubber has perished. Scuttle trays are in good condition
How to fix a Split CV Boot with out putting a new one on..😂
Hahaha
just came across this video.... excellent "show and tell"👍. One suggestion: when splitting the ball joints, undo the retaining nut to where the bottom of the nut is just level with the end of the spigot thread. This leaves several turns of the thread inside the nut but sufficient room to insert the ball joint tool. It ensures that when the ball joint separates, it doesn't fly apart. Also, if you don't have a ball joint separator, partially loosen the nut as above then holding a block of hard wood on one side of the ball joint, sharply tap the other side of the ball joint several times with a hammer to loosen the taper. Often times it will just drop down (but the proper tool is far easier!)😉
The best CV boot replacement video on CZcams! Thanks!
Wow, thanks!
"I'm sure there's a torque spec for it but I don't know what it is" You are a revolutionary hero my friend, right up there with GW😅🤣😂
Hahaha!
I've always fixed my own vehicles, and I didn't even hear about "torque specs" until the internet age came along. Just crank that fucker down and default to over torqueing.
Excellent straighforward video with no unnecessary waffle. It's given me the confidence to do this job if required on my car.
Thanks mate, I appreciate it.
Many years ago I replaced the boots on a 1977 Honda Accord. Today most cars have inexpensive rebuilt or new axle assemblies available in the after market. I recently replaced both drive shafts on a 2000 Honda Civic, each axle only cost 89 dollars. By replacing just the boot you still have to remove the drive shafts, usually you are replacing the boot because it is torn. This means that dirt and other contaminates have gotten inside and have begun destroying the CV joints so you also need to disassemble the joint and also replace the bearings. Then you install the boots after packing the CV joint with grease and crimp on the special clamps that hold the boots on. For me the inexpensive cost for a new axle assembly seems very compelling. My time is worth far more than it takes to rebuild a CV joint so I will always buy new or rebuilt axle assemblies.
If the parts are available, that's definitely a consideration.
Not with a Split Boot . 20 minutes your done leaving wheel on. Think smart. 🤣🇺🇲👊✌️
You can use a split boot however doing so is not very smart. If you do not remove the CV joint from the car, the easiest way is to remove the drive shaft, there is no way to clean out all of the sand and other contaminates from the grease packed into a CV joint that lubricates the bearings and cage. Not completely cleaning the joint before packing the joint and new boot with fresh grease will cause the joint to fail shortly after doing the work. Also mort people only mess around with CV joints after they fail, There are two CV joints on each axle and the other boot is the same age as the one that failed and will soon fail and you will be back replacing that one in short order. For me it is far better to just purchase a new drive shaft and install it because both CV joints are also new. By the time it is time to do this job again you will probably no longer own the car. When I had a CV joint failure, since I had all of my tools out as well as jack and jack stands I replaced both axles.@@BradNichols-vo9eo
Crickey mate this is bloody magic. I love it. Aussie accent only adds to it. And that’s not often said by a kiwi. Looking forward to watching more stuff from you!
Haha, I never think about myself as having an accent! Though I definitely do.... :)
Best car video we ever seen.
Thanks!
Best HD video with great explanation particularly on how to disassemble/re-grease/re-boot these style of CV shafts, thanks man.
Thanks!
No waffle alright and you are the ONLY guy to stress double support under the vehicle when jacked up. I know the steering knuckle usually only needed but lower ball joint open as you did makes it SO much easier and that screw tool is the way to go, I hate bashing the arm. As for the boot replacement you will know about the boot funnel. After I saw the local brake shop guy slip on two new boots like in 2 minutes each and clamp up strap with that proper tool you have, I was sold to pay for this bit as it saves knuckle removal and all that existing grease is still actually OK. Thanks for great video.
I've been looking at a boot funnel, they're a trick piece of gear.
In Aus, people die each and every year unnecessarily when jacks fail. I don't trust the things as far as I can throw them (with both hands tied behind my back!)
Jack stands are the only answer if you've gotta get under the thing.
If the old boot is actually split, then the dirt that gets in and mixes with the grease makes an effective grinding paste which will accelerate wear on the joint, so ALL the old grease needs to be cleaned out before repacking and reassembly if you want the repair to last.
If the boot has been split for a while, I agree.
Thanks for that info!
If the boot is split by the time you notice it it will be too late to save the cv joint, you’re better off getting the complete joint and it won’t cost much more to replace.
Any advice for removing old grease? Brake cleaner??
I usually spray degreaser initially, then keep washing out with keep until it's all gone. (Well close anyway!)
This another reason not to give up old commodore... no CV joints but this was a great video.
Except for the Adventra!
You are a great teacher very few make it so easy to understand
Thanks!
Teacher say you great student now go wipe the crap off your nose
I second that, good videos mate
Thanks!
Thank you mate . This is the very first time I’ve ever seen this done . Thank you again
Best CV boot replacement video on youtube. Straight to the point.
Thanks!
As a mechanic of fifty years experience and still working , save yourself all the drama of special tools and the hassle of replacing rubber boots on worn cv joints. Change the whole driveshaft, no special tools needed, price of whole driveshafts are very reasonable and you will save yourself from the disappointment of replacing the rubber boot and having the cv joint failing shortly after! 😊👍
If they're available, that's probably the easiest option.
My 1998 Daihatsu charade needs new boots, I’ve only really got one option for cvs in Australia. For the price of new cvs I’ve now got tools to do the job again.
@@theoargyros3618 Whatever suits your situation, I’ve just replaced both driveshafts on my 2002 Mazda Protege. $250, absolute bargain , I’ve been fitting auto parts for over fifty years, theses were quality parts! 😊👍👍
I have heard that all too often aftermarket c/v axles are less than good quality, worse sometimes than a re greased and booted originial.
@@marknathanks7592 As a mechanic of fifty years experience and still working I definitely disagree with you! Replaced literally hundreds of driveshafts and I have never had one come back, that’s right, not one! Good luck with your cheap boots and a packet of grease, I’ve always wanted to do the job properly.👌👌👌
Glad to see you got the wheel under the car!👌👍
Always!
Very well put together video, Amazing work and well detailed, Best CV Joint Boot Replacement Video on the internet
Thanks!
Well explained with very good camera angles explanation and a splash of humour. Thank you for sharing 👍😎
Thanks, I appreciate it.
Bloody well done mate. very well presented with a bit of humor. Your "specific torques" . 🤣 are taken straight out of MY book. I've got a 2020 LTZ Colorado, so sooner or later I will have to know how to do this without spending a fortune in a workshop. Thanks for sharing.
PS. I forgot to mention. Good camera work too. I was watching another video done by someone wearing a chest camera and it was almost impossible to watch, well, it WAS actually and that is how I found yours.
Usually disconnecting the steering knuckle from the strut gives enough room to remove the axle from the hub,not requiring disconnecting the ball joint or tie rod ,for those who dont have that tool, pb blaster on nuts and bolts if rusty ,also using impact on as many fasteners as possible certainly speeds up the job.
Great video, certainly doable as you show
You right that it depends on the design of the suspension. We don't really have issues with rust here in Oz, there's no body salting the roads in winter for instance and humidity is reasonably low in Victoria where I live.
It really depends on the design of the suspension, Eg. in my car actually if you don't remove the tie rod along with the strut you won't get enough room to take the outer CV joint from the knuckle.
From my experience, totally disconnecting the knuckle from the strut and removing the tie rod connection is sufficient to allow removal of the axle from the hub. Disconnecting the lower arm ball joint is not necessary and is the most difficult to do of all the joints.
Disconnecting the ball joint or tie rod end with the ball joint separator tool that he uses is not difficult (at least outside the rust belt it's not). Its one of my favorite tools.
Sometimes the extra clearance you gain is invaluable, so it's worth not rejecting out of hand.
great tip I just did an axle replacement on my 01 corolla and only had to remove strut bolts and ball joints to get the axle out. i honestly had a good amount of clearence after getting the struts but whatever is needed :D
Gratitude! I always wanted to know how to fix these!
You're welcome!
Just rebuilt both drive shafts on my Daihatsu fortrak 1998 f78 ,
Totally stripped joints , racers ball bearings etc .
Whilst it was all apart , new iner and outer wheel bearings and racers plus new knuckle seals .
One dirty shirt job .
Just subscribed.
CV grease still freaks me out! It sticks like the proverbial to a blanket!
Congratulations. I think this may be the first time I've seen someone install a split pin the correct way on CZcams. Nice work in the CV bit too. Pretty well exactly as I do them. Cheers
Thanks mate, I didn't know there was another way to do the split pins!
@@LockyourHubs4WDing Most people seem to do them sideways. You did them the right way. I would have had my ass kicked all over the place if I had done the wrong way when I was an apprentice so it was refreshing to see you do it right. I guess it one of those things and I'm not even OCD haha.
Hahaha!
@@lynpatnat Why is there a right way and a wrong way to put the split pin? Do you mean vertical as opposed to horizontal and wrap around the nut's sides vs over the end of the bolt? Or whether the eye goes towards the inside or outside of the vehicle?
Non-expert intuition tells me that the "correct"way may be eye to the back and ends wrapped either way sideways around the nut towards the back. That way any obstacles, rocks, etc you may scrape driving forwards are less likely to open up or break the pin.
@@dirk_t_wachter Yes there is a right way. As done in the video. The pun in out in so that when you split it the top wraps over the top of the bolt. Then cut off the excess of the leg and gently hammer the stub into the castellation so there is no sharp edge to catch yourself on.
Wrapping the split pin around the thread isn't the way to do it but everyone can do as they like. That's their choice. It's just when I see it done the right way I smile and know they have been taught correctly. Maybe it's OCD.
Wow the voice is so calm. I watched your steps I will replace also mine without a mechanic on Alfa Romeo 159 jts thanks buddy.you deserve plenty of subscribers hopefully🙂🙂
Thank you for a straight forward, no bullshit, hands on demonstration. Great video!
Thanks mate!
Great presentation! Loved the humor. I only wish I had this video twenty years ago when I did mine. Great work.
Thanks mate!
Great video with all the info I needed to replace my CV Boot.
Appreciate the detailed start to finish procedure!
Thanks mate!
@@LockyourHubs4WDingand thank you for using a camera stand and not waving a mobile phone camera around
Haha, if I could, I would!
All ways a Great Video, Just remember Don't hit the thread end of anything unless using a soft headed hammer or putting the nut back on loosely and hit the nut.
Definitely want to be careful with that thread!
Do appreciate your video and how to replace the boot on the CV axle I think I will start doing mines from now on I have the expense of always just buying a CV axle not wanting to replace the boot but seeing your step by step really inspired me to start doing my own thank you for the tips and the video God bless you
Thanks mate, I appreciate the kind words.
WOMEN know when an axle need replace when they see the wheel flying off the car.🤣🤣🤣🤣
Hahaha!
Awesome video, one of the most detailed videos on axle removal and boot replacement.
Thank you for your help. 👍🏾👍🏾
Glad to help!
....Now do one where the CV does NOT come of the shaft....get back to me when you sus out how to do it LOL....i'll wait....
Fantastic instructions, very well filmed and narrated.
Thanks mate, I appreciate it.
Thanks for the great video info. Doing the same cv boot in my ute. Your video was full of valuable info. Thanks. 👍
Glad to help!
The only thing I have learned from this video is that I should just take the car to the mechanic. Thank you for that, Sir!
It's not that hard, give it a crack!
This is good..some fools can not do small things like this.
Has de tener mucho dinero !
Those new after-market cv boots last about 1 to 2 years I found, after the originals had done 15 years!
Some are great, some are rubbish. It's a matter of sorting the wheat from the chaff
@@LockyourHubs4WDing I bought the rubbish kind... Learnt that the hard way, but now I can do a boot change with my eyes closed!
Excelent video. Step by step I love it. Thank you
Cheers!
love how you refer to the objects and items as he and him
Thanks :)
I have done it many times on my car. Saved some money for the labour.
Great! 👍
Good video. In years past I replaced the boots on my minivans but recently replaced an axle on the passenger side. The axle was only ten bucks more than the boots and I didn't have to take them apart. Quicker out and in. the inner boots are also getting harder to find for the older vans. The one I just worked on is a 99 Caravan. Good stuff. Happy Motoring.
Thank mate, that's definitely an option depending on price and availability.
I have a 07 fj cruiser with broken inside boot. Boots are like 80 and a whole axle is only 150. I've no clue how long my boot has been broken but I'm sure a good while lol.
Might be worth the piece of mind to swap the whole thing.
@@LockyourHubs4WDing yeah I swapped the whole thing. My cv joint was absolutely shot lol. Jingled likev a Christmas Carol when shaking it.
@@imkaneforever lol
I remember doing this 40 years ago, I couldn't afford a mechanic, and I needed my car to go to work. I had to take the bus until I fixed it. Still gives me nightmares of how I did it. No CZcams, all guess work, although I did ask for advice from a neighbor across the road about hammering to looses some nuts and bolts. I noticed the scratches on his hands, it was the least of my worries as I'm sure is his. Thanks for the video which I watched with a lot a anxiety.
Did it work though?
@@LockyourHubs4WDing yes, it did, somewhat to my surprise.
@@MichaelHarrisIreland fantastic!
I need to do a CV replacement on my falcon and this pretty much walked me through it, should be a cakewalk now. Will update once done 💪💪
It's not that hard.
If I can’t do it I shouldn’t be touching cars 🤣
Thanks for sharing . Will try it out next week !
Thanks!
Excellent video! I have to do this job on my daughters '99 Honda CRV. Much help...thanks! -Korey
Thanks!
Cv joint axel driver side !!Japan make so hard to find!! American made.are 4 inches shorter!!
Honda civic lx 1998 1.6!!
Brilliant, well explained , love you humour . Ready to my Rexton now .
Glad to hear!
Great video very helpful , thanks for posting .
Glad you liked it, cheers!
Great video !
Always use Original part when come to replace Belts and CV Boots from the Dealer !
If they are available, that's a great way to go!
Nicely done. thanks for sharing!
Thanks!
Thanks for a very comprehensive video !!!!!
Glad it was helpful!
EXCELLENT VIDEO, CLEAR AND PRECISE
Thanks!
Great video,very helpful !!
Glad you think so!
Very good , I just broke my Honda Jazz driveshaft , and I am waiting on the new part arriving . I am in no hurry as it's minus -2 c in Scotland . all the best .😎
Thanks!
Green p u r a knob this bloke made a great easy to follow video n even spoke bloody english..old skool style how i like
Great topic. It's just a matter of time and I'll have a CV boot to fix ha ha !
With the band tightening tool, it's a pretty easy process.
Clear explanation and good skills.
Thanks!
Use a stretch boot kit shaft and CV remains on the car. DIY tool is a simple cone and lots of lube.
Pro level tool is either a pneumatic boot stretcher or one that works driven by a normal socket wrench.
I have a pneumatic one great investment
I've seen them, they look fantastic, unfortunately, I don't own one.
Very nice and helpful video .. thanks alot
No worries mate!
Good job i learn a lot it look so easy the way you do it
Thanks mate!
Not sure what parts cost down under, but here in the states, if the boot is torn,, I'd rather replace the axle assembly than the boot. It's actually less work, and I only have to do it once. Most axle assemblies are under 100$ even at parts stores. Most people here in the states, only find out about a torn boot when they get their vehicle inspected. Most states only require inspection once per year and some states don't even require annual inspections. Great job on the presentation. Very helpful whether replacing the boot or the axle. God bless, stay well.
Thanks mate, at the time of filming, the boot was available and I had to wait for the axle.
@@LockyourHubs4WDing Nobody likes doing the same job twice, right? But it depends what the customer wants. I can usually talk them into a new axle assembly. Cheers. Keep up the great work.
Thank you for your video
Very helpful
Glad to help!
Great job! Thanks for showing me how to replace a boot...
You're welcome!
I love that form of measurement, a grunt and a half. That made me cackle!
It's the manual version of the Ugga Dugga!
Great job showing and telling, learning I am keep up the good work. See ya next time have a great day see ya bye.
Thanks 👍
@@LockyourHubs4WDing thanks for the reply I’ll lock them in and hear it knock at me Thay are noisy so I think they bad bearing.
Awesome vid. Thanks!
Glad you liked it!
Great video buddy !!
Thanks!
I've never seen anyone screw so fast.
unbelievable 🤣😂🤣
Hahahaha
I've never had to replace a CV boot to date, but when I do, I'll know what to do. Your garbage bin tells me you live on the western side of Melbourne. Not a bad part of the world. Thanks again for another interesting video 👍🏼👍🏼👍🏼
Yes! Good old Brimbank Council.... How many times have they been sacked now?
@@LockyourHubs4WDing Bombers mate?
Crystal clear my friend..
Thanks!
thank you sir , i was looking for ypur Vedeo, keep up the good work sir
Cheers!
Great video! Love the practical approach
Thanks!
What a nice explanation my friend.
Glad you think so!
Excellent video!
Thank you very much!
Thanks for the video.
Glad you liked it!
thanks for teaching me the easy way to break the ball joint's loose. I got to look for one of those . so i can break them loose the easy way like you with out wrecking the ball joint boot or having to chase the threads from getting
mad at it an hitting the end with a hammer.
Yep, they work great! Especially with an impact..... :)
Thanks for your video i was stucked.
No worries!
Thank you great job on the video
You're welcome!
Thanks for the good info. You make it look too easy.
Glad to help
Good work brother Brown, soon there'll be no mechanics with easy fixes any way man 👍
Haha, thanks!
@@LockyourHubs4WDing if you fit a front diff drop to the 2013 hilux would that he extra hard on your cv boots ?
@@shaneboyce9392 no, easier on both the CVs and the boots.
@@LockyourHubs4WDing just looks a very sharp angle on drivers side near the small clip that holds boot on . That video you did what year hilux was that ? Some cv specialists quoted $300 to supply and fit 4 new boots ,what's ya thoughts on that price?
Great video.
Thanks!
Helpful to all DIY buddies. If someone could design an easy replacement boot rather than removing all stuffs for the sake of just 2 dollars boot.
You can get split boots, though they're not as good
@LockyourHubs4WDing never use split boots.
great explanation, thanks...
Thanks!
Good job there Bubba 💥 🛠
Cheers!
The best tutorial.
Thanks mate, glad you appreciated it!
SHORTCUT......I remove the Big nut then the lower ball joint. I leave the caliper and the tie rod on. pull the axle put it in a vice do the boot put it back in the car. done.
I think that might be car dependant, sometimes the brake line and the tie rod don't allow enough angle to get the axle out.
I m with u. What i use to do
Great job well done
Thanks!
LoL paint the socket black! I Love it mate. Good video!
Thanks!
You done a very good job l love it.
Thanks!
Nice job!
Thanks!
Try spraying down all the rubber components with AT 205 several times/yr. Scotty Kilmer vid for it. Re-juvenates the rubber. Cheap preventative maintenance. And if you ever have a leak with a rubber seal on/between major components? You might get away with pouring in a bottle instead of a major repair? Handy stuff to have.
Good video.
Suggest changing both boots at the same time, often its the inner boot that fails first, which is kinda odd as they don't flex as much.
Couple of pointers, when using the ball joint separation tool only loosen the nut but leave it on flush with the end of the thread, same goes when hitting or using a puller on the end of the drive shaft, that way you can't burr the ends of the thread and even if you did when you remove the nut after separation it will clean the thread up for you.
The other pointer, get an assistant to hold the brakes on for you when undoing the hub nut before removing the caliper.
Not criticising, just having buggered up the odd thread end over the years learned the hard way to leave those nuts on to protect the threads till the last moment.
Just marvelling at the difference in the undersides iof a Cruiser in Aus and one you'd come across here in England, here everything would be rusty as hell or if like mine everything caked in grease or ACF50 trying to stop said rust 🙂
Just had the rear aircon pipes replaced right through on my Prado, mechanic was overjoyed at my rust prevention techniques 😁 think my parentage might have been called into question a few times
One other thing.
All home mechanics should invest in a rail of 6 sided sockets, and a pack of impact sockets (usually black) as well which are thicker and designed to take abuse and should be used whenever possible with impact guns.
These things lessen considerably the possibility of rounding nuts and bolt heads off.
Here in New Zealand and I presume Austraya too we don’t use salt on the roads to de-ice. just slide off the road she’ll be right mate.
Just a suggestion, the clip should be renewed.
Thanks for the info
You're welcome!
Thanks. Good video. It will help me. Rusty
Cheers!
Here in England we still use foot pounds for measuring torque, gruntage must be an Antipodean scale of measurement
We've learnt to adapt out here in the colonies! :)
Nice choice of Bahco sockets.
Thanks mate, I used to be a Sidchrome sycophant, then they shifted manufacturing offshore....
I received a small Bahco socket set as a gift and liked them so much I bought myself a larger set. The six sided sockets are great!
@@LockyourHubs4WDing Yup agreed re Sidchrome. Sadly, like all quality tools that USED to be made in Aus, they've buggered off OS. I too like the 6-sided sockets, the walls of which aren't too thick, so you can actually get them ino some places where the thicker impact-type thick sockets won't fit. Quality gear.
You saved that high quality Toyota drive shaft from being replaced by some cheap Chinese aftermarket,great move !
Fantastic!
its seem so easy and smooth when you do it.. i think it would be like hell when i do it
It's pretty easy if you take your time!
Mate, one minute into this video I was thinking..."Fuck yes I'm subscribing to this - click!..." 😄
Cheers!
You're legend.
Thanks!
Nice vid Mate - taking us step by step. My Daughter had one go on her Fiesta a while ago - garage charged her £90 odd - which wasn't too bad . Had I seen this vid and been in possession of one of those steel band tensioners then maybe I would have given it a go myself . I've seen those split boot kits that you glue together - can't imagine that they work too well
It's honestly not that hard to do the job properly!
Just use thick cable ties
@@krulzy1 funny. My name is John Blake. Far out man !
The best CV fix I just recently used on my ripped cv boot was loctite ultragel control, I didn't have to remove the cv axle. Make sure to clean the grease mess and apply the loctite ultragel control. It's only $5.
Glued it back together?
@@LockyourHubs4WDing Yea. It hasn't leaked yet no grease anywhere.
You should try it on your YT video.
Not the way to do it,replace the boot.
Brilliant