988 Tire Changer (950 with 2 helper arms) Deliveries require a forklift to unload OR pay for Residential delivery + $150 For clarification the 560 is the smaller unit up to about 18” rims has the square tube rear upright and requires assembly of the bead breaker. The 950 is the larger up to 22” rims, has the “Bead Blaster” and main rear upright is a round cylinder air tank. There's also the options of the 2 helper arms the #232 unit making the #988 unit and the other 300 with the black additional upright with 2 arms on it with a disk, the #300 unit making the #960. The Mayflower 988/680 pair can fit tight in a space about 80” wide IF the Balancer is turned sideways so shaft is out facing you. Other arm options will need more space. The 988 (950 changer with 2 extra arms) is about 45” deep. I used casters on the 988(950+ extras), Harbor Freight #62276 3” locking 100lb. NEED (QTY 8) regular 1/2”-20 nuts (ORDER or get at a regular hardware store. Home stores don't stock them but can order some). Unit is at or over the max weight of the casters so user beware. Remove rubber foot on bottom, just pops out. Install 1 nut all the way down on caster then insert up through hole and install 2nd. Caster shaft needs a spacer so could use 1/2” flat washers too instead of the first nut. Foot bracket is upside down U channel. 1 Upgrade I added was a 1/4” NPT street elbow to the main airline input on the regulator after removing the factory Japanese style fitting the US doesn't use. That allows the air hose to hang down when connected instead of straight out the back. Then used a 1/4” male NPT to 3/8” hose barb to a 6' section of hose for a whip to move the connection out where it's convenient. That way it's easy to connect when using. Then I added a 1/4” NPT quarter turn valve so machine can be disconnected without losing all air pressure in case air supply line is needed etc. Another upgrade I did was added a higher volume airline. The “Bead Blaster” is almost a joke and SLOW. If you see the size of airline and the regulator it runs through you'll understand. I've seen a few add a line at the Regulator. That technically does work but doesn't have the flow capacity I desired. So I added a line to the tank(rear upright). Remove the included Tee for the gauge. Tank bung is 1/4” NPT so I used a Milton s-646 1/4” NPT Hex nipple into the bung using 4 layers of Teflon Tape on all connections. Then I used a Milton s-655 Brass 1/4” NPT Tee which has 3 Female fittings. One end screws onto the previous nipple so the middle connection is centered and angled down and back a little. The included Tank gauge Tee then screws into the other end of the new Tee. Then the middle is a port for a new hose to connect Using a male 1/4” NPT fitting like Milton s-602 1/4” male NPT to 3/8” ID hose barb and a hose clamp etc. I cut about an 8' chunk of another 3/8” ID air hose. I strongly suggest not using 1/4” hose. Then a quick connect fitting on the end. I use and highly recommend the High Flow Milton Type V couplers. You can use a regular air chuck or make a little bead blaster that runs way better. Use a quick connect fitting then a quarter turn 1/4” valve then a short section of hose and an air chuck that locks on. This is a much higher volume short hose feed off the tank. Smaller and more hose length are restrictions. You can now swap chucks and fill higher psi tires and a higher flow bead blaster. But care must be taken using the new bead blaster as it's got straight tank pressure. So use carefully and once bead pops insert valve and use a gauge to fill properly. 680 Balancer Options/Upgrades Many truck rims will need an additional adapter cone with 5.5” diameter that's sold separately For best results the 680 Balancer, should be anchored to floor. Don't just bolt down unless floor is perfectly level where unit sits. Base is bolted down with (3) 3/8” threaded anchor bolts ideally with 2 1/2” of threads sticking up to level with. Method is below. I wasn't ready to anchor yet so leveled with 3 3/8” x 2 1/2” hex bolt, 6 3/8” flat washers, 6 3/8” nuts. A small thin rubber piece size of a tire patch works good on floor to help keep from walking across floor. Install a nut on the 3/8” bolt approx 1/16” from head of bolt, then a washer. Insert bolt FROM BOTTOM UP through holes on bracket then install 2nd washer and 2nd nut loose, then do same to other 2 holes/bolts. The lowest nut can be adjusted up and down to raise and lower the machine bracket sitting on it. Use a 2nd wrench as needed to hold the hex head while adjusting nut up/down. Use a 24” level on the side of the case to adjust till plumb side to side and front to back. Don't use the plastic tray on top, there's no way to know if it's level to anything. Use the base sides. Then when height is good tighten down the top nut to keep height. 1 wrench holding bolt head 2nd on top nut tightening. Essentially the machine bracket is sandwiched between 2 washers with a nut on top and below. Parking lot light posts are mounted similar for reference except threaded rods are in concrete. As the concrete anchors should be to secure it.
I'm interested in your tire machine modifications you should really make a video of the bead blaster and other little things you've done I have worked on these machines for 3 years now and and figured out most if not all of the tricks and quirks doing alot of low profile and all terrain stubborn. Golf cart tires from 8 inch to 14 inch and also work truck and car tires but I am very interested in increasing the bead blast it is fairly weak and only works at all for me with truck or trailer tires that are very soft with large sidewall I'm curious with adding new hose and increasing the flow have you thought of drilling out the bead blast holes on the clamps themselves?
Thank you for posting this video. It helped me to use my machine. However, I would do a video using an actually stiff walled tired, not a soft mock up tire.
it's basically the same though... ive done everything from cruisers to minis to cars with it. if it's hard to do something, it's cause the other side isn't in the drop center.
@@Mad8vCycles Yes I've discovered that holding down the one side so it drops it the center helps a lot. It's been a while since I've changed tires so I'm just getting my bearings again (no pun intended)🤣
Thanks for making this video. I've been wondering if this machine would work for my motorcycle tires. One question - it looms like you may be using some type of wheel adapter. Is this a correct assumption and can what are they / where did you order them? Thanks!
the one i have access to doesnt have those lifted arm adaptors. thankfully the bike tire i need to change only has one brake rotor and my buddy owns a tire shop AND this exact machine.
@@Mad8vCycles I'm on the kind of budget right now where the plugs themselves are pushing it. I'll just do what I do with custom tires and have it hold the lip of the wheel on the non rotor side n do my thing. I'm plug patching a tire. Just to share. Tires like maybe 500 miles on it and I'd be silly to replace it now.
i think they were just on amazon. www.amazon.com/Mayflower-Function-Extension-Motorcycle-Adapter/dp/B073DK5PK3/ref=sr_1_3?crid=YSNLCMTMK4XK&dchild=1&keywords=mayflower+motorcycle+adapter&qid=1628011315&sprefix=mayflower+motorcycle+%2Caps%2C168&sr=8-3
The TPMS sensor on my 2020 Goldwing wheels sticks out pretty far up inside the wheel. In your video, it's not shown nor mentioned. How careful do you have to be not to dislodge or damage the sensor? Also, breaking the bead right where the sensor lives could also damage the sensor. When I take my wheels into a local shop, I'd like to "instruct" them or at least ask them if they're aware of this potential.
Good vid. but that's the most easy tire to mount and demount like yoy say, i do al lot of this and struggle te most with large rims 19" to 21" with stiff tyres and a inner tube, or without a tube but with a pressure sensor. Can you make a vid for those sort of tyres? Sometimes i think that the adjustment of my duckhead isn't right, is there a proper way to mount those ?
Can you do a 21 inch front motorcycle tire with that size machine? It looks like a Mayflower 560 with car tire max outside clamping size of 18". I'm wondering if I should go for the next size up, the 950.
@@Mad8vCycles Mayflower sells adapter (and many other brands fit too). The adapters raise the motorcycle wheel up so the duck head can reach). I ended up ordering the 950 since I figured I might need to do SUV 21's sometime in the future and I wanted to have the helper arm mounting spot too. Thanks for getting back to me though.
@@Zt3v3 The adapters are needed for the duck head to reach the rim? I have the 950 and was planning on mounting some MC tires. I was unsure if I actually needed the adapters or not. Do you have the MC balancer adapter? if so, how well does it work?
A coats and weaver can’t be compared to a mayflower in quality and or price. I noticed you also upgraded your wheel clamps, so that’s not your average mayflower machine.
id bet they're made in the same factory and spraypainted a different color. the clamps are the amazon moto adapters yeah. i use them sometimes. and often cant cause they make the clamp smaller (19" wheels for example dont fit)
race rain tire. basically all the rain traction and no way to ride on it in the dry (it will melt in a lap or two if not being cooled constantly by water from the track)
@@Mad8vCycles yeah upon investigation looks like most companies across the board are about $300-350 more expensive now vs 1-2 years ago. I’ll still probably end up getting one.
it's the best manual one imo. but if you do a lot of tires, it's hard... and it's not quick. and sometimes you spend an hour fighting with a tire for no good reason


988 Tire Changer (950 with 2 helper arms) Deliveries require a forklift to unload OR pay for Residential delivery + $150
For clarification the 560 is the smaller unit up to about 18” rims has the square tube rear upright and requires assembly of the bead breaker.
The 950 is the larger up to 22” rims, has the “Bead Blaster” and main rear upright is a round cylinder air tank. There's also the options of the 2 helper arms the #232 unit making the #988 unit and the other 300 with the black additional upright with 2 arms on it with a disk, the #300 unit making the #960.
The Mayflower 988/680 pair can fit tight in a space about 80” wide IF the Balancer is turned sideways so shaft is out facing you. Other arm options will need more space. The 988 (950 changer with 2 extra arms) is about 45” deep.
I used casters on the 988(950+ extras), Harbor Freight #62276 3” locking 100lb. NEED (QTY 8) regular 1/2”-20 nuts (ORDER or get at a regular hardware store. Home stores don't stock them but can order some). Unit is at or over the max weight of the casters so user beware. Remove rubber foot on bottom, just pops out. Install 1 nut all the way down on caster then insert up through hole and install 2nd. Caster shaft needs a spacer so could use 1/2” flat washers too instead of the first nut. Foot bracket is upside down U channel.
1 Upgrade I added was a 1/4” NPT street elbow to the main airline input on the regulator after removing the factory Japanese style fitting the US doesn't use. That allows the air hose to hang down when connected instead of straight out the back. Then used a 1/4” male NPT to 3/8” hose barb to a 6' section of hose for a whip to move the connection out where it's convenient. That way it's easy to connect when using. Then I added a 1/4” NPT quarter turn valve so machine can be disconnected without losing all air pressure in case air supply line is needed etc.
Another upgrade I did was added a higher volume airline. The “Bead Blaster” is almost a joke and SLOW. If you see the size of airline and the regulator it runs through you'll understand. I've seen a few add a line at the Regulator. That technically does work but doesn't have the flow capacity I desired. So I added a line to the tank(rear upright). Remove the included Tee for the gauge. Tank bung is 1/4” NPT so I used a Milton s-646 1/4” NPT Hex nipple into the bung using 4 layers of Teflon Tape on all connections. Then I used a Milton s-655 Brass 1/4” NPT Tee which has 3 Female fittings. One end screws onto the previous nipple so the middle connection is centered and angled down and back a little. The included Tank gauge Tee then screws into the other end of the new Tee. Then the middle is a port for a new hose to connect Using a male 1/4” NPT fitting like Milton s-602 1/4” male NPT to 3/8” ID hose barb and a hose clamp etc. I cut about an 8' chunk of another 3/8” ID air hose. I strongly suggest not using 1/4” hose. Then a quick connect fitting on the end. I use and highly recommend the High Flow Milton Type V couplers. You can use a regular air chuck or make a little bead blaster that runs way better. Use a quick connect fitting then a quarter turn 1/4” valve then a short section of hose and an air chuck that locks on. This is a much higher volume short hose feed off the tank. Smaller and more hose length are restrictions. You can now swap chucks and fill higher psi tires and a higher flow bead blaster. But care must be taken using the new bead blaster as it's got straight tank pressure. So use carefully and once bead pops insert valve and use a gauge to fill properly.
680 Balancer Options/Upgrades
Many truck rims will need an additional adapter cone with 5.5” diameter that's sold separately
For best results the 680 Balancer, should be anchored to floor. Don't just bolt down unless floor is perfectly level where unit sits. Base is bolted down with (3) 3/8” threaded anchor bolts ideally with 2 1/2” of threads sticking up to level with. Method is below. I wasn't ready to anchor yet so leveled with 3 3/8” x 2 1/2” hex bolt, 6 3/8” flat washers, 6 3/8” nuts. A small thin rubber piece size of a tire patch works good on floor to help keep from walking across floor.
Install a nut on the 3/8” bolt approx 1/16” from head of bolt, then a washer. Insert bolt FROM BOTTOM UP through holes on bracket then install 2nd washer and 2nd nut loose, then do same to other 2 holes/bolts. The lowest nut can be adjusted up and down to raise and lower the machine bracket sitting on it. Use a 2nd wrench as needed to hold the hex head while adjusting nut up/down. Use a 24” level on the side of the case to adjust till plumb side to side and front to back. Don't use the plastic tray on top, there's no way to know if it's level to anything. Use the base sides. Then when height is good tighten down the top nut to keep height. 1 wrench holding bolt head 2nd on top nut tightening. Essentially the machine bracket is sandwiched between 2 washers with a nut on top and below. Parking lot light posts are mounted similar for reference except threaded rods are in concrete. As the concrete anchors should be to secure it.
I'm interested in your tire machine modifications you should really make a video of the bead blaster and other little things you've done I have worked on these machines for 3 years now and and figured out most if not all of the tricks and quirks doing alot of low profile and all terrain stubborn. Golf cart tires from 8 inch to 14 inch and also work truck and car tires but I am very interested in increasing the bead blast it is fairly weak and only works at all for me with truck or trailer tires that are very soft with large sidewall I'm curious with adding new hose and increasing the flow have you thought of drilling out the bead blast holes on the clamps themselves?
Thank you. Good video. I think I have that same rain tire.
finaly a good video with detailes,
Totally need one of those machines ....”dear Santa” lol
Then a balance machine
For bike tires the static balancer works fine
Great video
Great video and way easier then the old Armstrong type of tire changes lol.
i had a no-mar before which was... ok if i did a few tires a year. but i occasionally have weekends where i'm doing 10 sets and that was brutal
I bet lol. What are you using for a balancer?
Just a static balancer when i feel like it (ususlly for my svs i dont bother)
Thanks ! 👍.
Awesome video! How do you balance the tires?
Thank you for posting this video. It helped me to use my machine. However, I would do a video using an actually stiff walled tired, not a soft mock up tire.
it's basically the same though... ive done everything from cruisers to minis to cars with it. if it's hard to do something, it's cause the other side isn't in the drop center.
@@Mad8vCycles Yes I've discovered that holding down the one side so it drops it the center helps a lot. It's been a while since I've changed tires so I'm just getting my bearings again (no pun intended)🤣
i have a bunch of little blocks of wood that i'll shove in to keep it down. or no-mar yellowthings are pretty useful too.
@@Mad8vCycles yeah I should buy some of those yellow things they'll come in handy
Honestly just one is all youll ever need. They also have a lifetime warranty on the coating so if you tear it up theyll exchange it
Thanks for making this video. I've been wondering if this machine would work for my motorcycle tires. One question - it looms like you may be using some type of wheel adapter. Is this a correct assumption and can what are they / where did you order them? Thanks!
Thank you bro ❤️
did you have to get a different duck for motorcycle tires? i see you added the motorcycle clamps
nope, same one i had that came w the machine
the one i have access to doesnt have those lifted arm adaptors.
thankfully the bike tire i need to change only has one brake rotor and my buddy owns a tire shop AND this exact machine.
they were pretty cheap on amazon and are probably fairly universal
@@Mad8vCycles I'm on the kind of budget right now where the plugs themselves are pushing it. I'll just do what I do with custom tires and have it hold the lip of the wheel on the non rotor side n do my thing. I'm plug patching a tire. Just to share. Tires like maybe 500 miles on it and I'd be silly to replace it now.
Hey curious, have you ever used this on motocross tires say 19" and/or 21" that have tubes and rim locks? Thanks
21s i have to do with spoons. too big for the machine.
19s work fine with this machine
where did you get the MC adapters...ive been looking at different ones...some are located in China, so i dont want to order those
i think they were just on amazon. www.amazon.com/Mayflower-Function-Extension-Motorcycle-Adapter/dp/B073DK5PK3/ref=sr_1_3?crid=YSNLCMTMK4XK&dchild=1&keywords=mayflower+motorcycle+adapter&qid=1628011315&sprefix=mayflower+motorcycle+%2Caps%2C168&sr=8-3
@@Mad8vCycles *So with these adapters i can put them on regular “Car” Tire machines?*
Yep. They just clamp to the claws
Which model is this? Did you purchase any motorcycle specific adapters?
The cheapest one for mayflower. And yes i got the rim clamps
@@Mad8vCycles thanks
The TPMS sensor on my 2020 Goldwing wheels sticks out pretty far up inside the wheel. In your video, it's not shown nor mentioned. How careful do you have to be not to dislodge or damage the sensor? Also, breaking the bead right where the sensor lives could also damage the sensor. When I take my wheels into a local shop, I'd like to "instruct" them or at least ask them if they're aware of this potential.
I have no idea cause most other bikes dont have tpms and none of mine do
Keep sensor at approx 12 oclock and it should be ok, essentially 90 deg away from the breaker bar
HOw is the Mayflower holding up?
still doing its thing. i just replaced one of the plastic sliders on the head from being so worn down >
Good vid. but that's the most easy tire to mount and demount like yoy say, i do al lot of this and struggle te most with large rims 19" to 21" with stiff tyres and a inner tube, or without a tube but with a pressure sensor. Can you make a vid for those sort of tyres? Sometimes i think that the adjustment of my duckhead isn't right, is there a proper way to mount those ?
i literally have never done a dirbike or cruiser tire >< because why would i (it's all for me so it's all 17s)
@@Mad8vCycles Lucky you ! haha
Can you do a 21 inch front motorcycle tire with that size machine? It looks like a Mayflower 560 with car tire max outside clamping size of 18". I'm wondering if I should go for the next size up, the 950.
i dont think it can. but 21" is dirtbike shit, right? so you do those with spoons anyway
@@Mad8vCycles Mayflower sells adapter (and many other brands fit too). The adapters raise the motorcycle wheel up so the duck head can reach). I ended up ordering the 950 since I figured I might need to do SUV 21's sometime in the future and I wanted to have the helper arm mounting spot too. Thanks for getting back to me though.
I have the moto adapters on there.
@@Mad8vCycles lol, my bad, I got this comment mixed up with another video.
@@Zt3v3 The adapters are needed for the duck head to reach the rim? I have the 950 and was planning on mounting some MC tires. I was unsure if I actually needed the adapters or not. Do you have the MC balancer adapter? if so, how well does it work?
What mayflower machine is this?
Cheapest one
A coats and weaver can’t be compared to a mayflower in quality and or price. I noticed you also upgraded your wheel clamps, so that’s not your average mayflower machine.
id bet they're made in the same factory and spraypainted a different color.
the clamps are the amazon moto adapters yeah. i use them sometimes. and often cant cause they make the clamp smaller (19" wheels for example dont fit)
Where I can buy this machine
I think i got mine on ebay. Or coates site or something
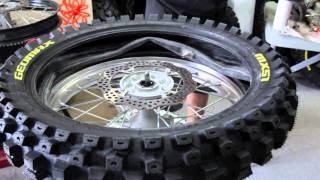
that is a crazt looking space moon vehicle tire! what where who?
race rain tire. basically all the rain traction and no way to ride on it in the dry (it will melt in a lap or two if not being cooled constantly by water from the track)
Far to easy.
Where is the best place to shop. Everyone wants $1650-$2200 for them now when I see online just 1-4 years ago people paid way less than that
I just grabbed it on ebay... prices went up it seems?
@@Mad8vCycles yeah upon investigation looks like most companies across the board are about $300-350 more expensive now vs 1-2 years ago. I’ll still probably end up getting one.
@@jbstrongman see if ebay does one of those 10% off promotions sometime.
agreed, the no-mar is junk. :P
it's the best manual one imo. but if you do a lot of tires, it's hard... and it's not quick. and sometimes you spend an hour fighting with a tire for no good reason