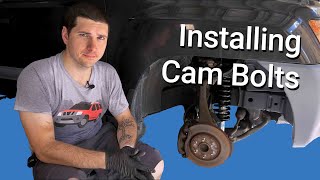
How to Install Camber Bolts

Vložit
- čas přidán 9. 06. 2014
- How to install camber kits. Learn how to install camber bolts so you can adjust the camber on your car or truck. You do not need any special tools to do this job, just a few basic hand tools. The job straight forward and anyone with basic tools can do it!
Here are the camber bolts I used: www.amazon.com/gp/product/B000...
How to replace a tie rod end FAST: • How to Replace an Oute...
How to replace a Control Arm: • How to Replace a Contr...
How to replace a Shock Absorber: • How to Replace Front S...
*If the video was helpful, remember to give it a "thumbs up" and consider subscribing. New videos every Thursday*
-Website: www.ChrisFixed.com
-Facebook: / chrisfix8
-Twitter: / chrisfixed
-Instagram: / chrisfixit
-Subscribe Here: czcams.com/users/subscription_c...
-CZcams Channel: / chrisfix
Disclaimer:
Due to factors beyond the control of ChrisFix, I cannot guarantee against improper use or unauthorized modifications of this information. ChrisFix assumes no liability for property damage or injury incurred as a result of any of the information contained in this video. Use this information at your own risk. ChrisFix recommends safe practices when working on vehicles and or with tools seen or implied in this video. Due to factors beyond the control of ChrisFix, no information contained in this video shall create any expressed or implied warranty or guarantee of any particular result. Any injury, damage, or loss that may result from improper use of these tools, equipment, or from the information contained in this video is the sole responsibility of the user and not ChrisFix. - Auta a dopravní prostředky


Chris, I just replaced all four control arms, four shocks, two sway bar bushings and end linkage and installed four cam bolts on my 1998 Mazda B3000 pickup. Your videos were a HUGE help. It makes the job so much easier when I've already seen exactly how its done on video. Also your tips on technique are excellent.
Your video quality is outstanding and your verbal instructions are crystal clear. Outstanding job on all your videos. I can't thank you enough. Well done! Keep 'em coming.
Your the only decent DIY guy I know. Rather than pay some guy on line to tell you how to repair or diagnose a problem, your always there to help.
CZcams is just an amazing source of information especially when you find a quality person such as Chris
+Tether Plus You're** x2
Reptiles ko
He makes money telling you how to do all this work. It isn't "free". Otherwise he wouldn't do it. What it costs you as a viewer is time. Time to watch any given ad that pops up. I don't think many people realize that.
@@Void-gn9zm so you think all these very helpful diy guys on CZcams many who are amazing mechanics, carpenters, electricians make money to make their helpful videos. Most definently not! I watched this whole video and 10 more just like it without a single ad.
hey Chris! Just wanted to thank you for the overall knowledge you you spread here. I knew close to nothing before I started watching all your videos and now over the last few weekends, I flushed my radiator, changed my oil, flushed my power steering fluid, replaced my drums, shoes, wheel cylinders, the assembly inside, my calipers, rotors, pads, wheel bearings, upper control arms, lower ball joints, inner and outer tie rods, all shocks, coil springs, and sway bar links! like I said I knew almost nothing before! blows my mind. thanks for introducing an awesome hobby I didn't know I loved and saving me a ton of money!
Dude just wanted to say that your videos are great... short, sweet and to the point. Saved me a lot of head aches, thanks...
+Jose Matteo Thanks Jose!
thanks Chris Fix, i haven't worked on a vehicle in years... now i took my 2006 ford ranger in for an alignment and need to change my Alignment Caster/Camber Kit.they wanted $250.00 for both sides, hell the kit is 36.99 for one side i now can do it my self and save money for the more important BILLS that i have!
+Johnny Garza Awesome!
After 2 hours of searching I finally understand how these bolts work haha, thank you very much Chris.
Also just doing a quick cruise the the comments I found something very odd, this video is almost a year old and you are still answering peoples questions! Not meant in a bad way, but most people who upload these videos it seems like they just hope the people figure it out on their own, but you make sure we get it right, kudos to you.
dethreveng I answer every question and comment (although that might change because I get over 200 comments a day and it takes me 3+hrs a day to answer them all). I do my best to help!
Great video Chris
But when you're torquing the bolt at the end you should Jack up the knuckle to bring the control arms to their normal resting place when your wheels are on. You do that so you don't twist the rubber bushing in the control arms.
Also your cams in the front are pointing down while the ones in the back are pointing up.
Should they all point up? Or point down? I’m installing them tomorrow and can’t find any information on that
I usually only look at these type of videos when a mechanic talks to me about something, but videos like these make me want to get a garage and do everything myself. Thanks for the video!
Scott Petrovic Haha, it gets addicting Scott haha. Im glad you like the video. Definitely consider subscribing! New automotive "how to" videos every Thursday and most Mondays!
Me too. I already have the basic tools to get things done. Just need the garage.
@@T82ravdaman You don't need a garage for most things. I do almost everything on the sidewalk, if I need a flat surface, I go to the Walmart parking lot
Right.. I've been outdoor doing everything in the driveway thus far.
I'm from Southern Ontario and seeing an underside that clean and not rusty is what dreams are made of
Haha, this is actually not bad for NY. I just undercoat my cars so I feel your pain!
Lol I moved to alberta from Ontario.. I was always into cars but can't imagine fighting rust ever again
Dude, you seriously rock! We were just discussing this in my Pathfinder group. Because it is something that needs to be done for alignment after installing a lift kit. Thank you!! Shared the video to the group!
Chris, I know this an old video, but wanted to drop you a line. Picked up a low mileage 99 Ranger to keep my 18 Mustang out of Ohio snow. Your channel is amazing, so much help to know what to expect prior to getting started! Thanks and keep them coming!
one of the best channels on CZcams. simple and to the point videos
+Ricardo Razo thanks a lot!
Chris you are THE MAN! If i had money i'll give it all to you, but i don't have any. That's why i watch your videos because i'm almost always broke and you save me a lot!!! So, THANKS A LOT and take this imaginary money that i don't have! :-)
Clear concise instructions with no music, no BS. Wish all CZcamsrs were like this.
You are GREATLY APPRECIATED Mr. FixIt. Please keep up the great work and service you provide to the communities.
I just did the upper control arms, lower ball joints, and tie rod ends on my 03 Ranger. It was an absolute bare getting the new control arms in and lined up. The new control arm bushings were snug, I had to use a rubber mallet and an alignment punch to line everything up. The wheels were toed way in once I got it all back together. Felt really weird driving it up to my shop so I could get it realigned. I'm having them double check everything on it as well. I'm sure they will have to loosen the camber bolts when the put in on the rack to set everything. Your videos helped a TON with getting the job done.
Thoroughly explained and easy to understand.Thanks Chris!
Im so glad you bought that truck. I have a 2001 ranger and pretty much everything you've done to your Mazda I've had to do to my truck. Thanks for sharing. It really helps.
Haha 01 ranger gang
Same
One of the rare videos on here that are shot in a nice, clean, straight forward manner, with good explanation and no stupid "uh, um, ah, um, ". Subscribed!
smithraymond09029 Thanks a lot! I am glad you liked the video! New automotive 'how to' videos every Thursday and most Mondays so stay tuned!
Chris, nice video. I just added these adjust bolts to my '03 Marauder. Interestingly, my camber adjust bolts went through the lower control arm (one bolt on pass side, one bolt on drivers side). The stock part did have rotation ability, however, not enough once I add ridetech coil overs - which I am doing today! Thanks again.
after 8 years of watching you this video FINALLY paid off helping me!!
***** I was actually hoping that rebuilding the front suspension completely with the new control arms, bushings, ball joints, shocks and end links, that the alignment would go back to factory, but it didnt. That is why I got this kit. The knuckle/spindle could be the reason it is not aligned but the bearing is fine so I am not changing that. Plus, I wanted the camber to be adjustable so now it is!
Thanks for the video! Have you had any issues with these bolts? Thanks like stripping or slipping? They look pretty sturdy, but I'm slightly concerned with them as the cams aren't welded to the bolts like the factory ones are. I'm strongly considering ordering them for my Ranger. After two years of use do you have any complaints or issues with them? Thanks in advance!
Did you have negative camber issues after installing new lower ball joints? I'm having that problem, not sure if I got cheap ball joints or what, didn't specify a direction to put them in either. No writing or markings that I could find anyway. Was contemplating doing the job over again, maybe I'll try this first. Thanks
These videos are SOO helpful. Own a 2003 Ranger FX4 which in all aspects is similar. Your videos are saving me a TON of time and frustration. Doing all new (Energy Suspensions) bushings, tie rods, ball joints, sway bar, and shocks on mine (along with torsion keys to level it out and make room for a little larger tire).
ChrisFix do these also make caster adjustable? Some I'm seeing say they do but I'm having a hard time visualizing caster being adjustable from the upper control arm instead of just camber.
Vids are great man. Keep it up!
I went for an alignment on my F 150 after changing the upper control arm and lower ball joint and tie rods. They wanted $150 for camber install. I bought the kits and did it my self. Back for alignment tomorrow. Thanks
I love watching chrisfix videos not because I'm going to do install camber bolts but I like his videos. and it gains me confidence to fix simple things and that has saved me alot of money and time for the small things I have done. Chrisfix is my idol.
Thanks! Your explanation on the installation of the camber bolts is the best compared with the other you tubers. On one site they installed erroneously the small washer on the outside of the large adjusting camber washer.
Had a mechanic quote me $800 for this fix. Thank GOD for the internet! Found what I needed, where to get them and this excellent tutorial in half an hour!
Been ripped off that way once many much. Also
Chris fix videos always help me. Thumbs up always! I thought these kits were doing something under tension but evidently not! I'm going to be trading out some standard replacement upper control arms and lower ball joints for mevotech tough trail ball joints and control arms on my Dodge Ram so I wanted to know what the mechanism for these cam kits was doing and now I know...nothing! No, I know they're doing something...it's just under a loaded tension or compression as I imagined. So, this will be an easier job. I just have to peep the kit and make sure I put it back exactly as it was set to begin with and yes...I am getting an alignment after I replace these parts on my truck and I just had some new all terrain wheels put on with much larger tread so it needs a bit of adjustment but over all I personally am always suspect of any professional work done to my vehicle as being totally unnecessary! Unless it's a computerized system being used on my car or I can see and work along with someone as work is done to show me what difference it makes then I am always suspicious it does nothing!!! So, I know a bit about my suspension after rebuilding it all and I'm still not 💯 on alignment...I'd like to know more about the process personally! Anyways, thanks for another informative and enlightening video that always helps me with my own vehicle.
I replaced the complete upper control arm of my 2001 Ford Explorer and remove that knuckle was incredible hard to do it the space between it so tie, the video help to much, thank for sharing and teaching 👍🏽👍🏽👍🏽
Chris your my HERO. I learned so much about cars from you. You have gave me my man hood
Thanks a lot!
My 2003 F150 2wd is identical to this. I just replaced every steering part on the front end and the alignment shop advised me to install these bolts before bringing it for an alignment. this video made it easy for me thanks
dam , been looking for my cambers... this is a most excellent channel 👊🏼
Awesome, thank you!
@@chrisfix no ty , you've got a A+ channel... keep up the good work
Aye man I just wanted to say thank you for the way you teach in your videos. You are giving people confidence to try new things and the world can use this right now. I have a Podcast that is growing daily and one day we may align to do an episode as I always encourage people to try new things, especially when it comes to fixing something internally and externally from themselves. Much Love
Never fails chris fix has the video i need even when i get a new junker, i always end up here. Good stuff brother!
ChrisFix, you're awesome Cuz! I watch several DIY channels for my car adventures and I think yours is best. Success to you here on CZcams! And Thanks for the help!
Went to Firestone shop for my 2007 Frontier lifetime free alignment. They said i need cam bolt. I told them its 12 yrs ive come here n not one time i needed it. Asking me $281. I said dont adjust it yet. Now i will try to put this on myself. Thanks Chrisfix.
This was extremely helpful! Im somewhat car machanics savvy, but what I dont know I research and learn on my own! I have a 2012 malibu and wasnt sure if a camber kit for was a strenuous task (or expensive)! Your vid taught me what I didnt know and this gonna be applied very soon thanks to you!
UNTOUCABL3 Awesome! I am glad the video was helpful!
thank you so much! your videos are every informative and easy to follow, now to do the same on my frontier! subscribed!
best video ive seen man, idk why you dnt have more subscribers, i love the step by step with explanation, keep it up bro
Thanks for your video. It's very helpful
Your videos are well thought out and your explanations are concise and to the point! Well done young man! Although I work on my toyotas i always see if you have any videos on the subject at hand to see if I can gain any insights from your point of view! It helps me recall the details that I may have forgotten! Thank you ! Keep em coming Im a subscriber !
+Mark Perea Awesome Mark! I am glad the videos are helpful and thanks for the support!
Thank you Chris you're the real life hero!! Fist bump!!!
you have a great explanation that it is sorta like a cam's lobe. I had my bolt in today doing this without the arm and its exactly like a cam in an engine!
I didn't even know this was possible. You just cannot beat a ChrisFix video.
!!!! I didn't know these existed!!!! I'm going to install them when I get my new upper control arms and lower ball joints. Thank you again Chris!
+RazorTNK They are super helpful for camber alignment!
You did a great job explaining. Thanks!
Very well done. Right to the point, clear dialogue.
Awesome video! Very clear. Very helpful. Thanks!
awesome, I was pretty sure the washer went on the inside but yours is the only vid that showed that. Saved me looking up the 100 ft lbs torque to
Nicely done, Chris! Thanks for this and all the other great videos!
Thanks bud! Glad you are finding the videos helpful!!!
The part where you said they told you it'd be $150... and it cost you $20. This has been driving me NUTS about shops around here lately. Most recent incident was with a place quoting me $350 for the driver side and passenger side camber bolts and tried explaining to me how it would take 2 hours for that job. Needless to say I told them to go fly a kite. Thank you for these videos you do and all the hard work you put in!! I've been making sure to share as much as I can with everyone! Self-sustainment is almost key nowadays! Good work!
Solid work. Keep saving me money brother. My '01 Ranger is feeling like a kid again.
Doing spray in bed liner (Raptor) as soon as it arrives. Wire brushed, sanded then rust converter on the rough spots and primered the whole thing.
robert montalbano Awesome! Glad the videos are helpful and make sure you take some pics of your project!
Chris. I just did this same job on my 2006 Ford Ranger.
might want to edit video.
your not supposed to torque the camber bolts unless they are preloaded as this can cause premature wear to the control arm bushings.
I lifted and put bigger rims on my ranger. I have a two inch spring spacer and it made the upper control arm practically touch the frame. It has a positive camber now and they said they tried adjusting the camber as much as they could. The technician said I’d have to get a body lift or adjustable control arms. I suggested camber bolts but he dismissed it.
I didn’t look to see that I have the square bolts like you showed. So I took his word for it and searched for body lifts and what not. But after seeing this I think I’ll try the bolts. Thank you
great video. i was just told i have to replace these, and boom!! i found your great video. guess i will give it a try.
Chris, for my 97 F150 4.6L XLT RWD, the FSM says to mark the cam disc and make another mark on the bracket FIRST before removing the control arm for repair or replacement. When you put the bolts back in, align the mark on the disk with the mark on the bracket. You have to do it with the "curb weight" on the arm, so that means tightening up the nut enough to keep it snug but not so much that the control arm can't move up and down - and putting the wheel/tire back on and putting it back on the ground. Then the FRONT bolt needs to be torqued to value FIRST (84-114 ft-lbs in my case), then the rear bolt. This has to be done WHILE HOLDING THE ADJUSTMENT CAM AT THE MARK. In other words you have to hold the cam with one wrench, always looking to see if the disc/cam has moved from the mark and re-adjust, while torqueing the nut.
This is done with the wheel/tire ON the car/truck, which is kinda tight quarters. I think the other way is to put a jack under the lower control arm and jack it up to where the centerline of the wheel (measured from the ground to the center of the axle with the cap off) would be as if the wheel were on. Maybe drill a hole through a piece of wood to pass the lower ball joint's nut through so you don't mess that up with the jack's plate. That's also with another jackstand under the frame if it slips, of course. I figured that would be easier than the way I did it. [Insert safety disclaimer here: as in - I'm not responsible for anything that happens to anybody who does anything based on my piss-poor advice].
My eccentric disc - the cam - has a small round hole opposite the bolt head and figure that there's a special tool Ford uses (and other tool makers sell) to do this adjustment. The only other thing I can see that might also be considered in this process is the square plate behind the nut that is probably also moved in the factory adjustment procedure. It ALSO has the "D" shaped hole and might be moved in or out from the frame to keep the centerline of the bolt in line with the axis of the other bolt or other steering geometry. Not sure about that, having never worked at a car factory or alignment shop, just repairing cars for 60 years. Just learned all this from my Dad who was a tool and die machinist and also built race cars with his friends back in the 40's - 50's.I like the idea of the replacement cam bolts better, because it's obvious the square hole is for a ratchet wrench to make it easier for the alignment shop. Having an eccentric disc on BOTH ends would mean you could be sure to get the axis of both the bolts in line, because they BOTH would be held in the center of the brackets, not just on one end as they are with a movable rectangular plate. You could maybe use a laser pointer to verify this, since they're cheap enough now. But I think it would still be a good idea to make marks on the old disc and the bracket, then try to make one on the new cams to match the old ones before putting the new adjusters back in so you can get a camber value close to the factory setting before taking it to an alignment shop.
The only other easy way I can think of, to keep a "near factory" setting until you get to an alignment shop, would be to measure the distance between the bolt and front or back of the bracket - at BOTH ends of the bolt INSIDE the bracket. Probably best with a vernier/dial micrometer. Then cut and grind down a bolt or something to put in between the bolt and bracket (same place you measured) to keep the bolt at the same distance it was when originally set. You could leave it in place or knock it out before having it aligned properly. Of course if you had a level and protractor setup to attach to the wheel (accurate measure from top of rim to bottom) and verified that the camber was the same as factory spec, you might not even need an alignment after that, assuming there was no damage to any other part of the suspension/steering and you didn't change the toe-in. Of course I'd still spend the money for an alignment some day. Thanks for the video.
I love how the bolts just effortlessly slip out of the bushings. If this were in Canada you'd be drenching them in Moovit before pounding on them for an hour with a mini sledge the whole time knowing that you'll end up just sawzalling them out and getting new bolts and bushings from the dealer for $150 because they're the only ones that stock the parts.
Hahahahaha of course
Right
Great job and video Chrisfix !!
Thanks Chris. I didn't know they made these replacement parts.
Thanks!! I was wondering how diificult this job was. I just ordered some cam bolts for my Frontier
Read today (after I tightened mine) Its best to tighten your control arm bolts while at ride height. It reduces twisting of bushing when you set it down.
Hard to do with the tire on. I set the lower control arm on a jack stand, then tighten the nut. Let the aleignment shop worry about it when they do their job
Well done video. Couldn't be more clear. Thanks.
Once again, You've saved my life and my pocket.
I’ve been watching ChrisFix for years and I just now found this video!
Same here!!!
I'm so stupid happy you own a Mazda B3000.
Excelente vídeo , claramente explicado,thanks a lot from México
Dang Chris ur vids are good money savers! Thanks!
Wow, your truck is very clean!
Your the best ChrisFix keep up the awesome work man
thanks chris. i bought my own from napa for 40 bucks a kit (you need two kits / one for each side). the alignment shop was going to charge 125 for the kits... another 130 to install... so basically I saved 175 dollars. thanks man!
I don't understand how there are people that give you thumbs down!!!
I congratulate you for your videos!!!!
j charles Thanks man! Haters gonna hate (or they miss the thumbs up button by mistake lol). New automotive 'how to' videos every Thursday and most Mondays so stay tuned!
Nice job Chris. Thank you.
Chris is a pro at tapping that
Excellent video quality!
You're seriously a life saver!
Nice I didn't know you could change them out. Thanks
Thanks for this helpful video!!!
You’re a legend Chris.
Do you have any videos for working on VW' Passats and Jettas? Your knowledge, procedures, and no-nonsense presentations are awesome and should be respected. Thanks in advance
Not specifically but my videos are broad enough to apply to most vehicles.
I can never truly trust him after i filled my headlights with soapywater
???
Blinker fluid
LOL
@@jamesmoat2023 Lmao you actually think he fell for it tho? Pretty sure he was just making a reference.
You mean soapy wooder haha
it's actually a 13/16 wrench or socket. I just did these on a 99 Ford Explorer and they were a pain. the driver side was by far the worst with all the brake lines in the way but the passenger side was a lot easier I had it done in about 30 minutes also with new control arms on both sides.
Brake lines... Yup!
You need a cashapp bro, just so we can send you a tip. Even if everyone of us sent $1 just once, you deserve it for all the help and knowledge you provide!
very helpful have pretty much same truck 2000 B4000 need to get camber kit glad to see its an easy job thx Chris subbed;)
+Seth Stone Glad the video was helpful and welcome aboard!
Your truck is very clean good job
I'm amazed on how much I saved thanks to your vids (and other YT vids as well). I am not only able to change brakes, suspension, joints or diagnose and fix some engine issues, but can also properly repaint the car so it lasts. And in my work it counts because where I work you usually destroy the car in a year (after 10 000 km). The new cars they make nowadys wouldn't even last two years.
@BL Dontmatter I'm a mailman in Poland. I deliver postage in the villages and we have to use our private cars. In times where other in other countries they get electric cars (which are be best for this work because of instantenous torque) to be more ecological we use old private cars which make the company look poor and unproffesional, but that's how it is. In 5 years I scrapped 3 cars. Swapped two engines, damaged 5 or more exhaust, even damaged the gas tank once, brakes are for half a year and the clutch is max 2 years. One guy damaged two oilpans in one day.
@BL Dontmatter too much fuel consumption, I just buy old banged up hatchbacks which would normally go to the scrapyard because of their looks and age but are working and are in good shape. I have one car which is my "main" car and I use it most of the time. It's 28 years old now and beaten up but has a healthy frame, swapped engine, modded brakes and suspension XD it's breaking all the time as well but it's not because of its age because literally nothing is stock.
@BL Dontmatter I have to get like 25mpg (and that' already crazy high because notmally it gets 30+) if I want to have some money left for fixes (they per for mileage). A 4x4 car with a 4.2 is what rich people get over here and they cost a years worth of paychecks to get a 20 year old one.
Great descriptive and informal video!
Dallas Smith Thanks man! Glad the video was helpful! Definitely consider subscribing! New automotive 'how to' videos every Thursday and most Mondays!
None of the alignment shops will put my European car on their rack citing their shop does not have proper tools. This makes me want to do it old school with a homemade bubble level gauge.. Set the camber angle, measure caster variations & changes in the toe to prevent excessive tire scrub.. Good video of an OEM issue
heavymechanic2 Thanks! That stinks. What tools do you need to adjust the camber on a European car?
Some shops rant about sand bags to weight the seats (used on BMW) my car is a S-Class Mercedes and it requires a thrust bar to load the suspension with 145 lbs between the wheels. The camber bolts you installed are similar on the lower control arm bolts, and if worn (or bent) require a special spring compressor. Its a long-arm short-arm configuration but the parts are unique and that scares people because its outside their comfort level.. The rear suspension requires rubber shims on the springs to dial in the camber... This car was in an accident and the RF wheel has -4 camber, (+.5 to -1 is typical). LF measures -2 and its normally set more neg due to the crown on the road. Measurements were estimated with a carpenters level and the car wanders all over the road due to excessive NEG camber. Caster is also set at +10 and some machines dont have the software for that setting..Hope this helps
Thanks, as always, for the awesome video. I've always been pretty capable but I've learned a lot of neat tricks from you.
You know how otherwise intelligent people can do some *really* stupid shit sometimes? Well, yeah, I couldn't figure out how in the world you were supposed to tighten the bolts on this kit. I mean, one side is kind of "slotted" for the adjustment washer to fit on, and the washer can't turn 360 degrees. That was my brain trying to work after getting home from a 12 hour shift and not enough sleep the night before.
Anyway, after watching your video the obvious answer hit me -- you turn the nut, not the head of the bolt. After bashing my head against the wall to try to knock some common sense back in, I went outside and wrapped up the job in no time.
FYI I bought the Moog Problem Solver kits from Rockauto for less than $20. I replaced both control arms and upper ball joints at the same time, since it was basically no additional work at all and the total cost on parts was only $150. Firestone wanted $240 just to supply and install those "adjustment kits"!
always great vids. two thumbs up👍👍.
+jamesblake1848 thanks
amazing video, now i can go and replace mine. thank you!
Carlos Maya Perfect! That is the idea! I am glad the video was helpful!
helpful video. i appreciate guys like u taking the time to make videos. 1 question. Why didn't you use the open end wrench for the nut so the bolt could come thru it & use the socket for the bolt side?
I couldn't stop looking at that shiny shock :D
Wish mine were 5 mins each. Got a 2012 ram 1500 big horn. My camber/caster bolts are on the lower control arms. Passenger side went smooth. Driver side the bolts were seized in the bushing. Strut bolt also seized in bushing. Cut off with sawzall and waiting on a new bolt and bushing for strut mount location. Then I’ll take my control arm to the local shop and have them press out the old and in the new then I’ll put it all back together and take it to get aligned. Ugh was supposed to be a day or less to do. I’m now a week into it and it’s basically bc it takes a day or two to get the parts… I’ll be so happy when it’s done. Was gonna do the passenger side bushings but since they weren’t seized I’ll do them later….
You are the f***ing man Chris! Saved me almost $300. Thanks so much
***** AWESOME! That is what I like to hear!
I just got done replacing my tie rods and the sway bar links on my 96 Ford Explorer. A day when I’m not busy I have to install my cam bolts.
+radcls01 radcls01, I cannot reply to your comment for some reason but I hope you see this. I checked and see they make a kit for the rear which is just like the bolt you saw in the video.
GH HV HV hhchdhgeg😁😁😀😅
Replies ko
Whats the part number for camber bolts for 98 ranger?
Part number plz for camber bolts on a 98 ranger
great job on 2 mil subs
Where your shock/ strut is bolted to the spindle , you can drill the top slot so you can adjust that way as well much more easier
Just bought a "lifetime alignment" package and was told on the third alignment in 2 mos, that I needed to change my camber bolts in order to achieve factory specs! Hilarious! Now I'm gonna bully them into changing them for free or doing a new alignment every 2weeks!
Hey Brother thanks for the informative video, it helped me out and save some money, God Bless.
kotrk69 Awesome! Glad the video was helpful and saved you money! New automotive 'how to' videos every Thursday and most Mondays so stay tuned!
Awesome job 👍
Great job thank you