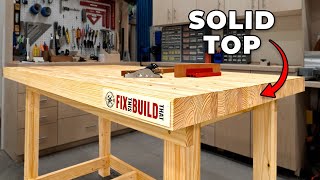
How to Build an Easy, Sturdy Workbench

Vložit
- čas přidán 7. 05. 2021
- Follow me as I build a strong but simple workbench that every DIY'er should have.
Proper DIY Patreon Page: / properdiy
🧰 The tools and equipment I use: www.amazon.co.uk/shop/properdiy
Amazon links to the equipment used in this video...
► Stanley Saw Horse: amzn.to/3vUD8oO
► Mitre Square: amzn.to/3f2sRjV
► Countersink Drill Bit : amzn.to/33F2DPf
► Quick Clamps: amzn.to/33qSuW3
► Dewalt Impact Driver: amzn.to/3tvYFmq
► Dewalt 18v Combi Drill: amzn.to/2MiM71A
► Bench Vice: amzn.to/3uzOzCf
► Tri-Dolly: amzn.to/3tq74b3
The Amazon links above are affiliate links. It doesn't cost you anything to click on them but I do earn a small commission if you do. As an Amazon Associate I earn from qualifying purchases. - Jak na to + styl


the author does like to from scratch, shaping and trimming wood from large blocks into fine finished products. czcams.com/users/postUgkxD-QRFQz730FJEh4f9BYSf-nkIMIC9hL_ as another reviewer mentioned, most projects require a lot of high-dollar equipment that most of us dont have the room or budget for. But, knowing how to do these things, even if we wont be able to practice the full stack project, is still great.
This is honestly one of the best DIY channels on CZcams. You do a good job of being thorough but not dragging on and making a ridiculously long video. Keep up the good work!
Glad you like them! It is always a challenge to get in all the info but stop it being 30min long!
Your so true long is a turn off
I think this guy is absolutely brilliant. Informative, very [very] good instructional videos, which are clear, straightforward, and with the right amount of information. He speaks clearly, has a good voice and I've learnt so much already. With this video, I think I have the confidence to build this workbench. Thanks ever so! 10/10.
👍
I wish you were my neighbor. I love listening to you and I’m learning so much. I’ve built a twin size toddler house bed, a workbench and a closet built in unit and getting things square is the most challenging aspect of any project. I see now that the right tools, clamps and attention to detail are the answer. That square jig you used in this project….wow…never knew such a thing existed. Thanks for sharing your knowledge.
Very quickly becoming one of my favourite channels:
Clever technique of completing a number of videos before uploading any to CZcams so you have a variety montage at the beginning of each!!! That takes planning and strategy !! No wonder you have reached a good number of subscribers in a short period of time.
Please keep in mind your humble beginnings when the channel grows. Too many larger channels now show ‘how they’re getting on’, with larger projects rather than ‘how they are DOING’ the projects themselves.....that’s how we got here in the first place......
Thank you for your comments and yes, there has been a certain amount of planning and strategy - well spotted.
All of my project videos are (and will be) based around what I'm doing in real life around the house so I hope will always fall under the 'DIY' banner whether building a table, fixing a fence or building a shed.
Thank you for your confidence that the channel will keep growing - that helps keep me movitated when I'm in the garage on my own for hours at 5 deg C!!!
Love the videos Stuart. Comprehensive, clear and full of tips thnx so much. You have given me the confidence to take on jobs that were beyond my ability previously. Cheers mate.
These are far and away miles the best simple and easy to follow videos.
Keep them coming
Thanks for the video! I’ve just finished my work bench using your design, and I love it! It’s absolutely rock solid too!
Thanks, keep up the good work 👍👍
Absolutely perfect timing for this video, you've stopped me contemplating purchasing a pre-built bench.
Thank you, and yet again another great video 👍
Good. Have fun designing and making
Here I go again....feeling guilty obtaining so much knowledge without paying for it. Super thanks from Denmark 👍👍👍🇩🇰🇩🇰🇩🇰
It's absolutely fine - I'm glad that my work is being helpful
😂😂 the clamping square got me, brilliant 😂
You noticed!
Again brilliantly put together. A dream to watch, precise instruction.
Thanks
WOW fantastic video. Straight to the point no drama and easy and strong table !!!
Nice build, simple, effective, great to follow. I watched dozens of workbench builds over the last week and I think I'm going to go with yours. THanks!
Thanks
I think you qualify as the modern day equivalent to the late Barry Bucknall who I remember from the days of UK B&W TV in the 1950 & 60's. Clear, concise, full of good ideas & a good sense of humour. Yes I'm old enough to remember him & I watched his shows with my dad not knowing at the time that I would need to put all that information to good use in the mid 1970's & beyond. After years of DIYing I'm now watching your vids with a better appreciation of the subject matter but always wanting to learn new ideas & techniques. Please keep up the good work you do.
That is very kind of you. I've heard of Barry Bucknall but he was a bit before my time. I think if you are practical and into DIY it's really good to see how other people do things and then to pick which bits you like to replicate. We are all always learning and if I can help do that while sometimes raising a smile then I've done my job!
@@ProperDIY 👍
Just building this now (with your idea for adding wheels😊)… with a slight modification as I have limited space in the new garage barn. I’ve added a drop leaf bench top / folding legs, giving me double the available work area. This allows me to fit this bench under a higher fixed bench… so that I can garage my MINI🤣. I reiterate the comments posted earlier.. great commentary and really good advice throughout. You are my ‘go to’ for proper DIY.
Thank you for this excellent, straightforward design. I've just finished my attempt and it's good and strong, despite my using horribly warped and rough reclaimed wood.
I’ve been watching your channel for the past year, I’ve just moved into my very own house and can’t wait to get started on some proper DIY!! I’m going to start with this work bench and also put the wheels on like you did! Thank you for putting the time into making these great videos, keep up the great work
Good luck in your new home.
I love your videos they are always straight to point and well put together. It’s brilliant to be taught by someone with an actual background in engineering too, how lucky we are. Well done Stuart!
Great video.In my world I spend ages selecting nice straight lengths of timber with no splits and within a couple of days of getting them home most of them have warped or split!
When trying to glue two parallel pieces of timber together, to stop them slipping and sliding, sprinkle some salt on the glue before putting them together. It'll stop them slipping and won't affect the joint.
Good tip
Salt does work - another thing I have done when using softwood is to use a couple of small ring-shank nails or similar placed flat between the wood on the joining face - as you clamp and get the glue meet the nails stop the two sections moving.
@@iant535 Or driving in a couple small trim nail and nipping off the head so theres a slight point sticking out...
An odd bit of doubled sided tape with the glue around it also stops those pesky bits of wood moving.
All your tips are better than mine; I was just going to use my pneumatic pin-nailer. I like all these ideas better though. 👍
🇬🇧
Some people have a natural gift for explaining things in a clear and simple way. I've waded through hours of workbench builds by mostly American youtubers with $1000,000 dollar workshop equipment. Finally, I now have the workbench that I'm going to build. And for that, I heartily thank you!
That is very kind of you to say that. I try to make thing clear (so I can follow them myself). I hope you have a good build.
I hope you have many years of fun in it.
Thank you Stuart! Finally finished my version! As a noobie, I made a few mistakes, primary of which was to not align the fence of my mitre saw! Which I fixed following your other videos.
Thank you again.
Nice video and a very sturdy bench at the end of it with no need for any complex joinery. I'm sure many new projects will be born from this!
Thank you. Yes, this bench will be well used and abused I think
Hi Stuart, I just made my first workbench using this video. I’m so happy with it (and chuffed with myself too). Can’t wait to use it for all sorts of projects. Thank you so much. 🙂👍
Nice one!
Love this easy & simple, I’m building a new shed/workshop, once completed I will use your design for workbench
Please do!
We’ll done a great video, straight talking, no nonsense, a refreshing change from all the American videos that talk for an hour about something that could be described in minutes. I will be watching more of you videos ! Thank you !
Brilliant! at last a no nonsense workbench project for the common man and fit for any workshop.
Thanks!
Great video Stuart, thanks for sharing.
Already looking forward to part two 😀
Thank you
I used some of that design today.Has 2 shelves,open all around and 42 inch tall,48x40.5 inch top.Solid as a rock !
Thank you for another great video. Most impressive part for me is the top was already square due to being cut by the shops panel saw. My experience is these things are never working when I ask :). Agree with other comments here you are one of the best DIY channels on CZcams. Cheers
Just found your channel today and have enjoyed several of your videos. Love the details you explain. Thanks.
Another one to add to my project list. Great video, thanks for sharing
Lovely job dad. Thanks.
Stuart, I recently subscribed and devouring your channel... I like your dry humour lots and you surprise me constantly with ideas; I thought I was up to speed with DIY (getting towards 70 years young!) but you really do give excellent presentations. I made my workbench a few years ago, many many times thicker and heavier but it had to be attached to a wall to stop it racking. I have still more recently added cross framing to eliminate it but I wish I had watched this video when I started to avoid the initial wobbles. My garage is narrow, sharing a large motorcycle and a 1000 litre fire extinguisher water tank (had to!) so every spare cc of space a valuable volume. I am still making more shelving etc to maximise space. Thank you for doing great work and I will soak in and re-watch your vids again. Best, James
Thank you very much James - it's very nice when I get comments like this and I'm glad that I am giving you some ideas, and, every now and then, raising a smile!
Rock on
I'm in ore of your craftsmanship. I have half a clue but plenty of glue. Got an outhouse shelving project and you have given me some positive ideas and really helped my planning
Awe.
I've used the 2x4 Basic leg set. The leg set is awesome! Make your workbench with 2x4 legs plus 1/2" top to any dimensions add your top and bottom and you're done. There are also connections for a center shelf. For about $120 you can't beat them.
Hello from Canada! Love your videos. So inspiring and easy to follow. I built a bench with the lifting castors for my miter saw. Works great! Please keep up the great work your doing and Thank you!
What a really good and well made, well explained project. Gives me confidence and the real desire to make something similar. So many high-speed-follow-it-if-you-can vids about woodworking, some of them are off-putting. But this one is great. Thank you so much for taking the time to explain the whys and hows. Only half way in, but had to comment. Subscribed!
Nice job with the workbench, it’s giving me ideas for my new garage!
Very well thought and executed mate. An idea for me to build mine.
I really enjoyed watching that video. Many thanks for sharing your DIY ideas, it really does give me confidence to do DIY tasks myself.
Keep up the excellent work - we all appreciate the videos !
I'm so glad!
So true
Hi Stuart, just discovered your channel…if only they could all be this professional!!! Excellent sir
Well thank you very much
Hi Stuart, Great video and I built this exact bench based upon your video with some very slight dimensional changes just based on the ply I had available for the top. Just a quick note for anyone making the same bench - mine started to sag a little in the middle and so was no longer level, so it's a great idea to add some brace beams/uprights in the middle section - just to support the weight of the worktop 👍
His design is good...not great
I built myself one of these over the past few days! It is the first thing I built in my workshop - it was fun and easy :)
Of course, my kid now says "you've not finished, you've not put wheels on it!". Sigh, no pleasing 'em.
Love you proper diy so much I love your videos
Perfect timing! I need one of these. Love the leg design.
Thanks
I like the entire build joints and top tips
Bit the bullet and am now using the lengths of 4 X 2 I salvaged from my old timber garage to build your excellent work bench, also using the heavy duty castors I had saved (hoarded) for years. Great simple design and excellent presentation,
Thank you
Well thank you very much. Enjoy the build
Nice bench Stuart, I made one very similar to yours for my shop but in the end had to put some castors on it, it became a real problem to move around so I had to bite the bullet. On the upside though it's great because I can now take it outside to work on exterior projects
Great Video Stuart. I Really like your strong, and movable workbench with loads of storage. I am going to make this bench now. Cheers Stuart.
Great video. In my next workshop will definitely be making one of these. Have a fixed bench at the moment but really like the idea of a moveable solid bench like this. Thanks.
Thank you. This week I'm fitting casters that I can raise and lower easily (once ive worked out the best way of doing it) so you may find that future video interesting too.
Excellent video, just what I needed right now. I'm going to probably add a sheet of steel to the top so I can weld on it (including an integrated earthing tail), but otherwise this design is perfect. The follow-on video with the casters is fabulous. 👍
Superb DIY advice, and 100% Made in Britain.
🇬🇧
One of the best
Just been thinking about making this sort of thing so perfect timing thanks.
No problem
I loved that joint
I was going to just buy a work bench ...but you demonstrate so clearly, i think I'm comfortable to try building your bench! Thank you very much.
Glad it was helpful!
Excellent video and work bench. I will be making one of these soon.
Great job !!
Thank you!
Excellent video! You made it look so easy.
Bench looks great, great video 👍
Excellent bench.
A tip for gluing lengths of 4x2 together, sprinkle kitchen rock salt onto the glue, it helps the timber lock together without sliding under pressure.
Hi Stuart - great instructional informative video -I really enjoy your diy videos. Thank you
A pleasure to listen to your advice and handy tips. There is one piece you don't show in the video, though - you have some supporting rail at the top for the mdf backing and its hard to see where and how that is fitted.
Great video as always Stuart, thanks
Good morning and thank you. I watched this tutorial about 4 times. And now have an amazing 2.3m x .8m workbench. It looks amazing and is superstrong. Cost £81.00. I used CSL glued/screwed and planed. Loads of storage. My Dads old vice is fitted . And this message is just to say a big thank you. I wouldnt of done this if it wasnt for you.
Excellent job. Very sturdy workbench. 👍👌
Thank you
Good solid no frills work bench & your building instructions & explanations are clear & easy on the ear. Brilliant👌
Thank you
Once the old brain cells Start thinking again that's a great thing
Hi Stuart from Oz. Love the channel and learn a lot from viewer's comments, like salt on the glue surfaces to prevent slipping. Bet you picked up on that one as well. But I would really appreciate you answering the question asked by a few and that is, running the 4x2's on edge as opposed to flat as in the videos. Serious question from a newby work bench maker!
lovely job !!! It s very good for inspirited me building my work bench ! GOD bless you ! 🙏
Glad I could help
Well presented. Easy to follow for any DIY'er. Thanks. Subscribed!
Awesome, thank you!
Great video. Really easy to follow, my next project coming up. Cheers. 👍
Great work again hopefully give me confidence
To try this
Give it a go! Call it practice and learn as you go.
Another great one here Stuart, nothing more satisfying than another nook to store lots of tools in!
Thank you
Best one yet, will make this one thanks.
Have fun with the build!
Another Great Video, and Tidy Job. Thank You 👍
Thank you
Brilliant work 😮
Great video it's given me my next project to do on my next few days off thanks keep up the good work👍
Thank you. Will do
Great works. The drill is powerful.
It sure is!
Love the way you plan your shots and transitions.
Thank you
Excellent video and process.
You helped me solve a problem that I have been working on for some time. I was building a caster lifting system similar to your watch your lifting system work inspired a solution to my system. Thank you so much for sharing. Bless you...I am a subscriber for life.
Thank you. Thats exactly what I hope for - that some of my ideas get modified into your own situation and it solves a problem.
Simple & well-engineered and at today's prices, finding that sheet of off-cut in the scrap bin is like winning the lottery. Nice videos & projects, all I need now is a bigger garage!
Thank you. I couldn't believe it when I saw it. I need a trolley so run through the car park and back to get one before it was grabbed by someone else!
Fantastic video, I am about to move house and will have a 11mt x 3mt wooden cabin as a man cave and will defo build the bench to stand pride of place, the only addition I will do is to put a piece of hardboard smooth side up fixed in place with panel pins which will give me a cheap sacrificial smooth surface without screw holes to collect dust etc, thanks for all the great videos
Thank you! 11x3m cabin will be a nice space!
Some great tips Top Lad all the best from Australia 🇦🇺🇬🇧👍🏻
Amazing video, so clear and helpful!!
Glad it was helpful!
Great video "storing tools and rubbish" 🤣 I hear you!!
Thanks. I say it as it is and glad to hear I'm not the only one!
Great vid again stuart its getting a bit of a habit precise instructions and a quality build very useful
Thank you - I'm glad you enjoy them.
hi there love the build, also to help the 2by4 from moving when gluing put a bit of salt along the length of the plants with the glue, hope that helps
Love your work - just came across your channel after your DIY lifting caster video. great stuff! Oh and I've been thinking about a laser level for ages, too!
Thanks - good stuff!
Brilliant as usual Stuart. You've actually inspired me into doing a job I was nervous of and willing to pay someone else. Now complete, successfully I may add, am really quite proud of myself. Sad? Probably, but I don't care. Thankyou. Keep doing this please, I'm certainly benefitting.
Excellent. It's really just practice like anything and it's not sad as I can totally relate to where you're at - one step at a time.
@@ProperDIY absolutely, but you're helping and inspiring. Look forward to your next mission.
Cool video, nice build. I like the clamping squares, going to rip them off.👍👍
Go for it - I won't tell Peter.
great video easy to follow and to the point not like a lot of others who love to hear themselves talk
I appreciate that!
Very engaging. Beautiful build.
Nice job. Great workmanship
Glad you like it
Nicely thought out and built. :-).
Thanks
Great video, just finished mine today, very solid, love it, castors go on tomorrow. Thanks.
Thank you. Well done! I'm pleased it worked out well for you.
👍
Fantastic. Probably the easiest build I have seen on utube. Most vids are overly complicated. Am looking forward to this project. Can't believe your luck with the shelves. That never happens. Subbed.
Thank you. No, neither can I - it never happens to me. As I was filming it I thought 'no one is going to believe this'!
Nice. A project I can get stuck into..👏👏👍
Go for it!
I like the idea to put the 2x4's flat around the perimeter. Designs that have them on edge seem to promise issues with dropping carriage bolts for a vise through.
Brilliant video. 👍
Excellent Video - thank you!
Glad you enjoyed it!