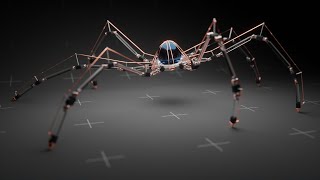
Tutorial: Making an Animated Robot in Blender

Vložit
- čas přidán 27. 06. 2024
- Let's create a light bulb robot from start to finish using only free assets! We'll use kitbashing to add mechanical parts to an existing armature, and then use a free addon to batch parent all the parts with one click.
New Patreon Tier:
/ polyfjord
The Mechanical Creature Kit:
www.blendermarket.com/product...
Light Bulb model on Poly Haven:
polyhaven.com/a/lightbulb_01
Blender Addon - Parent to Nearest Bone by g3ntile:
github.com/g3ntile/parentToNe...
Rokoko Motion Library:
www.rokoko.com/
Software used:
www.blender.org/
My second channel: @Polyfjord2
Chapters:
00:00 What we'll be creating
00:19 Importing motion capture
01:36 Importing the Mechanical Creature Kit
02:56 Kitbashing the legs
04:20 Kitbashing and modeling the arms
06:03 Adding core body parts
10:32 Adding the head
11:17 Kitbashing screws
12:17 Mirroring and final modeling tweaks
12:59 Batch parenting parts to armature
14:51 Attaching the torso using constraints
16:15 Material setup
17:53 Final result
18:09 Extended version + new Patreon Tier
18:43 Thanks for watching!
#motioncapture #b3d #robot - Krátké a kreslené filmy


Thanks to your tutorial, I got to know something new for me, "rokoko", "parentNearestBone", especially "select pattern", which seem to speed up work process.
And, Your final rendered animation is always fantastic!
Thanksk so much!! The select pattern is a lifesaver! The final render result in this one was done in Eevee, which is something I usually don't do. So I'm glad you liked it!!
@@Polyfjord hey poly, im in blender since 9 weeks, allready learned a lot (also from u thx a lot:) and i found out a few very interesting things on my own for rigging using I-ks and empty objects and so on, dont wane push my channel or anything but if u got a minute, im allready able to animate my own starwars the clonewars movie because of that, in short form what i do:
- i dont render, i simply screen record live evee, u see no big difference and safe a LOT of time...
- in pose mode u can click shift+I at any bone and parent it to a new empty object, i do that usually for both wrists and feet bones and the head, than i can go in object mode and simply move the armature, but because its fixed to 5 empty objects my character is just moving a bit, and of course i can for example just select both hand wrist empty objects and move them, or head, 1 foot and 1 head etc. u get the idea. insane fast possibilities, so i animate in objectmode! i usually record moving them around a few minutes from several angkels and than edit the best moves to shorts/ tiktoks etc... works great:)
- and of course u can change the range of the ik, so if i want that my empty moved in object mode doesnt affect the hole body but only for example the arm thats fairly easy...
- and pro tip u can parent all 5 emptys (2 feet, 2 hands and head) to a sixtht new empty object and than u only have to select the armature and the parent empty to move the hole rigged character around:) parenting the empty also above the rigg is dumb cause u want to move the rig separatly and moving all fivce empties without the rig is handy from time to time too, looks very realistic, cause when the character moves all bones move, when hands go up, feet spread a bit etc... very very cool and im sure a lot of people should know this method,
greetings bUild:)
Same man, I didn't know I could mirror objects without the mirror modifier!
Same! 🤯
I never knew about the parentToNearestBone add-on, and working with the mechanical creature a lot, it's a lifesaver! Originally I looked into parenting objects to bones with the same name, for quick rigging, but there didn't seem to be anything on that end. My go-to workflow for rigging a mechanical creature in the past has just been to select the part → select the armature → pose mode → select the bone →parent, and then to do that for every single part. It took a while, haha! But this is an incredible lifesaver!
I’m not even a 3D animator or modeler and I watch these videos to be inspired 😂 It’s just such an amazing process 🤩
You are an absolute gem! Thank you for your hard work, free tutorials and assets!
Another cracking video. I feel that i'm not going to be satisfied until we get Asbjørn in a mocap suit dancing
LOL thanks man!! That would be very interesting indeed :D
I was about to say the same 😂 ❤
@@hasselhoff3379 with some pestering and badgering i think we can make this happen
You also make tutorial like this
Your videos are one of the best sources of learning blender on youtube but they are entertaining as well. I love each and every part of your videos
IDK why but the final result and all that dancing made me smile wide😁and That final outro was so amazing and very creative 🔥
Always the best animation creatures tutourials ❤️❤️❤️
Great tutorial, great resources !
And great parenting addon dev, it's a subtle but good one ;)
so well done, like everything. The video, the tutorial parts, the way of explaining rigging. Just beautiful, thy sir
Thanks, you're very kind. your tutorial workflow is so helpful, including export and detail which I tried so many times to find out.
The final scene was so creative
I learned so much from Polyfjord that is incredible. Amazing that Pros like him share their knowledge
Awesome tutorial!!! All your content is top quality and easy to follow. Thank you for sharing.
Glad you made a video to show how to use the mechanical creature kit, hope in the future you make more videos on use how to get the most out of this pack.
Looking forward to getting this done this weekend!!!
Thanks for this! Polyfjord ROCKS!
Yes!! Love new videos from you!!
Thank you for all the amazing tutorials👏
Those final results are so pretty :D
learning and learning more between all tutorials, thanks so so much for all tips
this guy can't stop impressing me
That was sooo amazing. So many great tips in this video I haven't seen before. Bought the full MC kit. I might use it in an animation challenge somehow!
Nice, thanks so much!! Hope you like it!
Thank you for making am extended video for the core beginners, I'm happy this tutorial is fast
Nice video bro, thanks
Thanks, this is an incredible tutorial!!!
Top-notch channel! Really amazing content! Keep it up! Big fan.
Im new to blender and annimations are what i hate doing the most. This was easy to follow and gives me inspiration
That's one supercool project. Nice share.👍
amaaaaaaazeeeeeng 💪💪 thanks so much... so so helpful, much appreciated
Your Tutorials are like Entertainment😄
Very lovely tutorial I'm gonna use this in my new project
Nice!! Looking forward to see what you will create!!
another excellent tutorial.. thank you!
Wow, this was amazing
Wow, thank you, man!! So much appreciated.
I really love watching your tutorials......
excellent tutorial
What a great tutorial - mechanical parts have never made a cuter character! :)
This robot looks like he would win every dancing competition
WOW.... I love it
okay kind of insanely good tutorial. I downloaded blender and just attempted this zero experience what so ever in any think like this. I have a dancing robot not got to the materials side yet but yeah surprised it worked as well as it does haha. thankyou for this cant wait to improve now .
Im not even joking, i was just about to animate my model then this came out! Thank you so much Polyfjord.
Sweet!! Good timing then! Best of luck!!
@Polyfjord Thank you 😀
Fantastic tutorial , I was just waiting for a humanoid tutorial so I can begin my Frankenstein monster. XD
LOL looking forward to it!!
I have no words left to praise you.
This tutorial is really awesome...
🎉🎉🎉
Thanks for sharing 😊
And your background music is too...
Can you please tell me about the music you used in this tutorial?
Good job brother ❤
so cool so much hard work
Amazing tutorial..Thanks alot
this is the best tutorial.
Hi! Thanks for that tutor, it is really inspiring!
wow amazing content bro
You're a G. Thank you.
awesome, thanks
i'm not a beginner now by you , thanks sooooooooooooooooo much
Thank you! :)
Finally after a month... 💥
Another way to parent to bone manually is to select the object you want to parent in the outliner while you are actively in the armature's pose mode, and then hit control P, if the add on parents a lot of objects to wrong bones and they don't all need the same bone this way would be a lot less tedious.
By far the most seductive lightbulb I've ever met
Thankkkkk uuuu...
was just about to create a short clip qnd thought about same character, and woow looked into your channel and got exactly same 😳😳😳❤ so much thanks
I'll dance dance dance
No
With my hands hands hands
@@traveler329 above my head head head
@@farhadkhosravi4630Like Jesus, said
@@traveler329 I’m gonna dance
I love you, thank you very much
I love it❤❤
really genius
Great tutorial... Thanks.
Silly question, could you explain how u did the exploded view at the beginning of the tutorial... Like if I want my parts to be scattered around the floor and they will then animate in to form the shape of the robot.
Thanks again
无需先将骨骼绑定到模型,然后再向模型添加刚体。注意不要有任何线程,否则会变得更糟。烘烤刚体后,将其渲染成序列帧,并在 Blender 的视频编辑中反转其帧顺序。希望能帮到你,祝你好运
I just hit the like button and it went up to 4.6K 😄👍
Wow Very Cool and Thank you for your work?
Random found you now I am fan 🥰
Best video
❤ great
I love your videos....
Great tutorial. Im having a bit of an issue with some of the joints. Mainly the forearm one where they are disconnected from the upper arm at certain points in the animation. Do i need to set the origin point to a certain area of the bone?
HERE IS CAMES GUYS. I WAS JUST SCROLING ON THE CHANEL THEN THIS CAME, THANK YOU
Ugh! I got this far ( 13: 50 ) and then finally realized the "parent to nearest bone" feature is only available for PC's!? Have they never heard of Mac computers!?
Update: What it was doing on my iMac, was throwing the zip file into the trash folder. That’s where I found it. I was able to follow the instructions and get it to finally load into my Blender now. Sorry about the confusion. Maybe others need to be aware that it could end up in their trash as well. Thanks for your support!
What I want to know is how you rendered out the viewport for the final animation
Awesome video,
Can you use Midjourney + Blender, to do an UNIC 3d design?
LIGHTBULB robot! ;-)
Looks like Gyro's robot from Ducktales
Yes! It was very much inspired by Little Helper indeed :D
Another great video. Thank you so much, Polyfjord. I love trying to follow you making these. I must admit I have to go backwards and forwards a lot to try and get it right.
Just a quick quesion, after attaching the torso to constraints at 15:49, the cylinder moves below the model. I deleted it, but the relationship lines are still visible.
Hmm relationship lines are weird some times. You could try and use Alt + P to clear the parent, does that work? Or maybe there is some constraint on a different part that is now missing an object?
have the same issue, can't seem to find a fix for it. Everything else works great!
@@artsyrus Did you do the "origin to 3D cursor" based on the 3D cursor part before adding the constraint?
@@Polyfjord I did, but i think the object that i was parenting to had it off. I completely deleted the spring and the rod and created the new ones and they worked! about to post it on IG (expect a tag haha)
yess!!!!!!!!!
omg that is efficient! but can i show this a my protovolio? do you think that's appropriate?
not the same exact model as you ofc, but the same way you do this and put it in my protovolio, i feel like im lying putting an animation project in my proto but my knowledge of animations is still beginner
You probably know but; on the last scene, glass of the light bulb does not seem to be transparent, i could not see through it. To fix this, before you render, you can check the "transparent glass" button under the "Film" tab. Usually it needs some extra settings on its own tab but I am sure you can handle it :), that was a nice tutorial.
you can see the hand when it goes behind the bulb.. then the background is shadeless so it's hard to tell.
Bonjour Super tutoriel et super résultat
Bravo pour votre imagination.
Je suis en train de construire et pour le moment tous ce passe bien
Mais j'ai 2 questions: pour ce qui concerne la musique:
1) Il faut payer les droit d'auteur?
2) Comment vous avez fait pour qu'elle soit aussi bien synchronisez avec les mouvement du robot?
Merci pour votre réponse même en anglais, je traduirais pour comprendre.
Now make tutorial how to make animation of disassembling this robot just like you showed in cutscenes, please! 😃
Great Tutorial. Very informative. One question about your process: At the 10:18 mark, you add loop cuts to the added spine support, then you "G", Box Select the top portion of the support, and drag it to the right. The center portion of the support (loop cuts) leans nicely & proportionally to the right with it. When I do the same thing using "G" and Box Select, only the selected top portion of the support moves to the right, dragging the very top loop cut with it. The rest of the center portion stays vertical. No nice lean to the right. The only way I can get it "right" is to lean the loop cut and top sections to the right using "R", Rotate, and then rotate/"lean" the top portion back vertical again (and I know this is not right). What am I missing? Note: Looking at the tutorial, there is a large grey circle around the selected top portion of the support when you "move" it. There is no circle on my machine when I use "G" to move something. Am I missing a tool? Thanks in advance.🤔
He's using Proportional Object Editing mode, shortcut is "o" (press it to toggle on or off before you press "g" to move selected)
It's the dot and circle button in the small menu at the top center of the scene window
does anyone know how the damped track constraint work? tried everything and it seems not to be working for me
Great tutorial. But why when i render the metal dont shine
🤯
Reminiscent of the ally mcbeal dancing baby... LOL!
Oh, one question that might be off topic, but you might actually know: How would you make the most accurate use of RAL colours in Blender? Maybe you do know this? It's VERY tricky, somehow...
If terminators ever take over the world, this man will find an easy job at Skynet HQ. 🔥🔥👍
I love the tutorial, but i get massive errors when i try to recreate it. Example: on frame 316 (and many more) the left shoulder/left arm connection is wrong. So essentially the ring does not follow the U-formed shoulder. Am i doing something wrong or is it just a mistake in the tutorial?
As i said - i love the tutorial, but i stepped now frame by frame at time 0:02 through your video and you have the same "problem" that the joints don't fit in the animation if you are looking closely....at least i am happy not being too dumb to recreate it
😍
Hello, I just wanted to ask can you use other move instead of the dancing one? Because I need a move of a robot for a project of mine. Nonetheless great video.
As long as there’s an armature that you can parent the parts too it’ll work the same way regardless of what the animation is
I have some problems working with shadows and light baking for animation in Eevee. Could you help with that?
0:43😂
GG
Hello, I had a question, what should the sampless value be when making an animation video in 4K resolution?
票价:3840×2160或4096×2160
What do you do if the pose does not start like that? or if the model itself doesn't align with the resting pose for example?
ehm when i parent to bone it dousnt fix the detaching problem and the spring and cilinder just stick to the ico sphere
@Polyfjord
How are you bending that bar at 10.18?
I used proportional editing in edit mode! Hot key is “O” and you can use the scroll wheel to adjust the radius of the falloff
Fantastic, but dare I try it?
Hello Great tutorial and great result
Bravo for your imagination.
I'm building and at the moment all this is going well
But I have 2 questions: as far as music is concerned:
1) Do you have to pay the royalties?
2) How did you make it so well synchronized with the movements of the robot?
Thank you for your answer even in English, I would translate to understand.
Hey!! Thanks for watching!
1) Yes, I got the song at PremiumBeat
2) The dance is a bit special, because it seems to be one of those dances that just fits most rhythms. I think our brain is adding a lot of goodwill to make it look like it's synced to the music!
@@Polyfjord
How do I contact PremiumBeat?
What is the exact title of the music?
And how much does it cost?
Comment on fait pour contacter PremiumBeat ?
Quel est le titre exacte de la musique ?
et combien ça coute ?
I tried the same thing but, the parenting bone didnt work , the lines are attached somewhere and its moving irregularly.