Retopology Workflow and Normal Maps | Blender 2.91 Tutorial
Vložit
- čas přidán 9. 02. 2021
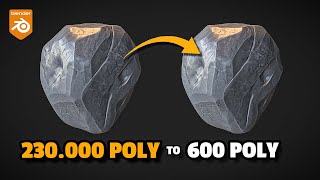
- Learn the basic retopology workflow in blender to quickly retopologize over your high poly mesh and get a highly detailed low poly mesh. The second part of the video shows how to bake normal maps and get the details from the high to the low poly mesh using cages. This tutorial is recorded in Blender 2.91 and starts with a sculpted mesh in Zbrush.
- Patreon Membership (Assets, project files and more!): / cgijutsu
- Artstation: www.artstation.com/yash2122
- Instagram: / cgi.jutsu
- Twitter: / cgijutsu
Music used in video:
_________________________________
Sweet Talks by Limujii / limujii
Creative Commons - Attribution 3.0 Unported - CC BY 3.0
Free Download / Stream: bit.ly/3gGVXXs
Music promoted by Audio Library • Sweet Talks - Limujii ...
_________________________________
_________________________________
Music from Free To Use Music
Track: Bonjour by Tobjan
• Tropical Chill No Copy...
_________________________________
_________________________________
Music from Free To Use Music
Track: Senseless by Johny Grimes
• Chill Aesthetic No Cop...
_________________________________
_________________________________
Track: Sweet Talks by Limujii
Watch: • Limujii - Sweet Talks ...
Free Download: www.toneden.io/freetousemusic...
_________________________________


Thank you very much man, I was looking for a tutorial on how to do this, your tutorial was the only one that works best
I'm happy it was useful to you :))
I had issues with my mesh when I removed the shrinkwrap modifier, so instead I applied it. Then, instead of just scaling up the cage, I used a displacement modifier at like 0.09 and applied that. It worked really well :)
That is a smart and quick way to generate a cage too. Will surely experiment with that in the future.
Very good tutorial. Love it!
Glad you do! : )
Thanks!!
Thank you. This is really helpful. Keep posting !
Thank you for the kind words! 🙇
Thank you so much
but how can i make stylized texture on it when its already have mapping texture i want be able to paint on my mesh and animated
I selected the highpoly then lowpoly, selected the image node and pressed bake, but it says "no valid selected objects". What am I doing wrong?
There could be 2 reasons for it:
1. In the bake panel make sure to tick the 'selected to active' box.
2. Select the two meshes from the outliner, and the order of selection is high poly mesh , control/cmd key, and lastly low poly mesh.
How my chin looks while mewing.