How to make a better Strawberry Pallet Planter

Vložit
- čas přidán 30. 06. 2024
- Lovely Greens is now on PATREON: / lovelygreens
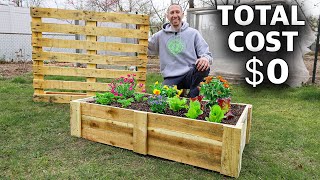
You've seen pallet projects before but this one is simple, relatively quick, and results in a planter that you can use to grow strawberries, veggies, screening shrubs, or greenery of your choice. The resulting planter is not only functional but looks great too - no one would ever know that it was a simple pallet in its former life.
The project requires one pallet, a few hand tools, and a couple of hours on a sunny afternoon. Once you've made one, you'll be able to knock them out quickly so you could end up with an entire container garden using these upcycled planters.
➤ More instructions on making this project here: lovelygreens.com/how-to-make-...
➤ Video on how to plant it up here: • How to plant a DIY Str...
➤ Instructions for making an even simpler pallet planter • How to make a DIY Pall...
➤ If you enjoy this video please give it a thumbs up and subscribe (thank you!)
➤Remember to TURN ON notifications to know when new videos are out
➤ FIND LOVELY GREENS ONLINE
LEARN MORE: lovelygreens.com/p/about.html
INSTAGRAM: / lovely.greens
PATREON: / lovelygreens
➤ NEWSLETTER SUBSCRIPTION www.subscribepage.com/lovelyg...
#pallet #gardeningidea #containergardening - Jak na to + styl


Hello Tanya Lovely Greens , Im a time traveller from the year 2023. I have just been watching you building a garden pond at your lovely new home . It is fantastic . The reason i travelled back in time is to you tell you, Your smile is as bright cheerful and pretty today in 2023 as it was here in 2015.😃.
Oh! I Forgot to mention. I also came back tp get tips on making this awesome strawberry planter...😃.
I have watched a ton of planter boxes made from pallets. Yours is by far the best looking and easiest I have seen so far. Thank you.
I made a strawberry planter from pallets. My pallets were smaller than yours so I used two pallets for one planter. It turned out a little different from yours but the same concept. Thanks for sharing your work.
Happy Gardening 🌱
I have been keeping aside a bunch of pallets for projects just like this, from the waste that is produced on my parent’s property, as they are renovating their house. Arrived at the site the other day and the construction workers had chucked them all onto a big pile of other rubbish and set fire to it!! Back to square one! My pallets and compost bin projects are going to take a while!
I know this is an older video, but you inspired me to create a planter and it was so easy just as you said! I plan to make several more to compliment my vegetable garden and new greenhouse.
Thank you! You just restored my faith that I can make some planters with my pallets I've been collecting!! My husband thinks I'm crazy!! lol
I love this idea. Pallets are my favorite things to work with. Thank you! Going to pick up a few on my way home from work today!!
Thank you! A very easy to understand and well illustrated video. We are contemplating raised beds, I think this might be a good complementary project to go with them
So well done. One of my favorites. Explained in detail, easy to follow. I also noticed the pathway in the background, with a split rail fence following. Looked like a park like setting. Beautiful...
Looks fairly easy. Very cost effective. I will be giving it a try. Thanks!
Great idea! And it's recycling what would always go to the dump.
Smart chick.
Great info regarding using pallets - I love using pallet wood for garden art etc. I needed an idea for my strawberries - thank u 🍓
Very clever, fairly straightforward, and I have some pallets out by the barn. And I really enjoy strawberries, too. So I'll make up one or two. Good idea.
I just made my husband drag 10 pallets from the local store. Soo many ideas. This is definitely one of them.
Just watched this as I was wondering what to do with my remaining pallets.
Brilliantly done and really clear instructions. Although my pallets weren't the same I managed to adapt it and now have a fantastic solid planter.
Many thanks!
As far as building up the inside of the planter, I will be making a mini wicker bed.First black builders plastic up to the top of all sides( I usually staple to hold in place) , then some small pebbles or course sand on the bottom, covered with a layer of shade cloth or fly screen wire. In one corner you place a piece of PVC pipe so it is sitting on the rock layer ( this is what you water through). Then as you said: compost/horse manure/organic fertilizer, and I always put some slow release fertilizer to help the new plants get well established. It is easy to cut a small hole in the black plastic, on the side, to put the roots of the plants through, as you said, as you are filling the planter with the soil mixture. Probably would not worry about the straw.
Great presentation. Good camera angles and written instructions as well.Thanks
The plastic is a good idea! I'd love to see photos of your planter.
Excellent use of a pallet and I love that you only need one pallet per planter. I use pallets a lot for my woodworking. I will definitely be make some of these this year for my strawberries. Thank you for the idea and the tutorial.
This is so neat, just the right size for a small household. Thank you.
Nice project! I also find pre-drilling the holes for the screws helps to reduce wood splitting when the screws are installed.
Thanks so much for this video. Last summer I got pallets from my work and made 3 of these! I have strawberries in 2 of them and I'm actually using the third for my son's outside toys right now because ran out of dirt lol! But this summer I'll be filling it with another variety of strawberries!
I have found my weekend project! Two pallets sitting in the backyard right now. Can't wait to start building! Thanks for a clear and simple tutorial!!!
I really think I can do this. It's a great idea, and looks very professional. I was going to use a strawberry planter this summer, but I like this idea much more. Thank You for the video!
That was brilliant I am definitely going to try that
LOVE this..going to try this and paint it white! I will probably use planting fabric to keep in the dirt. So excited. Thanks!
wish I had found your channel before I messed up my pallet that was exactly what I wanted to achieve what you have done. I have to find myself another one. good job!
hello. I've built this planter and must say look very nice after the build.. thank you for sharing my wife loved it william
Thank you. I've had my planter for a year and as you indicated the 2nd year harvest is much better. It's relatively maintenance free, I made sure that I had some decent soil, some straw and watered when needed. My wife was also able to make a hanging planter for my son with some of the "creeper" strawberries. Thanks again!
Great video and inspirational,look forward to your next project.
Lovely Greens..... and smiles.
Absolutely wonderful idea. I will be making several. Thanks
It seems surprisingly simple yet looks great!
That it's just what I have been looking for. You made it so easy. Thank you!!!
I'm making this today. I'm so excited and cant wait. Blessings
I'm adding a couple of these beautiful planters to the outside of a hoop house I'm making ! They'll make my hoop house more attractive!
Your voice is so calm and sweet. This video was great and informative. Thank you 💗🌸✨
Brilliant, love it. Will use this idea to make a raised garden around out house. Thank you!
Thats the best idea on slats, im making them! Thank you Lovely Greens!
Enjoy your future planter!
Great video, just in case it's not been mentioned already, attaching the feet at the stage you cut down the centre pieces (5 minutes into the video) would have made it easier. Well done, this gets a like from me.
Just stumbled upon your channel and I love it. Thanks for sharing this tutorial. I'm going to give it a shot.
Would have liked if you showed doing the chicken wire and the planting. Otherwise very nice job very well done tutorial. Thank you for the HT information as well
There was a link to the video where she plants in it.
Thanks alot for the video. Have just done it and it looks great. I found it easier if I put the legs on the bottom slats before attaching the sides. The legs go just in from the other blocks but makes it a bit easier! Thanks again for the video
Thank you for sharing your experience. 😊. Have a wonderful day. I'm from OHIO, USA. 🙋
Good job Tanya, simple, works for me. Thanks
great end product, I enjoyed watching this, thank you.
Nice job. What a lovely, brilliant young lady.
Great video. Instructions are so simple and clear! Thank you.
You had a very good opening sequence. In the first minute I believed you have credibility. Calm, methodical, presenter is very easy on the eyes & ears. Never seen this " cut into 3 pieces" method, but looks pretty good. No waste & only small amount of additional material required! I'll start scouting for pallets. In our area white oak pallets sometimes come in & this wood is more rot resistant than pine or spruce...or other softer woods lacking tannins
Awesome idea!! Love this! Thanks for sharing!
Love the birds in the back ground, , reminds me of Hawaii, love the project
+Lavonda Carter My neighbourhood is a bird haven! I'm so used to the sound now :)
Made two of these today with Pallets scrounged from a local builder, took 1.5 hours to make both and will make a perfect addition to our allotment. Thank you.
very good video, A great idea. Considering retiring and making things from pallets. I've come a long way, I used to make clay pots. At least I am staying with natural materials
That is brilliant ...that's it I am making one just need to find a pallet with 9 slats...looks fantastic you are such a creative person...thank you for sharing with us and your little cat is adorable...I would also have liked to see how you organise the planting but I think I can work it out...Be Safe
This is brilliant. Thank you so much. Now I know how to tackle my next pallet project. My first one was a disaster. I pulled apart every single piece. Lots of damaged slates from tearing away from the nails. Feel so stupid now. Definitely a whole lot wiser after watching this video. Thank you once again.
Philip Wong you can use a nail punch and hammer to loosen the nails' connection with the wood, then lever them apart with the hammer and a piece of wood (for the anvil). Sometimes you don't need an anvil, depending on how far out of the wood the nail has come. ☺️
I usually hit the nail about two or three times with the hammer.
Philip Wong f. ,
Philip Wong b h
Fantastically done. Thanks for sharing.
That is really helpful method, thank you for show this idea :)
Hi, I also live on the Isle of Man and love this idea, I will give it a go for sure. Thank you for posting.
All the best fellow Isleofmanner :)
This is an excellent idea. Would love to try for this summer.
Thank you so much for this beautiful design
Thanks a Lot. That is exactly what I was looking for. No extra expences for plastic bags like in other videos! Great job👍🤩!!
Lovely Greens good morning , beautiful your garden organic
Fantastic idea and presentation. Found my mentor. Thank you.
This was a great Idea. I think I may make one of these this year.
My very first one has seen it's last growing year -- it lasted five years!
Not only a good project for planting, but listen to the doves' in the background!!
Great job! This is going to be my next project.
That looks amazing, really enjoyed the video. Great job Tanya
Thank you!
I just love this. So easy and cute. It was funny how your cat was just sitting there, too cute. :)
+Windswept Homestead They ALWAYS need to be around when I'm taking video...I think they hear me speaking or working and think something interesting is going on.
Great looking planter will complete the rest of my veg garden --THANKS FOR YOUR INPUT--AND HAVE A GREAT DAY
+ilona frissina You’re so welcome
great idea and job Tanya
Fantastic tutorial, you’ve really inspired me to make my own one day x
Im going to go out and build some. This is way to cool to ignore. Thank you for this wonderful idea!
+Deborah Elliott Awesome! Happy building
I love it. I have tried the strawberry planter in a whole pallet and had all the problems you mentioned. This looks much better. I guess attaching the feet to the bottom before you attach the bottom to the sides might be easier but then again the screws on the inside would be in direct contact with the soil and might corrode more quickly.
This looks like a great idea for making a table as well
I love the planter. I will be making one. As a help to you, I had been having trouble with screwing in my screw with a regular Philips head so I started using a T20 and T25 star heads. Once you see them and start using them you will never go back.
Hi ya,
This is a FANTASTIC video tutorial on making a strawberry planter! By far the simplest and most elegant best looking one I've seen maintaining the integrity of the pallet(assuming it's a solid one) and just adding some extra screws where needed! So simple but effective and BRILLIANTLY done!
It looks great! I'm going to build a couple of these this week! As I have quite a few pallets and I'm going to make a range of planters and raised beds for the garden(aswell as a potting bench and even a small workshop using pallets! Lol) .. so this is ideal! BEST design I've seen!!
Cheers from London England 👍❤️😎🏴
Many thanks!
Love how your kitty joined in the fun!!
Very nice I'm gonna build at least one...
Thanks a Bunch !
Wonderful job on planter
You and your cat did a great job!
I made one yay. Thank you so much for the inspiration.
Easy to make ,low coast and beautiful look thanks for sharing .
Thank you from Italy. My wife and I will make it for our garden...!!!
Fantastic! If you have any building questions feel free to drop by again.
I love her accent, and yes I'm going to make this.
Very inventive. Thank you for sharing. It's a great idea.
OMG this is great!!! Very cost effective. Thanks alot!!!
You did a great job Tonya
Genius, thank you!
amazing, it is wondeful use for the old pallets, besides, it is the better way to have your own organic strawberry .
great job.
More DIY like that please, that's great !
Thanks Oliver! More DIY projects planned :)
Excellent Project and very nicely presented.. Thank You so much!
I'm pleased to share it! :)
You are so smart and beautiful, Tanya! Great work!
I loved the cat helping you.
haha I was going to say it :)
Thanks for sharing ....great use of a pallet....was looking for a cheap box to use to plant flowers and strawberries...TY.
Nice! Looks good. I just made a raised bed out of a old wine rack,i should have done something more like this
Your video was a random popup but perfect. When my Son was little we would grow Strawberries, now I have a GrandDaughter and your "Pallet Planter" will be a wonderful intro the world of plants and planting. Your information on Heat Treated vs Chem Treated is so important.
Good to see your a cat person..
Thanks.
+LarryParamedic1 You're so welcome! I glad I popped up and into your family's adventures in growing :)
Great cost effective idea. I've adapted this to aquaponic using two of these with pond liners. Gold Fish down bottom water pumped to the top then a bell siphon to drain it back down. So now instead of big ugly white tanks there are rows of sleek grow boxes ;).. thanks for sharing the concept you rock.
What a creative way to use them! If you get a chance would you share a photo with me? My email is tanya dot lovelygreens at gmail dot com
Really liked your video. Thank you. My next project.
Wil try to do this in our backyard👍
So cute! Really liked it a lot!
Too cute! Great job!
Brilliant! what a great tutorial video!