DIY Secret Room with Shelve Doors/Closet Doors How to

Vložit
- čas přidán 12. 04. 2020
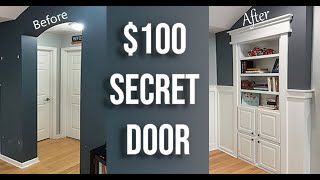
- This video shows how to build and install a hidden closet door made out of cabinet-grade plywood using basic tools.
Please subscribe, like and share. Thanks for your support!
By Co-Know-Pro
BACKGROUND MUSIC
"Late Night Drive" by Nat Keefe & Beat Mower
"Thinking About the Universe" by Nat Keefe & Beat Mower
"JuneBug" by The Grand Affair
"Giant" by The Grand Affair - Jak na to + styl

![This bookshelf has a secret... [Secret Door Bookcase Build]](http://i.ytimg.com/vi/9lHflXBRKRU/mqdefault.jpg)


That was incredible.
Thanks Matt glad you like the video 😎 and thanks for watching.
god i have motion sickness
Omg, this is exactly the video I needed!!! I'm going to do the same thing but for a hidden bookcase underneath a staircase with a crawlspace hatch. Adding the lip pieces so items don't fall off the shelves is genius. Thank you!!!
Awesome so glad you like the video. Remember to subscribe if you’d like 👍
EXCELLENT!!
I absolutely LOVE that design; brilliant!!!!!
Glad you like it!
beautiful work! I love that you explain everything in the voice over.Very detailed explanation.My hats to you!
Thank you so much 😀
One of the best builds like this that I have seen so far. Thanks for sharing it with us!
Absolutely our pleasure, thank you for this awesome comment 👍
Great and talented job! Explained very detail.Thanks and God bless you!
Thank you for nice comment! God bless you as well 😊
Excellent and creative.
Thank you very much!
Fantastic video! Fantastic design!
Thanks Mike for the great comment 👍😎
Great work brother!
Appreciate it! Glad you are digging the vids! Thanks for the comment!
Wow beautiful job! a lot of attention to detail. Thanks for sharing your knowledge.
Thank you so much 😊
Thank you so much for your video! You are amazingly talented! I’m Inspired and motivated! Looking forward to more videos
Thank you so much!
Cool comment love this channel ! They need moor views for sure. This vid should be at a million views by now 🤔 I’m going to share it 👍🏻😎🔨
enjoyed your work and i learned stuff i cant ask for more than that-- thx
Glad you like the video 👍🏻😎🔨
Nice job on this!!
Thank you very much for that awesome comment and thank you for watching.
If you ever feel like donating, you can click on the thanks below the video and donate a few bucks if you’d like no pressure just throwing it out there. Thanks again for watching. Glad you like the video. 👍😎
He did really well except you major centerpiece. To hide the opening to wide, you didn't need to make it wider than the distance.
From the inside of one shelf to the inside of the next door and normally built-ins are not shallow of the drywall.
Thanks for the feedback 👍
Good job brother 👍🏽👏🏽
Thanks 👍
this was an awesome video...I need help building a single door and you built 2 !!!...Nice work bro !
We got you bro‼️ Right on glad you liked the video and glad it helped you out thanks for watching. 👍😎💪🔨
Excellent video along with wonderful explanation of everything you did and why. It was great to see you go back to basics to for the hinges as there are times when it’s the only option and these are valuable skills to have. Something we must continue to encourage in the younger generation that it’s still worth learning this side of the trades . You don’t learn this on a site 🦋
Thank you very much!
Nice
Thanks 👍
Sweet
Thanks 👍😎
Dude you’re amazing!! I’ve been binge watching your channel and you’ve convinced this girl to start tackling projects around the house (starting with the walk in closet first) wish me luck!
That is awesome! Good luck! Thanks for the comment.
this is nice
Thanks for that👍 Glad you like the video thanks for watching 😎👍
Wow, that is fantastic. I'm glad I found this video. Do you have an exact cut list with the needed materials?
No, sorry. I will put one together and put in the description. Thanks for the comment.
👏👏👏👏👏👏
Thanks for watching 🔨👍🏻
Just curious if you've ever built a tiny home on wheels, or a granny flat? Could you do the electrical and plumbing too... what is your trade background? Did you pick it up on your own over the years, or training programs like an apprenticeship? Love the videos... thank you
I am a G.C. I do remodels additions and A.D.U. witch are granny flats and trailer homes In L.A. Thanks for the comment!
Top shelf music, way to prime rough, overall top shelf video
Thank you very much John for that awesome comment, and the support on a channel.
👍😎
The term is mortise the hinges. 👍
Thank you while I was doing the audio I kept forgetting that term. I almost used mortised hinges as well so I would only have to do one side but decided against it. The regular hinges seemed a lot stronger than the Mortised hinges thank you for the comment. 👍🏻😎🔨💪🏼
Outstanding video and work! What width is the custom jamb, and what material did you use? I see it's proud of the framing (which I presume to be standard 2x4 framing) on the backside/inside of the closet, and that's how you're able to reinforce it with brackets.
Great question it ben a while since we built this. But as I recall the wall I built it to was a 2 x 6 wall and I believe the inner jam was about 9 inches deep. Then the part of the jamb that was protruding on the interior of the closet, we added another piece of three-quarter by, about 3 1/2 inch to the outside of the jamb that is protruding into the closet to make it 1 1/2 inch thick so when we attach the brackets they will be more meat for the brackets to attach to as well as give strength to the whole jamb when the doors are completely engaged and open in that inner jam is taking all the weight of the doors loaded with towels or what have you. I hope that makes sense. Let me know if it doesn’t. Thanks for watching.
👀👀🙏🏻
great work, just too bad with the fisheye video bends in both sides. but your work, is fantastic 🙂
Thanks for the great feedback 👍😎
Wet informative and well done. Question, what are your thoughts on finishing a basement floor for remodel (underlayment, moisture barrier, drying out /sealing concrete prior to floor etc) Want to avoid future moisture issues. I’m in New England so have some serious weather sometime .
Thanks for the comment! I'm in California so not to many basements. If it was my place i would look into a really cool epoxy coating for interior use and i would may be do the or tile. If you want to seal the concrete you can do a few things. You can apply a coat of Red guard or dry lock it. Those are both waterproofing products. If you are going with laminate flooring then underlayment is ok but it would still be a good idea to red guard it as well as underlayment. Do you have a sub pump in the basement?
Co-Know-Pro thank you for the response. No pump, and no real water issues so far. Red guard is a good idea. I was planning on using quiet walk from Home Depot as the addition underpayment beneath the life proof vinyl flooring. Which already has an attachment underpayment , but figured the vapor barrier and water wicking tech on the quiet wall is extra protection?
@@just4fun-family145, just saw your comment, and we're in the process of finishing our basement as well. Lifetime new englanders and first time home owners, so this is the 1000th video I've watched on all the aspects of floors, insulation, framing, etc!! We are currently putting down carpet, ONLY bc a family member works for a hotel, and they had surplus of a neutral color, that will easily cover the 600sq ft area. Our basement floors are concrete, and protected, and after this current winter, we have any moisture issues, buy still have a dehumidifier unit as a precaution. Anyway, although we're doing carpet now, it's only so that we can focus on the rest of the project now, and do the floors at our leisure. We've been really impressed with the recent concrete floor options we've seen. I LOVE the way most of them look, and actually want to do it upstairs! I'm told it's too heavy to use where I WANT TO, but PERFECT fpr the finished basement!! The faux marble, stone, and even stamping that I've seen is BRAUTIFUL, and apparently PERFECT for our unique needs here in New England!! I know this was a long comment, and I apologize for rambling, but this is ALL new to me, and I saw New England, and figured I'd offer whatever I know or ideas I have, in hopes that it helps get you closer to precisely what you want!! Hope it's worked out!! And PS to the maker of this video: Thanks for sharing this, as I've now a decision on the closet door I'm going with!! LOVE THIS!!!🥰
Many thanks for this vidéo.
Do you have somme sketch available in order to reproduce it.?
Of course you are very welcome, regarding a sketch I have not put one together I tried to explain it clear enough so you can basically build one from just watching the video you may need to take some notes and then figure out your own measurements based on my design. I will definitely think about putting a little detail in the description. Thanks for watching 👍😎
Excellent video without the music
Thanks 👍😎
i love that safety is #1 with you, how you wear the gas mask while working, 👍
Right on
Thank you for this video. I'm trying to build this right now. How do I figure out each shelf door width, knowing that there has to be a large enough gap in the middle for the doors to close properly. My door jam width is 36.5 inches. Any help is greatly appreciated.
Great question. If it’s a 36 inch opening you may be able to do one single door. If you’re going to do a double door go ahead and take two pieces of wood at 15 inches By the thickness of your door set them in your jam and face them into the opening mimic opening the doors and if they don’t hit each other then you can go a little bigger until the touch each other when you mimic the opening then that is how you determine the size of each door. Apologies on the grammar I hope that makes sense.
Fantastic! High five, you are awesome! Thank you so much. The door jam is primed and tomorrow I'll find out the correct width and build them.
@@djkitty777 Heck yeah right on👍 hope it worked out for you, hope you got it figured out, good luck on your build👍😎
Could have just used 1 hinge 😊
Yes, very true if you’re referring to a piano hinge. I’ve used piano hinges on these builds in the past, and they just didn’t last as long as individual hinges from experience it was better for me to go this route for longevity. Thank you though for your comment and thoughts definitely for watching. 👍
why not put some kind of wheel/roller to support the weight of the shelves?
Great question, the build came out so solid we did not feel they needed coasters. But in the future if there happens to be sagging witch I doubt. A spring coaster can be attached to the back of the doors. Thanks for watching
What is the cost for something like this?
It was a custom size 8 ft tall so was around $2k but materials are double now so $3k.
Thanks for watching.
Nice to see a how-to where the creator (who claims to be a "pro") doesn't think an 18g gun is for EVERYTHING. lol
SomeDumUsrName 👍🏻 He is using a 15g gun and glue and countersink with screws a lot better then only 18g for sure. 😎👍🏻🔨
@@dlconstruction5255 yes thank you. I can see what he is using.
Thanks for watching.
I love the design. But you need to learn how to keep your camera still. Zooming in and out that fast will make people seasick and I never got a really good view of what you were talking about because you never left the camera in one place for long enough.
Thanks for the tips!
Fantastic job. The only problem I have is the title. That is NOT a DIY, at least not for me.
I feel you 👍🏻🔨😎
Bad choice for the "fish eye" type camera lens. If you want to showcase your craftsmanship, straight lines should look STRAIGHT!
Thanks for the advice! We are using a GoPro. It is set at 1080 wide maybe I’ll try the 4K hopefully that helps with the curve look. Thanks for watching