How to Epoxy a Garage Floor - Every Step Explained

Vložit
- čas přidán 29. 07. 2024
- DIY Bri Shows You How to epoxy paint your garage floor from start to finish. Epoxy-coat Reviews product and gives some real DIY Tips.
Subscribe to my channel for the latest DIY Videos!
/ doityourselfbri
Support DIY Bri at doityourselfbri.com/
Like and message me on Facebook / doityourself4life
Link to buy epoxy-coat from Amazon
amzn.to/2eOrbsX
Link to the kit I used from epoxy-coat
www.epoxy-coat.com/full-kit-pr...
Link to the self leveling caulk I used
amzn.to/2eOqRdH
Check out my other CZcams Chanel's Too!
My personal channel: / @brianbassett5468
My car problem/FIX channel: / @askmyautomechanic4133
My how to channel (this channel DIYBRI) / doityourselfbri
SUBSCRIBE TO ONE OR MORE OF MY CHANNELS FOR MORE GREAT STUFF! - Jak na to + styl


Good video. Having used epoxy-coat several times in the past, I'll offer a couple of tips - Instead of doing one section at a time, it works great to go ahead and mix and pour out all product at one time. Throw out the little squeegee that comes with the kit and use a large one to spread epoxy over entire area. As long as you have the spiked shoes, it is not an issue walking in the epoxy. Also, using a hand held fertilizer spreader works perfectly for spreading the flakes - much easier than trying to spread by throwing them up in the air.
4:50 Step 1 - Clean and prep floor
6:26 Step 2 - Floor etch
10:50 Step 3 - Filling holes and cracks
12:53 Step 4 - Applying and spreading epoxy
26:01 Step 5 - Clear coat
If you diamond grind, Epoxy-coat says DO NOT acid etch. If you diamond grind there is no need to etch.
Really like the way you broke the project down into steps. You also did a good job in listing all the materials and supplies. Very informative. Well done Sir.
I cant help but give alot of appreciation to your method on your video. I am a new set of eyes who is wanting to learn about doing this project and I love the way you explained it in details from the beginning. Some people go off the topic and dont stay on point when explaining things. Your information was easily digestible and your illustration on the project was excellent. Thank you so much for your time and your patience in explaining this as well as your time to research. Now I dont have to do much research LOL.
Very informative. Just ordered my 2 standard kits today (almost 1,000 sq ft garage). Cant wait to get it done. I'm sure i'll be referencing this video again.
Just bought a house, and before moving anything into the extended 3 car garage, I'm thinking of coating the floor like what you did.
Great advice during the video! I especially like when you're sharing little "hindsight" tips so that we can learn from your experience! Thanks!
Your instructions are extremely well thought and your details are very clear and to the point. This video is by far the best video on this subject I have watched so far. Thank you.
Thank you for taking the time to make this. Huge help.
Great Video! You explained everything well and have an easy going to very detailed way of communicating. Well Done Sir. I am planning to do my garage and this was very helpful in my planning and research.
Excellent video! Thank you, I feel confident now to undertake my garage project.
Excellent video... I am going to tackle this job, again, I done it before CZcams was a thing and made a few mistakes, Now, with your excellent step by step...it’s gonna be fun watching it come together. Thanks BTW, using that squeegee technique really makes a difference, I actually done the same step while applying a silicon product to my roof...
Thank you! I'll be attempting this soon and hopefully saving a grand! I appreciate the video.
Oustanding. Learned a lot! Thank you for the tips!
It was realy informative video for my floor work, process explained very well..keep it up good work...thanks for sharing.
Thank You!
Thanks buddy! I really appreciated the tutorial and feel much more confident about doing this job now.
I've been wanting to do this for a while in my garage but wasn't sure if I could do a good job of it. After watching your video I think I"m ready to pull the trigger on it. Thanks for the detailed instructions. Appreciate it.
Battery tools.
You do it?
I love the attention to detail you gave us and how you highlighted the issues you had that we should know about. Thanks Brian!
Thank You!
Very helpful thanks. My first garage floor painting. Your tips, eg have water and plenty of rags handy, etc, were great.
Your video helped me find the product and other information about it. I''ll be asking my general contractor to use this product in our renovation. Thanks!
We used epoxy-coat on our garage floor 8 years ago and it turned out very nice. We used dark red with no flakes, but we did apply the UV clear coat. The UV clear has held up nicely inside but the sun faded it within a year where it is exposed. Just completed another floor with "colored epoxies" and we're happy with it. Colored Epoxies is probably more for the professionals as it was more difficult to apply, but the UV clear coat is 10X better.
EXCELLENT Video!! Very in depth demonstration of the work and application process required in order to get a CLASS A job. My floor will be even more difficult as it has previously been painted with epoxy and I believe will require even more prep! I definitely learned it is not for the faint of heart to attempt as a DIY and now will be looking into hiring a professional if I follow through with my plans to have my floor redone. Thanks again for a GREAT video and keep up the good work!
I REALLY want to epoxy my garage floor but man... that is a lot of prep work for one person. If I can find someone to assist I might take it on. Thee is nothing like an garage floor that has been finished with epoxy. It just brightens up the whole garage. You did a fantastic job and doing by AND doing a video.... wow... that must taken a long time. Great job.
Awesome video. You showed everything there is to know before diving into the project. Appreciate your time and explanation. God bless you.
thank you for video, my project is in an enclosed basement so am concerned with fumes and hope a paint cartridge filter mask will be sufficient
Finally, a really great ‘garage floor getting the epoxy treatment’ video. Well done.
I'm never too old (75) to learn from experts like you ... biggest obstacle I have is that my two car garage is full of non car stuff like tool boxes, wheeled steel storage bins, exercise equipment etc... Methinks the first step in this process from my perspective is to check out the weather forecast (rain/wind) since I'd obviously have to move 'stuff' out of the garage onto the driveway. Second step was how best to protect this stuff from weather/walk around and grab guys etc. This is all before I tackle cleaning the garage floor. Know it can be done, with help from my friends/family, but takes some dedicated thought. Thanks for great video
Thank you so much for taking the time to make this video brtha👍🏼. I will start my Epoxy project in 5 days (Wife n kids will be visiting family) so i will have a lot of free time to get this done and will use your video as a my go too follow along. Your floor looks great. Thanks again & Wish you continued success in ALL aspects of life brtha.
Best wishes & God Bless👍🏼👊🏼🙏🏼
Good stuff bud. Just spent the last week chipping up asbestos tile and painstakingly removing black mastic tar with Goo Off orange oil stuff. I look forward to getting a great finish and appreciate your video.
Very helpful instructions et advice. Thank you!
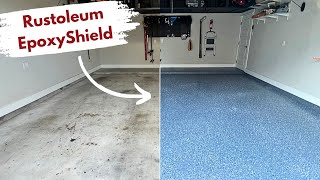
Good Job!! I already purchased Rust-Oleum Epoxy Shield, so too late to use the product you recommend. However the application is the same. Watching you go through the steps and explaining each of them was great! This made it easy to understand what to do and how to do it. Thanks for taking the time out for us.
How did the rust o leum work out for you?
Man... vid is just fantastic, you were just right on explaining all steps, good speed and voice tone when talking; plain and simple , I couldn't find a single thing to criticize negatively... a FANTASTIC VIDE0 👌🏻👌🏻👌🏻, THANKS,. I just subscribed 👌🏻
i was wondering how i can have this look in my garage. thanks for this illusion, was very helpful. All thumbs up!!!!
I watched a lot of videos on this subject but yours is by far the best. Very detailed instructional video. Thank you so much for taking the time to share this with us. I'm probably going to buy from the store you recommended. Hopefully they are giving you some type of referral fee! =)
Thanks so much for your feedback!!!
Do It Yourself Bri I have this same kit. How much working time did this product allow? Does it set up too fast to do the entire floor? Thanks.
great video. I am now confident I can apply the epoxy coating to my garage floor and be successful. will let you know how it comes out
Thanks Al
Yes do let me know how yours went!
How did it go
Very well made video. You covered all my concerns with the application of this product. Thank you.
Step-by-step... along with time-frame great! thanx
Nice job, Best I've seen here, I'll let you know how it turns out.
Sooooo how did it turn out ?????
This was excellent, thank you. It not only helped with in depth steps of how to do it, but you introduced me to epoxy-coat's products. Epoxy-coat seems to be of much better quality than what the big box stores sell. I just finished prepping my floor (all week) and will be applying today & tomorrow. Genuinely, thanks Brian.
How does it look
@@bubthegreat1 like a NASCAR garage floor
Awesome video! This is going to save me time and research. Thanks from one Brian to another!
I did the same procedure, except I used 2 color coats, the top one with the chips. I have a 3 car garage and got 2 quotes from painters at $4,000.00 and one at $3,000.00. I did it myself for roughly $900.00 in materials. I agree with your procedures. It took me 5 days to complete and another 5 days curing time before the cars went back inside. I also painted the stairs, garage doors, short walls, concrete landings, shelves, tool boxes and hydraulic floor jack. Got rid of a lot of junk, and moved a lot of stuff to the tractor shed. I was tired of having a junky looking garage.
Probably been said already..but one of those hand held seed spreaders look like it would work well for those particular deco chips.
Appreciate your efforts. Getting ready to do my floor.
Really helpful stuff
Brilliant video. Really helped me understand what's needed.
I feel ready to give a go now. Thanks!
Excellent advice about the flake distribution! Thanks!
This video was awesome. It helped a lot, and helped me a lot. Especially the tip about the caulk.
“Culk” is such an interesting pronunciation for caulk. Is that the Canadian way?
Have watched a lot of videos on applying epoxy flooring, your prep work is meticulous, and the results show that. This floor turned out as good as any I've seen. I especially appreciate the advise on bouncing the paint chips off the floor and ceiling for better dispersion.
If there was one thing I would do differently, would be to first paint the stairs a bright color (yellow?), then mask off the edge of the stairs. After finishing, I'd peel off the masking and have a nice yellow stripe around the edge of the stairs, for safety. Of course you could always put something down afterwards for the same effect.
Hired a business who specializes in epoxy garage floors. 2 guys came in at nine in the morning and was done in one days of work, it was a three car garage. I saw them use 4.5 inch angle grinders to roughen up the cement and used the special nail shoe bottom to walk on the epoxy to throw on the flakes. They made it look real easy.
thanks for sharing. Was looking for information concerning prep work, and you provided a great example!
excellent job! on instructional video. really pleased on the amount of information you give in this video. 2 thumbs up. Thank you very much BKR Kentucky
great job, thanks for sharing! I wouldn't change anything, you covered it all very well.
Thanks!
That was amazing great job!!! lots of info and very helpful
Thanks!
show a good shot at the end at various angles that shows the completed project, kinda like an after as in before and after
Great video, thanks a lot for making and sharing it.
Thanks!
VERY PROFESSIONAL VIDEO AND JOB! THANK YOU!
Nice to see someone have success doing this. Most of the epoxy garage floor videos don't turn out so well.
wearypirates his won’t turn out that great either. Always grind down concrete a bit before applying any coating
Very helpful I was going to pay someone to paint my garage floor but, now I can do it myself. Thanks.
I really liked your video. Specially the way you applied the chips/flakes. Thank you.
You did an amazing job!!! thank you for the video,👍🏼👍🏼👍🏼
Well done. Buying a new house and considering this for the garage floor. Thank you.
Awesome! You did a good job in explaning everything. Thank you!
God bless you !
Liked the whole video. Appreciate the tip on Epoxy-coat company. Mine is going to be a little more complex in that I'll be renting a floor grinder to prep the floor (some rough areas), and need some leveling agent for some low spots, but I hope to have it turn out as good as yours !
Hi Brian,
First video of yours I have watched and I enjoyed it very much. I will certainly be checking out others.
Thanks!!!
I liked the step by step process. Very informative. Thanks!
Great demonstration - subscribed. Thanks!!
Your floor came very nice. And your procedures to me makes sense and spot on. Nicely done. You sold me I want to use your product and your process
Thank you for great video. I plan to do garage as well as driveway. is this product suitable for driveway? Thanks again.
Brian, Great video. Im doing my 3 car garage this weekend. I would love to suggest you do a video on how to epoxy coat concrete countertops in an outdoor kitchen. thank you for considering.
There's Tons of vids for that. I like The Leggari Guy/Bros (I forget the last part) channel as well as the Stone Coat Countertops channel.
Awesome video thank you for all the info
Great video. Very concise. It will certainly help me when I go to epoxy my floor!!! Thanks!
I really like your detail explanation and most of all you broke your steps.thank you.
Thanks for the advice, I guess the most important thing is to clean, clean, clean, and prep the floor really well. Useful to see how to deal with the bubbles, spiked shoes a good idea. Thanks again.
Hello. I noticed a big price difference between Amazon and directly ordering from the manufacturer. Does the Amazon kit have less materials?
Hi Brian. I would recommend grinding the substrate. Acid doesn't give you the profile that diamond grinding does. Also, your squeegee, that's a window washing squeegee, although it worked using an 18" flat blade squeegee would have been so much easier for you. Thanks for doing the video! Great job!
Was big help for me. Thank
I subscribed few mins ago, Thank you.
Thanks!
very good presentation/demo job well done and i thank you
perfect work just smooth helped a million
What color did you use.. is it the beige or the taupe? And what color flakes did you go with? Thanks!
Thanks for an excellent instructional video
Great video by the way; very helpful. What about "hot tire" reaction? does it stand up well against hot tires? I live in Southern California and it gets pretty hot. So of course after the commute I would be hesitant to park in the garage right away.
Great job video. detailed and to the point. thanks
I really appreciate your in depth tutorial. I know this is an older video but I'm only *worried* about a *slippery* went wet finish? I'm too old to break bones .. so are the flakes and aluminum oxide enough with leather shoes + water not to slip. Many thanks if you can help! 👍👍😎
Excellent video. I used Rustoleum Epoxy shield on a 3 car garage about 10 years ago....and it still looked good after 5 years when we sold the house and moved. Believe me I am NOT HANDY, but following the instructions it came out well...tan with black flakes. My recollection was how hard it was to properly prep the floor....my garage floor was about 2 years old at the time...no oil stains etc...like you i pressure washed the floor, then wetted it down and scrubbed with some kind of degreaser cleaner l...maybe Lyson..cant recall...then hand scrubbed it with the chemical etching...i was so afraid that the epoxy might not adhere that i probably went overboard on the hand scrubbing....but it worked because by the time i moved there had been no problems with the epoxy coming up off the floor. My biggest worry, based on the instructions, was the TIME SENSITIVITY of how quickly you had to spread the epoxy before it would harden or firm up...it just made me feel like 2 people could do a much better job than one working with the short time frames that the mixture would b workable.
I watched your video because i am thinking about doing it again in my current garage. Garage floor epoxy companies want about $2500 to do a 2 car garage! Just as an aside....i am thinking about using interlocking rubber floor tiles as an alternative....just a lot easier to do and not overly expensive. Something to consider anyway. Again, great job....just emphasize the timing issue related to how quickly you have to spread the mixture.
Loved the detail.
Did you do a light flake medium or heavy?
Your video inspiration for me to paint my floor
But i dont know how materials must i need if my floor 4 m× 10m?
What are materials i need to do it?
Thanks
Great video, very thorough! Thank you!!!
What?? this is awesome!!
Very nice video, thorough and understandable.
For a DIYer you did great! Most people tackling this next level project wouldn't be so thorough on the research and prep. You could note the rate to rent the diamond plate floor grinder as an option. Also, any surface that gets wet, you need a maximum moisture level as most products will state in their tech data sheets. A moisture meter will help here. 24 hours may not be long enough for some people. Err on the side of caution here. All in all, good job.
Thanks for the video, very well done! I have a question though, did you pull up the painters tape you used to define the edge after the first coat, the clear coat, etc? Did the blue painters tape give you a nice edge or did it peel up any of the epoxy? Thanks!
Painters tape does not stick to concrete well enough to leave a clean edge. There is a new product out (2018) called Concrete Tape. What I have seen was bright yellow and it stuck pretty well when rubbed down very firmly. Professional installers are using this tape in the Atlanta area.
Hi Bri
I was hoping after 3+ years you would do another video showing how the Epoxy-coat was holding up.
wonderful video - THANK YOU
Hey Brian, Shane here again another helpful video. Do they say how much product you will need to coat the entire floor? Or is it more or less a guessing game as how much to buy at the start? And yes , You are excellent on returning mail. Thank you for this and, all the knowledge you are willing to share. Looking forward to the next one.
Hey Shane nice to talk to you again! As far as the brand epoxy-coat, the coverage depends how thick you want it to be for example you can buy a kit for a Little less than $200.00 that covers 250sq feet at 9.7mils thick or a another kit that is just under $300.00 that covers 250sq feet at 19.4mils thick...They are very good at explaining the kit details in how far the kit will go and at what thickness it will cover..
Do It Yourself Bri hi, in your garage how much did you use? 2 epoxy kits? Thanks
@@doityourselfbri do you have an update video how the floor is doing now 5+ years later, id really like to see that thanks!
Very good step by step. Came out real nice!! My next project 😊
I've used this product before, it works amazing. Just be sure to spread it out as you need it because once it starts to set, it sets quickly and it can create lumps in your final finish.
Hey Ryan. I have this same kit. How fast does it start to set up? Is there time enough to spread, bankroll and throw chips? I’m working 500 sq feet.
thanks for this fine video!! I learned it's too much for me to do myself. Hahaha I'll for sure hire a pro!
Any issues with the Dap product used to filled holes and gouges? Both with the application and the hold up after the project was finished?
thnks a lot it was amazing.. well done.. congrats