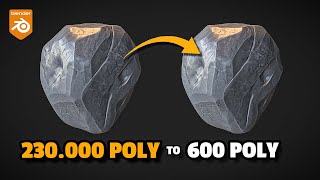
Normal Map Baking: Blender + Substance Painter
Vložit
- čas přidán 20. 08. 2024
- Baking normal maps from a high to low poly 3D model - Blender + Substance Painter
How you name the mesh objects in Blender's Scene Collection does matter!
Use the suffix _high and _low or use your own and set up custom suffixes in the Substance Painter Bake Mesh Maps options.


This is the best tutorial, so fast. So my baked maps came out like sh*t because:
1) My low poly and high poly meshes were not right on top of each other
2) I did not smooth my low poly before exporting
3) Max frontal and Max rear distance had to be pushed up a tad bit
My mesh now looks beautiful.
Ty so much for the video.
Awesome! You're very welcome :)
This is one of the few tutorials like this, straightforward and accurate, thanks!
Dude this is one of the most straight to the point tutorials i have found, thankyou so much! i can now move on to learn stylized artstyle with this for games!
Brilliant, so glad it helped!
it's recommended to set the playback speed to 0.75x or lower 😉
😬
Need more tutorials like this. So many people just blabber on. Thanks a lot.
Glad this style of tutorial worked for you, cheers!
This video is very helpful. I just started learning Substance Painter today and was able to get some great results. Thank you from Japan!
Glad it helped Oskar. Cheers from Northern Ireland!
thank you so much, best tutorial by far. quick and easy to understand
thank you so mush!!!!!! this help me a lot.
Thank you so much
Nice Tutorial bro.. dont stop making this kind of cool tuts..!
Thanks!
thank you bro, this really help me
Glad to help!
underrated, thanks
thats helps alot thank you bud!
Cheers :)
Finally good tutorial
Thanks for the feedback :)
Thanks a lot, great tut
thank you a lot for that! Helped me a lot!
hey. a question. why am i getting clear UV seams in the curvature generator?
bro you are a god ty so much
Glad it helped!
thank you so much for this video. I may sound stupid with this question but I hope you can answer it. can we compair normal maps. like which normal maps or displacement maps give more details is it the one zbrush generates or Blender generates or are they the same or it depends on the details of the 3D sculpt
That's a reasonable question. Zbrush is generally better at handling very high definition meshes (with a high level of detail). It's often the software of choice for AAA games sculpting. I use Blender because it's free, efficient in creating indie game assets, students can easily download it from home, it's lightweight with a small download size and runs well on laptops, and it has decent poly modelling tools. Blender's sculpting is getting better, but will likely never be as powerful as Zbrush for generating normal maps from a high definition sculpt. Having said that, I prefer using Substance Painter for normal map baking and would use it to bake Zbrush models too.
@@JonnyShields Thank you so mcuh for clarify this to me. I really appreciate your help.
@@anissar7301 No problem!
My edges are applied all over even when I use the generator and idk why is my UV is not seamless. Can you tell me what I did wrong?
Ooooh so you don't have to uv unwrap on high poly? :o :o mind. Blown
I know, thank goodness!
I don’t want to apply the subdivision surface and bevel modifier in my blender project so that I can keep a low poly count. Can I instead tick the box to apply the modifiers on export to substance painter then do the texturing in substance painter and import those textures back into blender and add them to the models with the modifiers? Would that work or would it cause issues or do I need to apply the modifiers before exporting or instead add high poly texture to low poly mesh as shown in your video.
nice, but can you talk just a little bit slower? ;)
I did all steps in this video but my normal map is still appearing blank?
Nevermind, my normals were flipped wrong.
@@Brettski Glad you got it sorted!
What if i want to bake a sword per example? in which the blade and the handle are separate objects.. do i just join them? or..?
You don't have to join them necessarily. For example I just made a pirate ship wheel today and I kept the spokes, inner part, main wheel, and base as separate objects but I exported them together as a FBX to be brought into Substance Painter. If you make sure they can all use the same UV space without overlapping it's all good. If you stack UVs just make sure that you move each stack into its own UV space.
@@TheOnlyOOKS bro how do i put all my UV's in the same space?
Gently, gently... Talking to you much too quickly... it's incomprehensible... especially when English is not the native language...
Hi thanks for your tutorial, recently I finished my first 3d model, unwraped, sculpt and the issue is baking normal this is part of mesh I want to know why the seams appear in sculpted places, im trying lots of methods, if you take a look at my mesh very appreciate it
drive.google.com/file/d/1hj9iWgLCP-JQ-pjv22TPxEa7Xg8pYPP8/view?usp=drivesdk