Displacement in UE5 | Geometry Script Tutorial

Vložit
- čas přidán 17. 07. 2024
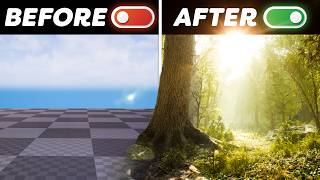
- In this video you will learn how to use tessellation and displacement in UE5. We will be using the Geometry Script workflow for tessellation and displacement. Geometry Script is used to create and generate procedural meshes.
Patreon ► / pinkpockettv
Instagram ► / pinkpockettv
Timestamps ►
00:00 Introduction to Geometry Script in UE5
01:16 Downloading and Importing Textures
02:17 Creating a Material in UE5
03:05 Geometry Script Plugin
03:17 Creating the Blueprint
04:03 Procedural Mesh Generation
06:00 Tessellation in UE5
06:51 Displacement using a Texture
09:25 Baking the Mesh to use Nanite
10:38 Our Procedural Displacement Tool is Ready!
11:04 Outro
#UE5
#UnrealEngine5
#GameDev
@UnrealEngine


Wow Batman you made my skin tingle, this is so much easier than doing it manual. Thanks for a great video. Peace from Scotland ☮💜
😂 Thanks for watching!
You're the best. Amazing tutorials. Tons of new information. Thank you very much!
Hey, thanks for watching. Appreciate the support.
Was a great help, thank you!
Excellent tutorial sir! Thank you for adding more value to learning Unreal Engine!
Thanks for watching! Appreciate the support!
Loved this keep em coming pink :)
Yup! Thanks for watching!
Thanks man, finally a Blueprint video I fully comprehend thanks to your great explanation style 🙂
Hey, thanks for watching and appreciate the support!
EXACTLY! Exceptional
@@bernierao hey, thanks 😊
I don't understand why Unreal engine made it difficult to just simply add and change Displacement into the material nodes
thnx it helped me
Your tutorials are great. Thanks!
Thanks for watching! Appreciate the support!
wow thank you so much. no joke it is now so much easier and u explained it really good.
Thanks for watching! Appreciate the support!
This is a brilliant tutorial my man. Thank you! A++
Hey thanks and appreciate the support!
I was using a substance designer method before this and just replaced it forever thank you much love man
\
Yeah, this is way faster! And thanks for watching!
I had no idea this was a thing 😅 thank you very much, I think this will be incredibly useful
Yup! Thanks for watching!
Excellent video! Thank you!
Thanks for watching!
Very usefull!!! As usual! Great job!!!!
Thanks for watching!
Great tutorial. Thank you!
Thanks for watching!
This is brilliant, kinda like blender's geo-nodes / material-nodes, I like it
Going to have to try this out right now!
👍
Another great straight forward tut! Keep them coming friend!
Can you do a VR map tutorial? :D
awesome, really what i needed
Glad it helped!
@@pinkpocketTV one more thing, how would i do this for an custom mesh, ive tried using "append mesh" but it didnt work can you help me with this aswell? :) just found displacement in the modeling tool thx anyways
Fantastic, Thank you.
Thanks for watching!
thank you man! you helped me a lot 🙂
Hey, thanks for watching!
Waiting For it ❤️❤️
Thanks!
thanks, very interesting and fun
Thanks for the! Appreciate the support!
Hi, your tutorials have been a learning platform for me like everyone else. Thank you for creating them. Also wanted to understand if this similar process can be used to get displacement on a custom ready model. For eg a house and i want to displace snow on its roof than is it possible to add house node? Or it will work with primitives of Unreal only?
Awesome!
Thanks for watching!
Thanks man!
Thanks for watching!
Thank you very much !
Thanks for watching! Appreciate the support.
This is hidden tool change my day forever!
Yup, geometry script is amazing!
Amazing ! 👏 is 🔥
Thanks for watching!
Ty very much, can't w8 to see a fully nanite displaced terrain with different textures blended. Maybe we can see the first one in the next quixel demo. This is way better compared to traditional terrains, this is the natural evolution of terrains. Texturing a terrain nowadays looks too flat.
Nice script!
Omg 😱, thankyou bro
Thanks for watching!
Thanks for this.
Thanks for watching. Appreciate the support!
Thanks for tip!! Is there any way to add a blend material node network into the blueprint that you are using?? I'm actualy looking for a way to displace a mesh wish I'm vertex painting onto... my idea is... if we are able to blend albedo, normal, etc... as the blend material does. it should be a way to blend displacement map aswell, right!??
Rather than displacement texture pluged into ADFTM node, could we plug a blend displacement nodes setup?
Sorry for the brick, hope you get it!
Thx for reading
Hi, this is a great tutorial, and definitely helped alleviate my fear of Blueprints, thank you. Would you know if it is possible to combine triplaner mapping with this technique? I'm looking to displace spheres with textures I create myself, and trying to find the best way to map the material on seamlessly. And advice would be deeply appreciated, I'm pretty new to Unreal Engine and your tutorials have been a great help thus far.
very very Good
Im going to have to do some testing buy this could make for some really cool world effecting magic powers
amazing job
i used to do it manually through Modeling panel This way it is faster
Yup, the geometry script workflow is faster!
Best temporary work around so far. True tessellation happens only on the GPU, so there’s a lot less memory overhead than displacement. Since this displacement method still relies on actual geo subdivisions, it’s still going to be extremely expensive on larger terrain meshes. Also last I checked, Nanite does not support meshes with displacement, so performance will fall off a cliff with enough of this. This is a fantastic tut that will def come in handy for certain applications, but Epic made a huge mistake removing tessellation, and this is proof that even the best work around is still not a viable solution.
Nanite doesn't support dynamic displacement. This method bakes the dynamic material into a static mesh, which is nanite compatible. The end mesh is exactly what nanite was made for.
Yup!
Yes, which just leaves us with another unviable workflow where we must bake out a new static mesh anytime we want changes. Then we are trading memory for disk space, and utterly removing the procedural component that makes tessellation useful in the first place. I can use any program to just bake out a gazillion poly mesh, that is not a solution.
Has this changed since months ago or still the same?
@@wintersouls6123 Unreal 5.2 does enable Nanite meshes to use World Position Offset for material displacement, so you can now use a texture and material parameters to more procedurally drive displacement, and still utilise Nanite to optimise the polygons for rendering. This finally makes it a viable workflow imo, but it does still require that your super-high-poly meshes exist on your disk (i.e. in your game build!). Nanite is built fairly narrow-purposed, for dynamically down-resing large scale geometry. Nanite needs to be able to dynamically up-res as well. It has to read a height map texture, calculate the gradation, and use that to add more polys where they are needed. If they can integrate that into Nanite, they have truly replaced tessellation.
I've seen a few ways of doing this but is there a way to conform or shrink wrap this to another material? That way you can design with simple cubes and then lay this on top easily.
Can geometry script or modeling tools be used to create a single texture (displacement not required) of a layer-painted landscape? I have my painted landscape, imported from a Gaea heightmap, and also a static mesh of the same landscape. I want to apply the same landscape textures, made up of painted and masked layers, to the static mesh, then convert it to nanite for use as a backdrop.
Is there a way to add a static mesh with open UVs instead of a flat one? and what the process would be like ?
Thanks for the tutorial. How can we append a custom mesh?
Thank you so much for a greate informative video! I've subcribed.
Hey, thanks and appreciate the support!
I didn't know you could do that. But what advantages does it offer over displacing the mesh beforehand in a software like Blender?
You can use blender too but this will save a lot of time.
U BEST!!!
Thanks for watching!
Excellent. How and is it possible to apply this to existed custom static mesh, boulder, for example?
Pinkpocket nice video
Thanks for watching!
Where can I find that rock cliff that you used?
its amazing
there is a displace mesh(deform) in Modeling mode, so i can use it in place of other displacement types or like yours
i do have a question about this will it reduce the further away you are like how the old tes worked or would we have to code that in?
Can you explain how this is better than the displacer inside of modeling tools?
i wonder if could apply some kind of tessellation and displacement to things like metahumans and give more detail to faces
The metahumans are detailed enough. Also, I don’t think skeletal meshes are supported.
Thanks bro , could u plz make a videos about how to make pbr material like stone ,wood,metal
I wanna do displacement at runtime just like foot prints.
Can you please make the tutorial :')
I am waiting for retargeting 🔥🔥
@pinkpocketTV Sir plz make a video on Night Enviroment Lighting & Sequencer animation btw love the video
hi another question, is there any way to use something to fix cracks in the mesh?
Do you anyway to do a rarity drop rate? Like some item have 6% spawn chance and other item 20%...
Hi sir u r teaching ery easily so i request to make a full detailing video on Blender shaders and Geometry nodes that how it works and how to do.
great info in this tutorial but I have a question: how can we use custom imported meshes ? do we still use the Dynamic Mesh Component ?
amazing thanks
Thanks for watching! Appreciate the support!
Thanks for the tutorial, it's very good. At the end of the process you convert the dynamic mesh into a static mesh... Would it be possible to use this technique with a mesh imported from our DCC? Thanks
Yup custom meshes work!
what happen if you use an existing mesh like (a trunk with a UV)?
Hi could you please tell me Which cam do you use?
Hi, is there a way to use this method on the lLandscape/Landmass? Of is that not just possible? But the Landscape in essence are just flat planes, so I would guess it would be possible.
Can I import my custom meshes in "Event On Rebuild Generated Mesh" ?
How to get this to work on a static mesh not a dynamic mesh.....
This is a great tutorial and seems to differ from most of the other displacement tutorials. So what led you to going down this route vs the displacement options from the modeling tools? More control i presume?
I think the blueprint approach is a faster and efficient way of displacing meshes.
@@pinkpocketTV Does this work for imported geometry? Is there any way of displacing pre-existing elements?
Yup it does.
I can think of a way to automate the last part non-destructively as well..Need to try it out, I'll let you know if I get it working :)
Yeah but I think you will have to bake it to a static mesh anyways because Nanite only works on static meshes.
@@pinkpocketTV yeah you'll need static mesh, and you can add functionality within the BP to convert/bake it for you. Just need to figure out the actual method, but I'm not an expert with blueprints :(
Okay, I figured it out, can I e-mail you a screenshot of the BP? :)
For those who may have not seen the bro’s reply - you can append any static mesh that you may have. IMO not sure if this is any easier than doing the usual displacement function in the modelling tools
How?
@@km230481 go on "selection mode" scrol to "modeling mode" get to deform section and clic on "displace". Do this with the mesh selected. 😉
@@bendiba28 you answered the wrong question my friend. He was asking how we can import custom meshes instead of generating the meshes procedural (as in the tutorial).
Awesome tutorial...I have one question...how do we apply this displacement technique on the entire landscape?
Well you cannot. Landscapes don’t support displacement. You will have to layer the landscape with megascan meshes.
Great tutorial! Is there a way to Apply this displacement on a landscape too?
Thanks for watching. And at the moment landscapes don’t support this.
Simply brilliant .. Thanks a world for sharing .. Keep up the greatness .. Cheers
Hey, thanks for watching! Appreciate the support!
Amazing stuff as always! Any way to break out a channel of a packed texture in Unreal? Using Megascans materials to make some meshes and would love to handle that part in Unreal instead of loading a standalone copy of bridge and downloading separate textures. Of course Unreal 5's Bridge doesn't give you an unpacked displacement map...
I have the same situation here, if you find a solution I would love to hear it :)
If you are talking using Megascans surface textures then they come with the packed ORD map when downloaded. You can just select the blue channel from it for the displacement and use as a 2D texture in the modeling tools.
@@7_of_1 but you cannot use the texture as it is with the rgb channels inside the graph editor inside the blueprint as it is in the video
@@rodrigocascas if you want to unpack the texture you can use photoshop and separate the R,G and B channels into separate layers which will give you AO, Roughness and Displacement as separate textures and re-import them to content browser.
@@7_of_1 thanks! yes I know.... I just wanted to see if there was a way to do it inside Unreal as Michael asked, thanks
is there a solution for landscapes?
Thanks so much for this! I am looking for a solution for dynamically changing the strength of Displacement in Sequencer. Is this setup going to work?
Yup! Thanks for watching.
@@pinkpocketTV Hey - for some reason my Dynamic Mesh Blueprint disappears when i try to render out a sequence. And obviously if i bake it into a Static Mesh, i'm no longer able to control the strength of displacement with keyframes. Has anyone had luck doing that? Any advice would be super helpful!
what do i do for texture samples from the quixel bridge that dont provide height maps?
Quixel bridge gives you an ORD Mask Map. So, the displacement map corresponds to the Blue channel. (i.e. RGB) You can use this as the height map to drive the displacement.
@@pinkpocketTV thank you so much for the quick reply. you are the best!
What's ur video card u use?
I have a 12GB RTX 3060.
so is wpo a workaround given displacement is now gone in ue5 ?
I hope you read this because I'm a complete beginner when it comes to blueprints. What if I want to apply multiple displacement texture passes in a single blueprint? I tried copy pasting some of the nodes but only the first displacement slot is functional, the others don't affect the mesh.
you need to combine them first and than output the result.
How to do this with a static mesh instead rectangle xy ?
can you do this on the material it self or does it have to be a object
On the object itself, the mesh I mean. We are displacing the geometry itself, and baking it into a Nanite mesh. This is not a shader displacement effect, like using RVT’s and Heightfield Mesh.
Bro , are you still up . Thanks for the vid
ДААА именно то, о чем я мечтал. делать тиселяцию на плейнах! кайфули, а на мешах с готовой карты как это сделать, не дублируя меши?
Hi. I try to do like u, turn on plugin, restart, but in functios no Rebuild Generated Mesh ((
What if it’s from megascans and doesn’t have a displacement map but just one of the texture maps?
Amazing work , Are there any way to make it on alembic file ?
I don’t think it works with a geometry cache.
How different is this from using the displacement map and using the "displace" function in the modelling section?
It’s not different, actually it’s the same. But the blueprint way is like more efficient while doing level design and stuff.
@@pinkpocketTV cool. Thank you!
Could you made a tutorial how to use it on a marial landscape ? thank you
For a landscape you will have to use virtual textures. I’ll probably make a video on that sometime soon!
Is it possible to append custom (own) meshes in the blueprints (not just primitives)?
Yes!
@@pinkpocketTVHow?
Nice tips. It would be great if there is a method to mask Blue channel of textures in blueprint. This way Bridge's ORD textures can be used as displacement map directly. I have no idea is it possible or not. Any clue?
Yup. Export the ORD map from UE5 then open it on Photoshop. After that go to the layers panel and switch to channel view. Then disable all channels except the blue channel. Then change the mode from RGB to Greyscale. Now save it and import that texture in UE5. Hope this helps.
@@pinkpocketTV That is the obvious and long way. I am seeking a direct usage of ORD as it download.
Yeah, actually, you can’t directly separate channels in BP, you can only do that in the shader editor. There is one way but that is a long one, using render textures. 😅
@@pinkpocketTV That is definetly another long one. I am planing to use nanite version of SM. So In modeling tab displacement panel already has channel options. So I may stick that. But BP version is really remarkable. Thanks for the tip again.
I just did a test and found out the "options image channel" on the "Apply Displace From Texture Map" node can choose which RGB channel to use for displacement.
0 is R, 1 is G and 2 is B (I'm guessing 3 would be A)
What performance hit does this have?
After baking the mesh just enable Nanite. So, it’s very optimised.
Can we append a custom mesh to be displaced in the same way?
Yes!
I’m just doing that.. do u know how to do that ?
You can show how to make waterfall in next video please.
make a video on how to make a day night cycle in core engine
make a video on how to earm from core
Faz um material master com tudo muito completo e coloca para download por favor
What kind of PC spec do you have?
AMD Ryzen 1700x CPU, RTX 3060 12GB GPU and 32GB of Memory.
And how to Add the Effect from Plane to a Landscape?? ???