One thing to always remember is the cost of your time processing them. That looks like it would have been a lot of work! Still, it looks like you enjoyed it and the results are spectacular. Thank you for the detailed instructions!
You’re blowing my everloving mind, man. I’m just getting into 3D printing, and it’s content like this that’s leading me further down the rabbit hole of what’s possible.
Great video! I really appreciate how you explain why you chose to do something a particular way rather than the typical "do this, do that" approach. Keep up the good work!
Awesome video, that you for sharing, really enjoyed it. As you said how amazing it was how the people used to make coins. This is a great initiative, well done. Keep them coming.
If you plan on printing them the same way next year, try covering them with a shoe polish and then wiping them off. It is a nice and easy way to add the same weathering to add shadows and highlights to them. Thanks for sharing.
I've been FDM printing for about 3 years now, just dipping my toes in resin printing, so glad I've found your channel, found it a tad hard to get some simple walkthroughs on the resin process.
Metal ones could be made. Make a mold of your best printed model, and use epoxy infused with fine ground copper. These can be inked and polished for that faux age patina with dark nooks and crannies. Faster than metal casting but similar heft.
I tried 3 different things: The clear spray and 2 different photoactive resin coatings. Just was playing around. Some day I might do a video on some real tests of making glossy prints.
Hello, I use to work at a few companies designing challenge coins, dog tags, emblems, etc. I use Zbrush and have been learning Fusion 360. 3D Printed a tag of Sisu with Zbrush on a Photon from Anycubic. Good video . Thx. I prefer resin over FDMs
RE: From the U.S. Mint - In my research it indicates they used much larger originals and had a special mechanism with a pencil then guide - possibly a type of lathe or grinder transferring as one moved at much smaller detail while hand tracing the larger blueprint... that took it from originals size to coin size, and etched it - then they could get the detail with closeup eye ware a meticulous process, yet they started large to get the smaller detail corrected before the reductions.
been using fusion 360 for years, but I never realized mirroring was thing I usually draw or just measure with some geometry trick so thanks for mentioning that man
This is exactly what I needed. Thanks for the excellent info not really covered in too many other places. I knew about bump maps and how to create them from playing around with homebrew mapping, but what I needed was the portion on turning that greyscale image into a 3D relief. Now it is time to go finally purchase some software so I can make some relief maps. I'm curious to know how your experience with Siraya Blu was. Did you notice much warping or dimensional errors with it? Looking forward to the next project video and I hope the kids all enjoyed their 2020 dog tags. Maybe one with a dumpster fire for the rest of us would make for a nice limited run merch item 🤣🌎🔥
Thanks. Glad it was helpful. I bet you can do both the depth map render and create the relief in blender which is free. But I don't know how to use blender (yet). Siraya Blu - I think the resin needs to be warm. You might have noticed the seed heater inside my printer. I added that to keep the resin warm. Although the desert in July is pretty warm already. I haven't done any calibration tests with it yet. I would say on warping that I did notice some of the dog tags warp during post processing. I left them on a paper plate and they drooped in the middle. The good ones I post cured laying flat on the wax paper.
This is very close to how I make coins with head profiles. Except I used a falloff map (perpendicular - parallel) plus ZDepth blended together. The falloff map helped blend the edges so it doesn't have such a steep edge. I'll have to add in the AO on my next one, you got some good detail in that AO pass. With your dog tags, you could make a couple masters, and make silicone molds. Mold Max 60 if you want to do pewter. Mold Max 20 to do resin casts. With a resin cast, you can get pretty close to the look of bronze, pewter, and other metals by doing cold metal casting. If they are personalized with names, you make a cavity in the main mold that allows a 3D printed name to be snapped into place, and then a cast is made. You just need to make sure you have a good drafting on the letters of the name and use mold release so the two resins don't stick. If using pewter, you would have to make a sheet of names in Mold Max 60, and plug those in for each cast. Vacuum chamber, and pressure pot or pewter crucible, if you don't already have this stuff it does add quit a bit to the cost though.
I would like to make a mold and then make a pewter one. I saw the Crafsman do it and want to try it out. But I also have another project where I'm going to do that and make a video about it. I want to start messing around with some casts.
Nerdtronic Just make sure whatever silicone you get for the molds, to be tin cured. Platinum cured may react with the 3D prints, Crafsman also ran into that in one of his mold making episodes with 3D prints. I still prime my prints just in case with fine detail primer usually used with model cars, miniatures, etc. A good Sulphur free clay is also a must.
i have the best way to make relief using blender and knald which works significant to this one, first bake 3d model to a plane as normal map then use knald to extract the height map
I am so glad I subbed to your channel. Wish I knew about it when it came out. I really enjoy the content and the way you provide details and your learning curve. This is very helpful to me.
I don't know how this channel only has 137x subscribers. Great content and amazing production quality. I'm guessing this is not your first YT channel rodeo?
You could try and spray them in a metalic paint, they actually look very much like metal at that point. I've done it with medalions before and it looks super cool and is very easy with the spray paint cans.
I'm late to the party, but for old school coins a sculptor made them large. They then had a needle move over the surface (think like a record) and that needle was connected to a series of gears that miniaturized the motions to make a smaller mold.
@@Nerdtronic Great video. You've got a great presentation manner. Coin/medal striking dies were cut in steel with the use of a pantograph (a set of sliding arms that can be set for the amount of reduction desired w/ one arm holding a stylus and the other a rotating cutter to mill the steel. The original was sculpted at 300 - 500% in clay, a mold was made from the original and cast in a hard plaster or resin. The plaster tracing master was installed in a pantograph and the arms set for the amount of reduction. If it was a semi-automatic pantograph, the tracing stylus would follow a preset pattern to totally cover the master. If it was a manual, an operator would slowly push the stylus over the master as the cutter milled the steel away. The reproduction of detail was the end result.....everything sculpted at an enlarged scale was faithfully reproduced in the reduced version. All this from a guy that spent many hours tracing with a manual pantograph........Google Gorton pantograph for an image
@@Nerdtronic I’m waiting on season 5. I’ve read all the books, including the most recent one. I’m waiting on the next book chapter. I’ll look out fir your other hats! Any references to Don Quixote? He he.
@@LtJerryRigg thanks. I found the step down process on how it’s made. It doesn’t do the step down on one go, it requires artisans with jeweler’s precision to do the job at every step down process.
How they did it "back-in-the-day": I used to make commemorative sewing thimbles from pewter. I used a foot tall model (hand carved), then used a reducing pantograph mill to reduce it 12:1 and mill the new model on wax. It would be lost wax cast in bronze, then rubber molded to make additional molds for pewter...
Great video, I will have to try this myself. With cost comparison you should note how long the extra processes took. Once you add labour costs, you quickly realize why everything is made in China
The design time is about the same for both. Printing time I don’t consider labor. But yeah. It took a while to clean them all. Putting on the jump rings and chains took some time.
For the detail you can do some pseudo HDR processing to enhance detail and small relief changes, and or use high pass filters. For the final cost I would not neglect FEP and LCD replacement costs as those can be a significant fraction of the final costs. If the LCD costs X dollars and lasts Y hours you can estimate its cost as (x/y)*hours to print.
@Nerdtronic I watched this when it was first released and thought nice work! fast forward and I'd like to make my own relief of a wolf stl for trinkets my wife can take to a gathering outside of North America next year. I'm a Fusion360 user but not a Cheetah3D user and quickly got lost trying to follow your vid. Maybe if you do dog tags for the fam again this year it would be possible to make a longer, more step by step, tutorial? Big ask of me I know.
would have been interesting to have printed in a solid "brass" color, and then done a black wash to achieve the same "metal" look... maybe try that with an extra and some paint?
I want to do that. I need to think it though. Most of my prints come out pretty clean. But everyone has their own voodoo they do to get their prints clean. Some which are polar opposite of my methods.
Really like your presentation style....... the 4 C's calm, cool, collected, and concise. Assuming ambient occlusion only works with meshes. Don't have an Apple, so no Cheetah. Wonder if you know of any near similar raster filters that would give comparable results in Gimp, Inkscape, or Krita.
Any 3d rendering app should have a way to do something similar. Try blender. Render out a depth map. Then light it white and render out an ambient occlusion map. Should work with any 3d objects.
I actually want know how did you paint those so nice! I have made some brasslooking emblems like Destiny 2's seals, but didnt get so perfects old brasscoin look (dirty caps and shiny surface)
The metal ones aren't 3d printed. They're actual metal. I had them made in china. This year I 3d printed them instead. The design method though was the same.
Is there a way clean/smooth the edges of the model after you applied the height map without losing detail on the important areas? Would those lines/artifacts be noticeable with normal resin?
The making of the lion looks cool and interesting, any chance you could make a video guide on how to make it in Blender or other 3D apps that can do this ? am on windows and I normally use Fusion 360 too
Unforunately I don't know blender yet. I suggest just googling how to do each of the steps in blender. Render a depth map. Render an AO. Combine in PSD. Use that image to make a relief.
I'm a bit concerned with the resin tags, I'm always scared there will be some uncured resin and I don't feel right slapping one on my cat, am I just overthinking?
@@UmutUcler yazsmetals. I originally contacted them through alibaba. They did great work but you do have to micromanage the design a little. Make sure they are making what you want them to make. Sometimes there are slight confusions because of the language barrier.
I'm an idiot! Formatted the USB flash drive that was in the printer. I don't know what to do next. I downloaded some drivers from the phrozen website and I hope they will work.Please help me!!!!SOS!!!
I don’t know blender yet. Need to learn it. This can be tricky. I did a dog tag on year that didn’t come out very good. Not enough contrast in the height map.
It is a little complicated using a subdivision modifier with a displacement modifier maybe a UV map depending on what way you do it. But if you ever learn it once you unlock a world of possibility's. I edit video's in blender even
Hi, do you do custom work? I need a coin made ( I can use it to cast metal ones) for my animal foundation to raise money for it. Let me know and I'll send you a copy of the design.
Hey michael, that email you gave didn't work but I deleted my comment either way, just in case I was right. Still, I want you to know that your content is great and I'm subscribed. :)
Oh now I remember.. michael@nerdtronic3d.com Yeah that's ok. I did a search and found lots of schools but now ours. That slogan was only used one year a few years ago. Even if I googled the slogan and our city I didn't find our school. So I feel pretty safe about it. But it was a legit concern. Thanks for watching
Estimating the price you did not included your time into account. If you'd do it for sale, probably your price will be about the same as metall ones was shipped to you previous years.
Hey thanks for watching Roman. True I didn't count my time in any of it. But was still a fun project. I have to admit that I like the metal ones better. But some of the kids liked the 3d printed ones better.


One thing to always remember is the cost of your time processing them. That looks like it would have been a lot of work! Still, it looks like you enjoyed it and the results are spectacular. Thank you for the detailed instructions!
This has great overlap potential for desktop CNC machines as well. Great video Michael.
You’re blowing my everloving mind, man. I’m just getting into 3D printing, and it’s content like this that’s leading me further down the rabbit hole of what’s possible.
Wow thanks. I'm glad someone found this video useful. :) I'm going to do a followup eventually where I cast some parts in puter and then plate them.
@@Nerdtronic My wife is a second grade teacher, so projects like this are right up my alley! I’ll be sure to catch that follow up video!
Great video! I really appreciate how you explain why you chose to do something a particular way rather than the typical "do this, do that" approach. Keep up the good work!
Thanks.
You are the best in this field 💐💐💐
Thank you
Awesome video, that you for sharing, really enjoyed it. As you said how amazing it was how the people used to make coins. This is a great initiative, well done. Keep them coming.
Awww thanks.
Great video thanks. :-) The Expanse hat was a great touch
First to recognize where the hat is from. I have 2 other expanse hats.
You can always get into metal casting and cast them in puter yourself. Just a thought.
So much great info. Thank you for this. My 3d printing skills are a little weak, but you're helping me see the world I can grow into.
You can do it!
yes interested in the cleaning up parts video. any videos from you are well worth watching. well done sir!!
Ok thanks! I'll try to make one about that soon.
If you plan on printing them the same way next year, try covering them with a shoe polish and then wiping them off.
It is a nice and easy way to add the same weathering to add shadows and highlights to them.
Thanks for sharing.
Amazing detail. Love the cost analysis at the end and the tutorial was detailed enough. Thank you and well done. Hope this channel grows.
I hope so too!
god bless for your work . very detailed and well made video.
I've been FDM printing for about 3 years now, just dipping my toes in resin printing, so glad I've found your channel, found it a tad hard to get some simple walkthroughs on the resin process.
Welcome aboard! Hope to have more videos out soon.
Metal ones could be made. Make a mold of your best printed model, and use epoxy infused with fine ground copper. These can be inked and polished for that faux age patina with dark nooks and crannies. Faster than metal casting but similar heft.
Meshmixer is another program equipped to handle high facet count meshes. Also free! Excellent video!
also try gloss acrylic clear cote spray if u want glossy surface.
I tried 3 different things: The clear spray and 2 different photoactive resin coatings. Just was playing around. Some day I might do a video on some real tests of making glossy prints.
Spray Prime, then spray base, then wipe with black to tint. :P
Eventually I'll make a mold and cast in puter. Then electroplate that.
Hello, I use to work at a few companies designing challenge coins, dog tags, emblems, etc. I use Zbrush and have been learning Fusion 360. 3D Printed a tag of Sisu with Zbrush on a Photon from Anycubic. Good video . Thx. I prefer resin over FDMs
RE: From the U.S. Mint - In my research it indicates they used much larger originals and had a special mechanism with a pencil then guide - possibly a type of lathe or grinder transferring as one moved at much smaller detail while hand tracing the larger blueprint... that took it from originals size to coin size, and etched it - then they could get the detail with closeup eye ware a meticulous process, yet they started large to get the smaller detail corrected before the reductions.
been using fusion 360 for years, but I never realized mirroring was thing I usually draw or just measure with some geometry trick so thanks for mentioning that man
What a high quality information. Great teacher you are. Thanks.
Wow, thank you!
Good information, working on a couple projects that this will come in handy with.
This is exactly what I needed. Thanks for the excellent info not really covered in too many other places. I knew about bump maps and how to create them from playing around with homebrew mapping, but what I needed was the portion on turning that greyscale image into a 3D relief. Now it is time to go finally purchase some software so I can make some relief maps. I'm curious to know how your experience with Siraya Blu was. Did you notice much warping or dimensional errors with it? Looking forward to the next project video and I hope the kids all enjoyed their 2020 dog tags. Maybe one with a dumpster fire for the rest of us would make for a nice limited run merch item 🤣🌎🔥
Thanks. Glad it was helpful. I bet you can do both the depth map render and create the relief in blender which is free. But I don't know how to use blender (yet). Siraya Blu - I think the resin needs to be warm. You might have noticed the seed heater inside my printer. I added that to keep the resin warm. Although the desert in July is pretty warm already. I haven't done any calibration tests with it yet. I would say on warping that I did notice some of the dog tags warp during post processing. I left them on a paper plate and they drooped in the middle. The good ones I post cured laying flat on the wax paper.
This is very close to how I make coins with head profiles. Except I used a falloff map (perpendicular - parallel) plus ZDepth blended together. The falloff map helped blend the edges so it doesn't have such a steep edge. I'll have to add in the AO on my next one, you got some good detail in that AO pass.
With your dog tags, you could make a couple masters, and make silicone molds. Mold Max 60 if you want to do pewter. Mold Max 20 to do resin casts. With a resin cast, you can get pretty close to the look of bronze, pewter, and other metals by doing cold metal casting. If they are personalized with names, you make a cavity in the main mold that allows a 3D printed name to be snapped into place, and then a cast is made. You just need to make sure you have a good drafting on the letters of the name and use mold release so the two resins don't stick. If using pewter, you would have to make a sheet of names in Mold Max 60, and plug those in for each cast. Vacuum chamber, and pressure pot or pewter crucible, if you don't already have this stuff it does add quit a bit to the cost though.
I would like to make a mold and then make a pewter one. I saw the Crafsman do it and want to try it out. But I also have another project where I'm going to do that and make a video about it. I want to start messing around with some casts.
Nerdtronic Just make sure whatever silicone you get for the molds, to be tin cured. Platinum cured may react with the 3D prints, Crafsman also ran into that in one of his mold making episodes with 3D prints. I still prime my prints just in case with fine detail primer usually used with model cars, miniatures, etc. A good Sulphur free clay is also a must.
Wow the skill and knowledge
i have the best way to make relief using blender and knald which works significant to this one, first bake 3d model to a plane as normal map then use knald to extract the height map
Binging all your videos. They're super pleasant and easy to follow along with, I'm learning so much. Thanks!
I am so glad I subbed to your channel. Wish I knew about it when it came out. I really enjoy the content and the way you provide details and your learning curve. This is very helpful to me.
Forgot to mention that Mesh Mixer does what Cheetah does.
Welcome aboard!
Your videos are great, very clear and precise.Please keep them coming! A post processing video would be great to see also.
Plan to do one on cleaning. Tip #1 will be to protect the part from any UV light during the entire cleaning process.
Awesome video! And I also love your Expanse MCRN cap!
Thanks! Yeah I have 3 or 4 Expanse hats. They have so many great logos on there. I had these made custom.
I don't know how this channel only has 137x subscribers. Great content and amazing production quality. I'm guessing this is not your first YT channel rodeo?
Thanks. No my other channel has even less subs. New channels just take time to get traction. Subs and like help!
1.4k subs now. It goes up a little every day. :)
You could try and spray them in a metalic paint, they actually look very much like metal at that point. I've done it with medalions before and it looks super cool and is very easy with the spray paint cans.
You could. For this project I wanted as little post processing as possible.
I'm late to the party, but for old school coins a sculptor made them large. They then had a needle move over the surface (think like a record) and that needle was connected to a series of gears that miniaturized the motions to make a smaller mold.
Great comment. Thanks for the info!
@@Nerdtronic Great video. You've got a great presentation manner. Coin/medal striking dies were cut in steel with the use of a pantograph (a set of sliding arms that can be set for the amount of reduction desired w/ one arm holding a stylus and the other a rotating cutter to mill the steel. The original was sculpted at 300 - 500% in clay, a mold was made from the original and cast in a hard plaster or resin. The plaster tracing master was installed in a pantograph and the arms set for the amount of reduction. If it was a semi-automatic pantograph, the tracing stylus would follow a preset pattern to totally cover the master. If it was a manual, an operator would slowly push the stylus over the master as the cutter milled the steel away. The reproduction of detail was the end result.....everything sculpted at an enlarged scale was faithfully reproduced in the reduced version. All this from a guy that spent many hours tracing with a manual pantograph........Google Gorton pantograph for an image
Awesome channel!!
Thank you!
This is amazing! Thanks for going over how you approach a project!
Great video! I've been wanting to do coins for quite some time. This will help a lot!
Cool.. if you make a video about it add a link here so i can check it out!
@@Nerdtronic Thanks! I'll give it a shot!
Love the hat! Drapper and Alex would be happy.
Awesome. Yeah I have 3 home made Expanse hats that you can see in other videos. I need to finish watching season 3 and 4 yet.
@@Nerdtronic I’m waiting on season 5. I’ve read all the books, including the most recent one. I’m waiting on the next book chapter. I’ll look out fir your other hats! Any references to Don Quixote? He he.
13:18 - Correct, larger engraving, then used a reducing lathe to produce the die.
Thanks!
What was the step down process?
@@yuriyfazylov5506 look up what a "pantograph" is, it uses a mechanism to reduce a larger relief to carve something much smaller, mechanically
@@LtJerryRigg thanks. I found the step down process on how it’s made. It doesn’t do the step down on one go, it requires artisans with jeweler’s precision to do the job at every step down process.
Your content is really great! Hope to see more in the future!
Thanks. I want to do a lot more of these kinds of project videos. More on the way soon.
How they did it "back-in-the-day": I used to make commemorative sewing thimbles from pewter. I used a foot tall model (hand carved), then used a reducing pantograph mill to reduce it 12:1 and mill the new model on wax. It would be lost wax cast in bronze, then rubber molded to make additional molds for pewter...
That's great info. Thanks for that. Really cool.
Zbrush does relief really good as well but it's way more expensive.
Try adding some graphite power to the rein. Or other powders to make it look metallic.
Great video, I will have to try this myself. With cost comparison you should note how long the extra processes took. Once you add labour costs, you quickly realize why everything is made in China
The design time is about the same for both. Printing time I don’t consider labor. But yeah. It took a while to clean them all. Putting on the jump rings and chains took some time.
Many Thanks Share😍🥰🥰
to be quite honest, the weight an feel of metal, is just superior to 3d printing it,
Far superior.
love you videos, love Rubik's cubes
That's an electronic one that has an iPhone app and teaches you to solve it.
For the detail you can do some pseudo HDR processing to enhance detail and small relief changes, and or use high pass filters. For the final cost I would not neglect FEP and LCD replacement costs as those can be a significant fraction of the final costs. If the LCD costs X dollars and lasts Y hours you can estimate its cost as (x/y)*hours to print.
wonderful vid/tut love this channel :) thank you
@Nerdtronic I watched this when it was first released and thought nice work! fast forward and I'd like to make my own relief of a wolf stl for trinkets my wife can take to a gathering outside of North America next year. I'm a Fusion360 user but not a Cheetah3D user and quickly got lost trying to follow your vid. Maybe if you do dog tags for the fam again this year it would be possible to make a longer, more step by step, tutorial? Big ask of me I know.
wow, I learned a lot. Thank you, keep up the good work.
Thanks. I'm working on an app right now and my next video will be about that app and the problem that it solves. Hopefully about a week out.
would have been interesting to have printed in a solid "brass" color, and then done a black wash to achieve the same "metal" look... maybe try that with an extra and some paint?
They would carve a small model out of wax. The harder the wax the more detail. Then they would do the lost wax process.
I would definitely like to see a clean up video
I want to do that. I need to think it though. Most of my prints come out pretty clean. But everyone has their own voodoo they do to get their prints clean. Some which are polar opposite of my methods.
Really like your presentation style....... the 4 C's calm, cool, collected, and concise. Assuming ambient occlusion only works with meshes. Don't have an Apple, so no Cheetah. Wonder if you know of any near similar raster filters that would give comparable results in Gimp, Inkscape, or Krita.
Any 3d rendering app should have a way to do something similar. Try blender. Render out a depth map. Then light it white and render out an ambient occlusion map. Should work with any 3d objects.
It would have been cool to keep the right side overlap over the edge - it would give it interesting pop - something to consider in 2021/2
you ever thought about spraying them gold, washing them with, black or any other way to achieve the same metal look?
It's worth a try. This year I just wanted to leave them translucent. I also didn't want that much post processing.
had the same thought. light touch of black spray paint? terrible? okay? (extra work for sure.)
In the show The Expanse, the "Ceres Coins" are 3D printed. So you are thinking Futuristic
Love that show - as I'm sure you can tell.
I actually want know how did you paint those so nice! I have made some brasslooking emblems like Destiny 2's seals, but didnt get so perfects old brasscoin look (dirty caps and shiny surface)
The metal ones aren't 3d printed. They're actual metal. I had them made in china. This year I 3d printed them instead. The design method though was the same.
Ahh yea.. I've learned to make almost so nice metallic look and fooled of yours :D
Is there a way clean/smooth the edges of the model after you applied the height map without losing detail on the important areas? Would those lines/artifacts be noticeable with normal resin?
I've done it by hand. Just editing the mesh manually. Not sure what would be noticeable. Depends on the print resolution probably.
I wish there was a software that blended all those software in a blender. To make one free software like Blender.
What course can I take to learn how to design better?
The making of the lion looks cool and interesting, any chance you could make a video guide on how to make it in Blender or other 3D apps that can do this ? am on windows and I normally use Fusion 360 too
Unforunately I don't know blender yet. I suggest just googling how to do each of the steps in blender. Render a depth map. Render an AO. Combine in PSD. Use that image to make a relief.
Thanks!
I'm a bit concerned with the resin tags, I'm always scared there will be some uncured resin and I don't feel right slapping one on my cat, am I just overthinking?
Great video with a really cool look. Do you have any good idea, how to make the depth map from a photo of a person?
The iphone could theoertically do it. It has a depth camera. Someone would have to write an app. I'm not up for that :)
@@Nerdtronic Would you mind, sharing the chinese manufacturer?
@@UmutUcler yazsmetals. I originally contacted them through alibaba. They did great work but you do have to micromanage the design a little. Make sure they are making what you want them to make. Sometimes there are slight confusions because of the language barrier.
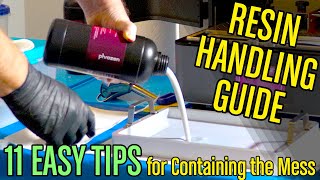
I'm an idiot! Formatted the USB flash drive that was in the printer. I don't know what to do next. I downloaded some drivers from the phrozen website and I hope they will work.Please help me!!!!SOS!!!
Are you on Mac or pc?
@@Nerdtronic pc
I've been trying so hard to recreate this in blender but with not much luck.
I don’t know blender yet. Need to learn it. This can be tricky. I did a dog tag on year that didn’t come out very good. Not enough contrast in the height map.
It is a little complicated using a subdivision modifier with a displacement modifier maybe a UV map depending on what way you do it. But if you ever learn it once you unlock a world of possibility's. I edit video's in blender even
Couldnt you then just design the dogtag fully in photoshop and import it, the way you did with the lion
is there a way to do them in metal?
moar
Hey sir, is it possible to do that for a real dog, with a photo or something like that ? Thanks a lot !
Hi, do you do custom work? I need a coin made ( I can use it to cast metal ones) for my animal foundation to raise money for it. Let me know and I'll send you a copy of the design.
How about blender for editing meshes?
Yeah would work. I just knew cheetah 3D better.
Why not use blender?
To powerful and he hasn't took the time to learn how amazing it is.
bonjour tu peux faire la même chose avec des logiciels gratuit ?
Hello, can you do the same thing with free software?
Hey michael, that email you gave didn't work but I deleted my comment either way, just in case I was right.
Still, I want you to know that your content is great and I'm subscribed. :)
Oh now I remember.. michael@nerdtronic3d.com
Yeah that's ok. I did a search and found lots of schools but now ours. That slogan was only used one year a few years ago. Even if I googled the slogan and our city I didn't find our school. So I feel pretty safe about it. But it was a legit concern. Thanks for watching
Estimating the price you did not included your time into account.
If you'd do it for sale, probably your price will be about the same as metall ones was shipped to you previous years.
Hey thanks for watching Roman. True I didn't count my time in any of it. But was still a fun project. I have to admit that I like the metal ones better. But some of the kids liked the 3d printed ones better.
Hi What is the name of the 3D printer are you using?
Phrozen Transform
that aint no dog in the thumbnail… thats a lion
if yoda had sex with leia, this guy would be the result.
Do you have a Twitter or instagram?
Unfortunately no. I might do daily updates either on patreon or on just a blog site. But I'm not sure who would sub that.