How to use my Lighting Recipe Guides

Vložit
- čas přidán 29. 11. 2022
- I've created a number of "lighting receipt guides" for photographers that they can use to recreate various lighting setups and tweak them to create all new variations. Each of these guides shows the behind the scenes, lighting info, camera settings and more.
This video explains exactly how to use these guides.
👉 Check out my lighting receipe guides here: lindsayadler.photo/guides
----
👉 Portfolio: lindsayadlerphotography.com
👉 Instagram: / lindsayadler_photo
👉 Facebook: / lindsayadlerphotography
👉 Twitter: / lindsayadler
👉 Education: learn.lindsayadlerphotography.com - Krátké a kreslené filmy


The one and only Ms Adler - She is phenomenal - fantastic portfolio of real ,well thought out images.
Thanks so much for the kind words! :)
Good idea using a mannequin for practice or demo. Great work on sample learn plus classes. Good refresher course for non-profit work or small business work.
I've been shooting events (conferences etc.) for, like, 20 years, and recently got into portraits. I bought a ProFoto setup and some backgrounds I can setup at clients for corporate pictures, family portraits etc. and was actually quite baffled how hard it is to get really good lighting, even with my many years of experience in general phtography. Lighting is a whole other "animal" than non-flash shootings and even having gone through multiple CZcams videos on the subject, I just bought your "money making class" because I like your "here's a detailed approach to how you can actually do this type of shot with this type of gear"-videos, which - I guess - is the whole point of using the word "recipe". At 70-80$ for hours of video tutorials and SPECIFIC advice, it's a "steal" because it's going to earn itself back quickly and multiple times. Thanks!
I'm so happy to hear the classes have been able to help you! :D
Thank you. I have never seen anyone so detailed and intelligible.
Thank you so much!
Love your lighting guides! Thank you for making these videos and sharing your skill set!
I like the lighting recipe guides and how you explain them. They look similar to the set reports I use for product photography. Your guides are valuable tools photograpers can use to bring consistancy to their work. You're showing us how to use light, but what I also see is how to be professional and prepare a set before clients/models arrive.
Thank you, Lindsay, for another great video.
Thank you so much!
It’s always a true pleasure watching Lindsay. I just love everything..the way you explain, the details, the alternatives you give, the way you deliver information..it’s just such a pleasure learning from you! If you need a free assistant I live in nyc! 😅
Thanks so much!
Do you always have to be beautiful everytime?
Wow! Amazing guides. Thank you so much Lindsay for sharing with us. ❤️
Lindsay be teaching and we be exercising what she teaching. Great work home skillet
This is by far one of my favorite tutorials on YT to watch on the subject. I purchased your "Money Making Photography Lighting Recipe Guide" over the holidays and it IS PHENOMENAL. It is providing me with the foundation/workflow for my plans to do headshots soon. Also Sekonic wants me to send you their thanks and gratitude for being the influence on me in purchasing a new light meter from them.
Awesome!! I just got another book you wrote. Plan on reading it after new years. Thanks for sharing expertise.
Great guide! I look forward to viewing the others! Thanks!
Thank you for all your videos and educational information about photography. I learn something new every time I watch one of your videos. Your work and style of photography is stunning. Your videos are so helpful and detailed which makes them easy to understand and follow. You make everything make sense to me. I appreciate all the time and work you put into these videos and your dedication to helping other photographers grow. I would love to take a workshop in person with you.
Thank you so much for watching!
Always very interesting content. This content is Pure Gold. 🤗
Goated! Love you Lindsay ❤️❤️
Amazing as usual, Lindsay!!!!!
Absolutely love this.
My husband doesn’t understand about photography so he listen to me watching her from a different room and he calls her a ‘the scientist’” because she is so knowledge ❤
Love that!
I love you. You are awesome!
Lindsay you are the best!! That's all I have to say! 💗
What a great tips …. Love it. Ty as usual!
Bought the Black Friday special for these! I cannot wait to dig into them!
Yesssss. Hope you enjoy the content!
Hello.
I love your videos and tutorials very much. Thank you for your work and inspirations.
Merry xmas from Germany.
👍✌️👍👋👍
Thanks so much!
Lindsay, thanks for your interesting tips, show us easy system to set up lights, so interesting way, nice explain, is going to help...
Thank you for watching!
Thank you so much
thank you so much
WELL explain
Very nice technical instruction of a studio portrait set up. I would also suggest others get John Cornicello's book titled the Anatomy of a Portrait, and also check out Mark Cleghorn's videos on his Clock and Compass set up on portrait lighting. These resources combined with Lindsay's guide will be a great place to start. Now go out, grab a friend or two, experiment, learn, and practice! Thanks Lindsay for the great content.
I'd personally recommend lindsayadler.photo/msl -- the most comprehensive lighting tutorial out there. full stop. :D
More ! ...More ! 😍😍
I still use these
That's good to know!
Hey Lindsay, great video! Love your posing book! Could you tell me the name of, or where you got your small grey background light stand? I have not been able to find a stand that folds down that small that is sturdy enough for a strobe. thank you!
I have an impact stand and a manfrotto nano stand
@@lindsayadlerphoto Ok, great, thank you!
Amei ❤🧡💚
This is great! Please tell me how do you hang your light dish on the walls? love the space saving hack
coming out soon!
@@lindsayadlerphoto Thank you
@@petervu9466 No, you need an attachment that fits. Not many options out there.
Are these lighting recipes available in print format or only on website ? Extremely helpful presentations every time
So the guides are PDF format and some people opt to print a personal copy out for themselves. :)
thanks sister
The Lighting Recipe Guide is great! Just the off center i canl‘t understand. In your video, you move it just a bit back but then you change the distance from model. I just work with the distance from model and hight above eye level. The result is cool but maybe i can do better 🤷🏼♂️ Thank you Lindsay
so I'm lining up with the center of the frame (aka camera angle centered on subject) and then estimate the distance off to the side from the center point.
I am a long time Sekonic light meter user. I often need to recreate the same lighting recipe but instead of a tape measure I use a laser: Bosch Blaze Pro GLM165-40 165ft Laser Distance Measure with Color Backlit Display. And if I am really in a hurry, I "walk it off" 🙂
A laser would be a great idea!
Thank you so much for the video, Very helpful. Can you please give information about the mannequin where to buy it? Thanks again.
Amazon
Great video.
You should try using a laser tape measure.
Thats a great idea. On it!
Hihihi, like spending an afternoon at my studio.. 😛
Love these guides, my only thing would be if the measurements had metric as well.
Siri
all new guides have metric
@@suebyrne7739 what lol. Are you trying to ask for Siri??
@@lindsayadlerphoto do you have a link for the dummy model you had in this demo?
It's been a while, I believe it was on Amazon, you should be able to find it there.
I don't think I have ever used F-14 in the studio unless it was for a large group with at least 2 rows of family. Single or couple portraits I used F-11 to F-16. with a Medium format camera.
lol It was an example But I shoot F11 all the time.
Which recipe guide contains the lighting setup used in this video?
My headshot lighting recipe guide: lindsayadler.photo/headshots-guide
@@lindsayadlerphoto Thanks. Ordering it now.
Can you please do the same video and explanation but with beauty photography ?!
I have a class on learnwithlindsay.com !
Plus this is just an overview of how to use the guides. I have guides/classes on beauty photography.
Good god! ☺️😍🥰😘
Bonjour j'aimerais savoir a quel endroit vous avez acheté le trépied et la tête du modèle,merci.
Adorama
I didn't get the difference between the distance of the light and the off center. Both seems the same, one from the shoulder of the model and other from the center of the model's face. Could you please explain? Is the off center the angle?
For example, the light may be 53 inches away from the model, but only 6 inches off center of the middle of the frame> it shows approx angle and the distance is separate.
@@lindsayadlerphoto thank you
dear Mrs. Adler, what is the name of the Mannequin you use and where did you buy it please?
Just a general mannequin, doesn't have a name, and Amazon.
what tripod are you using?
I dont have that on me right now, but the brand is Manfrotto!
@@lindsayadlerphoto thanks
All measurements are based on model. Did I miss how tall the model was off floor. You explain light 1 with eye level info but what was model height for this setup
I also provide the height of the light off of the floor. So the info is all there.
Plus, you should be able to adjust things to your own environment/situation.
FIRST ❤
Light meter
Yes?
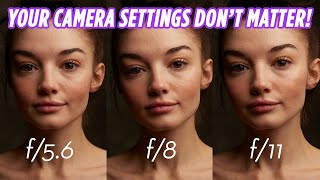
I am surprised about the use of f14. If I am not mistaken diffraction begins affecting lenses starting at about f11 and picture becomes softer. Can you explain?
I shoot at F/11 75% of the time. at a 50megapixel camera if you miss focus at F5.6 its OUT and hard to save. My default is F8-F11. So this is just a tiny bit more. And the amount it affects lenses is soooo tiny it is not visible except maybe at pixel level.
@@lindsayadlerphoto Thanks so much for replying!!! I should learn better not to take anything as an absolute, especially for photography.
Diffraction is lens and sensor dependent so test to see what stop it becomes an issue.
why f14? and not f6 or so?
it really wont make much of a difference in the shot, truly. If you go wider you could get a narrower depth of field but it really doesn't change the look of the photo that much. If you want the sharpest part of your lens, aim for a middle aperture.
@@lindsayadlerphoto Hi, thanks a lot for that, yeah thats what i was thinking =). thanks a lot, great videos btw!
Thanks so much!
informative 17mins.
I notice you comment the same comment on every video lol
Only hundreds of setups?
I'm out ...
Down vote.
This chickas masterclass in lighting should be necessary learning for all photographers
lol