
- 188
- 35 003 509
Next Level Carpentry
United States
Registrace 8. 01. 2015
Next Level Carpentry is for aspiring carpenters who want to take their skills to the Next Level.
The tips, tricks and methods of work featured here are things I've picked up and developed during nearly 50 years in the building trades and are what make my 'The Timber Tailor' residential/light commercial remodeling business profitable and successful.
Since I'm a master carpenter and video production amateur my hope is that viewers will find enough value in the content to learn worthwhile skills despite my less-than-great video production capabilities.
I added Patreon for viewers who want to support production of free NLC videos: www.patreon.com/NextLevelCarpentry
Correspondence or items of interest can be sent to:
Next Level Carpentry
3213 W. Main St
PMB #111
Rapid City, SD 57702
Thank you for watching and subscribing!
Perfect Mortises for Round Corner Hinges
Learn how to make a simple, easy-to-use template to match tricky mortises for round cornered hinges of any size. Let a Master Carpenter guide you through the process to achieve professional results every time!
FWIW CZcams's "Super Thanks" feature a great way to 'tip' content creators and is active on the Next Level Carpentry Channel... juss sayin' 😉
Tools and supplies you see in use during this video are available through the Next Level Carpentry Influencer's Page on Amazon: amzn.to/3xHBVrA
Note to Viewers: Purchases made through these links are at the same low online price you expect but Amazon pays small ad fees to the Channel that help justify the time I invest producing videos you watch for free on CZcams so I really appreciate it.
CZcams's Algorithm doesn't reward producers of long, full featured videos like this one very well but you can by becoming a Next Level Carpentry patron through Patreon: www.patreon.com/NextLevelCarpentry?fan_landing=true
Official Next Level Carpentry teeshirts like the ones I wear in this video are available through Spring... just click here to get your gear: teespring.com/stores/next-level-carpentry-swag-shop and find yourself stylin' and smilin'
Score a steal of a deal on any of my favorite CA glue products... get 15% off any and all Starbond CA Glue and Accelerator by using exclusive offer code "NLC15" during checkout at the Starbond website here: bit.ly/3DzbHpj
zhlédnutí: 11 642
Video


Build Floating Closet Organizer Shelves
zhlédnutí 13KPřed 3 měsíci
A deep-dive Master Class showing pro tips, techniques, tools and hacks for building professional grade, custom/scalable floating shelf units for closet organizing in a modest woodworking shop. FWIW CZcams's "Super Thanks" feature a great way to 'tip' content creators and is active on the Next Level Carpentry Channel... juss sayin' 😉 Tools and supplies you see in use during this video are availa...

Camera Boom Arm & Gantry Build
zhlédnutí 11KPřed 4 měsíci
Tripods are SO last year! Upgrade to an overhead Camera Boom Arm & Gantry for improved video production from ideal camera angles not possible using a tripod. FWIW CZcams's "Super Thanks" feature a great way to 'tip' content creators and is active on the Next Level Carpentry Channel... juss sayin' 😉 Tools and supplies you see in use during this video are available through the Next Level Carpentr...
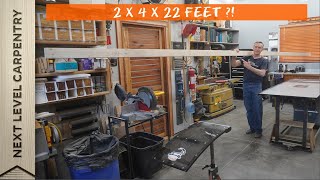
TwUberfours DON'T come from Uber-Tall trees!
zhlédnutí 82KPřed 5 měsíci
Learn how to make a "TwUberfour" 22 FEET long or longer using a special "splined scarf joint"! FWIW CZcams's "Super Thanks" feature a great way to 'tip' content creators and is active on the Next Level Carpentry Channel... juss sayin' 😉 Tools and supplies you see in use during this video are available through the Next Level Carpentry Influencer's Page on Amazon: amzn.to/42f430i Note to Viewers:...

Master Carpenter's Tool Tote Build
zhlédnutí 320KPřed 7 měsíci
FREE PREMIUM CONTENT: Master Carpenter's Tool Tote Master Class build with no paywall! This 3-1/2 HOUR deep dive tutorial shows the entire build including joinery, jigs, fabrication and glue up with detours into digital router lift operation, laser engraving and application of a flawless finish. Buckle up, hang on and enjoy! PDF Master Plans for this custom design Master Carpenter's Tool Tote a...

Lasered Louvers
zhlédnutí 11KPřed 8 měsíci
Making mortises for louver slats with a laser opens up design/style options not possible with router jigs or CNC machines for a modern touch to timeless louvered panels. Ready to enter the brave new world of Laser Fabrication and Engraving? GREAT!! Use this discount code for a great deal on any xTool product orders made through the Next Level Carpentry Channel: xTool P2: bit.ly/3tX7Gec Discount...

Wall-Mounted Clothes Drying Rack
zhlédnutí 19KPřed 9 měsíci
A Deep-Dive video showing how to build this custom Wall-Mounted Clothes Drying Rack with 14 FEET of hanging space! PDF Plans available. Premium content with no paywall for start-to-finish instruction by Master Carpenter Matt Jackson! FWIW CZcams's "Super Thanks" feature a great way to 'tip' content creators and is active on the Next Level Carpentry Channel... juss sayin' 😉 PDF Plan Set for this...

Make Shelves Fit Perfectly with Simple Stopped Dado Jig!
zhlédnutí 226KPřed 10 měsíci
Master Carpenter Matt Jackson shows how to make a simple router jig for routing precise stopped dados for shelves with a perfect fit that are also surprisingly strong. Learn how easy it is to make the router jig for stopped dados regardless of the project you're working on! FWIW CZcams's "Super Thanks" feature a great way to 'tip' content creators and is active on the Next Level Carpentry Chann...

Organize with Custom Toolchest Pullouts
zhlédnutí 16KPřed 11 měsíci
Premium Content, NO Paywall: These Sweet Custom Pullouts with full extension soft-close drawer glides turn good metal cabinets into great ones by making everything accessible. Hang with Master Carpenter Matt Jackson and see how to upgrade storage cabinets with this COMPLETE build video! FWIW CZcams's "Super Thanks" feature a great way to 'tip' content creators and is active on the Next Level Ca...
Game changing xTool P2 55 Watt CO2 Laser gets a test drive by Old School Master Carpenter
zhlédnutí 30KPřed rokem
Check out $500 off coupon code below! An Old School Master Carpenter test drives the game-changing xTool P2 55 Watt CO2 Laser Machine after unboxing it, building a custom mobile cart and doing initial setup. If a "digital troglodyte" like Master Carpenter Matt Jackson can do it, you can too! A PDF Plan Set for the P2 Laser Cart featured in this video will be available soon! If interested, pleas...
Tapeless Drywall Repair
zhlédnutí 30KPřed rokem
Learn how this method for Tapeless Drywall Repair produces better results AND saves time/steps in the process. Known by some as a 'California Patch', useful for smaller repairs, Master Carpenter Matt Jackson shows how to take the technique to the Next Level with a full 18" x 24" Super Patch! FWIW CZcams's "Super Thanks" feature a great way to 'tip' content creators and is active on the Next Lev...
Bluebird Nestbox Build
zhlédnutí 49KPřed rokem
Watch Master Carpenter Matt Jackson Build a Nestbox for beautiful Western bluebirds. Detailed PDF plans are available here: next-level-carpentry-swag-shop.creator-spring.com/listing/new-bluebird-nestbox-by-next-l FWIW CZcams's "Super Thanks" feature a great way to 'tip' content creators and is active on the Next Level Carpentry Channel... juss sayin' 😉 Tools and supplies you see in use during t...
Replacing Stolen Tools
zhlédnutí 47KPřed rokem
Tool thief forces decision on replacing stolen tools: Do I replace missing tools with the same brand or decide it's time to switch? Are you considering purchasing any new tools after watching this video? If so, will you consider shopping with Next Level Carpentry at ACME Tools? Any tools purchased through affiliate links here are the same to you but ACME pays small add fees that support video p...
Ultimate Zero Clearance Throat Plate with Replaceable Inserts
zhlédnutí 243KPřed rokem
The design of this Zero Clearance Throat Plate with Replaceable Inserts for tablesaws lets you get precision results consistently. This FULL build video shows how you can make one of your own that will be the last one you'll ever need so check out the Chapter List below as a guide. FWIW CZcams's "Super Thanks" feature a great way to 'tip' content creators and is active on the Next Level Carpent...
6 Panel to Flat Panel Door Rescue
zhlédnutí 43KPřed rokem
Clever carpentry rescues a house full of 6 panel doors from landing in a landfill. A straightforward re-paneling process saves these solid wood door slabs AND their jambs from an unpleasant fate. Learn millwork magic from Master Carpenter Matt Jackson as he performs a panelectomy and reconstruction that means a new lease on life for old doors. FWIW CZcams's "Super Thanks" feature a great way to...
Milwaukee Rotary Hammer Review & Ergonomic Improvement
zhlédnutí 16KPřed rokem
Milwaukee Rotary Hammer Review & Ergonomic Improvement
Pro Tips, Techniques and Tools to Create Weathered Wood
zhlédnutí 36KPřed rokem
Pro Tips, Techniques and Tools to Create Weathered Wood
Building GROATs: The Greatest Roller Of All Time Episode #1
zhlédnutí 47KPřed rokem
Building GROATs: The Greatest Roller Of All Time Episode #1
Powermatic PM2820EVS Drillpress Unboxing & Assembly
zhlédnutí 29KPřed 2 lety
Powermatic PM2820EVS Drillpress Unboxing & Assembly
$300/300K Subscriber Appreciation Giveaway Drawing
zhlédnutí 4,4KPřed 2 lety
$300/300K Subscriber Appreciation Giveaway Drawing
$300/300K Subscriber Appreciation Giveaway
zhlédnutí 8KPřed 2 lety
$300/300K Subscriber Appreciation Giveaway
Great information masterfully presented. Thanks!
Long video & poor production quality? at least we were warned, but time travel @16:02 ?!!!! I was not prepared for that.
Where does on get 1/4in melamine mdf? Never heard of it before.
I get it from a local cabinet supply house but here's one option online (although I know nothing about them): www.woodworkerssource.com/melamine-white-14-g1s-thermofuse.html
Fixing to do a major tear out tomorrow and going to use your method. Excellent way to do it and nice thing you have to remove the nails and screws anyway. I'm retiring my hammer. Thank you sir!
Thank you for the in depth video. I appreciate how much effort it takes to produce content this good.
Brilliant! Thanks
How long it remain in position?
Forever.
@@NextLevelCarpentry Thank you
Inlay
Good enough is the enemy of excellence. Well done. I like to use the DEWALT 8V MAX Cordless Screwdriver Kit, Gyroscopic, 1 Battery, Electric (DCF682N1)
Hate to be behind you at Menards😂
Why?
I always appreciate the attention to detail and the tips to make less work. The tongue and cheek makes it all the more fun! Thanks for another great educational, yet entertaining video!
Thanks for watching and commenting on this video! It helps offset the trolls who leave comments that NLC videos are way to long to hold their gnat-like attention spans! Best, Matt
Love the detail and video. ❤❤❤
Awesome video, grunt guy!
Where did you get the level with a height gauge attached?
Here's one option for that slick "How Far Out Gauge" tool: amzn.to/4ddLNbX
33 minutes? For 2x4 sawhorses?
Yes... but it's okay if you're really slow and it takes you a couple of hours. You can always set 30 minutes as a goal and someday maybe you'll be able to build them that quick too😂
Wow!
Your outfit is inspirational and no festool required for this footstool 👍
"No Festool for this footstool" is a great mantra... thank you!!
"crooked as a bucket of snakes" ....thanks for that one...hahahaha
U have some beautiful tool boxes we need to see more off them are they the grip latch
Great video's Keep them coming
Wouldn't it be far simpler and quicker to just cut out the bow using a long metal straight edge and a circular saw?? What am I missing?
It sounds like you're missing experience that helps decide which of many methods to use for cutting a straight edge on a crooked board. The one shown in the video is my go-to when I have more than 1 or two pieces to straighten but, often, using a basic straight edge as you suggest is a better choice for a one-off use IMHO.
This was extremely helpful. Thank you for making this!
You're quite welcome! BTW I was literally working on this same house just today, years after making this video and it's still the best method out there for the potentially difficult/messy job of removing Dryvit type cladding IMHO.
You sir are the Norm Abram of CZcams. The only difference is you don't hide your mistakes. You voice your frustration, then show or tell us how to fix those mistakes. I enjoy watching your videos from start to finish because it's what I enjoy, and I sure don't want to miss anything. Thanks for all your effort. It is very much appreciated!
You're too kind, Corey... but thank you!
I’m curious why you don’t put the fence of the jig on the barrel side of the hinge? The door face and jamb edge will be flush and there won’t be a need for two jigs.
Good call... that's what I normally do but, for this project I only had to rout the door edge and the original position of the fence in the video clamps on more easily to the door. Truth be told I had to backpedal when I decided to produce a video on the process, hence the fence switch-er-oo in the video.
@@NextLevelCarpentry since we are airing it out. I used to only do single jigs for three hinge doors and jambs. It wasn’t until later I figure out I could route the single temp into 3 hinge template. To think of how many doors I did like that. 😂 There are so many different size plates that come with hardware these days. I make nearly of all of my jigs for strike plates and hinges. By dropping the material in on the table saw. ( I know). But there is a safe way to do that- all ways putting light forward movement on the material. The radius jig I made was done with a rectangular hole sized to the hinge dimensions. . I used that as a guide for the forstner drill bit. I then cut the top and bottom of the hinge jig edge with a miter saw and dropped the vertical long side the hinge on a table saw. I’ve seen a video where the guys route the jamb and door with one jig and the same time. 🤪 Some many ways to skin a cat. Thanks for sharing your experiences.
@@IndianaJBird Ahh, yes: there are SO many ways to separate a feline from its fur! It's cool to hear how your process evolved over time... I can totally relate to that!
One hour?
Yup... sorry it's so short because I much prefer going into more detail for those who don't catch on as fast.
Crooked as a bucket of snakes! That line had me LOL! Great video. I'm looking to do this on a live edge. My only worry is that is a heavy piece and about 18" thick.
I think you mean your live edge piece is about 18" WIDE, not thick? For that situation I'd be much more inclined to use a more typical straightedge clamped/fastened to the piece and make the cut with a hand-held circular saw.
Fantastic information!
Thanks for watching and commenting on this video... after all it's 4 years old with only 10K views! Some of my best tips for the process though and ones I use every time I make small mouldings!
This was an absolutely stellar build. Thank you.
I don't know why I've never thought to use tape with caulk. I tried it with some silicone and it gave it a perfect straight line! Thanks for this video.
A bit of relatively inexpensive masking tape is a real game changer, that's a for-sure! 😎
I’ve done a few projects around the house and found lumber today to be absolute crap. I’m going to purchase my first job site table saw soon so I’ll try this method.
Sad truth about a lot of fast-growth lumber sold these days. I always make every effort to buy the straightest stuff available because this would only help to get straight 2x4's out of pieces 2x6 or wider but I always have this trick up my sleeve as a backup. Best part is that I'm usually able to salvage more than a few pieces of old lumber on remodeling projects this way and avoid the high cost (and poor quality) of new lumber in the first place.
Wow …I just put a bowl on the end
I'm not gonna judge... whatever works for you!
This would make a good base for an over-arm blade guard / dust collection for a table saw
Thanks for watching and commenting on this video Stephen. The concept certainly has potential for other applications but for full disclosure I should say that, at the length built in the video, it's great for a light weight camera but would need some thoughtful engineering to support anything like a blade guard that needs to be more fixed/rigid IMHO. Best, Matt.
3 knuckles on the door so you have something to hold when hanging the door on the jamb. Ironically if you look at all the pre-hung doors in my house, it's the opposite - two knuckles on the door, making re-installation a pain. I never understood why they came backwards from the factory. One of these days I'll get around to reversing them!
Exactly!
Thanks for all the tips here. The gang cut is a stroke of brilliance! The whole idea is practical and easy to do. I will use these techniques in the future.
Oh, and I'm getting myself one of those erasers
I wish I could say I never need/use my jumbo "OOPS" eraser but I'd be lyin' if I did... I think you'll like one if/when you get one!
Hello Matt. Just curious how you and your Powermatic drill press are getting on. Any issues since you did all the repairs?
No issues whatsoever regarding function and performance. I'd buy the same machine today if I had it to do over again. There was a definite mental transition period going from A/C motor and belt drive to the way the DC motor and direct drive runs but, now that I'm used to it I'm able to do more, more quickly and efficiently than any previous drillpress type or model. I've got to say that I wish I'd switched to a keyless chuck years earlier though because that alone makes the setup and bit change process so much quicker, regardless of the motor and drive system...
Where’s the link for the graf carving disc, or the resurfacer? Your Amazon link appears to be broken or not linking…..
Thanks for bringing this to my attention Larry... not sure when or how the link got busticated but I updated the link in the video description with this link where you can find the great Graf carving disk and restorer tool: www.amazon.com/shop/nextlevelcarpentry/list/2YDX33SWCBWMR?ref_=cm_sw_r_cp_ud_aipsflist_aipsfnextlevelcarpentry_TW01AGW99ES2FEMJTY8Q_1 Please let me know if this answers your question and/or if you have others and I'll try to help you for helping me! Best, Matt
This is great! I'm making a tapered newel post for my stairs and I want to use your method to anchor the post. The only difference in my project is that the post is going to sit on the bottom stair which is basically hollow. Should I open it up to put a block in for stability or will that not be necessary? Great video!
This probably isn't a reply you expect: Actually I wouldn't recommend this method for your project as described. The newel would only be as solid as that bottom tread, which isn't designed for the 'stress'. That's good news because, since you can remove the bottom step you should be able to extend the new newel down through the bottom step and into the floor framing below in a more standard installation. I encourage you to do a bit more research and expect you'll find other videos that apply more directly to your project. You're a smart person to be pre-planning and thinking through your design and I'm confident your project will turn out great! Best, Matt
@@NextLevelCarpentry thank you for the advice.
In a job site situation by which i’m assuming that you are referring to framing, then why would you be straightening 4x2’s? By doing this you then alter the size of the timber therefore making it unusable for framing as it will differ to the rest of the timber
My guess is that you're lacking experience "In a jobsite situation..." because, anyone who had real-world jobsite experience has encountered plenty of situations where straight pieces of non-standard width are needed. That experience also teaches carpenters that the cost of lumber makes it more than economical to get maximum yield out of crooked boards by making straight, narrower pieces out of wider, crooked stuff, hence the lesson in the video.
Great video. I used a similar template making process for routing hinge mortise in boxes and chests. FWIW. I put the 3 knuckles of a hinge on the door because it is easier to hang the door. At least it worked for me.
Your reason is exZACTly the same as mine... no surprise to me; a pinched finger or two from 'backwards' hinges is enough to make the lesson stick for a lifetime!
@@NextLevelCarpentry And I have scars to show the other method doesn't work well. 😎
@@jerrystark6766 And every scar is a lesson learned!
@@NextLevelCarpentry As I look at my hands, it would appear that I am a learned man. 😎
too funny... if only they made fancy diplomas to recognize every 'lesson' learned by injury for us to hang on our walls!
Your "editor" is almost perfect! Not much noticeable difference in the nine million transitions from one edit to the other. Sadly, I love your information in your videos.
Uhmmm... thank you? 🤨
Thanks!
Thank YOU for the Super Thanks, Rob... much appreciated! If you're doing a similar beam project I hope this video really helps. FWIW If I were doing another beam project this week I'd use the same sequence and methods shown in this video again.
Hey Matt, Why not show us how You MAKE THE DOORS 🤷
I don't like to 'bait and switch' but can tell you I did do a couple 'behind the scenes' videos featuring the doors that got posted as Patron-only content in case you'd find enough value in learning about the doors to check it out... Best, Matt
great video. I appreciate how to the point it went.
Incredible detail! I like the frogtape and saw dust for managing glue squeeze out. I am about to glue a guitar neck to the body and for finishing purposes there can be no residual glue near the joints.
I haven't seen you for ages Matt!...Good to see you still going strong.
Thanks for sharing this Matt. You made my repair project much easier than it would have been.
You betcha! This is not the sort of thing you want to make a career out of but I can tell you the more of them you do the faster and easier it gets😊
Strap your lumber down, got it.
This video takes me back to physics class with ideal spherical cows. It was so easy to fit that jig on an idealized perfectly square door jamb. In reality door jambs are covered in trim. I don't see how that jig would fit past the door trim.
I hope you didn't miss the bigger point in physics class like you did here. Hint: don't rely on the professor to teach you, apply yourself and learn! The video shows how to easily make a template for round corner hinges, not to solve every hinge-routing situation that exists. Thinking outside the box for just a few seconds I can think of half a dozen ways to modify/ adapt the jig to work in any situation I've ever encountered and challenge you do try some creative thinking for a change.
After 3:34:56 of learning I would like to say… Amazing result!
Excellent tool, I used a damaged hard drive magnet