
- 779
- 72 026 677
4DIYers
Canada
Registrace 27. 12. 2010
Hey everyone,
Welcome to my channel 4DIYers. I'm a Canadian CZcamsr producing automotive related repair videos which can be used for those working from home or professionals working in the field. All my videos are easy to follow, tool lists and video summaries are included in the video description, and I'm always uploading new videos every week!
Welcome to my channel 4DIYers. I'm a Canadian CZcamsr producing automotive related repair videos which can be used for those working from home or professionals working in the field. All my videos are easy to follow, tool lists and video summaries are included in the video description, and I'm always uploading new videos every week!
How to Replace the Rear Differential Bushings on a Mazda CX9
How to replace the rear subframe bushings for the differential on a Mazda CX-9 AWD. This is a 2015 model, so this applies to the first generation but a similar procedure can be applied to other generations as well as other SUV models from Mazda. Failing bushings will cause your vehicle to vibrate during acceleration or cornering during a takeoff. Unfortunately Mazda does not carry the parts, they want to sell you a whole new subframe instead. The parts are available through an aftermarket supplier, I have seen upgraded bushing options online too. #oemtools #mazdacx9 #mazda
OEMTOOLS 24837 3-1/2 Ton Low-Profile Floor Jack: www.mobiledistributorsupply.com/24837-oemtools-24837-3-1-4-ton-low-profile-jack-oem
Website: 4diyers.com
Patreon: www.patreon.com/4diyers
Facebook: 4diyers
Twitter: 4DIYers
Instagram: 4diyers
Tumblr: 4diyers.tumblr.com
Pintrest: www.pinterest.com/4diyers/
Tools/Supplies Needed:
-dye grinder
-drum sander
-carbide burr bit
-new bushings
-brass hammer
-hammer
-brass bar
-socket or pipe
-Bessey clamp
Procedure:
First is driving the rear of the vehicle on ramps for more room. Drop the spare tire using the supplied tools in the trunk.
Using a 17mm socket with a ratchet, remove the two nuts and washers. Using a hacksaw, cut the webbing out of the bushings so we can remove the centers.
I tried different methods to remove the old bushings with no luck. A hammer and chisel or a punch. And using a hacksaw blade to cut the outer front. Then I tried an air hammer, but it didn’t work.
The best option I found was using a die grinder with a burr bit to cut the outer ring. You don’t need to cut it all the way through, but a majority of the way it can separate and the ring will from the tension which makes it easy to remove.
I did put the ring forward and this will help clean the exposed hole as it may be filled with rust. Pull the ring out from the spare tire side as shown here. Pliers work great for assisting in the removal. Remove the other ring. Make note of the orientation of the bushing, the new replacement will need to be installed in the same position.
Using a drum sander with the dye grinder, clean the holes. Remove any rust or debris so the new bushings don’t have any binging with the installation.
I did try a test fit with the new bushings and there is no way to install these as there’s too much of an interference fit. Meaning that they’re far too large for the holes. I have seen some posts online also complaining about this issue.
I have read about people grinding these down but by far the best way is turning these down in a lathe. They were trued up using a dial indicator within 0.005”, and then the diameter was brought down by 0.040” from the original measurement.
Once the one was turned down, I was able to hammer it into the hole. Make sure it’s in the right orientation. This is a tight fit and should be so it doesn’t have any movement when everything is back together. I used a brass hammer to start it, this is softer than the outer ring and will not cause any damage. The center stud for the differential can be adjusted back to a jack to move it up or down, ensuring that the bushing is going in correctly. Make sure you go around the perimeter of the bushing and not in one spot so the bushing is pushed in evenly.
A hammer with a brass bar can be used to push it in flush to this side of the subframe.
Next was using a Bessey clamp with ball joint press attachments. These have an insane amount of clamping force so they’re great for pressing in bushings. When it’s clamped in place, you can hit the threaded rod with a hammer to help relieve some tension by driving that bushing in. Then compress the clamp again and repeat.
You can make some small adjustments using the outer ring from the ball joint kit and a hammer. The bushing needs to be almost flush with the other side. The same position of depth as the old bushing.
Then the same process is done with the other bushing. First it’s hammered in and then pressed in after.
Make sure those bushings are properly in place, then reinstalling those washers and tightening up the nuts with a 17mm deep socket and ratchet.
Put the spare tire back into place.
Thank you to all those who watch my videos and support my content. Don't forget to subscribe to my channel for future tutorial videos and like my video if you found it helpful. New videos are always being uploaded every week!
© 4DIYers 2013
All Rights Reserved
No part of this video or any of its contents may be reproduced, copied, modified or adapted, without the prior written consent of the author.
zhlédnutí: 303
Video


How to Install Electric Exhaust Cutouts on Your Car from Spelab
zhlédnutí 662Před 14 dny
How to install electric exhaust cutouts. For this, I’m using my friend’s 1971 Buick Skylark. Keep in mind, that this is for off-road use on. Exhaust cutouts are used to by-pass the mufflers to increase the sound of your exhaust and potentially increase performance. #spelab #customexhaust #performance Spelab electric exhaust cutout: bit.ly/3VtOJLd Spelab Official: bit.ly/3KwhfWw 15% OFF for All:...

Two Years of Ownership Experience - BMW 335d M57 E90
zhlédnutí 488Před 21 dnem
In this video I’ll be going over my experiences with owning a 2010 BMW 335D after two years. The start off, this was a well-kept car and the previous owner had it since it was a couple of years old. I am the third owner. This car only had about 165,000km on it when I bought it. I will be covering all the areas beyond basic maintenance such as oil changes or air filters. #bmwm57 #bmw335d #bmwdie...

How to Replace the Front Brakes on a 07-15 Mazda CX9
zhlédnutí 821Před 28 dny
How to replace the front rotors and pads on a Mazda CX-9 AWD. This is a 2015 model, so this applies to the first generation but a similar procedure can be applied to other generations as well as other SUV models from Mazda. #thewrenchmonkey #mazda #mazdacx9 #mechanic #brakesystems The Wrench Monkey links: Website: www.thewrenchmonkey.ca Facebook: thewrenchmonkey.ca/ Brake Pads: www...

How to Replace the Front Sway Bar Links on a 07-15 Mazda CX9
zhlédnutí 724Před měsícem
How to replace the front sway bar links on a Mazda CX-9 awd. This is a 2015 model, so this applies to the first generation but a similar procedure can possibly be applied to other generations as well as other suv models from Mazda. Worn or broken sway bars will cause clunking or reduce your handling performance. If broken, you will notice an increase of body roll when cornering. #thewrenchmonke...
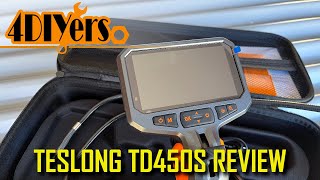
Review: Teslong TD450S Borescope Inspection Camera
zhlédnutí 492Před měsícem
Video review on this borescope from Teslong, this is their TD450s model with an articulating tip. This is a two-way articulating borescope and I’ll show you this in a moment. This has 5 feet of reach and can navigate through tight places, viewing objects it just passed through with the articulating head. The borescope and accessories come in a hard EVA carrying case to keep everything in one pl...

How to Remove the Intake Manifold on a BMW 335d M57 Diesel
zhlédnutí 543Před měsícem
How to remove the intake manifold on a BMW 335d M57 diesel. This particular car I am working with here is a 2010 BMW 335d. #bmw335d #turnermotorsport #bmwm57 Throttle body gasket: bit.ly/3IQ4Sob Intake manifold gasket (round): bit.ly/3YWNJyJ Intake manifold gasket (rectangular): bit.ly/3EyfYeJ Teslong Camera: www.teslong.com/Industrial-Endoscope/Dual-Lens-5inch-Industrial-borescope-inspection-c...
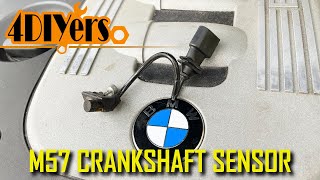
How to Replace the Crankshaft Sensor on a BMW 335d M57 Diesel
zhlédnutí 603Před 2 měsíci
How to replace the crank sensor in a BMW M57 engine. This particular car I am working with here today is a 2010 BMW 335d however a similar procedure will apply to other vehicles equipped with the same engine. A faulty sensor can cause a lack of performance, poor fuel economy, rough idle, engine randomly stalls, no starts, and the tachometer not working while the engine is trying to be started. ...

How to Replace the Headlight Switch on a BMW 3 Series E90, E91, E92, E93
zhlédnutí 724Před 2 měsíci
How to remove and replace your headlight switch in a BMW E90 with the European version that has the rear fog light option. Which headlight switch replacement is required for your car will depend on what trim you have, they come with both the silver and black trim on the knob. It also depends if your car has Xenon and adaptive headlights. #bmw3series #bmw335d #bmw Website: 4diyers.com Patreon: w...
Review: XTool D7W WiFi OBD2 Scan Tool
zhlédnutí 861Před 2 měsíci
Review: XTool D7W WiFi OBD2 Scan Tool
How to Install an Alumium Trifold Tonneau Cover from Worksport
zhlédnutí 3KPřed 2 měsíci
How to Install an Alumium Trifold Tonneau Cover from Worksport
Must Have Ryker Tool Bag or Pro Tool Roll
zhlédnutí 742Před 3 měsíci
Must Have Ryker Tool Bag or Pro Tool Roll
Symptoms of a Failing Harmonic Balancer on a BMW M57 Diesel
zhlédnutí 1,1KPřed 3 měsíci
Symptoms of a Failing Harmonic Balancer on a BMW M57 Diesel
Review: Auxito AJ01 Jump Starter with Air Compressor
zhlédnutí 453Před 3 měsíci
Review: Auxito AJ01 Jump Starter with Air Compressor
How to Upgrade the Air Intake on a Ford 7.3L Powerstroke
zhlédnutí 721Před 4 měsíci
How to Upgrade the Air Intake on a Ford 7.3L Powerstroke
Top 6 Reason to Own a Borescope for Automotive Repairs
zhlédnutí 755Před 4 měsíci
Top 6 Reason to Own a Borescope for Automotive Repairs
How to Replace the Tail Light Bulbs on a Mazda CX-9
zhlédnutí 2KPřed 4 měsíci
How to Replace the Tail Light Bulbs on a Mazda CX-9
How to Change the Radiator in a Dodge Ram
zhlédnutí 1KPřed 4 měsíci
How to Change the Radiator in a Dodge Ram
How to Change the Rear Sway Bar Links in a Mazda CX9
zhlédnutí 1KPřed 5 měsíci
How to Change the Rear Sway Bar Links in a Mazda CX9
How to Replace the Headlights on a GMC Sierra GMT800
zhlédnutí 753Před 5 měsíci
How to Replace the Headlights on a GMC Sierra GMT800
Review: Vevor Swing Truck Box in a Dodge Ram
zhlédnutí 2,4KPřed 5 měsíci
Review: Vevor Swing Truck Box in a Dodge Ram
How to Repair Faulty Trailer Lights on a Dodge Ram
zhlédnutí 12KPřed 6 měsíci
How to Repair Faulty Trailer Lights on a Dodge Ram
How to Replace the Low Beam Headlight Bulbs on a Mazda CX9
zhlédnutí 5KPřed 6 měsíci
How to Replace the Low Beam Headlight Bulbs on a Mazda CX9
How to Replace the Cabin Filter on a 2007-15 Mazda CX9
zhlédnutí 1,3KPřed 7 měsíci
How to Replace the Cabin Filter on a 2007-15 Mazda CX9
How to Repair an Exhaust Leak without Welding
zhlédnutí 1,2KPřed 7 měsíci
How to Repair an Exhaust Leak without Welding
How to Install Wireless 12v RGB Lighting
zhlédnutí 697Před 8 měsíci
How to Install Wireless 12v RGB Lighting
How to Install a Swing Storage Box from Vevor in a Dodge Ram
zhlédnutí 4,8KPřed 8 měsíci
How to Install a Swing Storage Box from Vevor in a Dodge Ram
Review: OEMTools 24616 Portable Tear Down Tray
zhlédnutí 758Před 8 měsíci
Review: OEMTools 24616 Portable Tear Down Tray
It looks like my parking break is not on. But my break light is on flickering. It has never came on before. WHAT Do you think its wrong?
Very good commentary.
What chemical did you use for cleaning? Citrus cleaner? Can you add please the product name? Also for egr aluminium cooler, what chemical is best for cleaning carbon that doesn't damage the aluminium?
my boyfriend would be so proud of me
Thanks great video
Thank you
THANKS, this saved me a huge headache!
Have to tell you that your videos help me a lot with a 2001 ranger I’ve been working on, not really knowledgeable in vehicles but I try to understand so thanks man keep up the good work 🤙
ball peen hammer didn't work. Sledge hammer did the trick.
I have the opposite problem. No power to blinkers or brake lights but i do have parking lights.
Thank you so much 🎉❤
Will this work on a 2001 jeep XJ Cherokee?
Does it bury the bed hooks or can they still be used? Thanks.
What if fluid gets in the pump?
Anyone try it for Mercedes oem ones?
I gave up for months on trying to fix it, then finally looked it up and saw it took less than a second to do. Wow!! Thank u so much lol 😂🎉
What's the purpose of this knot? When pulled, it comes apart
Thanks mate
When you’re done you say you have to adjust and keep adjusting but to what exactly?
why is mine backwards??? when connect black probe to negative wire and red to positive wire it reads negative numbers ?? what am I doing wrong
Hey I have a 08 ram 1500 and I held the lock button 5 sec then the panic for 3 sec now the horn works
hi i have a 2005 c70 convertible he boot open light wont go off it sometimes flickers when i go over bumps so i cant open the roof would you have any idea what it is thanks alan
It worked!!!! Thank you!
Thanks for the video I used your instructions to change the fluid on my 1998 Ford 4.0 and it went just as you said it would
Thanks a lot❤
After 10 or 15 years, they stop carrying and making parts for cars. You have to custom make by a welder or craftsman. It's the same way with Toyota, after 16 years the parts are obsolete . Don't even think about getting your catalytic converter replaced. If a welder can't custom make parts anymore, for your car then you have to call tow truck to have it hauled away.
Mechanics won't waste time repairing your car if the time and labor is not worth their time. One dealership try to charge me $2000 just to cleanup oil spill on hood and tighten the engine oil cap. Nothing wrong with the car, just somebody didn't tighten the cap tight enough and when I drove, oil exploded everywhere under the hood. You have to be careful, because they will quote you for a nonsense car repair . If dealership don't have the part you need, go to junk yard to buy parts from cars that have been towed to facility. You will have to unistall the parts yourself, so bring your own tools, hat, and sunscreen, and 1 extra person to help you pull apart and carry item.
hi sir... why my 320d e90 m-sport doesn't have bump stops(seems like my metal cap attached on black plastic cover not on bump stop)) or metal cap on plastic cover suppose to remove first or my Bump stop entered into plastic cover, when i DIY to remove my rear absorber..is m-sport version doesn't have it?
Thanks
Idk why everyones bitchin this is a good investment and gives you the ability to DO IT YOURSELF so easy.
Out of all the videos I watched so far, yours is the only one that shows an example of distortion. I’m new to car audio and I thank you for this.
Wow, that's VERY quiet!
I bought a new Motive bleeder kit along with motive adapter that is advertised as compatible with Hyundai / Kia. I had mixed results. I just read the quick instructions on the box. ( No long detailed instructions paper included - you are supposed to print them from the Motive website & the FAQ's ) I skipped the dry test, where you connect the system, no fluid, & hold 13-15 psi pressure for ten minutes. and poured brake fluid into the Motive pump. I pumped and around 11 psi the adapter leaked fluid on my engine. NASTY. Of course, i picked the wrong size rubber o-ring adapter ( its not a spare they are different sizes). I cleaned up. I then unscrewed the adapter, cleaned it , and screwed it back on, albeit tighter. Now the system holds pressure fine. Proceeded to bleed my brakes. Good. However, when I attempted to remove the motive adapter, it wouldn't turn. Tried & tried. Read on internet to double-check counterclockwise to remove . Waited for next day, my 250 lbs couldn't unscrew the adapter. Now im driving with the adapter still on but corked and encased in duct tape. Frustrating. I emailed Motive Support & they responded there is no procedure to remove an over tightened & wrong size rubber o ring. They pointed me to slip joint / Channel lock pliers .
❤ 🇱🇰
Help! Boot loop My ArtiDiag 600S went into a boot loop and I can't reset it. I've tried the reset button but nothing happens. Please help! Great review, by the way!
Is it.possible to heat the Torx bolt?
If only it was that easy
Thx. I’m sure I can do mine now!
pls help .how do I tell which speaker wire is positive and negative on car DOOR AND REAR!?!
Awesome great video! It's the first one I've seen where someone showed all the house connections instead of just replacing the purge valve and having that fix the problem.
Thank you for the video!😍
The application I have will probably have the connector sitting in a stream. Will these methods work to prevent the wires getting wet and causing short circuits?
Ty man🎉
, thank you mate , simple , clear and easy ...
How is it for long drives? How has your led lights held up after all these years?
now do a rusty one! lol
Can I use silikon instead of double side tape???
What are they called? Can I get them at Auto Zone
The method 2 is good. The only problem it is difficult to see where is the mecanism. What i did to see better is to drill a bigger hole. This way i could see where it is and i removed the rotor easy. Thanks for the video from Canada
Good bayy😢😢😢