⚡️Live⚡️Caulking Shower Corners

Vložit
- čas přidán 22. 07. 2024
- Caulking showers can be stressful! You've spent so much time on planning and building the shower and caulking is the last step. In this video I demonstrate how I caulk shower corners 👇👇👇👇👇👇👇👇👇👇👇👇👇👇👇👇👇👇👇👇👇👇👇👇👇👇👇👇👇👇👇👇👇👇👇👇👇
First - is to make sure the walls are totally dry and clean of any thinset or soap scum
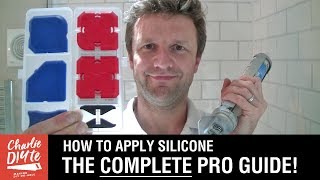
2nd - Cut tip of caulking tube at a 30 degree angle and start out small (3/16")
3rd - Practice, yes I said practice! Try an area in a low visible area and find the right caulking tool that scraps and leaves behind a small amount of silicon. Links below for tools
4th - Apply caulk as neatly as possible (being continuous with the application helps)
5th - Spray down the newly applied bead with windex. This will prevent smearing along the tiles
6th - Use caulking tool to remove excess silicon
7th - Lightly apply pressure with your finger to smoothly finish the joint
👉Here are a list of caulking tools that will make things easier:
Newborn caulking gun - amzn.to/3oqoTWV
Caulking tool kit - amzn.to/3ncHpCM
Homax caulking tool - amzn.to/3cd2C9e
Windex with Vinegar - amzn.to/30mbFm9
🎁Affiliate links to products used in video (appreciate anyone purchasing through these links. This helps out my channel tremendously-thanks!)
👉Visit my Amazon Storefront to view and purchase all of my recommended items to help you BUILD: www.amazon.com/shop/bathroomr...
🎥Chapters
0:00 Intro
1:50 Best silicon for tiled showers
5:02 How to caulk a shower - first step cut caulking tube correctly
5:27 How to caulk a shower - practice first
9:00 How to caulk a shower wall with tile - best tips
14:40 How to caulk a shower - corner shelving units
16:00 Like & share, thanks
👉Follow me:
Instagram: / bathroomremodelingteac...
Facebook: / bathroomremodelingteacher
Tiktok: www.tiktok.com/@bathroomremod...
Twitter: @bathremodeltchr
LinkedIn: / steven-white-9a30a534
Pinterest: www.pinterest.ph/bathroomremo...
www.bathroomremodelingteacher.com - Jak na to + styl


Forty years watching different guys work and you re near the top , well done
Shower has Italian vibe, nice to see something besides a square niche. Absolutely beautiful. Thanks
Great topic and video Steve, something we have all struggled with, especially caulking around bathtubs.
Thank you for sharing your tips! We are novice DIYers and these videos make our remodeling success possible!
Shower looks great , nice job!
Thanks! 👍
I always use acrylic ,,its been in my shower for 23 years and looks perfect ,and always apply sealer to caulk ,,its never been an issue ,,never !!
Shower turned out pretty good!
Thank you 👍
ty! i have kitchen backsplash I still have to silicone, it’s been completed for a few months, but I’m dreading it. 😅 Specifically came on today to find a video, so happy I found yours! And, I have tile around a tub and shower panels to do next as well… 😅
what about the ceiling line, do you use the same product there as well? any different tips for it? 😃
I see this was done a year ago but can you tell me the type of tile that was used? Really great job!
I just had a handyman tell me that there is no need to remove the grout from the corners before applying the caulk. Would that work, or should i steer clear of him? He comes highly recommended, but this just didnt sound right.
Do you use it around the joint where the floor and wall meet?
I love u dawg
Great video. Question: How do you deal with larger gaps at the floor between the floor and walls? I have an area where the installers grouted a while back and now all of it has cracked out. How do I fill it?
I'd recommend using a grout piping bag to refill with grout and create a solid base to silicone over.
Great caulking tips. Can you tell me the brand of shower/tub surrounds you prefer..saw it in a video of yours or the previous guy and can't find video or remember the name. Thanks
American standard or Jacuzzi. Jacuzzi does make regular tubs. That would be my number one choice. Next would be the American standard Americast tub. Well made with long warranty 👍
These American standard studio tubs are nice too. 👍 amzn.to/3DgUzEj
@@BathroomRemodelingTeacher Sorry i wasn't clear. I meant surrounds for tub and shower walls. I found it, it is called Clarion. Thanks
Does the glass cleaner need to be Ammonia Free, or will either work? I've heard Ammonia Free is the way to go, but perhaps your experience is different.
Either works really. You could even use water with a bit of dish soap. I just always have the clear Windex with vinegar for removing grout haze. Plus theres no dye in it, so no worries of staining anything
👍
@@BathroomRemodelingTeacher Great advice. Thank you!
Where's the shower door install video? Don't leave us hanging!
😆 I’ll have that up soon. This one was a dreamline mirage x. I think it’s a great system. I like the bottom track with no header rail above
amzn.to/3kwxXs9
@@BathroomRemodelingTeacher Curious about this door installation as well, I am considering installing the mirage x in my upcoming project. Did you need to screw through the Ditra/Kerdi to secure the bottom rail?
@@cherrybombking5330 I’m overwhelmed with editing, 😆 I probably can’t get to it till February now. But yes screws need to go in to hold in place. I drilled through (but not hitting waterproofing) and used a plug anchor and epoxy. I’ll try to make a short on it. But I liked it. Track on bottom isn’t the most attractive but does contain water well 👍
You are also wrong about forcing the silicone into the gap. All that does us makes the sealant the thickest at the only point of movement . Exactly the opposite of a properly installed fillet bead.
Again total ignorance of very basic sealant principles.