Video není dostupné.
Omlouváme se.
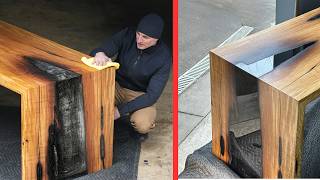
Calculating Epoxy Volume--How to Epoxy Woodworking

Vložit
- čas přidán 11. 12. 2019
- How to calculate how much epoxy you are going to need is one of my most common questions people ask me. In this video I'll go over in detail how and where to measure, how many measurements to take, and areas you didnt even know you needed to account for. I decided to demonstrate in my largest epoxy pour to date. $3000 of epoxy went into this one table. I can't even guess how much it weighed in the end... Ok, I could guess, but I don't actually know.
Want to build your own epoxy table? Check out my epoxy table virtual workshop: workshops.blac...
I hope you find this video helpful, and if you prefer a written tutorial, feel free to click here for my step by step guide.
www.blacktails...
How to make an epoxy table:
www.blacktails...
How to finish a table like this (in a dusty shop):
www.blacktails...
Volume calculator: www.omnicalcul...
Links to purchase:
My current epoxy: amzn.to/3wqVT3N
Plastic syringe: amzn.to/2P9Kanh
Epoxy dye kit: amzn.to/348EUEE
Black dye only: amzn.to/2P9yxNf
Epoxy mixing paddle: amzn.to/2E2IBRI
Dewalt drill/impact combo: amzn.to/2SSrk5Z
Wood finish for this table: amzn.to/2SRW1bl
blacktailstudi...
/ blacktailstudio
/ blacktailstudio


After about three years of wanting to make a river table I finally got my hands on a slab and I’m gonna go for it. Thanks for all of your tutorials
I'm trying to just make a SMALL coffee and not a whole new dining table and it's hard. All of the beautiful 6 foot slabs are calling me!! 😍
Results???
The dark is beautiful but so is the light I would pick the dark. Your work is fanominal
After watching the video advert i was still skeptical. But when i finally downloaded the plans czcams.com/users/postUgkxZF0EMnrujZvqHhGkxiz559uIABJWR9TG i was very impressed. The whole plan was just as you said in the video. Thank you very much. I now have a large and valuable collection for my woodworks. This is great!
If you can weigh the pieces, you can get a more accurate measure of epoxy volume using this method:
Weight an offcut cube of the wood on kitchen weighing scales and measure its dimensions so you can work out the wood density.
Weight all the pieces you are using on a bigger scale, take the total weight and divide by the density. This gives you the total volume of wood.
Work out the volume of your mould, take off the volume of wood you calculated and what's left is the volume of epoxy needed.
Also, this is an incredibly beautiful table and I am very jealous!
Came here to write this comment. 👍😂
Exactly what I thought he's going to tell, this is a much more precise and less time-consuming method. But I guess math is not for everyone.
Also was going to suggest this.
How much effort would that be. His method of approximating is good enough. If epoxy was worth the equivalent of gold then perhaps it would be worth getting a closer approximation. Even in topographical surveying they use similar approximating techniques which have worked well enough for the vast majority of cases.
Also if you want a better approximating you could utilise tech using a ceiling mounted camera and some cheap software or even open source to calculate the area of the empty sections
@@sulimanahmed8588 that'd be way less effort and time consuming than the method he presented in the video
This table is GORGEOUS. It must be so amazing to be able to create something like this! I can't imagine the feeling of pride when you have the finished product
I to, would love to have a table like this
I just got your solution to do it way easier.
Take a picture from the top, put in GIMP (or photoshop), crop the image to the borders of the table. Select by color the part of the table that will be epoxy (the white background) then go to the color histogram it will tell you how much pixels your selection takes up.
You can easily calculate the percentage by dividing the selected pixel count by the total amount of pixels of the table and multiply by 100.
(example: Cropped picture is 1920x1080. White selection is 400.000 pixels. Calc (400.000/(1920x1080)*100) = 19,2%
You know the size of your table, just apply that percentage to your total table volume (height x length x width). Add the perimeter stuff you require, and you got the volume of epoxy you need.
I just tried it on the best "on top" screenshot I could make, and got pretty close to your calculations in literally a few minutes.
great idea. just a nit: this will almost always underestimate the amount required because tapered edges cannot be taken into account with this method.
This, or, if the parts don't mind getting wet:
Drill a small hole in a corner, plug hole, fill with water, unplug hole and measure water volume once fully drained
I actually thought, he would use calculus.
@@RevHardt If you use a good camera you can by using the color select to select just the tapered parts. Or a 3D photogrammetry program. There are also cheap lidar modules for the Arduino. You can use those to generate a 3d model and get an exact measure.
God I’m in love with this. I want one just like this for a desk. Im currently trying to get into medical school and have several years ahead of me before I’ll even be close to getting one, but man am I determined to own one of your pieces.
Beautiful table! I love that black. It really seems to draw your eye to the beautiful wood, instead of away from the wood. I love it.
Amazing!!! I want to make a kitchen table for my home so I am trying to do as much research as I can about this. I would rather have a table that I made with my hands then by something everyone has. It will mean so much more! So, thank you so much for helping people like me learn.
That’s the right attitude jean!
Did you ever get to making your own kitchen table?
Did you get how he did it?
I love the video....and the value of the the table is in the years of learning your craft.. much like a $3,000 purse is not in the cost to make it, it's in the value of what the customer is willing to pay for a one of a kind table. Thank you again for the videos.
Thanks Dennis! Well said
Here is how I would do it:
I would take a photo from above the layout so that there is minimal perspective distortion. After some image manipulation and coloring in gimp (or photoshop), I would make all the river pixels to black and everything else white. Then a histogram analysis (Colors -> Info -> Histogram in gimp) tells you how many black (river) pixels are there. After that, I would do the same with the timber pixels. Assuming that the river wall is more or less vertical everywhere, the ratio of the river pixels over the timber pixels tells you how you should divide the whole volume of the brick between epoxy and timber.
For example, if you get 8% river pixels vs 92% timber pixels and the whole layout size is 200 cm x 100 cm x 10 cm then the whole volume is 200 liters. 8% of this volume will be resin so you will need 16 liters. I would add some extra, so 17-18 liters would be fine.
This technique works even the weirdest river shape, as long as the walls are vertical. If they are not then you should adjust the boundaries manually.
It was 105 litres. You'd be short almost 90 litres or 800% with your estimate.
@Csongor Halmai Aaah, I see. I thought you had used your photoshop technique and arrived at a calulation for the pour which was out by about 800%. What you're saying is, your rounding up to 17-18litres was for an imaginary pour on a table with about 800% less volume than the one in the video recording?
Now all becomes clear. Thanky senhor Halmai for the esplanation. I like your approach. It is digital age technique. Very cool
First of all, thank you so much for taking the time to share your work. I'm a big fan of the speed and level of detail you show, focusing on the project. I've done half a dozen smaller projects over the last few years, learning something new with each one. I made the leap recently and decided to try a bigger project and make myself a 6'x2.5'x2.25" maple desk. I used a single piece of maple that has a lot of natural voids and poured straight epoxy with no color added. I poured it last night and used 8 gallons of liquid glass epoxy. I knew this was a lot so I started with a few fans on it and it was in my house with A/C set to 73F. Unfortunately, it still got too hot too fast (165F about 6 hours after pour). I added 4 more fans, but it still cracked a few times in the center. The learning continues. One of the cracks came clear through and left about 1/8" gap over about 6" span. Should i fill the crack before or after i remove it from the melamine slab?
Just did a pour last week, and used this method to calculate. Had about 2L excess at the very end on a 34L pour! Thanks for sharing.
Nice!
Your quality on your work is just second to none. Amazing job
Wow, thanks Nathan!
Have to laugh you do measurements in inches but end with litres, thought you guys use gallons ?? 👍 Great looking table
The calculator juist converts it to liters
we use feet, ounces, gallons, liters, grams you name it. us americans do it all
We honestly use metric and imperial interchangeably lol
Use both Metric and English.
@@adamjohnson5307 Sometimes it’s a serious problem because one engineer could use thousandths and another engineer could see that and think it’s millimeters.
I am a wood working hobbyist in Vancouver, WA. Really enjoyed this video. I have some Myrtle wood that I bought in Girabaldi and want to build a dining room table out of it. Your tips are helping me learn alot. Thanks.
Just spend the last 1 hour watching you videos with my dad and sister. Dude you are a beast of a worker. No corners cut with you!
Thanks bud!
Hi Cam, have you ever thought about using silicone on the underneath of the slabs to stop the epoxy running underneath, similar what you do to make the dams, and then when you take it to the shop to plane it, just plane both sides until you get rid of the silicone underneath.
Love your work, the tables look fantastic!
Paul, Liverpool
Hey Paul, where in Liverpool?
+
Love it as always, I'd love to see a table like this with gold rivulets through the resin.
Every project I watch of yours keeps getting better and better bro you've really found your talent in life well done and keep these videos coming 😉👍
I have actually asked how you guys estimate the amount of epoxy so accurately with such odd shapes and now I know, learned something new from you once again, thanks cam, keep up the good work bud
If you had 35 measurements with each 6" apart, that means you have 36 sections. 6 X 36 = 216". That's the length of the river in an easy way. 😊
I been wanting to get into working with epoxy especially after watching this!!!! Wow awesome job my friend!!!!!
Awesome!
Same here bro!!!
After so much calculation I got to see a wonderful table, it means the brain and beauty walk together 😀. Nice👍👏👌 🙏.
Better. Amazing video. Your videos are the only ones I will watch for more than five minutes without skipping ahead. Great job.
The finish is very beautiful! Seen from above, it looked like a river on the ground! Thank you for making a great video.
Cheers!
Sorry if someone said this already, but maybe do an estimation contest some say. You would take hi res photos of the layout and post them. All the finite element analysis folks would get to take their best shot against the final pour count. 👍😝
I am not sure which table is more gorgeous. I think I want all the tables you made! amazing skills and craftsmanship.
I´ve seen some other guys doing this kind of work and let me tell you, I like your videos and your art a lot more, thank you for talking and not using some music that only the gusy who used it like it, best regards
After the first layer I would fill the middle part with black glass stones to save material. It will be possible to save a third of the quantity.
Thanks for the detailed measurements and the explanation of everything that has been done...
Thanks Tim! Happy to help
@@BlacktailStudio the sarcasm
Of your videos I’ve watched so far I think this is my favorite table.
I am buying a slab from creative woodworking in Denver next week , I can’t wait to work with these guys Lukus is my man thanks
Awesome!
@@BlacktailStudio are you guys in denver? If so ide love to see you shop. Awsome video btw. It’s going to be a huge help...
Uma mesa espetacular. Além do alto custo financeiro do projeto, tenho certeza que também foram muitas horas de trabalho. Parabéns pelo projeto. 🇧🇷
Algo que não está ao alcance de todas as carteiras
A master piece. Pure masterpiece.
Whoa, thanks!
Cam, Thank you so much for this calculator. My wife and I have struggled with this for some time. You made it so easy! Thanks again.
Thanks tony!
What a magnificent table, yes, interesting calculation but does not mean to much to this disabled character, but the table, that is SO BEAUTIFUL. There will be MANY people, like me, who wish they could build something about 1/10th of the size but just as beautiful. There needs to be a series of 'higher buttons' than just the simple 'like' button for your work. You are a true Artist & a true Craftsman wrapped up in one fantastic package. Don from South Aust.
I hope your planing on makeing more of your videos there awsome .I love wood working never tried the epoxy yet but you have given me some great ideas on some of my own projects. Thanks a bunch.
Its amazing so many people getting worked up over the cost of a table, if a lot of you knew the actual markup on 99% of the products you buy, you wouldnt be saying this table is overpriced...
I’ve been to the Chinese furniture markets. You’re definitely not wrong.
It’s not overpriced...
That’s poor people thinking.
People saying it’s overpriced can’t afford it..
Blacktail Studio every thing is overpriced when you can’t afford it 🤣
@@BlacktailStudio I believe the problem is that people have got a custom of buying their furniture from outlet stores or Walmart. These same people have lost the value of things made by hand. Glad to see that some people can still make a living with woodworking and that these cheap Chinese goods have not run people out of business. I loved the table, I hated that the client wanted it in black but hey the person who pays get what they want.
Absolutely gorgeous table!
I believe that your style of teaching plays an important role in your success and very much appreciate it. Keep up the great work!
I couldn’t make it through all 2.4K comments to insure that the following suggestion was not already made so please accept my apology in advance if it was.
My suggestion is to use the same silicon caulk used for sealing the mold & making the dams to seal the bottom live edges of the slabs to the bottom of the mold. In other words, run a bead about an ⅛” from the actual live edge all along the live edges where the epoxy resin will be. Combined with enough weight to insure holding down the slabs wouldn’t this prevent the epoxy from running out and creating an ⅛” of epoxy all over the entire bottom of the mold. It seems like the wasted, expensive epoxy exceeds the actual amount poured to create the river, unless it can be prevented from running under the slabs.
If this works then maybe each edge of the slabs that meets the side of the mold could be sealed with a bead of caulking and prevent the waste that occurs from leaking out the sides.
I expect the first resis
Epic build. So much detailed information too! I'm in the UK and you've inspired me to get into woodworking. It's a novel trade. If it was good enough for Jesus, it's good enough for me. Thanks again, ❤
your wife's got a great sense of humour 😂😂😂😂
Wish I could get a job like this. Also imo a better way to calculate the volume would be to count the volume of the pieces separately, add those up then the volume of the pour box to the pour height, and subtract.
Never thought of that!
@@BlacktailStudio How to do that would be put each piece into a plastic bag to keep dry, make a box bigger than your biggest piece which has rim and a funnel - fill it to below the rim with water, when you put each piece in the displaced water can be funnelled into a container and measured and thats your exact volume.
@Nadie nice idea, I was thinking water but I like your fine sand idea better.
Materials information for whatever type of wood you are using is available online. There you will find the average density. You are probably purchasing the wood by weight. Take the density and divide out mass. This volume calculation is the easiest method to find average volume. Subtract the calculated volume from the vessel's volume.
Density of black walnut is 660kg/m^3 how much do your pieces weigh?
i already knew this of course and can do the various calculations in my head.
i just added this video to my bookmarks tool bar for others who are definitely not me to use as a future reference.
Excellent!
A great example of a Fermi problem. I use this method regularly in Engineering. You’d be surprised how fast and accurate you can get with practice.
Oh nice!
I found that the most impressive part of the video was the poster's politeness in the face of rude and/or inane comments.
Oh, I don’t yell at dogs that bark at me as I drive by either. Seems about the same.
Take a picture and import it to a cad software, rescale it then redraw the contour and it will give you the area :)
Photoshpp has some measurement features, same thing, lol!
Killer idea.
Man. Found your Channel on saturday and I've been munching these episodes like a kid filling his guts with cereals that never ends.
Absolutely fantastic job. Wish i could afford one day to build a nice epoxy table myself also. These are so frickin good looking 😍
I fell in love with the picture of this table quite a while back. I had no idea it was from your studio, until I saw this video! Awesome work!!
На речку смахивает классный стол я бы сказал очень много сил было на него затрачено)
Wow, that’s one beautiful table ❤️👍🏽
I recently made my first epoxy table. Mine was not a big as this one, but big enough for 2 people with enough space for much to eat and many drinks.
I just poured water inside and counted the liters. And it went really well. Then I was able to mix the right amount of Epoxy.
So some days after, when the ordered Epoxy arrived the wood and the shell was clean and dry again.
There ya go!
Thanks so much for this! Been doing resin projects for fun for under a year and been guessing with how much I needed which usually means 2 pours at least. Tried your way today and was the perfect amount!
Couldn't you also wheigh the wood, calculate it's volume with the density and subtract that from the total volume of the table?
Brilliant!
This is how I would have done it. Knowing the density of the wood and the volume of the table and assuming it’s uniform thicknesses you could easily calculate the volume difference.
@@hydrohobbyist the problem is, that theres no constant density, this is no homogeneous structure
It's homogeneous enough, for sure it's faster and more precise than measuring such curvy path.
This was my initial thought as well.
There are a very simple method for this: calculate the volume without wood, and find the weight of all pièces of wood, and find the approximate volume with the volume weight of the type of wood u use
You would need to know the density of the wood used for this type of calculation using weight/volume ratio. Not really the best method
@@moonraker8794pretty sure we can find a result so close to the reality
Great job! I am just finishing a walnut 51x96x2 1/2 with white tinted epoxy. All good except for tweeking my back loading it into my van after running it through my buddy's 52" sander/planer. Next step to surface coat with clear epoxy then spray with UV resistant 45 sheen urethane and viola. Thanks for the demo. Few understand the costs of these projects.
Awesome!
So awesome your calculations are as good as you could get given the irregular shape...
Beautifully done.
Thanks Mary!
Is there a reason not to add thinner "filler" wood through the river to reduce the volume of epoxy required? Or is the black just opaque enough that it would be noticeable?
The "filler" wood would float. Sometimes you have to clamp smaller pieces, but these were large enough to be held down by their own weight
@@colincamus2098 so put somthing that wont float
There is a reputation risk for doing that. Buyers do not expect it. If discovered then it looks bad for the company and future business could suffer.
From the beginning of the process to the end of the process I’m sure is a difficult project to minimize any mistakes and to keep it looking beautiful and from what I’ve seen you’ve never failed to produce a truly beautiful end product! From large wooden tables to corner tables and desks, just pure works of perfection!
I'm always saddened when a such beautiful live edge is lost because the color chosen is so dark. you don't get to appreciate the beauty of the live edge. The table is beautiful but it could have been so much more.
Now you tell me.
dizneymn different kinds of beauty.
It would’ve been cool to see in light and dark though.
Knowing how lazy I am I'd mix up more than enough, pour it, and then use the left overs on something completely random
Can I know the recipe of this glue?
Beautiful table - great to see you making such wonderful pieces on these videos
Just finished my first epoxy project... thanks for sharing your know how, I am learning a lot from you.
While this is great work, I can't help but to feel like you ruined those amazing pieces of wood. The texture and depth would have made for a great transparent pour.
The black just buried it all. You could have done that table just one inch thick and gotten the same result.
Sorry, I don't mean to be critical but I have to on this one....missed opportunity 😞
Reef Keepers I just don’t understand what the point is making a live edge table if you’re going to pour black resin into it 😕
Probably what the customer wanted! I agree, though, it would have been cool to see more of the interior.
Extremely sad, I thought clear would be the only option with these pieces of wood, if I was the customer it’s exactly what I’d want.. especially when this guy thinks this table is worth over $10k .. this was just a waste
It may not show but the black is somewhat transparent. You can see all the way trough. Though black is not my top choice. Something like turkious blue would have made it really pop.
TBH, I think the opaque black will appeal to a much broader clientele. It's a much more classic look, will never appear dated, and will require less maintenance over time.
That is amazing! Would love to build something like this one day
did you do it yet
@@polymerized8183 nope
Yea, this guys a beast!
I love these woodworking videos they remind me how much I love to working with wood I got into it in high school and woodshop is where I got my love for creating something with my own hands I wish I could do what you do but these complex projects or something too big for me you can't teach an old dog new tricks and at 55 I'm too old to start now but I love watching you do it I'll tackle something smaller
Someone else mentioned the density trick above, but I also wanted to suggest an improvement to this method in the video. Say the direction parallel to the longest side of your table is north/south. Divide the table into segments by drawing lines directly east/west (not diagonally) across your table at each point where either "bank" of the "river" has a corner. Record how much of each of those lines is in the "river", and do the same for the northern and southern edge of the table overall. If the line crosses the "river" multiple times, add all of them together.
You're going to give each segment a score. Add together the river width numbers you recorded for the lines on both sides of the segment. Multiply that by the distance between the lines. That's the segment's score; write it down on the segment. For example, if one line has 5 inches in the "river" and the other line has 3 inches, and the two lines are 8 inches apart, you would write down (5+3)*8=64.
Add together each segment's score. Divide by 2. Multiply by the height of the table. That's a pretty good estimate of your volume.
Imagine being rich enough to spend over 10k on a table
Would be nice!
M R pretty sure the wood alone is not far from 10k
@@weg5856 would be alot cheaper to build a mill and cut your own slabs. Just need somewhere for them to properly dry for 2 years. I see big old trees all the time you would be surprised how often people will let you take them just to get rid of them. Then build yourself a sawhorse and a cherry picker, cut the logs to your desired length, set up your makeshift mill, cherry pick your logs onto your sawhorse and get to work.
I can't even imagine spending 3k on the epoxy :P
sometimes you have to bite the bullet and take into consideration how much it would cost for three inexpensive sets that would last 5-8 years versus buying something you love and you'll look at every day for thirty years! It's a tricky balancing act. But you have to ask yourself "what brings joy to my life"
Wow... this is the RIEMANN SUM!!! So cool to see math applied in life!
A Reimann sum is the heart of a fermi problem.
I going to have a go at a small kitchen island 48x30. Greeting from the UK🇬🇧
Your work is stunning. Thanks for the tips and sharing your knowledge.
I just had to come give a big thank you!. I just finished my first ever deep pour epoxy table and used your method for calculating the epoxy and it was extremely accurate. It was a smaller table and came to 2.9 gallons. I just used 3 cause I had 1.5 gallon kits and there was very little left over. I imagine had I measured out to 2.9 I would have been exact. Always better to have a hair more though and now the client gets some cool coasters.
Anyways thank you again. This worked amazing and I will be using it on the two larger ones I have coming up!
Wow, that’s awesome!
Absolutely gorgeous.
Hey, just a crazy idea; if the table/mold is watertight, couldn't you just fill it with water, pump it back out and measure the water? Even if the mass of water vs epoxy is different, if you know the ratio between water vs epoxy you could do a simple calculation.
Might be I'm just an idiot for suggesting it, but what the hell right?
edit; see, I am an idiot, I just realized you can measure the water before pouring it in.
The wood will be wet then, and need to be dried out properly.
I was thinking the same but with jello
I just feel really confident about my project learning from your videos and how you explain the process of working with epoxy resin. Thanks Cam
Thanks Nicole!
I've poured many dozen epoxy table tops in every shape you can imagine and I'll promise you there's a much quicker and more accurate way to figure how much to mix up. After setting the pieces into the form I use the cheapest, thinnest poly drop cloth that I can get and cover the whole form with plenty to spare all around, start pouring water onto it using your fingers to manipulate the poly down into the crevices, the weight of the water causes the poly to conform tightly to every contour, even undercuts. When you're satisfied with the level of the water in the form simply gather the edges of the poly and direct the water off into a bucket. Now you know exactly how much to mix, I usually add 3-6 oz just to be certain.
Interesting!
That's an amazing table!!!!
Thanks Lloyd!
Why not just pour water and measure how much it takes to fill? The wood is sealed no?
that is the fastest way to do it,
Great idea. Drying it would take some time though I think. ( Well - not where I live. )
@@chookvalve put plastic
or just do the volume of the cuboid and minus the volume of the wood
The problem is if anything goes wrong and the wood gets wet you would have to dry it again
Just had this thought.
Buy a few bags of sand (or just dig up some dirt from outside. But make sure it is clean and consistent, you don't want to be mixing in compounds with different densities.)
Calculate the weight of sand for a given volume (such as the number of ounces per gallon or some such).
Lay all of the wood slabs in the form, and fill in the river space with sand up to the target height.
Pull the slabs out and sweep the sand into a container.
Weight the container on a (properly zeroed) scale.
Using the above weight/volume ration, calculate the volume occupied by that weight of sand.
Probably need to add a bit of cushion, since you will lose some resin in manufacturing, and the resin can fill gaps that the sand won't, but that should give you a fairly quick, relatively accurate method of calculating the volume of empty space.
The only issue I can think of is that some times you may not want to cover the slabs with sand (for example, DON'T try this when the wood is freshly sealed, the sand would stick to it...)
There are other things that this could be done with. Water for example, better ability to calculate volumes and fill voids, but I doubt you would want to dunk your slabs most of the time.
Another option would be small metal bearings, though that could get expensive. Coarse sawdust might work as well. You can get creative, just be careful about contaminating the project, the environment, or yourself.
Your videos are truly a blessing and you are very inspirational!!
Such a beautiful table top. The legs are certainly disappointing though.
And using an opaque black resin
Do you hear something about Arhimed of Syracuse and his "Eureka!" )))) Back to school man :(
thinking the same thing .. Kinda a retarded approach to take all those measurements ... Could have immersed and whatever the run over difference is the volume ..perfectly .. Reminds me of a high falutin moron that acted like what he was doing was science .. They were going to calculate the radius of a big hot tub .So they could make custom bullnose tile .. Came out with felt paper and traced a segment and then traced another segment .. No orientation lines .. I suggested .. Measure across at different diameters .. ..add all those numbers together and divide by how many times you measured ..then decrease the diameter by a 1/2 " for thickset ..
@@IVORY123100 Actually, if he could just get a good known density of the walnut from a weighed square piece, then all he would need to do is weigh all the walnut to find out how much volume he is short. Wouldn't even have to immerse it!
Tried going by weighing the wood?
1. Weigh a given cube of wood (say, 10x10x10cm), so you can calculate the density of the wood.
2. Then weigh of all the wood you're putting in the mold, and apply the density so you know the volume of the wood.
3. Then calculate the volume of the mold to the height you want to pour epoxy
Then you just substract the calculated volume of the wood from the mold volume.
Downside is of course that you need to know what the given cube of the wood weighs in at, and that is probably different for different kind of wood, and fluid content might skew the density a couple of percent. Also, you need a system to weigh the wood :D
You are really amazing at what you do. I just like how you go into detail in showing how to do and not what to do. I tell you what you should get into is making knife scales out of epoxy and make some from wood too. And I could just buy from you. Thanks for the videos Gary Watkins
Stunning! Hey if Americans used metric measurements one day it would be so much easier. No cheaper unfortunately.
$3K for the finished table or $3K for the epoxy?
Table costs over 10K so probably in epoxy.
Just the epoxy 😬
Casey Mills yeah, only $3K for a table like that... What are you on drugs? ;)
@@Smalltime Sorry, I have no idea what something like this costs. I would need a much larger house. LOL
Casey Mills sure, it’s hard to estimate :) I’m only joking. my guess would be around $15K to $20K - But what do I know!? ;)
"noway to get it perfectly level."
I don't think you are trying hard enough. Love the content either way.
I always learn something new with each video of yours. Thanks. Great work. Kudos.
7+9= 16 ÷ squirrel = thumb times tree is roughly 195 total length
I forgot everything I learned in calculus.
Same, I wouldn't know where to start now
All your work is so gorgeous. I love to watch your videos.
Thanks for explaining the process of estimating the volume.
always over estimate and pour the remaining resin over the neighbors fence or flush it down the toilet
Flush it down the neighbors toilet.
You never want to over estimate, resin is far from cheap my friend. And if you do plan on over estimating always have some smaller cuts of wood in a form to make wall art with the left over resin.
@@jordanl5628 hehehe sarcasm
fill the epoxy areas with uncooked rice then measure the rice after in 5 gallon buckets. accurate, easy, cheap and re-useable.
I do like rice. Having 100 liters of it handy would have fringe benefits.
I was thinking fine sand, the volume estimate would be closer and the cost cheaper, it wouldn't spoil, etc. That would save so much time on measurements. Try it with a smaller poir to see how closely it estimates the actual liquid volume required.
Pretty damn good idea. Assuming water would penetrate the wood too much.
Very nice tabl
I learn more from you tomch thank you
Nice Calc method. I simply use pearlite beads and a measuring jug. Pour in the beads with jug, measuring the number of jugs. Once it's full you have the volume and vacuum the beads out. I like the edge and bottom calc.
Beautiful work! Great video, really appreciate the content. Been watching them a few times and that 1-1 consult is not to be overlooked. Talk to you soon
Wow! I had no idea epoxy would be so much.
Epoxy certainly does have a very wide cost spectrum.
I use a very good quality epoxy that costs $115 per gallon. And I'm happy to pay for that.
Now, get into aerospace certified epoxy, and some of their stuff is about $200 a quart, or $800 per gallon.
And there are cheaper epoxies.
At this price point on this table, I'd assume hes using quality stuff, averaging about $110 per gallon himself.
or you could just cover the woods with plastic and pour measured vol of water to know the vol
What I would have done
Or packing peanuts
No word to start comment with? Or did I just not get it. Great, like your tips and your style: no teacher, not smart xxx, just a guy I enjoy listening to and learn something as a bonus. Thanks. Did you ever think about a kitchen counter top?
Hi Cam, I just watched your "You Tube" smart desk for your wife. I am just starting to use epoxy and resin products. I really liked the brass/ bronze you used for the cracks etc. I have found that if you use a small amount of wood stain acrylic sealer stirred into the epoxy/resin it tints to match closely with the wood you are using ie walnut wood add tiny bit of walnut stain, mahogany wood use small amount of mahogany acrylic stain. The acrylic is the only one I've found that works at this time. As you know, some woods are expensive and with metal epoxy/resin additives it's also costly so test on a small piece of scrap wood. Also, Raw Umber is a great tinting tool if you've gotten it too dark. I've been a contractor over 30 years, antique restorations, however I'm looking forward to retiring and trying my hand at woodworking! Used to be I could walk into a lumber mill and I could tell which lumber by the smell and my crew used to laugh at me! I ultimately want to do a full table in walnut, if I could get a thick enough slab I want to slice it and biscuit both pieces together to get a butterfly design. It's only happened for me once, years ago, restoring a walnut shrunk, but I'm hopeful! I've subscribed to your site and look forward to the next project! Be well and blessings for Father's Day!👍😀
Wow, that’s! And happy Father’s Day!