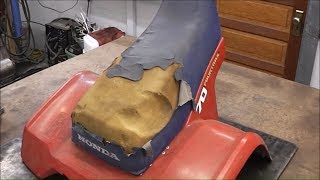
How to Install ATV Seat Cover ~ Perfect Fit Every Time!

Vložit
- čas přidán 23. 07. 2024
- How to install an ATV Seat Cover with simple hand tools. This video will help you get wrinkle free results every time.
~Arrow t50 Staple Gun: amzn.to/31tmcZz
~Stainless 3/8 t50 Staples: amzn.to/3sCZR7O
~Subscribe for more: czcams.com/channels/NYH.html...
~INSTAGRAM: / raztech_pow. .
~Consider our Product:
-- Like, Comment, & Subscribe! -- - Auta a dopravní prostředky


Looks so much better. Awesome walk thru.
Thanks and yeah it always makes a huge difference!
You are a Pro my friend but your little helper is the Bomb!😂
Hahaha thanks and he makes filming quite interesting 😂
Thank you. I need to wrap a couple seats pretty soon. Getting my machines ready for the summer.
You´ve got this backwards, it is now during spring you get your machines ready for next winter...
This guy is awesome...can't wait to do mine now!
Thank you sir and goodluck 👍🏻
Great job!
Nevermind I read the description. Awesome job I might ad
Great job
thanks for the help....
Very helpful, thank you
Glad it helped 👍🏻
You have a good advisor there.😃
He’s a wealth of knowledge 😂
Like the video. I like the fiberfill overlay for the worn cushion. I got a 81Honda 185s atc 3 wheeler seat to do and the seat foam is worn so I will use the fiberfill to cover my foam.Good video.
Yeah I’ve used this trick many times and I’ve always had good results
😊
Great to do things yourself when possible - tnx.
Indeed! Always rewarding seeing the finished product
Great video, as an FYI:
The 125M ATC 3 wheeler DID have reverse!!! I used to have one (86). It was on the brake lever. Small red button, downshift from N.
Great video, ty. Just trying to figure out which seat cover to purchase. Working on my 1995 Warrior 350. Restoring and upgrading to keep up with son's new Yamaha YFZ 450R SPECIAL EDITION, lol
I’ve had good luck with buying seat covers on eBay. That’s a great Atv for your son. Keep him off that 450 🚀😂
My mom would love if you did this to her dining room set. 😂 Cheers!
Grant commentary is excellent, btw.
Unfortunately I have recovered dining room chairs as well lol. Grant makes filming very “interesting”... like the lawnmower scene?
I was pissed off for you. I think you should get the Lav mic next.
@@JaredRMorgan and that lawnmower was across the street ☠️
Lav mic wouldn’t have heard it. Someone was leaf blowing in my last video while I was talking.
@@JaredRMorgan oh that’s awesome 🤘🏻
Would it not also be a good idea to apply some adhesive to the inside of the seat pan, beneath the staples, to secure the cover and take some load off of the staples? Just a thought...
Great video I got my first project bike and now I know I don't gotta buy a new seat lol I'll replace the cover
Exactly and thanks for watching 👍🏻
Just watched your video and it was very informative. I’ve never done a seat, but just received a new cover for my Big Red. I’ll definitely opt for the batting material as I feel it will help with some of the foam imperfections. Much appreciated brother!
What is the name of the cushion material exactly and where can I get it ?
I am trying to redo a Polaris, but I can not get the fabric to stop lifting where the seat curves from the front, would you recommend adhesive spray? My fabric is pretty tough and slip resistant doesn’t stretch the best.
Warm it up and stretch it really tight on the left and right side (towards the front)
What's the name of spray that you used?
Great video! what name brand did you buy on Ebay? I bought one and it does not stretch at all. Thank you
Thanks and unfortunately there is no branding on it. Most of the seat covers stretch well tho. Surprised yours doesn’t
What size staples?
Great video! What’s the name and size of the poly foam?
Thanks! I’m not sure But I think most craft stores have it in stock
How did you get the back corners smooth like that
It takes some practice, but just pull the material around the corner a little bit at a time and staple it. Plenty of staples
Can u show which direction you overlap the rear corners so that there isn't an ugly foldover on those corners
Does this stapler go through the seat tray plastic pretty good?
With ease
How thick is the poly foam material?
About 1”
👍👍
What length staple did you use?
Usually 3/8
Hey man whats the white material called?
Polyfill
Is the foam required? Or I can I just take the cover off and replace it
If your foam is in good shape then you can just replace the seat cover 👍🏻
@@RaztechPowersports thank you for the fast reply
@@miguelgarcia-vg1fh no problem and good luck on projects 🛠
Are you using poly-fill or poly-foam?
99% sure poly fill was the name of the material
I tried to do this with with the exact same staple gun as you on a 1990 CR500...the staples just don't penetrate the plastic..they go in maybe 1mm. I used 6mm staples. Cant find any issue with the gun.
You have to hold the staple gun very firmly. Any loss of energy will allow the staple to not penetrate the plastic
@@RaztechPowersports thanks for the answer! I’ll try.. I’m also going to to try the staples with the sharp deviated point. I’ll post back.
It’s honestly easier in the long run to remove all the foam yourself and have it redone at a shop and have them do the seat cover like 175$ tops is what it cost my old cr500 for a new job because seat was worn and hurt my ass
Finding someone to reshape the foam correctly is pretty tough in today’s times
U just take it to a upholstery store
@@the_ltz_guymaster7912 I’ve yet to find a good local shop 🤦🏻♂️
I can't get my staple in without bending... won't drive through
Yeah, it can be a pain sometimes. Make sure you’re holding pressure behind the plastic, so it cannot flex.
Kids are great leave them in the video
Haha thanks man. Yeah it’s a little more stressful but I’m sure I’ll appreciate see him in the videos as the years pass by.
Why can't the old cover remain in place? Removing a couple hundred staples is a lot of work and seems unnecessary. Otherwise, very good video.
If you use the poly fill you might be able to leave the old cover but I’d rather just do it the right way the first time. More work but the end result is always great