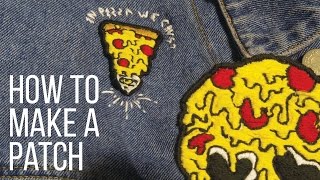
How to Make a Custom Patch | DIY | Beginner Friendly!

Vložit
- čas přidán 21. 01. 2021
- Hello! In this video I show you how to make a perfect patch using any embroidery machine. Tutorial starts at 0:58
---
🌟Shop my patches🌟
www.etsy.com/shop/stitchbacks...
---
🌟How to digitize any custom patch design🌟
Part 1 - Applique & Satin Border: • How to Digitize a Cust...
Part 2 - Fill Stitch: • How to Digitize a Cust...
Part 3 - Satin Column & RunStitch: • How to Digitize a Cust...
Part 4 - BX Fonts: • How to Digitize a Cust...
Part 5 - Creating Holes: • How to Digitize a Cust...
---
🌟Materials🌟
Water Soluble Stabilizer: allstitch.com/collections/wat...
Organic Cotton Twill: organiccottonplus.com/collect...
Iron On Backing: allstitch.com/products/fuse-n...
505 Temporary Adhesive Spray: amzn.com/B00YNZZ0I0
Walnut Hollow Woodburning Tool: amzn.com/B000VRVKMO
(Optional) Patch Twill: allstitch.com/collections/pat... - Jak na to + styl


Using the machine to make your cutting template ahead of time is genius! ✨
Thank you! I watched a few other "how to make a patch" videos and yours was the only one that cut to the chase and hit the high points specific to patch-making.
Thank you so much for all of your tips! You got right to the point and didn't fill your video with fluff.
Thanks for making all these videos, I was browsing through quite a few before you linked me to your videos and nobody explained stitches and the importance of each step the way you do :) It makes a huge difference and I feel like I learned so much.
You're welcome! I had so many questions when I first started, and couldn't find a lot of great resources. I feel comfortable now to share what I've learned, and I'm happy to help others. :D
I've been trying to learn how to use Embrilliance over the past week or so and your videos were the most informative and helpful by far! Really glad I found these series. I learned so much! Please keep making more
So happy you find the videos helpful! Definitely more videos to come ☺️
This was a very good tutorial! I'm going to make my patches like this from now on. Thank you so much!
Yay have fun with it!!
Your videos are awesome! They are clear, concise, newbie friendly, and to the point. As a newbie myself, I learned more from your patch series than many other co content creators. You just earned a new subscriber. "Kaptchi Kapshida!"
Thank you so much! I'm glad that videos are helpful. More tutorials to come!
omg i found your shop almost a year ago and wanted to know how you made your patches and have struggled since with trying to make my own, thanks so much for this video and sharing your knowledge!!!
What!! How cool! I'm finally confident enough to share and I'm happy to help others out :D
Thank you so much for a concise tutorial. I am a beginner and hopefully I will be able to make some. God bless you🙏
You’re one of a kind, very talented & generous sharing your lovely 😊 ideas ♥️
Thanks 👏🏼
thanks for the love!
This quick little video was soooooo helpful vs. Other lengthy videos that confused me....Thank you so much!!!!
awesome! happy to hear that
Thank you for your video. I finally understand what kind of stabilizer I need to use. Your creative designs are very nice!
thanks for watching! Glad to help
You did an excellent job young lady!! Thanks so much for doing this video so beginners can understand and keep up with your instructions!!
thank you! glad you found it helpful
Thanks that was really nice. I have just started making patches!
Thank you for such a fantastic, thorough tutorial.
Love your patches. thanks for the video.
Amazing video! I have a Brother PE800. Can't wait to check out more of your content!
That looks so fun & easy! Thank you for a great video 💕
Great video- great tips! Thanks❤️
Literally the best tutorials I’ve ever watched
omg you're the best
Cool designs. Thanks for this video
Love the info! Thank you for doing this!
Thank you, Robin! Glad you found it helpful!
Thank you!! These are the best tips. And my patches came out amazing.
So happy to hear!
Great tutorial! Thank you!
Thanks this is a wonderful tutorial! My daughter wants to create patches
Amazing tutorial and super cute patches!!! 😍😍😍
Hehe thank you Grace!!!
Can you make a video on making a patch with Velcro backing 💕
I can answer that! You can actually buy Velcro strips/pieces and either sew or stick them on!
So much great info! Thank you!
Thank you for watching!
Does it beautifully and neatly. Well done, I really like your work! 👍🎉
thank you!
This had great tips and information! Thank you!!!
Thank you for watching!
Thanks for this tutorial! Awesome!
No problem, thanks for watching!
Thank you, this was very helpful
This is so great! I wish more of my files came with a placement stitch step, most of hte ones I've bought online don't and I have to guess and use way more material than I need to
Thank you! It definitely took my some time to learn over time how to make accurate placement stitches, but I can do it pretty accurately now!
Great tutorial
Thank you for this!
OMG tysm!!❤❤ I can finally make my Al-qassam and Wagner patches UwU✨💖
i want to do it too ;-;
Great tutorial video! Thank you!
thanks for watching!
Beautiful disign
Thanks for the videos they are really helpful!!!! Keep it up!!!
Thanks so much for the love!
Thank u! Look so easy
This is so helpful! Thank you. Could you do a video in the future about how to do more than one patch at a time?
Glad you found it helpful! I can definitely do a video showing how I embroider multiple patches
Thank you very much. This video helps me a lot. 🙏🏽
You're welcome! Glad you found it helpful :)
This was so easy to follow thank you
yay! thanks for watching!
Thanks for sharing Host Very informative
thanks for watching!
Thank you so much! 🙏
Thanks For Sharing..🙂
Thank you!
Excellent content
Thank you! I learned a lot
Thanks for watching!
Beautiful wow thanks so much!!
Thank you!
Thanks for sharing!
You're welcome!
Very helpful thank you!
Glad it was helpful!
Beautiful patches
Thank you!
Wrong flag bro
Thank you!!!❤💯
Thank you for posting this video! This is very helpful information.
Keep up the hard work! That CZcams Silver Play Button (Creator Award) is in your future!
Haha you are so sweet! Thanks for the love!
Thank you
Thanks for the easy-to-follow explanation guide! Are there any device models you might recommend for a newbie? I take it you've been happy with the Brother brand?
Thanks
So much gold in this video
thanks so much!!
Awesome video what kind of iron backing are you using.
I am ♿ AF and desperately looking for a new hobby. If I was to be making a patch could I start and stop multiple times on a single project without ruining a sewing machine?
In my experience with my brother se700, if you stop in the middle and turn off the machine, it will usually ask to resume upon turning on again. But if not, if you stop between two colors it’s super easy to pick up where you’ve left off 👍 all you have to do is keep the design in the hoop and don’t move it around so everything will still be aligned when you restart
Hope that helped at all! Let me know if I can clarify
Also disabled, yes you can on the more recent machines, I use a se1900 and it will ask to resume where I left off if I turn off in the middle of a project. Even if it didn't for some reason as long as the item is still in the hoop I can just select the design again and set it to where I want it to start stitching from.
Умница!
Great video! I was wondering if you can make patches that aren't completely filled with stitches? Like I've done a skeleton and there are parts of it with the material showing through. 🙃 Hope this makes sense. Thanks!
Thank you :-) . . . .
I just want to say I adore your videos. You are easy to understand and pleasant to watch. Please keep making more videos. You are a gift!
Thank you so much!! Definitely will be sharing more tutorials soon.
Love from India❤❤
Thank you!
Thank you for this video, it's great!! How do you create a border around a design that you already have so that it can become a patch?
you can do it in digitizing software with a satin column or satin border stitch :)
Omg this is amazing! if i asked you to make me a small custom patch for a cap, can you tell me how much you will charge???
Thanks so much for sharing. Do you sell just the embroidery files, so I can make the patches myself?
No problem! I don't sell the embroidery files, but I have videos showing how to create the appliques yourself :)
SPOOKYYYYYYYYYYYYYYYYYYYYYYYY
spoookyy season! (not really XD)
@@stitchbackstories You're my little PogChamp. I hope you know that.
@@GorillaCape haha love you!
Love your videos! Would you mind saying what thread weight and needle size you use for your patches?
I use size 80 or 75 sharp needles and madeira polyneon 40 for thread
Thank you for the info! How do you get the edge so clean?
trial and error! But now that I've made so many patches, I can generally digitize perfectly on the 1st or second try :D
Hi! I love this video, thank you so much for making it!! I have a quick question about your stitches. Does the stitch you punch out onto the paper just cover the size of the white part of your "let it grow" patch, or does it also include the border? In other words, should the fabric be the size of the entire design or just the part inside of the patch border? Thank you in advance!!
thank you! For this design, the white background and the border end at the same place. The fabric should be the size of the design. Usually when making appliques, a lot of people trim the fabric after the tack down stitch, but the paper template allows you to skip this step and cut all the fabric out beforehand (this is especially helpful if you plan on making multiples of the same design!)
@@stitchbackstories Thank you so much for your quick response! That is helpful! I am struggling to get my fabric cut outs the exact size of the patch even with the paper template - I always seem to be just a little under or a little over. Do you have any tips for getting the size spot on? (Or, in the case of imperfections, is it better to be a little over or a little under?)
@@kaitlynt649 A little under would be better so that you don't have the fabric showing through. However, if you go too far under, your satin stitches could start coming apart. When digitizing the position stitch, I like to place it about 2/3 the width of the satin stitch outline. Digitizing just takes practice, and I go over my process in the How to Digitize a Patch series: czcams.com/video/DddtX8JqQMw/video.html Hope that's helpful!
Hi, do you habe a recommendation in regards to a digitalizing programm, or better what Software do you use to create Patches
👍
Can u do a video from beginning on hiw u put it on software to do a patch?
Thank you for sharing this video with us...I know I'm a couple of years behind but I am just getting into crafting. What materials and equipment do you have?? Not sure where to begin looking. Thank you!
the brohter p800 is a good starting machine! embroidery thread and stabilizer is the first thing you need
Great content , keep making . Is the machine NQ1600E worth 2k? I make gas station patches for shirts for about 1000 patches a year.
It's still a single-needle machine, but it's worth is over the PE800 if you can afford. It's faster, quieter and has less issues
Thanks for the awesome content!! Keep it up and I know you’re gonna amass a huge following before you know it!! Btw do you digitize with stitch artist level 1, 2, or 3?
So sweet of you! I really appreciate it :D I have level 2 but in my 'How to Digitize a Custom Patch' series I only use tools from level 1. The only features I currently use in level 2 are the satin column input and gradient.
@@stitchbackstories Perfect Thanks!! I’m trying to make sure I get the best “budget” software and still be able to digitize a logo it’s hard to find. Do you feel as though I’d be able to digitize professional logos for businesses with only level 1? Or is it vital that I have the extra tools you mention in level 2?
@@visionlesbluus8535 I was in the same boat! I think it depends what kind of logos you digitize, but overall I would say yes! You can do almost everything in level 1, and level 2 just make some processes a little easier. I started with 1 and upgraded to 2 a few months in. That's the great thing about Embrilliance--you can always upgrade when you're ready for more, and it doesn't cost any more than if you bought all the levels at once.
@@stitchbackstories THANK YOU 1000% lol!! I really appreciate your insight it’s invaluable! Question.. is a run stitch the only way to do really small words in a logo? When I try to draw the outline and apply a satin stitch the threads are crazy jumbled but when I change to run stitch it only looks like an outline. Help please?
@@visionlesbluus8535 Depending on the font and the size, I might use the run stitch or satin stitch. I have separate videos on how to digitize both types of stitches!
What fabric did you use?
Can you make these into iron ONS?
Great video do you have one discussing machines ? I don't have one yet and would be good to know beginner entry machines etc.
I don't have one, but I can definitely make it! That would be fun video to make after I move and get my new craft room set up :D
@@stitchbackstories thank you for your reply I shall await that one. I currently use a c9mpany to.make my Cosplay patches but would be nice if I could make myself
Hi! How long does it take you to make one patch?
Is there reason we can't just embroider right on the backing? do we need the twill if it is fully embroidered?
Great tutorial...how do you get the edge stitched around the circle? Does it have to be a digitized design?
yes, it's a satin border stitch! You can digitize it yourself, or find embroidery files that have them
Thank you for the video! What is the largest patch that your machine can make? I'm looking to make a custom logo patch for a hockey jersey.
sounds like a fun project! My brother pe800 has a 5"x7" embroidery area and my brother nq1600e can sew up to 6"x10"
Good vid an all but it would be nice seeing how its done from software to emb machine
thanks! there's a playlist that goes over all the steps in the software I use (embrilliance stitchartist)
So I accidentally got the film stabilizer can i still use it?
Came out perfect, do you digitize your own designs?
thank you! yes I do
Do you take orders? 😅 i want a few patches and the places I’ve checked wants orders of 100 out more
Will you make a patch that I designed for me and what would you charge if you do?
I love your videos. Hw do ou design your patches, it will be a good videos
thanks! I usually design on my ipad or illustrator
This was amazingly helpful thank you
appreciate it!
Could you do a video on a custom photo patch? Do you have to have a certain machine to make those? And do you do you patch design on a computer? Or could you use an iPad? 😃
you don't need a specific machine, but you would need to digitize. It's a very manual process to create a custom photo -- almost like sketching it out, so you would need some drawing skills. You could also reach out to a professional digitizer to do it for you
👏🏽👏🏽👏🏽
Does Heat and Bond allow us to iron the made patch to a cotton shirt? Or is there a different product that u have found to attach the patch to a t-shirt? Great video. Thanks!
I think heat and bond works, but I've never tried it -- try doing a test one first! And cotton shirts can shrink while your patch will not, so keep that in mind. I prefer to prewash the shirt and then both iron and sew on the patch, but I rarely will add patches to shirts.
What brand model of machine did you use?
Excuse me,
I hand paint patches and I need help or advice on what backing I can add
Also how do I hand sew the edges of each patch
Thank you a lot, i design an logo how to insert to the machine?
you have to digitize or get the logo digitized from a professional
*my shirts are about to get real gay*
In all honesty thank you so much! 💗🌸
haha thanks for watching!
That's a great idea! Imma make a bi pride flag for my backpack, thanks for the idea lol
@@adler.76251 that's so awesome, have fun!
Stop, it's just an innocent guide
@@weirdoscreation And what I said was innocent, have a nice day.