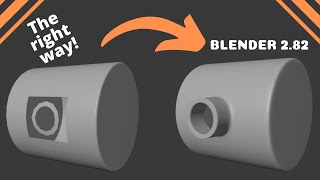
Blender Beginner Modelling Chair Tutorial - Part 2: Edge Flow

Vložit
- čas přidán 29. 04. 2020
- Blender chair modelling tutorial series continues! In this part we learn how to tighten edges with edge loops, and then direct the flow of topology in the direction we want it to.
Join the free newsletter to get a Blender Keyboard Shortcut PDF: mailchi.mp/ef5b15a32043/subsc...
-----------------------------------------------
Follow me:
Twitter: / andrewpprice
Instagram: / andrewpprice
Facebook: / blenderguru
ArtStation: artstation.com/artist/andrewprice
Blender Guru: www.blenderguru.com
Poliigon: www.poliigon.com


Just to tell people that the merge command is not "Alt + M" anymore. It's just "M"
"Alt + M" is Split now
thank you so much you should be on the top
Thanks
Thank you so much, i tried to solve this problem for half an hour and i didnt think of going in the comments
no i have it as "Alt + M" idk why.
You're a kind person
When i mirrored the leg it made a leg on the opposite side of the x-axis, not inside the other
Edit: To Fix this Undo the mirror until before the step, Next select all of it and Right-click and click "Set origin" then click "Set origin to Geometry" then mirror it that should fix it.
me too...any way to solve that?
@@AlaePulli Yeah Undo the mirror until before the step, Next select all of it and Right click and click "Set origin" then click "Set origin to Geometry" then mirror it that should fix it.
and make sure you're not in edit mode
This happens because you moved the leg in Edit mode. When moving in edit mode the leg origin stays at world origin and only the model moves whereas when moving leg in object mode, the origin always remains at center with respect to the leg model
Yeah, you gotta be careful with the origin point of your mesh, when you move the mesh in edit mode the origin doesn't move (in object mode it does) so the reflection can end up somewhere else.
"If I can undo enough **Nervous laughter** " Story of my life.
your comment does not have enough recognition. lol
You can increase it:
*Edit | Preferences | System | Undo Steps*
@@vitaliidmitriev7179 and kill my laptop in the process lmao
@@vitaliidmitriev7179 holy shit thank you
Maybe go back like 20 years, that would be nice...
i cant tell you the number of times I went to 'ctrl + r' for an edge loop and accidentally restarted the video
Same and same
Yes, I too am a part of Club Refresh. Shut up and take my (ad generated revenue) money, Andrew! Poliigon is gonna have to pay this dude so much. ;)
I've never wanted to turn off CZcams hotkeys until I started watching Blender tutorials.
I'm back!
Some advice I'm stealing from a different CZcams comment: If you right-click TWICE on a CZcams video and then select "Picture in picture," it will pop out the video and let you place it on whatever monitor you want. A massive benefit to this: hotkeys no longer work on the video! So if you click Ctrl+R or (as I do more often) press a number key, it won't screw up your video anymore! Amazing! Wow!
@@BryantNaro Plot twist he owns Poliigon
8:00 For people who has problem while using mirror modifier,(my mirror one is too far from the origin). So if you see a little orange dot on the grid, that is called as origin.
Solution:
go back to object mode > hit the horizon panel "Object" > set Origin > set origin to geometry
Life saver!
Thanks!
My god. Thank you so much man
thank you
شكرا
Can we appreciate that Guru spend a lot of time doing these tutorials? i mean, the dude made tons of chairs just so we have a higher quality tutorial to follow, not a lot of people would do that.
yeah you're damn right. no one explains likee he does. The other guy CG GEEK just kinda shows off what he has while guru has an expertise yet is so down to earth that he's trying to help people like us to atleast understand the basics of blender. He a God man!!!!!!!!!!!!!!
So true - this is the 11th chair! Dedicated man!
love how you explain that you don't just "know" how to do the things you do and it is trial and error sometimes. very motivating
Yeah, I agree with that.
it dose not motivate myself, but it dose not demotivate me if that makes sense.
My 10 year old son is following along with your tutorials. He just finished lvl 3 part 2 of your donut course he loves it and does it instead of schoolwork. Keep on building!
I'm doing it instead of my schoolwork to but I'm 14 😁
Your sun knows what's important in real life xD
probably acquiring more useful skills in the process yeah, most of the smartest people i know werent high achievers at school, thats where they focus on mediocracy etc, so a lot of potential is wasted when they bore students to death with their impractical programming lol ;)
you following along too?
yesterday, my 6 yeard old son grabbed a toy and said "dad, I want to do this in blender!"... and he did it! in the process, he learned about edit mode, inset, extrude and edge loops... ;)
@Nom they grow up so fast
For anyone having issues with the mirror modifier: in edit mode, after you've deleted half of the vertices, select one vertex on (top left) on the side that's cut. Once selected, got to Mesh->Snap->Cursor to Selected. Go to object mode and select the entire geometry again, right-click and select Set Origin->Origin to 3D Cursor. After that, add the mirror modifier and you should see accurate results.
thx a lot !
Lifesaver! I knew there must be a way to salvage my blunders but I never would have figured this out! Thank you!
thank you!!
Thank you. Solved my leg mirroring on the opposite face.
LEGEND
Actually, learning from mistakes is highly educational. If I make something that works, I rarely have learned something in the process. No pain, no gain. You should make a video on what to avoid.
Yeah there's bits of that in the next part ;)
@@blenderguru you have really changed my life from getting out of depression by learning blender it gave my life a purpose i started from your donut tutorial you are my hero seriously every day i am getting better at blender thanks to you for the inspiration andrew
Facts !!!
@@blenderguru in the video you mention the segment about car tutorials and how you just need to test things out and see how it works, and it ironically enough solved my issue I was having with my model lol. Topo can be tricky!
and also, once you know the basics. the best way to learn is to make something not directly from a tutorial. you will eventually reach a road block and need to hit up a tutorial to learn a technique or method. I think its better to learn on an as needed basis because you will immediately apply it.
6:46 When using alt-click to get the selection to "follow the topology all the way around" if your selection goes in the wrong direction, make sure you click on the edge and not on the face (if you look closely at the video, you can see Andrew's cursor positioned on the edge).
OMG, thank you kind sir!
thank you!!
Had to alt+left click on one vertice (at bevel centre) and then alt+left click on the other vertice perpendicular to the direction of face travel.
@@demoBGful aaaaaaaaaa, many thanks!!!!
thanks this was bugging me thought they changed another short cut , hard to keep up with blender they seem to change a lot of ways to do things
For those struggling, do not worry! I messed up so many times during this tutorial but I pulled through even though sometimes I didn't know what was going on. Just recreated the chair super quick compared to my first attempt. it gets easier, don't give up!
It randomly duplicated 2 verticies 4 different times and i didnt know how to fix it and now i have been spending the past hour trying to do something that should have taken 10 minutes
The only thing I saved so I don't have to go all over again is the placement of the reference images :))
9:26 Guys, remember to put the mirror modifier ABOVE the subdiv modifier. I had to do it all over again almost from the
beginning until I found, why I am having some of my chair foot's faces split by curvy paths after deleting that face on the top. And it's really helpful to do backup copy layers of your object from time to time
Couldn't figure this out, now I know thanks to you and thanks for the timestamp as well
So i put the mirror modifier above the subdiv modifier and yet it continues to get curvy shapes after deleting the top face !!
I don't understand why this is happening and its ruining the whole process !
Thanks Nurlan, it helped
You saved me, thanks!
@@Octopusskull Same for me too, after extruding it automatically splitted in 2. I still haven't figured it out.
Its important to note that at 9:54 when he does this very subtle transition to the next step.. he's turned off Edit Mode on the subdivision modifier. If you look at the list of modifiers on the right side, the subdivision one has that square box icon with the highlighted corner, turned OFF. This is important because as you continue following the next steps, you're going to see extra weird lines trailing along and your leg has an addition loot cut that you never put there, which is super duper confusing. Also optimal display is checked.
You're my hero
Thanks ♥
Okay, but that doesn't explain why the back of that chair piece is straight at the 9:54 point in the video. It was rounded before he cut, but then all of a sudden it's straight. Did he delete the faces? Did he do a loop cut on that part of the chair without us looking?
Petition for a Patreon. This much time, effort and quality content for free is making me guilty.
You can always buy his stuff on Poliigon.
He has Poliigon. Just buy some materials, they are actually pretty good!
4:59 For people using Blender 3.0
Thank you :D
For anyone watching this tutorial around June 2020 or afterwards, the Alt + M shortcut he mentions is now just M.
omg thank you so much, i spent an hour trying to figure that out!
thanks for that bud
tahu OneFiveSeven THANK YOU!
@@harshdeo5409 it's not a bug, it's an update
thank you so much stay blessed
9:54 He deactivated the "show modifier in edit mode" of the subsurf modifier in case you wonder why it looks that way.
thanks!
Do you perhaps know the shortcut he used? I tried to look at his key bindings but the yellow on the light background makes me want to shoot myself.
@@mv4770 You can't see him deactivating it because of the cut in the video and I don't think there is a shortcut assigned by default.
Thank u so much for this, i had to do the tutorial twice cuz i thought I was doing something wrong
Camila Herrera I did literally the same thing...
For those having problem with clipping (they have the chair leg cut in 2) increase the value of merge. you find it directly on the buttom of clipping in the mirror menu
BRO I KNOW THIS IS FROM A YEAR AGO BUT IF YOU SEE THIS I LOVE YOU PLEASE FATHER MY KIDS
Thx man, very helptful!
Actually the "bad topology" from the incredibles was specially made to control the crinkles on her cheeks :D
I figured those were there for a reason
Source?
@@invalidacess twitter.com/henningsanden/status/1201720661086896128
yea it looked like it would create dimples or something to that effect
I KNEW IT!! And I'm like but what do I know, I've only been learning about Blender basics for 15 days, and these people who were critiquing study this stuff full time for years in school
*For those on Blender 2.83 or later*
The merge shortcut changed from *Alt+M* to only *M*
Thank you !
thank you!
"This chair is pretty tame. It's not like a tank..." Me: "OR AN ANVIL!"
Lol I just finished the Anvil, but MAN was it a big jump from the donut tutorial. I'm so glad you're making this series for additional and deeper modeling fundamentals :)
Side note: this IS a fantastic bridge to that tutorial. He doesn’t go as step by step into the modeling as this one so that’s why this is a better next step after the donut, but after this, go to Andrew’s Intermediate Modelling Tutorial which is the anvil.
I did that WITHOUT this and although I had some slight issues, I was able to finish it. So after this one, I’m sure you could do that one a lot easier.
That anvil had me defeated... I got so far. It was basically ok, except a few minor errors that I couldn't seem to fix. This is the first tutorial after a couple years after the Anvil... So far so good!
That anvil was tricky. I made it even harder for myself because I wanted the throat of the anvil to have a smooth curve from the base to the top of the horn, instead of segmented like Andrew had his.
I only managed to get to the UV baking anvil tutorial because its a hassle to texturing also having half baked anvil sculpt.
Honestly, I would love a long video where you model something harder. Not in a tutorial format, but simply a video of you solving things, going back, seeing if something works... Because most of the tutorials on youtube are rather "easy" and are deliberately avoiding some harder stuff. Most things have multiple approaches and when modeling more complex stuff, one is bound to find some problem. Often times (when boolean, bevels, subsurf and bad topology come together) there are tons of issues and most people make the bevel smaller, move something problematic elsewhere instead of tackling the issue. I would love to see you doing exactly that.
Perhaps something like the Subway in 20 minutes video, going through the process, highlighting all the steps and slowing down to focus on some the details and speed past the repetitive boring bits. Could be a few minutes per iteration, here was the thought process, here is where the modelling wasn't working, here's the next iteration.
Blender guru is the only person to explain detailed information in 3d modelling. So I am watching his all tutorials.
The best nugget of wisdom from this video, circa 14:30: Its ok to try something and then decide it doesn't work.
I needed to hear that. thank you.
9:20 If you have troubles with wrongly rounded edges try to increase "Merge Limit" in mirror modifier.
спс, бро!
Hi, thanks I was just looking for how to fix this! But also there is another way I figured out too: If you make the mirror modifier to be on top of the subD, it also eliminates the round edges. Cheers!
Thank you so much
Thanks.
I also had this problem, you just need to put mirror mod above the subdiv mod. 7:40
Thank you for this series. I used 3d Max in my childhood. This series is helping me to get back to 3d design after so many years as an adult using Blender.
Andrew, everything you do is instructive, encouraging and entertaining. I'm amazed and grateful for all that you share with the world. You have a lovely gift for language and the turn of a phrase, but it's one vertex, two vertices, full stop.
I really appreciate your hard work in providing high quality tutorial like this one, hope you are going to share your knowledge to us forever!!
Pure gold. I don’t think anyone is teaching blender “better” than you. Your tutorials are full of such REAL, VALUABLE information on so many levels
His level of honesty is amazing! I love this.
These tutorials are just amazing, not boring, learned a lot and just super easy to follow, I did the donut tutorial completely and it also amazing! Thanks
After the Donut Madness and now the topology madness, it is still refreshing and surprising to realize how amazingly easy to follow the instructions are!
Great video, Andrew :)
I'm looking forward to the Anvil series after I finish this one!
14:37 this is very important for people who are trying to learn 3D modeling to hear. even good people need to try and fail even though its an everyday thing for them. Thanks for sharing such information.
Thanks so much for taking your time and energy to provide these tutorials for us! It makes such a difference in learning!
I didn’t know I should’ve done this tutorial before attempting the sofa tutorial, and I’m learning a lot of things I was wondering as I made the sofa! This is great knowledge for making clean shapes
For those who are having issues with "Merge-By Distance" just press "A" to select everything before.
Hope this helps :3
also it's not Alt+M anymore for merge but just M
Corporate needs you to find the differences between the words *vertex* and *vertice*
Andrew: They're the same word
So good! I finally decided to start to learn how to model, after 10 years in the VFX industry and this is perfect: principles to apply instead of mindless procedures to follow, I'm having so much fun modeling my first chair!
Thank you for this tutorial series, so many new tricks I haven't known about! I have something to look forward to tomorrow, especially at this time.
13:27 For Blender 3.5.1 Mac users, the shortcut for Select Circle has changed to W (shortcut cycle) or Tab + Spacebar + C.
If you have problem on seeing the right wireframe in 10:06 and you still see the detailed wireframe, disable the third icon near the camera and pc icon in subdivision modifier panel.
I spent a day figuring out why i didn't see his same wireframe.
saved my day!
thanks you, glad I read commits. got to the curve part and was like why do I have all these extra lines, then figured it was something like this because they didn't have any vertices.
I muck around in blender casually, I've gone through a lot of your donut tutorial and others. Always really well explained, engaging, useful. Thanks!
Thank you so much for making these tutorials! This one and many others allow me to really easily make the models in Blender I need to make games which is a dream come true!
For anyone else whose curve bends inward after mirroring and deleting one half, increase the merge distance in the mirror modifier.
Interesting to watch. I used to use TrueSpace back in the late 90's. Using the same methods of course. Seeing how Blender has developed is amazing!
After years of modelling, rendering, writing articles on it, giving lectures on it I completely dropped it all. Everything I need in 3d now is in CAD where edges need a perfect radius, everything needs to be spot on. It's refreshing to see 'It'll do' visual modelling again.
I'm watching these to try get back into modelling for organic and non CAD designs that I want for 3d Printing. Right now though it's all a bit like using right handed scissors in my left hand, lots of tongue chewing as I know what and how by just have no idea where all the tools are :)
Thanks for the vids, I'm going to push on with it.
I love how sincere you are about the boring part of try>fail>try again>fail again part of modelling. Make me fell a bit less shitty. Thank you, Andrew!
Just starting the series tonight! Its really well explained. I am the type of person who really likes to know why I am doing things instead of blindly following along, so this series is amazing. Blender is very cool
Thanks for improving my quarantine!
Also if anyone have troubles during the mirror modifier, make sure you have the origin (the orange dot) in the center of ur leg,
If your mirror is showing up on the other side of the center point of the scene, you need to move the origin point of your object. Specifically, for the mirror modifer, you need to set the origin the the left face of your leg object.
Hitting [ ctrl ] + [ . ] will allow you to select the origin point. Hitting [ G ] will allow you to move it; make sure you turn snapping on.
Thank you for your time & most straightforward and easy to follow tutorials man! Love it! Please keep on sharing the knowledge and keep doing what you do. Cheers!
Thank you for taking time to explain us step by step these small tricks. Helps a lot !
appreciate your tutorials
practicing this stuff til you just naturally remember key bindings helps a lot
and now it's not magic to me anymore. I can actually do this stuff.
And the more I do it the more I learn. And yea I only recently learned about good topology like a few days ago
And I definitely needed to know about this alternative to beveling
10:59 If your wire frame has significantly less polygons than in the video, go to your subsurface modifier and uncheck 'optimal display.' This should solve your issue and the wire frame should look the same (excepting small variations in how close you made your loop cuts).
Didn't work for me unfortunately.
That's what I like about this community, so far I never had to scroll down past 20th comment for the explanation of any little detail I've ever missed.
Thank you BlenderGuru! Your tutorials are much needed for a beginner like me!
This is actually the best tutorial series you made so far.
7:30 There is an auto mirror addon that does the same job as the mirror process. Instead of needing to use a loop cut and deleting one side before hand, the auto mirror does it... automatically. Just enable it and open/use it from the edit & tools menu (N)
I kept getting a gap along the top surface of the chair arm using standard mirror process; this fixed it. Thanks for the heads up! 👍
I love you ;)
Edit: Oh but there's a problem when removing the top faces :O
really thankful to you , you helped me a lot
was waiting for this, thanks mr blender, you're too wholesome
travisjacksonnin broo. Get it right, his name is mr. guru. First name blender, last name guru.
“The names guru. Blender, guru”. I’ll take my martini right click not left
travisjacksonnin This was posted at like 5am where I live.
10 Hour Entertainment idk abt the other guy, but I watched this at 5 am. Quarantine got my sleep cycle fucked
Edit: I was having problems, but due to this person being such a great teacher, I used what he's taught me and was able to correct my mesh and get it looking much better!
Probably the best way to present tutorials I've seen on youtube. Great personality. Makes you not want to rush through the tut. Nice one matey
to use the mirror modifier to mirror the object properly, you must have your objects' origin set according to its geometry. I ran into some issues when the objects origin (shown as a little orange circle with black outline) was set at the center cursor. This meant my objects' mirrored counterpart was far away from the original object. To fix this, go to object mode, select your object, then in the toolbar select object > set origin > origin to geometry. You must do this ~before~ deleting half the vertices otherwise the translated origin will be off-kilter in the x axis. (He addresses this in episode 4)
thx soo much 😁
Thank brother 😁😊
Thank you so much....!! I spent so much time on this issue..😢
If your mirrored mesh is "pulling apart" after you delete the faces on top, try selecting all your vertices in edit mode and shifting them out and back (essentially widening and then narrowing the leg of the chair). This fixed it for me. (Also could be a 2.9 alpha bug).
I solved the problem by saying "Delete faces only" instead of delete faces
@@milesalderman Life Saver, cheers mate
that fixed it for me too thanks
@@milesalderman Yes, thats it, thanks.
@@milesalderman love you tnx
Hey Guru Andrew. I never thought I would give 3D modeling a try. You have some of the best tutorials ive ever seen on youtube. you are doing a fantastic job so keep it up! ive been through endless tutorials for Premiere, Photoshop, Ableton, etc. These are by far the best. Congratz on your success and hard work.
You are the best 3D teacher I ever meet! I want to be a 3D and 2D animator. Thank to you. You help me to learn Blender. Thank you I always love your tutorial and other content.
i wonder what transformation his beard is gonna go through in this series
hes gonna look like gandalf
EXTRUDE
This time he gonna go bald np
Beard Beginner Tutorial when?
I afraid he has already recorded all the videos and just releasing them one a day, so the transformation is going to be really small.
at 9:57 if you don't know why the mesh looks different after the video cut, he disabled the edit mode from the subdivision modifier (near the name of the modifier u have 4 buttons just press the one that has a square with 4 squares in the corners)
My god thank you! I was stuck wondering what the hell did I do wrong to make mine seem so different.
Thx
THANK YOU HOLY SHIT
Thank you for another series I always look forward to them, and also very true about not worrying about technically wrong methods if they work. I've slowly had to learn this. As long as the result is good
Just another comment to pay a legitimate tribute to sir Andrew whom Blender beginner's community owns so much. Thanks to his personality and his sense of pedagogy, learning is a pure pleasure. Without doubt, the best way to tame the beast.
I'm going insane, the mirror modifier keeps placing the mirror across to the other side of the reference photo even when I set it to the X axis. Anyone know why?
Edit: If anyone else runs into this problem, select the chair arm in object mode and click object in the top left, go to set origin and select "Origin to Geometry". My origin point was still in the middle of the scene lol.
The mirror modifier uses the Object origin as the line of symmetry, unless you specify another object. You can adjust the Object's origin by pressing Ctrl + Alt + Shift + C, then Origin to Geometry. Do this before cutting the object in half. Your mirror modifier should work as expected now.
@@ideallyyours Thanks! Now I knew what to look for, although the shortcut didnt actually work for me, but another way to do this is to go into object mode with the chair selected, press "Object" which can be found in the top left corner of your screen right next to object mode. Select "Set Origin" then "Origin to Geometry.
@@avdv116 Thanks - every time I added the mirror modifier I would get two legs !
Thanks :D
Thanks guys, had the same problem here :D
Hey Andrew! I think you should mention that in future versions of blender we will be pressing M instead of alt+M to merge vertices, so your videos won't outdate so fast
OMG!! thank you thank you thank you! so much!
I am very new to modelling in blender and this helps a lot. It is a lot like drawing where you shouldnt follow it piece for piece but rather find the little tools and try them out yourself. Even a bit of remodeling after learning just one thing can really improve how something turns out.
I enjoyed your comment about how these tutorials are mostly problem solving small things, and by that, about learning how to model anything by learning all the small tools you're teaching us. I'm coming to enjoy making mistakes as I go when I miss something you do, because I learn a lot in correcting my own problems that you don't make. My origin wasn't centered so I kept mirroring at weird spots, and I didn't have my xray on for the second half of the tutorial so the second chair leg kept coming out funny. I've done the first half of this video maybe twice and the second half three times, but I keep a pretty detailed document on all the skills I learn as I go.
Great tutorial thanks ! 3 tips:
* put the images for reference into a collection and then you can use the eye in the right to remove and put again in the scene as you wish.
* you can click in each image and in the item menu click in the locks to avoid move them by mistake.
* instead of scale the cube just move the cube to be one side on the reference of one line of the leg and then you can move only the opposite 2 vertices to have a better adjustment to the image of reference.
If there's other noobs out there wondering why their wireframes isn't looking like Andrew's while modeling the back part of the leg; check to see if you've got "Display modifier in edit mode" checked in the Subdivision Surface modifier - if you do, uncheck and it'll look correct :)
Hero! Thanks
tysm
Brilliant, thanks!
optimal display its called on mine. Thanks
my deepest thanks for your helping the community.
I have been using Blender as a hobby for years and still learning new things from this
Please Andrew I request you from the depth of my heart make a beginner's nodes tutorial, I cannot find a complete one throughout CZcams, plus you teach very well......
In the donut videos near the end of the series, he teaches about nodes and how to use them to texture objects.
There is also a video by CGgeek (i think) where he uses nodes when making a sci-fi scene (the one with the big floating triange).
Most of nodes is just playing around and seeing what works and what doesn't.
Sometimes i forget you live literally on the other side of the world, its 4:40 am and I can't sleep
I get mine at 5am.
Hello, it's one a.m., can I join your party?
I'm watching this after making two different donut tutorials. In the first ever donut tutorial we made a cup and added loop cuts to make the edges more refined. Back then I couldn't entirely understand what we were doing but here with a more rectangular object it makes perfect sense :)
For various reasons, I`ve been away from Blender for some time now and have got a bit rusty. This is a perfect little refresher tutorial. Not too complex but enough to get me going again with modelling and UV mapping. Thanks Blender Guru.
In case anyone (like me) couldn't find the automerge button, you have to switch on "Tool Settings" under the "View" menu of the 3D Viewport.
4:50 The new shortcut for merging duplicate vertices on Blender 2.83+ is now only M, while Alt+M does the inverse operation (split). This was done because it is such a common shortcut that it got a brand new, easier shortcut just for that and because the Alt key is usually used to invert the command, so there's that.
True but I guess between client work, his company and the tutorials Andrew isn't testing the new versions until after the final release. So he will stumble over the key change in about 2 weeks ☺
Thank you so much that saved me some time
tysm
Thanks for keeping it real at 16:30 good thing to remember. It's easy to think the process is supposed to go as smoothly as it seems to in a tutorial.
The lesson on making mistakes toward the end of the video is very true. I tried modeling my bed frame for 2 hours only to delete 90% of it and restart with a much better method that took 15 minutes. The trick to 3D modeling like a pro is getting the experience to figure out how to model anything.
Nice I needed this tutorial, hopefully after this one we will get an ADVAAANNCeee one =]
The anvil one is harder than this one if I remember correctly, you can do that if you haven't already.
@@maximilianstarling4038 Oh thanks, must have missed that one.
@@maximilianstarling4038 The anvil one is extremely sloppy though.
Rubén Pérez Alonso not sloppy, just not as beginner friendly as Andrew has gone recently.
But he goes into topology and it’s a more complex shape. Still does edge sliding in this too.
Tbh this is a fantastic bridge between the donut and the anvil.
@@Gredran I actually did mean sloppy. The topology in that one ends up being the messiest thing ever. And not even for good reason because it's an extremely beginner-friendly thing to model too (not sure where you got the idea that an anvil is a complex thing to model. The modelling part of that tutorial can be done in under 5 mins by anyone half competent).
If you want to learn more advanced modelling techniques and do something like a car you have to pay for a decent course IMO. Andrews sloppiness may be beginner friendly (though I wouldn't necessarily say so), but you really have to learn the proper technique in order to do anything worthwhile.
I'm glad you said, "Zed" instead of "Zee".
we indians are always tought ZED instead of ZEE tho some know its ZEE not all
Thank you so much! You're an amazing teacher.
Bro you are my inspiration. Thanks for making tutorials.
2:51 - Just in case anyone is having trouble with ALT + Click not selecting the face loop, make sure "Emulate 3 Button Mouse" is disabled in preferences!
Thank you man
@@tlatopb802 if u do have emulate 3 button mouse u can double click a vertex to select the loop as well
@@Tuxedo_Elite aha that works as well!
double G for edge slide ? You just divided my modelling time by two, and I've been using Blender for three goddamn years
Yeah i also found out about the double tap g thing recently, so damn useful man
You can also use the slide with vertices. In the operator window (now called Adjust last operation, bottom left or call it with F9) you can type in the percentage value you want to slide the components.
I really like that he questions what and why of the tools usage. Lots of thanks.
I just started using Blender this week, currently going through the donut tutorial. These beginners tutorials a great!
I thought I was following his Blender tutorials, but actually it was the beard that I was following all along.
That cheek topology was actualy made well, you want a little wrinkle in your cheek when smiling and talking. The only quads is a myth being constantly repeated by amateurs who think it makes them smart while they brobably dont understand the problematic anyway
I was thinking that topology had to be for a dimple and separating the cheek from the mouth. When Andrew said sometimes It's quicker, I thought how many seconds would it have taken to join those vertices together. That enclosed loop seemed purposely modelled to me.
Huge thank you. Publishing this so openly was very humanist of you. 💞
extremely helpful, thanks for all of ur videos
9:29 I'd keep those faces and add that edge loop. Adding faces there will help with AO and "gluing" the mesh together. It's a minor thing, but hey, it's the last 5 % that makes it good
Was going to comment this from other angle. If this model is ever to be 3D printed then definitely keep the faces and make parts manifold. Repairing sloppy meshes can be major pain.
All good .. but there's another principle being illustrated here: model for the intended purpose! Visualization? Close-up? Long-shot? If no need for manifold meshes, then model separate parts as separate parts.. etc. Commercially, laziness is *vital* to success. You've just got to know, very well, where you can get away with it.
Can we get a Tesla Cybertruck tutorial?
That will be fun and easy
cggeek made one check him out
Put subdivision on that and there you go :D Toyota Supra.
i honestly stayed on learning blender because of you i love your tutorials
Really never under stood sub surface modifier like this ever before.....beautiful...