Models aren't that complicated with this approach! (Blender Tutorial)

Vložit
- čas přidán 30. 08. 2022
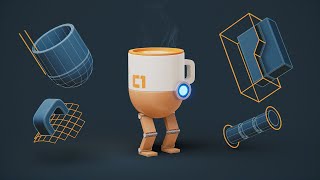
- In this video, I'd like to discuss a different way to look at "complex" models, and how to break them down into simple shapes so it isn't as tricky as it looks.
►► Enroll in the most popular (and free) hard surface modeling course - www.blenderbros.com/jumpstart
►► The Hard Surface Academy - www.blenderbros.com/academy
---------------------------------------------------------------------------------------------------------------------------------------------
SOCIALS:
💻 Our Blender courses - www.blenderbros.com/
☎️ Discord - / discord
🖼️ Instagram - / blenderbros3d
CONTACT:
📱 Inquiries/questions - info@blenderbros.com
►► Enroll in the most popular (and free) hard surface modeling course - www.blenderbros.com/jumpstart
MY FAVORITE BLENDER ADDONS:
⚙️ Hard Ops/Boxcutter: gumroad.com/a/811037811
🔳 UV PackMaster 2 Pro: gumroad.com/a/1027609715
🔨 Decal/Mesh Machine/Machin3 Tools: www.blendermarket.com/creator...
🧘♂️ Zen UV - gumroad.com/a/997463155
⛮ Kit Ops 2 Pro: gumroad.com/a/779940979
💾 PowerSave: gumroad.com/a/442037363
🔌 Cablerator: gumroad.com/a/341111923


For those just finding this video without any real Prior knowledge.. it might be worth mentioning at the start of the video that you are using HARD OPS add-on and this is NOT just vanilla blender.. otherwise fantastic video and a good demonstration on breaking down a complex looking structure down to its simplest form.. well presented
Yeah I was curious how many of these tools were default versus add-on
It remains that you can still do the same without the addon. It will probably take more time though
Thanks for the feedback - just in case people are wondering of the addons I use:
- Hard Ops/Boxcutter Bundle
- Machin3 Tools (free)
- Mesh Machine
@@JoshGambrell Great.. Maybe worth mentioning to check your description in your videos what Addons you use for these videos and have them in there would be an idea without needing to repeat yourself in every one ☺️ just an idea..
@@stonbax yeah he is using so many shortcuts and from those addons, gg without them
What I gathered from this video is that 3D modelling isn't that much different to traditional 2D art: You have to define your primitive shapes before chiselling away and adding detail
Correct, yet most people observe it from the eyes of the final result, which results in demotivation and unnecessary over-complicating. One should observe models from a primitive structure and keep adding detail as necessary.
Well said 👏
This is one of the most enriching and instructive visual art advice I've read
that's true for a lot of things, like for example, when you see something from a distance, your brain will classify it and refine that classification through iterations (drugs like LSD mess up with that process), and at some point your brain finally understand what the object is, it happens so fast that you don't mind it consciously. AI models work like this. So here you are building the shapes from the bottom-up, you need to start somewhere and the best place to start is with good foundation.
2D +Z :)
There are several way to model. Sculpting, using boolean operations, polygon modelling, etc. Each having their own pros and cons. There's nothing preventing one to use all of them for the same object at different stages or to achieve different shapes. Learning at least the basics of a lot of them will demystify a lot of the apparent complexity.
Thank you for this great demonstration of that!
This is a very important video. Impressive how easy it is to build complex structures, if you develop an eye for basic shapes. Thanks!
Absolutely!
Try CAD software approach it helps a lot
This is one of the most useful tutorials out there. Not a lot of people actually discuss the thought process behind modeling! It doesn't matter how many topology videos you watch, what it comes down to is training your eye and breaking complex objects down into their simplest shapes. Bravo!
Reminder to people just stopping in for the first time that this is just for getting the overall form down. You still need to retopo and you are definitely not done here. For example this model here has massive Ngons on the top and bottom. Sometimes that works fine, but sometimes you get shader errors with that, which can be a big problem. Make sure to clean up the topology a little bit more. Ngons are sometimes okay on non deforming surfaces, but it is not only good practice (but also not always accepted professionally depending on if you are working for someone) to have good, clean topology, but also the way to avoid shader problems later down the line.
Luckily for you, you are on a great channel for learning about this stuff! Check out some of the other videos too to learn more of the workflows that Josh shows, there is a lot more to go, but hopefully this helps inspire people to learn a bit more with everything! I just mentioned the shader stuff, but Josh often covers that in various places, so see about more of these tricks while working to get some better ideas!
Thanks!
So... that cut that he did like in 7:20 ended up adding a lot of triangle and ngons, right????
Ngons are absolutely not ok unless you subdivide the part or retopo.
How hard doing retopology to a model with so much bevels like this
This is why I really like 3D art, coming from a software engineering background. With software engineering especially with CI/CD (continuous integration/continuous development), it is really difficult to break down work into manageable steps, especially since there are lots of dependencies for certain tasks. Not to mention that you're often working with botched or poorly documented APIs or software packages.
However, in the case of 3D here, it's all very basic steps that can be layered like a cake. With every new tool or technique I learn, it's more of another horizontal layer rather than a complete new vertical to learn. It allows me to apply the ideas of "iteration" and "only needs 90%" very easily and tangibly see my own progress as an artist. Not to mention that I love 3D because it feeds into the technical side of my brain. Absolutely love it.
Creating the model isn't the problem, it is quite simple, Topology is what consumes the most time and effort.
Yup, the worse you make the topology, the faster you can do it : )
I can make what I want, but usually I want to add it to game engines or texture it and just give up while trying to retop it.
And it doesn't matter really considering it's a hard surface object. All you'll get in games are triangulated meshes. Topology that matters is when you're trying to make it bend or warp it in any shape or form. Cyberpunk uses CAD objects that are decimated and using weighted normals, and have the most beautiful hard-surface weapons and objects right now.
Yes, and the object in this video may look good, but you need no knowledge about topology to reproduce it. If an object doesn't consist of "flat" surfaces only (like here), then you don't get far with the techniqes shown in this video.
You so efficient with hotkeys!
I remember losing the magic of watching someone create something in blender when I learn to understand it
But you just gave me that sense of magic all over again!
You really are using addons to the max
I just want to know which ones he was using, I think one was mirror gizmo, but I want to know what that quick cutting one was!!
Edit: I think it might be bool tool
Edit2: Nope, it's hardops boxcutter
@@PyrianVT his addons are in the desc. read there gumroad pages and you can probably find out
Thanks a bunch! All I'm using is Machin3 Tools (free), Hard Ops, Boxcutter, and sometimes Mesh Machine
I just finished the blenderbros mechanical arm tutorial and I was surprised at how quickly you can learn everything needed to make almost any hard surface object.
It helped shape the way I think about modeling into exactly what you were talking about on the video.
This was actually a very great tutorial! love the shape as well, trying to drive this concept into one of the guys I'm coaching's head.
Always appreciate the positive encouragement. Like you said, it's easy to get overwhelmed/demotivated.
Great video Josh! Another great way to attack this model would be with flat low-poly strips that could quickly be bent into 1/8th of the model, extruded, beveled and mirrored. This would create something with super clean topo that would be easy to UV. 🎉
as someone who uses SolidWorks a surface based 2D to 3D modeler, i find it fascinating how all 3D software's can replicate this object and how each one is approached differently and also how this is considered a more complex shape in blender.
Well this shape is more CAD oriented hence it's more convenient in CAD softwares. I personally use CAD primarily, but once you get into sub and all blender shines alot with it's addons
thank you, i was planning to get into hard surface, i got some tutos as intro but needed to have the good mindset before, this video is exactly it.
Another great video mate, cheers for taking us through your workflow
Many complex things start with one single vertex. You can have a whole human body basic structure made in less than a minute using one extruded vertex and then skin modifier. Also, having lines that you turn into a curve and give it a geometry thickness can give you complex albeit uniform curves like pipes. It takes time to simplify the process, tho. The power of boolean is also something unique and the same applies to the array and mirror modifiers.
Finally, you can do wonders in other free tools such as Inkscape, save as SVG and then import that SVG into Blender, turn it into a mesh and extrude and modify it at will. Those tools are magnificent.
I've already taken the how to use blender basics to advanced etc.... but I really appreciate everyone throwing one in because sometimes you have to brute force this type of knowledge/skillset. it takes many examples and tutorials to master a subject ultimately
Amazing tutorial as usual. Also whether if it's 2d or 3d, it's about the shapes. Then, think big details to small details. 😀
Great video. You made it look so simple and I'm sure it is. I have just started showing interest in this brilliant program, but I have a mammoth way to go. But I really found your explanations so logical. Thanks
Can you break down all the tools u used to make this video. Because some of your shortcuts and add ons from what it looks like i didnt quite understand. It will be really helpful if u further elaborate more modelling workflow tools and methods.
Boxcutter for boolean cuts, meshmachine for fixing messy geo and hardops for some general operations
@@CGLife Thank you very much
Sure, I could make a video discussing my tools.
@@JoshGambrell thank you very much
@@JoshGambrell Subbing for that video!
Nice to see breakdowns like this. Kind of like a magician showing how the trick is done.
your designs are so clean! very eye pleasing
Thanks a bunch! Practice, practice, practice.
I am soon to join a 2 years long 3D artist course, but 10 years ago I did Industrial mechanics CAD both 2D and 3D in High school. Looking at the reference image you posted, I was already imagining a starting shape and all sorts of internal shapes to perform booleans on it to match such component, and was glad the process you then performed was quite similar to what I expected, coming from CAD experience. This gives me hopes I won't be entirely newbie to the course. Thank you kindly for showing this!
You should look into Vitaly Bulgarov.
What secrets are you expecting to learn that you ca t get for free on the internet?
Hi, I'm somewhat new to blender with about a few months of overall experience gained over the years of on and off attempts. My initial guess was a cylinder that was extruded but I didn't guess the mirror modifier or the cut tools as I haven't really got into those at any point in my practice and didn't know you could do that so easily, my main thought was that you used an object to subtract the areas you needed and worked from there. I was pleasantly surprised however that I got the initial shape and general extrude method right as that was my only conclusion as to how to easily make that shape.
I did it with the base program (only have machine tools). I started out with a cube because I didn't think of extruding the cyllinder and I used the free (included but disabled) bolt factory addon to make my threads and inserts. I'm glad I watched the video after though as I learn something new. And as I see it there are multiple approaches to do things, just like with coding, no approach is wrong but there is always a more efficient way of doign it.
Moral of the video 👉 it is our misconceptions that anything we see any 3d complex work our brain thinks it is very complex but you free mind analysis whole work and divide into parts this is only method to tackle any kind of work.thnks sir for 🙏this video.
This is a really awesome demonstration of the philosophy most 3D modelers use to build these complex shapes! Worth adding for clarity that while models that look complex like this can be broken down easily with practice, there are still other models that will be way more complex to make than they look, namely very organic shapes with little randomness like animals. Basically, this same idea will help you make anything from a soda can to a city block, but it probably won't help you if you're trying to make a dog. The right tool for the right job though, and there are definitely tools to make that doable too, just keep on trying at it :D
Yep that's the difference between hard surface modeling and organic
Right off the bat, I was like "mirror modifier". This particular object is perfectly symmetrical in all axes.
Brooo what a great channel finding you guys was a total jackpot you guys ROCKKKK 🤘🤘🤘
Josh all grown up 💪 Nice motivational tutorial. Well done.
Absolute legend. Love the way you present information with such efficiently and ease +1sub
incredible possibilities to those who master it. I am almost done with my first track, but there is so much more to discover and learn. TNice tutorials
Your video was clear and made the needed points. Thank you!
I wish you added all the short cut keys that pop up in blender so new users like me could understand what exactly what you were doing/keys your pressing
Very fascinating and very interesting approach you have in your presentations - you are a very good teacher.
When I first saw this object, I see a lot of symmetry, but struggle a bit because the symmetry is from multiple views.
I'll watch the rest of the video and learn (and subscribe - I like your style/approach).
I always thought that boolean operations are the way to go in a big part of hardsurface modeling and this is why I had so much fun with it in Zbrush even 10 years ago. The problem was of course always topology or the lack of it. I know they solved this pretty well on Modo with meshfusion a long time ago but it's nice to know it also works in a free software, even if an add-on is needed. Another good alternative for a boolean workflow is Fusion 360, which works pretty well for concepting for years, I just didn't check recently if they have any solution for a 'real' polygon model with a decent topology.
im starting with blender, im a designer and i always used solidworks which is all numbers and perfect geometrics, and adapt my head to this type of modeling is really complicate, this is abstract for me, thanks for the video, is really helpfully!
man you whipped that up quick - I'm starting a small 3D printing business for niche items in my main line of work. I'm stuck currently deciding what program to spend most of my time learning. I started teaching myself AutoCAD and enjoyed it, moved into Fusion360 and enjoyed it even more however I keep wondering about Blender.
All good points. The next thing people don't think about is modeling in relation to 3d printing. What is the best printing orientation for the strongest part. The layer should always be perpendicular to the parts load. Then the next is to design a part that doesn't need supports to print.
Theres also a difference between just making stuff like that, and making game art style stuff, especially for older games, where you need good edge loops and optimized geometry. It all depends on what you are going for.
right! I think modeling without having good topology in mind is just modeling for passing time, anyone who wants to be a part of a team and create models that can be animated properly needs to be able to create good topology.
@@SB-gy2vx yeah, but these hard surface will have deformation on the animation?
And what about using autoretopo tools like instant mesh?
@@ivensauro I rather model the objects with the best geometry possible to avoid future problems and more work. But that's just me.
That video helps a lot and I think I speak for everyone here! Thank you!
hahaha... you made it look so simple and easy. Well the way you explained it, it was so encouraging that i am going to try it out and test the little skills that I have.
Thank you.
Learnt some plugins are really cool and important to use for a faster modeling process in your video.
It's crazy how fast you made it 😁
TNice tutorials should be the first video that pops up when you're new to making soft
Absolutely, I’ve learned a lot. Thank you very much.
Great video as always. Love your stuff. I have a small channel and owe a lot of my current Blender knowledge to your videos, in fact it was learning so much from CZcamsrs like yourself that made me want to start the channel to give back to the community that has given so much of their knowkedge away for free. At the beginning of the video I paused it and made the object myself before watching the rest and realised I follow a different mental approach to you (especially at the beginning). Would you mind me covering this piece (referencing you and this video of course) to discuss different approaches to modelling to get the same outcome?
You definitely have techniques that I have not seen before. I have always struggled with Booleans although I have gotten a little better. Cutting, Yea I have never used that and as I can see here I need to learn that.
You are a very good teacher this helped me a lot , thank you brother , subbed
Thanks bud! great video and instructions.
Hey, thank you very much for the review. How do you add electric app to the tracks? (Real electric app)
Bro thanks to your video my hard surface modelling has improved.
Awesome!!
Incredible as always.
Great video 😁👍very helpful.
thanks man for the tutorial ,really loved it. i learnt a lot
I was wondering what is the setting that gives you that glossy shine on the edge of objects? I've seen that in some videos and can't find how to set mine like that
Another awesome tutorial. Amazing work.
i have no idea why, but hearing your voice just makes feel soothed.
Hello Mr. Gambrell. Is it best to learn modeling by doing it by eye like this or model around an image put in Blender with different views?
brotther please help me to know that how did you cut that model by the cylinder at 5:25 for get the circle shape ,, i was trying for 1 week ,couldnt get it yet ,, please help me ..
Thank you! That was a great tutorial!
Makes me glad I use CAD for this kind of thing. Blender simply isn’t the best tool for this kind of modeling.
So informative, thanks a lot!
Amazingly the base shape of this model can be made from only 2 sketches (disregarding chamfers and screw holes). 1 extrusion in the Z direction and 1 cut in the y direction.
This was so helpful!! Thank you
Man I thought you had some crazy tricks to this, I was all drawn in. lol Then you go into basically modeling it from scratch! xD Great video, just not what I expected is all. :)
You're essentially using a solid modeling/cad workflow. Looks good.
What an awesome video. Thank you!
Which modifier are you using to cut the shape??
Damn.... that video helped so damn much. I sometimes look at certain things and my brain is totally overwhelmed, haha. Thanks so much for that video, it really helped! :D
Add on such Mesh Machine or Box Cutter helps you modelling much faster. I can't understate that enough. Once you get hang of that, there is no way you can come back.
His channel has helped me to get into blender for 3D printing, it is so easy to to understand even for a newbie like me.
I have managed to 3D print my own design using blender I didn't know how to move the box when you open the app, and no word can describe that.
My only question tho when it comes to modeling models like this is measurements, if I wanna this exactly model with with CAD precision, how would you do it???
I have been using CAD Sketcher add-on which is awesome but the tools he used make things a lot easier and fun, but no CAD precision. How to solve that??
Thanks
Very motivating tutorial!
Hello, please explain to me how the "mirror modifier" is activated at 7'20 just before the cut by selecting the ngon cutter , thanks 😉
There's no doubt that this is one of your most valuable videos. In a matter of minutes, it delivers stunning results that are straight to the point. Good job.
TNice tutorials is just the pick up I needed, thanks man
Hey do you have a video on "hard edge dissolving into sofrt surface? Like a smooth transition from a hard edge into a very soft one. You can see it often on cars. Do you just make everything hard and then smooth it out later with sulpting tools?
Well, you could use bevels or subd depending on the effect you want to achieve.
@@JoshGambrell Would love to see it :)
Very useful, thank you!
love the vids! thank you so much
You are a life saver! Kudos to you! You rock!!
thanks for being so uplifting!
Excellent clear tutorial, but could you tell me which addons you used for your booleans etc?
Booltool is the free boolean addon(comes with blender). Boxcutter is paid. He uses hardops and meshmachine here too. So many videos on blender bros about them.
@@CGLife Thank you
Hard Ops, Boxcutter, Mesh Machine, check out some of my other videos
bloody great work mate
Big thanks man. That helped a lot.
Are you using the Producer version, if so are all the effects and tutorial you use in the video included as standard with the Producer
amazing work, thank you
what is this cut toolin blender object mode you use?
My initial thoughts (before watching more than a minute) is that you can mirror it on x, y, and z axis, and I know you love using booleans so my guess is you used those to cut out the holes. Other than that, I'm not sure how you would do it, but I noticed a comment from someone that you're using addons (which don't cost much but could be an issue for some people).
After watching the video, it did some things I expected, but I probably would have mirrored it first and not gotten as nice of a hole as you did. Also, while you did use some addons, the only real thing you did that would require an addon is the Ever Scroll, but you'd only need to add on a bit of width to that part to get the difference boolen to work correctly, and maybe the cutout you did for the detailing (though anyone could just use the knife tool).
It's great to see things as primitive objects, too. Even many company logos are made using primitive objects, usually circles.
Really nice what you are showing here.
I play around with Blender but use Lightwave as my key model program. I then use Maya. Then I might use Blender for my project videos.
As for this video project. This looks good. In many situations the more complex it is the less complex it is.
Really good, well done.
SOOOOOOOOOOOOOOPER HELPFUL man!! Thank you
I can't figure out how you added the chamfer. I bought boxcutter and hard ops because of your videos, but I can't figure out how you are doing the chamfer at 2:30.
Really need this kind of videos, it turns out I'm not that bad
Can you display the shortcut keys you use for all the different tools ?
s and a couple EDM and Dubstep goals for myself, and I guess I better start learning sowhere. Thanks for the great vid!
Спасибо, этот урок был по настоящему полезным) 🤝👍
Really interesting workflow, tho I still kinda don't understand all the add-ons you are using. Do you have a separate video where you explain all the add-ons short keys and overall how to use them?
Super! Thank you!
OMGGG IT WORKED!!! I finally got this app and I