Maximum Custom Guitars - Neck Contouring Jig

Vložit
- čas přidán 14. 08. 2016
- This is a demonstration of a guitar neck contouring jig that I recently finished. I was trying to replicate the exact dimensions and feel of a 2001 Reverend Eastpointe neck for a customer...and I wanted a way to do it not only once...but be able to repeat it over and over with absolute precision. After doing extensive research on the internet, I found a couple jigs that others made that I really liked...but wanted to combine the features and customize it some to the available tools in my shop. The first one that really impressed me was from a CZcams video by Pederson Custom Guitars....look it up...very impressive. The second one was produced by a gentleman in Canada...Bill Scheltema (who now has a CZcams page)...and published his design on the Telecaster Guitar Forum (www.tdpri.com).
I took ideas from each of those previously stated designs...then added my own flare. The replaceable template pucks allow for unlimited neck contour design options...and have given me accuracy and repeatability...while saving a lot of time in the production of my handmade guitars.
I plan to continue posting more video of my adventures in custom guitar building and interesting guitar mods. Thanks for watching...and don't forget to subscribe.


Within the next couple weeks I'm going to post another video using this jig...and I'm am also going to include information on how to shape the neck by hand. Seriously, on your first guitar....you should learn to do it by hand tools. Then the jig will make better sense after you understand the hand tool process. Maybe later this summer I will break down my neck contouring jig and show all the pieces, parts, and dimensions of everything contained within my jig. Maybe someday I will make full plans on CAD...but until then...you guys should be able to reverse engineer after seeing all the parts separated. It is getting close to a full year now that I have been using this jig...and it has held up great.
Hey man. So nice to see your setup. Looks awesome. Thanks for the shout out
Beautifully done. Wow !!!
That's a great piece of kit and you have a lovely workshop! nice one
good job on neck! thanks for the post will be looking forward to see more of your posts
Thanks Andy. I try to share things I do...but it would take a full time video staff to share it all. I'd rather be building guitars than spending too much of my time in post production! But feel free to make requests of tasks that you think are not covered well enough...I will try to share the techniques/tools I use.
Thanks for adding, that is so cool
That, to me, is simply amazing!
excellent! I have been pondering a fixture to shape necks. I had been leaning towards the neck being fixed and the router in a sliding & rotating carriage. Your way seems quite practical, thank you!
Its amazing we were working on a jig that looks almost the same almost at the same time. Your's is way nicer than min tho. Cool video!!
Very nice thank you.
Came for the contour jig. Didnt know reverend were from eastpointe and i grew up right by there!
Steve, I am wondering if you are building any of these for sale? I have purchased some of your template kits and they are very well thought out and easy to use. Thank You.
I still like Texas Toast method of using a roundover bit with the bearing running along the fretboard edge and finish sanding after.
Hi, excuse me, what router bit extension brand do you recomend for this job?
Thank you very much
Did you ever publish plans for this? Thank you for the video!
No...I never made plans. I figured out the construction at I went.
Awesome jig! How did you arrive at the shape and size of the template blocks that determine neck shapes and taper between nut and heel?
I started with a pattern I found on the TDPRI forum...then adjusted as needed for my desired specs. I think the info on where I found that drawing is in my video description.
Genius
How do you shape the headstock and angle it to the neck? Do you to this before or after taking it through the jig? Great work btw on the jig!
There was another CZcamsr's video on how he made ramps for his contour jig to do away with most of the filing of the headstock and heel.
Wish you had drawings of your jig and how you built it.
One question : Is there a reason to make contour templates bigger then the actual neck contour ? Wouldn`t it be easier to make them same size or am I missing something ?
Try it and see if it works. To me...it seemed like there were some mathematical relationship that has to happen that is something other than a 1:1 ratio. The initial templates worked for me...so I just keep using them...changing the templates by actual differences in other spec necks. But if you figure out an easier way to do it...I'm all ears!!!
Texas Toast sent me. Great rig!
Thanks. Been using it for like 5 years...and still does a consistent job for me.
You really need to get a PAF (no, not the pickup. lol) and market this wonderful piece of machinery!!! I totally agree with the "learn to do it with hand tools", like you say but even so, there's so much time saved to be perfecting other parts of the project. I'll be mimicking (hopefully w/ success) this design soon! :)
Do the cams compensate for the width difference between the nut end and the heel end? Trying to wrap my head around the physics of it.
They are a ratio...so yes they play a part. Don’t over think it...I still struggle to understand.
How did you rig up the wheel and knob at the ends?
Getting ready to try and build one of these, where is the center of rotation? I can't tell from the video if its centered with the platform the neck is mounted to or slightly above it.
I gave a lot of details in some of the older comments...might want to look through those. But it is basically at the top of the neck blank. Since mine is designed to be used with the fretboard already glued on...there is about a 1/4" offset.
Great concept, thanks for sharing. I'm actually trying to replicate this. What I don't understand is how you form the round templates that give the neck its profile. Duplicating the extremities of the profile doesn't work for me, since the templates are located outwards. In that way I'm not getting the right angles where I want to rout. Seems that it needs some kind of projection for giving the templates their correct dimensions. How do you achieve this? Thank you in advance for any advice!
Ralf, thanks for the comment and question. Most of the answer is contained in my reply to John below. I have received this question before. I may not be a mathematician enough to give you a scientific answer. However, I will tell you what I know. I did a lot of research when I was looking to build one of these...and basically there are offsets there to give space for the rotation of neck platform. If I measure from the center rotation hole of the puck to half of the width of the neck (at either the headstock or the heel) you have 3/4" extra to the edge of the template. If you measure from the center of the rotation point to the the 12th fret height and the 1st fret height...each template has exactly 1/2" extra to the top of the templates.
Basically you can draw your desired profile from the rotation center...then add 3/4" to each side and 1/2" to the tops...then connect the points with your desired shape (C, D, V, whatever) and you with have the perfect template. So, even though I don't fully understand fully the math...I can see how it works...and that it in fact does work.
Good luck with your goals....let me know how it works for you.
Thank you Stephen, I would have been lost anyway if you came with a maths formula ... you could have answered in chinese too ;-) Your approach seems logic to me, thank you. I will try to figure that out. A happy new year!
so your center line to the cutting surface is off by 1/2".
If you were to raise the cutting surface 1/2", you could make the cutting masters to scale?
My idea is to use the same concept but keep the pucks scaled at 2:1 so it can make better use of finer contours.
Great invention.
Works well.
Easy to make and doesn't cost a ton.
@@jimmpanik3402 my thoughts exactly, this way the pucks are bigger and you can finetune them
Awesome jig! Does it allow for use in making an acoustic guitar neck?
Hey Don. The contour jig was designed for electric necks. However...I have successfully used this jig for multiple acoustic necks too. By luck I made it just wide enough...and tall enough...to fit the heel of your standard acoustic guitars. The only adjustment I had to make was to use a clamp on the top to restrict the router movement on the heel side by a couple inches. I also made new templates for my classical guitar necks to produce a slight “D” shape to the center of the back contour. Pretty simple...and has worked great for me!
How did you determine the dimension of the cams for the jig? Are they the same as a cross section of the neck at the first and twelfth fret or are they larger than finished scale? I'm thinking interchangeable cams for different neck profiles. Or do you not want to share your details?
Man...that was like a lifetime ago. I'm pretty sure I had responded to old comments with what I know...but in the end I am not smart enough to know exactly why it works. Sorry.
Where can I take the classes at local community college you mentioned?
Hoping I can just take this class, I am in Littleton, Colorado. I am an injured Master Carpenter so I understand everything already, if I can refine my skills, at a community college that would be very appealing. Thank you for videos
Red Rocks Community College in Lakewood, CO. I teach the Electric guitar construction classes there…but they offer many stringed instrument classes.
Very nice concept and demo.
I also like the idea of the acrylic cover.
I'm building a neck back contouring jig also, it's gonna be a bit different, but I'm struggling with how to make the templates on each ends the bearings run against.
It seems if I make templates that have the same radius/shape as what I want the neck contour to be at each ends the result are off, so I guess I have to add an offset to the templates but not sure how to calculate that offset. If no offset is needed then maybe there is something else I'm doing wrong.
Any helpful hint would be greatly appreciated.
P.S.: i know people will likely tell me to use a cnc machine, i know i have one and it's doing great, but my opinion is that a jig like that is still very useful and not obsolete when for instance you want to achieve a specific shape result quick without spending hours in front of screen designing a model for something you're probably only gonna build once or a few times.
I hear you on the whole CNC thing. I wish I could help you more...there is an offset to it. One of my previous replies here went into as much detail as my brain can handle. I worked on the offsets till I had my standard neck I liked, then my changes were a 1:1. The template should start off about .5 mm from the edges of the fretboard at a given bit height. Then you can figure out the size of the template for the neck side and heel side profiles. Look through my previous replies...I think I gave more numbers.
Thanks a lot for your kind reply.
I've found what you were referring to, omg, sorry my bad, should have checked the other comments in more detail. This will help, I guess I can take it from here. Much obliged.
Always glad to help people named Steve! ;-) Good Luck to you.
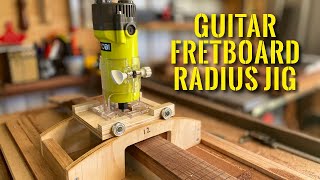
Could this be used for radiusing fretboards, especially doing a compound radius using appropriatelly radiused pucks on each side?
Don't believe so...she is a one trick pony. But who knows...anything is possible.
Do you have plans to sell as a kit that can be assembled at home?
Hi, Could you tell me please, ¿what kind of router bit it is? Thank you very much, awesome neck carving jig.
I started using a 1/2" spiral upcut bit...don't remember the brand...but switched to a 1/2" round nose bit as I found it produced a better finish that required less sanding. Both bits are 1/2" shank for very solid and stable performance...both are made for the CNC world.
@@maximumguitarworks thank you very much
Do you have project plans available for purchase so I can build one?
Whats the formula for making the discs? And is there a taper built in, how much taper do you like👍🏻
I like about 3mm taper...but I can adjust for the customer.
You might want to read through all their other posts and comments here. I tried my best to answer that question before...but the math is above my head. I did a lot of trial and error to get it right.
A bunch of these are showing up "private". I was looking for the review of the Byrnes saw mentioned in another video. I remember seeing this in the past. Only two videos in the playlist are public. Is this intentional? Thanks!
Liam...my video from last week explains why I made my videos private. I will re-release my Byrnes tools videos. Thanks for your comment.
Thank you very much for taking the time to reply. I purchased the saw in large part inspired by your very informative review and wanted to share it with a friend.
Did you contour the fretboard before or after you carved the neck back?
Don’t remember what I did on that video. I have done it both ways...but prefer to radius the fretboard and install the frets first. Mainly because it is a little easier to do the fret pressing while the neck is still flat. My contouring jig has foam that will compress around the frets and keep the neck from rolling.
Hey Steve cool… ‘jig’? That seems too small a word really. More of a system!
I guess that can work on a sort of spherical neck shape - will it handle D’s, Vee profiles etc - or would one have to calculate and fabricate the appropriate shape cams for each end?
Do you build and sell these guitar jigs?
Tom Sisson
You should make kits and sell them!
one question from a noob and a guitar builder wannabe :)
why do you move the router along the neck instead of set it on one end and do the neck routing by spinning the neck with that wheel and then move the router a bit forward and use the wheel again? like, the reverse of what you are doing, I think that way it would turn out a bit smoother without that much sanding to do
I tried this, it was way slower and no significant difference in smoothness.
We made ome in the 80s that did two at a time..a lot simpler than this.👍 it looks good and it works..that all that matters
Won’t you get cleaner cuts with downcut bits, instead of upcut ones?
I’ve done other videos on this jig in the past 6 years...I’m using a different bit now. I use a 1/2” round nose. In theory a down CUT would be A better profile bit for the side of wood (or compression bit)...unless there is no where for chips to go...like a channel. However, a down cut applies pressure down. In the case of this jig...there would be constantly pushing to extend the springs that are trying to hold the platform up. An up cut would tend to pull the wood up...which would be against the rigid template pucks. There is no easy answer...or a rule that is without exception. Each case must be evaluated in its on merit. With this jig...there will always be a need to sand...same for pretty much any CNC operation.
@@maximumguitarworks I see what you mean, and it makes total sense. Thanks so much for your detailed response. Great jig and great video, by the way!
You don't appear to use any hearing protection!
What would neck blank thickness be? 3/4" or 15/16"
Final thickness is normally 3/4"...with a 1/4" fretboard. Blanks normally start at 7/8" to 1" to leave room to flatten and sand.
where did you get the thick plastic at and how much did it cost
1/2" acrylic. I got it at my local plastic supply company. I cut it on a table saw and welded with acrylic solvent that they also sell. 6 years later...I have no idea what it cost me. But it was worth it.
@@maximumguitarworks Think you
Do a 5 string banjo neck.?
I spy ShopSmith tools. cool!
You would get batter dust collection still, if you had air intake.
It does…the slot in the top. There is only chips…no dust. Cleanest neck shaping jig I have seen. Over five years ago…the jig is still working great. One of my favorite jigs…and I have made many jigs!
@@maximumguitarworks way to steal my thunder Lol.
I'm getting ready to build one of these, does it work on set necks? I imagine you'll need to measure for a different fret?
Work smart not hard!
The issue with this gig is the neck is wider on the bolt side, and narrow on the neckplate.......means you will have a gap each time you approach the upper part (I mean, there will be a flat part when neck and fretboard meet).....you fix this with files? (or I pressume the size of the round guides for the acrylics have a difference in size?)
Yes the templates on either end are different. There are no flat spots....except for the fretboard edges...which is what you want. I wish this jig could do the transition areas on either end...but that appears to be its limitation. I suppose that is where a CNC would be more advantageous.
You still didn't adequately explain that the two end cams are different sizes to represent the tapering of the neck.
My Strats all havevneck profiles that match my Music Man Silhouette. I really disllike "chunky" necks.
I have made many template pucks...for pretty much any personal taste of neck shape...even asymmetrical necks.
Show us how to make the JIG … and to use it to set various radiuses
Man...that would be hard to do...not impossible...but hard. I did not make plans when I built it...I just took a couple different Idea's and went for it. I have some improvements in mind if I ever build another...and if I do build an improved model...I suppose that I can try to film it. But that might not be any time soon. The jig is still working great a few years later.
@@maximumguitarworks your building guitar necks !!! how hard could it be for a talented guy like you .. do some basics on the jig …
@Maximum Guitar Works - if you would do it with some sponsorship let me know.
I find these methods clumsy - why not just use a CNC if you re going to mechanise it theres no difference except a CNC would be far more accurate, I built my own junkyard cnc for very little money
Ahhh...you mean something like this?
www.dropbox.com/sh/q7vrze5t98py1y8/AAD_qNgSYBu8WduYiHOUSLVTa?dl=0
You are obviously advanced and technically minded. Router jigs are a great stepping stone for those still using a hand plane...and not the budget or experience to build their own CNC. It is always good to start learning with the most elementary methods...then work up to more advanced procedures...and automation if someone wants. But I totally get it, CNC's can be great tools that are becoming more affordable every year. Thanks for your message.
LOL
You make it sound like you can just buy a CNC and throw a chunk of wood into it and magically get a neck out of it. Aside from the "simple" cost of the machine (and I'd love to see the amount of backlash and runount in a "junk yard" CNC) there's a mountain of work yet to be done in generating a usable neck CAD model and then turning it into tool paths.
Nothing wrong with a simple jig.
@@donvanco3078 SO True!!
A CNC is useless to someone who has no desire to learn to use it...learning CAD, creating models, tool paths...etc etc is a long and complicated process to learn. If you already know routers and woodworking you can throw something like this together in a day, and you’re up and running. No additional months of learning required
you're right, I'll just come up with like $5k, add a computer, buy software and pop out neck in no time.. that way I don't have to spend $100 on this to build it in 2 days and finish necks 5x quicker and more precise
Jesus is the only way to meet God, the true truth, and the true life. If you believe in Jesus,
You get eternal life, you get out of judgment, you get life. Trust and welcome Jesus, who came to the light of life to save you.
He is God the Creator.