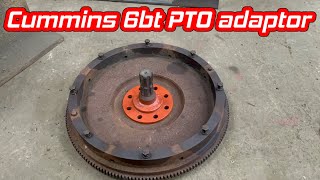
Replacing broken shaft in conveyor roller.

Vložit
- čas přidán 10. 06. 2023
- In this video I replace the shaft in a conveyor roller. The original shaft had snapped where it had been welded in, the weld had caused it to be brittle. A new bigger diameter 35mm shaft was used to help eliminate the weak point.
The first job was to cut out the old shaft with the oxy torch then remove the old end plates. I cut away as much as I could without damaging the outer roller but it was difficult to find the separation line without burning the roller, the second end was removed with the arc air gouger giving a faster and better result.
Once the old welds had been ground down, 2 new end plates were cut out with the cnc plasma then machined to size using the lathe.
The new 35mm shaft was then cut to length in the chop saw then both ends were turned down to 25mm in the lathe. A new keyway was also cut into the shaft using the milling machine.
Once all the machining had been done, the roller, end plates and shaft were assembled and tacked into place. The rolled was checked with the dial gauge to make sure it was within tolerance. The ends and shaft were then preheated before welding. And that’s the good complete.
Thanks for watching
Hope you enjoyed the video!
Follow on instagram: / snowball_engineering
Follow on facebook: / snowballengineering - Věda a technologie


Why didn't you fabricate a complete replacement
Because I didn’t have any tube. The time I’d spend ringing around suppliers finding the right size and someone who’d sell me 950mm instead of a full length. My time was better spent reusing the old.
@@snowballengineeringI agree there mate, I would have used the old pipe too. Everyone's so quick to throw stuff away these days when a little persistency and skill can save stuff from the scrap heap.
This job is 100% adequate, absolutely no need for a complete new roller so why would you need a whole new replacement 🙄
@@derekblake9385because less job is to do a new piece than disassemble old one, but in case if you have no material it is reasonable decision
Could you have cut out the ends with a lathe?
Liked and subscribed my friend 👍 Great video….I’m not a machinist or fabricator, but I am an autobody man of 33yrs. From what I see in your videos, you do a really good job at everything you do. You have lots of experience. Thank you for all the extra work to film, edit and upload these videos. I seem to learn something new with each one. Thanks again my friend, from David here in the States👍🙂
Thanks David!
I am 57 and still learning the "best way" to tackel jobs!I think your approach was spot on, use the tools already out and set up, then switch if it's not going well. Great video, love the shirts.
Good repair, spot on welding on larger diameter, though if I may comment, larger root radi on shaft, and polishing to reduce likely initiation of cracks.
Great video and photography, thanks for sharing.
Best regards from the Black Country.
John
I love how your danger-wand has the primary flame, but then it also has fun little secondary flames too! 😅
Another great video. I love your techniques using just basic equipment. But at the end of the day you got the job done.
Nicely done as always, Oliver buddy, good honest repair, I used to work in quarry maintenance and we did tons of these, Oddly enough I actually worked in a conveyor factory at one time too 😀
Top work again mate, I’m a fitter in a similar industry down south. When our machine shop makes rollers they always put a small hole somewhere to relieve any pressure during welding. It may save you a swollen piece of tube 👍👍
I like the logos. Look pretty good. Your filming and editing are spot-on. Thanks
Do it once and do it right. It’s what makes you a professional. Thank for the video.
Good video, thank You.
One minor thing that might be worth mentioning. When a shaft likes to snap off like that it is because it first developes a crack and then snaps off. Cracks like to start from sharp corners. From what I saw, You just created a sharp corner at exactly the place where the shaft likes to snap. Since You were already at the lathe it would not have been too difficult to create a radius instead of the sharp shoulder there is now,
Bad design in the beginning. But easy said, when I have done farq all, meself. And we don't know what or how bearings etcetera arre fitted.
That's a good tip for future reference Finno. Thank you for the heads up.
It's always a joy to watch your work.
"Bit of a farmer made roller"🤣👍Been there... Great work again thanks for posting.
Hoodie was oki, but I'd lose the other "logos" and only keep your own, looks better that way, and Greetings from Sweden :D
Nice job! At first, I thought that was we were seeing the flail mower roller again! 😂 When a machine has a weak spot it certainly makes sense to improve the design when it fails and has to be repaired. I like the logo on the shirts. The light grey isn't bad. Nice!
Thanks Bruce!
Only new to channel . This man has a great pair of hands your work is fantastic
Another nice simple job well done Olly. Good videoing and commentary. Thanks for sharing mate.
I like your "over engineer" mentality. The short sleeve Polo looks good and I agree the hoodie needs more work. Cheers!
Excellent work 👍👍👍 . Thank you for sharing. Take care of yourself 🇨🇦
Thanks for the video. Watching this here in Australia on The Kings Birthday Holiday😊
Gday, I think it was worth the extra effort to make the shaft stronger, it does get hard working out what tool best to use on a job, the tee shirt design looks good and the hoodie definitely needs the YT/Instagram symbol to be smaller, great job mate, cheers
Gday Matty, great channel and good honest work here my mate, nice seeing you out and about on youtube 👍
Good video mate, a well thought out repair. That’s called a tail drum, and a head drum would have rubber lagging on it. A few things I’ll suggest if you’re ever doing a job like this again, drill and tap the ends of the shaft because you can screw in a lifting eye to help pull the drum through the conveyor belt when fitting. And always machine the shaft down to the desired size for a sweat fit for bearings, if the bearings just slide on they’ll not last as long (depending on the environment of course) I do maintenance on a quarry and work around conveyors all the time
They’re some good suggestions. Thanks! This is used for something to do with potatoes (not quite sure what) so it shouldn’t have as hard a life as in a quarry.
Another suggestion. If you have the space and can adjust the ends to suit, on next job put a smooth radius on the transition where the 32mm is machined down to 25mm. As it is the sharp transition is an opportunity for shaft to crack again at this stress riser. As you have mentioned in answer to Peter's comment, this is used for something to do with potatoes. May not be as hard an environment as quarry, but as you are an engineer (I am not) you would be aware that cracking only occurs with flexing from load or where part is subject to vibrations which are long term and close to the natural resonant frequency of the item. Very difficult and expensive (meaning waste of time) to measure for those frequencies but radius will at least mitigate any crack starting. Retired mechanic/machinist in Land Down Under.
Thank you very much for uploading this video, job really well done. Watching from Perth Western Australia 😁👍🇦🇺
Absolutely brilliant video
New viewer from Otley, West Yorkshire, loving your work!
We have the same rollers at work , but now we use taperlock system for our axles with beter result then weldet ones .
Good work as always! The hoodie is pretty slick!
Nice work... Thanks for sharing the video 👍
Nice repair, it will be back for repairs when you're 80.
Great quality work sir
Great repair that will last a lot longer than the original job did 👍
Great video, and I'm not questioning whether you should have built one from scratch. You're the professional, not me!
Good job going to thicker shaft, trick we found some years ago was to weld the end plates on the shaft on the inside only then weld into the rollers. No welds on the outside more applicable when welding stub shafts in the ends of tube rollers.
The best way to do it ,the end plate supports the shaft weldment and stops the flexing stress on the weld itself Thicker the end plate the better as it acts as a hub giving support to the shaft
Moro no Brasil acompanho seu canal há muito tempo.
Another excellent watch and learn. Thank you.
Another interesting and informative video. Good work.
Good job my friend. Thank's
Top Class job as always.
Good job, no need to complicate things. The original cracked shaft looked like a shock loading fault, I've seen a few of those years ago with the NCB equipment. Nice clean repair, shirts look good. Be safe keep well 👍
Great job! Thanks for sharing! 👌👍
Nice job 👍.
Another great video, keep em coming !!
Masterful... good job!
Very similar roller to what is found in brunswick bowling machines. I used to have to repair similar jobs where the bearings ceased and ate shaft down to a few millimetres. I ended up making through shafts
I’ve made these with a continuous shaft as well but with taper lock bushings at each end. Makes it serviceable. One I even repurposed sprockets that had the taper bushings already (turned down on lathe to fit inside tube, cut teeth off obviously…).
Nice work with the modification. You shouldn't see that one back again.
Good strong fix that will last for ever. Nice merch
Good repair
Awesome video, thank you
This dude works on metal like it’s wood wow😮
Great video man and I like the new shirt and hoody.
Very interesting task young man. I did an auger rebuild recently (Its on Instagram and YT). Much ponderation as you go with jobs like that.
Darker grey or black and smaller logo in my opinion.
Precision fit!
Warching the 21st century Vulcan in his workshop 🙂
Love it!
Well done, son 🙂🙂🙂
I think the Shirt and Jumper look great.
Like the hoody but darker grey 👍🏻
Nice work Oliver . Full time job just working on farm equipment mate .
BRAVO !
Thanks
Good Job!!!!😝😝
Another fiddly job done well😊love the lightsaber 😝oh and your right about the merch! Maybe a bit more colour in the logo or some shading to make it stand out more.
Nice I like it👍
Nice dual-flame gas axe you've got there ;)
Another great video mate cracking work can you make sure you get some big sizes in the clothing and I will have some
Great video i see you cut the solid bar in the chop saw with one of
them carbide blades i cutt a lot of stuff with my chop saw and find that solid stuff destroys my edge i cut all that stuff now with the grinder i even turn heavy wall box up in the vice and it cuts 10 times faster them blades are €140 were i live and i have destroyed a blade the same day i got it but i can get months now hope this helps
Yes, they’re not keen on solid bar
Nice job making it stronger. Over engineered is agood thing. Like the snowball hoodie and tee shirt. I would like to buy a hoodie off you. if you have one for sale.😁 thanks Ruth.
Thanks Ruth! I don’t have any for sale yet. I want to be 100% happy with the design before I think about selling them.
👍👍
Enjoy your videos. Is that an Elliot mill you have there? JJ
Great vid, would a mag drill not be quicker to drill out the holes before the plasma
Add taper lock bushings to the end plates.
Then they can repair in house.
A lot of work just to save that piece of tubing. Making all new from scratch may well have been faster, which means cheaper. If the roller is crowned, then saving it would be the better choice.
Not really. If I had the material for a new tube in stock then yes. But by the time I’d spent finding a supplier to supply me with the right size tube that didn’t want to sell me a full 7.5meter length that I’d have no other use for. The less than an hour spent saving the old tube was definitely worth it.
👍😎👍
If u have a 3 point steady for the lathe couldn't u have set that up b4 cutting the bar out then maybe run it up in lathe to clean up etc just wondering...keep up the good work awesome videos..
I don’t unfortunately and my lathes too short. A bigger, longer lathe is on list of future purchases. Thanks!
Would have the stub shafts have been stronger if you had turned the small are down and left a radius in the corner where the bar went back to full diameter. A shaft will most ofter snap if you have a square shoulder where a small diameter goes to a larger on. Also keep the weld only on the larger diameter of the stub shaft.
Ironically the cheapest part ended up being the only remaining part left. You could have maybe just replaced the shaft by air arc gouging out the shaft welds but at least your repair is better than the original 👍🏻
Merch looks good - stickers ? Like these for the tool boxes !
I've repaired several of them, but that it by bore out a broken part by 10-20mm. Then removed rest. Use existing holes and fit new shaft. Then just centralise and weld. At my work I don't have a lot of time to repair parts , production is waiting so I'm utilising as most as possible old parts and use minimal effort and parts to repair. Good movie... to much work. That shaft will snap again if setup incorrectly on c/v.
If I had a big enough lathe I could of removed old shaft and replaced with bigger. However the old ends weren’t welded in particularly well so I think welding in new ends was my best option. Thanks for your opinion. 👍🏻
Don't know if the pin goes all the way through, at the beginning of the video... but the welds aren't that great on the whole of the part. Proper preheat/blanket cooling should solve some of the issues with the thing I would imagine. But, turd welds, typically means, they didn't do proper welding protocols to ensure the parts weren't compromised when reassembling the previous repair.
Hi, great job what grade of material was the round bar you used
En8
A brand new roller would be cheaper than paying you to repair one. I used to replace these all the time as a Millwright
You can’t buy these rollers. The originals had the drive motor inside the roller which are mega expensive. The farmer made the one I’m fixing.
@Snowball Engineering that makes sense if a new part has to come with a built in motor then.
I think a new piece of pipe would have been the go! after labour and consumables?
Do you have a steady rest for your lathe?
Shaft diameter was not the problem. The weld was the problem. It must be the entire circumference instead of two partial welds. I don't know what the application is but the lack of a radius on any shoulder cut into the shaft tends to kick the problem on down the road. I'm sure it will last a very long time. Radius on all cuts is a good practice to maintain.
I wish I had a Blunt that long, but no, alas it's all good.
What make and model is the respirator hood that you use? Love the video's!
Bump
And build 2 roller stand that you can you to weld this stuf much much easier and also cut it
Nicely done 👍 what's the engine in the background? Om606 ?
Yes, om606 for a project, not sure what project yet though.
@@snowballengineering looking forward to see that one 👍
great job nice job when we repair a roller we weld in the shaft and then turn it using a steady to take out any run out from welding
😊😊😊
The polo with the logo maybe half or two thirds the size would look sharp. That said I'd rather be a channel member for a few quid a month; I don't need another polo etc and shipping ends up being prohibitive.
Would it not have been best to use a "radius" to transition from the smaller portion of the shaft to the larger?
Yes, but I didn’t have an appropriate tool. And I thought it’s survived this long with just a welded in shaft so it should last the rest of the machine’s lifetime as is.
would it not be more faster to make a new one from scratch ?
No. Or I’d of done that 😄
I agree Ade. If the roller tube material is available, the whole oxy/arc gouging disassembly process would’ve been eliminated. This was the only salvaged item.
@ade johnston, maybe more better two
also depends on customer budget. The materials have become crazy expensive.
bent shaft bent roller non coded welds expensive gas a new one may be best but that's in hindsight
The social media logos are way too big, otherwise pretty cool.
Would it fit on your lathe to cut out the two endplates?
No, it’s not long enough
One method that may have been easier would be using your lathe with a steady, or is your lathe too small?
Why were the ends that thick? Seemed to be over kill on the thickness.
I have a mig welder that is 250amp would she be able to weld brackets on a bale grab a jcb 406 fitting bracket
Yes, should be able to.
Not sure if the bigger shaft is going to be stronger without putting a radius on the transition. Although the weld might have caused the failure in the first shaft