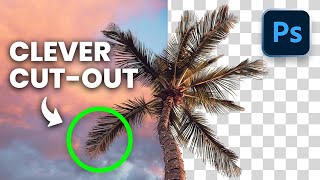
Mask out Blue Sky IN SECONDS with Photoshop
Vložit
- čas přidán 5. 09. 2024
- In this #Photoshop #Tutorial I'll show you how to quickly mask out complex objects using Channels!
You can find the photo I used in this video here to follow along:
unsplash.com/p...
▬▬▬▬▬▬▬▬▬▬▬▬▬▬▬▬▬
Thank you for watching my video!
► Prints: www.the-phlog.com
► Patreon: / phlog
► Instagram: / thephlog
► Facebook: / phlog
▬▬▬▬▬▬▬▬▬▬▬▬▬▬▬▬▬
If you ever wanted to manually remove a blue sky in the background with complex objects in the foreground you probably have struggled creating a precise selection. Photoshop offers many ways to work with complex objects and selections. In this Photoshop Tutorial, I'm using the channels to create a perfect sky selection and the great thing is, this is super easy and fast!


This is super helpful thank you 😍
Thank you for this turorial!!! Went through at least 7 other videos that more complicated not as efficient. .
This is a great tutorial; couldn't have been handled any better. Blessings!!!
Fantastic! This worked wonders for me. Thankyou
Wow !!! Really usefull !!! Thanks a lot !
Thank you!
Works great. Thanks!
Very useful bro, Overlay brush is the key!
Thank you! Overlay brush is sooo helpful here
Excellent
Thanks for the video mate. Very good. Although we work diligently in this type of difficult work, we encounter 2 main problems.
1- Tissue losses in the areas of the cut edges
2- Again, chromatic aberration in the areas on the edges where the cut is made.
These are very important issues. We would be pleased if you show us the solutions to this problem with a video.
Thank you very much for the comment!
Loosing parts is really annoying, you could try refining the mask in the masking settings which should help quite a bit already. For the chromatic aberration you could try dropping the saturation of the purple tones for example with a hue adjustment layer.
I wrote it on my to do list, so there will be a video in the future
@@ThePhlogPhotography Thank you brother
Awesome, thanks.
Thank you!
This is really handy, great stuff. Cheers 👍
Thank you Michael!
Thanks for sharing... could show us you do blending for night photography. Especially when you take different exposure for the foreground and the sky.
Thanks
Thanks for the suggestion! I do plan on doing something like this in the future when I get a fitting scene!
awesome!
thanks a lot man. u save my @ss
Thank You!
I got everything up to when clicking on the thumbnail and ctrl (or cmd on mac) and only the whole frame would select, not the black.
🎉🎉
What exactly did brushing with the black brush set to overlay accomplish when you brushed on the tree? Did that simply act as a way to make more contrast between the white and black? By the way your videos are among the best on You Tube.
Yes, the method of setting the brush mode to overlay is useful to refine the masks, as it makes the dark greys more black and light greys more white (with a white brush) like you said, simply adding more contrast to the mask.
Thank you very much! @deBurrows pointed it out correctly. Using an overlay brush you can nicely refine the mask!
How to remove the blue fringe inside the tree
min 1:36 hitting control what?
😘😘😘😘😘😘😘😘😘😘😘
Why not just use background remove?
Thats a possibility as well, there are many way to achieve the same thing in Photoshop
@@ThePhlogPhotography isn't my way easier?
@@Lapusso650 I dont know, could be, I personally never used it, but it also doesnt bother me to do things in more time consuming or complex ways as long as I get the results I aimed for :)
"Control eh"? 1:34
Ctrl + L, had to Google 🤣