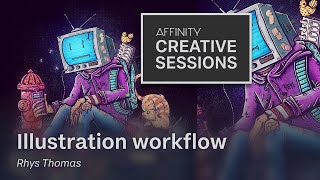
Create a lettermark and badge design in Affinity Designer with Luc Sauve

Vložit
- čas přidán 28. 04. 2023
- Design a lettermark and badge for a fictional Hockey team - Affinity Wild Hockey Club! Graphic designer Luc Sauve walks you through the process in Affinity Designer, showing you how he uses 3D and warped text among other tools to create a unique design.
Download the working file and other resources for this session here: affin.co/LSFC
Download the free Google font pack Oswald here: fonts.google.com/specimen/Oswald
Luc will be available on CZcams’s Live Chat for this session’s premiere on Saturday, 29 April at 4pm BST to answer any questions.
An experienced graphic designer based in Essex, Ontario, Canada, Luc works at a full-service design and marketing agency and also freelances, where he specializes in retro badge designs and typographic logos.
To learn more about Luc and his services, or to see more of his work, check out the following links:
Website: www.lucsauvedesign.com/
CZcams: / @luc_designs
Behance www.lucsauvedesign.com/
Instagram: / luc_designs
Affinity Creative Sessions
Led by top creatives who use Affinity, Affinity Creative Sessions give you the chance to follow along as incredible artists, illustrators, designers and photographers work on a project using the apps.
We announce details of upcoming sessions on our social channels, so make sure you're following us on Instagram ( / affinitybyserif , Twitter ( / affinitybyserif ) and Facebook ( / affinitybyserif ) to stay updated about future premieres.
You can find out more about the Affinity suite, including getting access to free trials, over on affinity.serif.com/. - Jak na to + styl


Thank you Affinity for having me, I hope everyone found some value in this video! If you have any questions feel free to ask me!
Very helpful... creating circular logos
I learned so much, Luc! Thank you so much for making this tutorial so easy to understand. I look forward to trying this myself.
@@kvnale thank you for the feedback! I tried my best to to make these designs in the fewest steps possible, I wanted to make sure that anyone would be able to recreate these
It was our pleasure, thanks for sharing your process with us! 🙏
I'm only four minutes in and have already so much. Thank you!
Top video. It's like watching the top student in the class doing the assignment. Everything is perfect and neat.
Thanks @Luc Sauve Design! This was awesome. @Affinity, please be sure to invite him back again!!! So thankful for the additions of the warp and shape builder tools, and it was fun to see them in in action.
Thank you! I'm happy to hear you enjoyed the video and I would love to make more in the future!
This is one of the best tutorials I've seen yet. I'm not a novice, but certainly not a professional so this was perfectly paced with a lot of little extras to learn from.
Absolutely a great video with so much information. Clearly presented and explained. Pace of video was great to follow along. Love your teaching style.
Fantastic. I've been using Affinity for a few years now but found soooooo many useful tips in this. Really well paced and easy to follow. Thank you. Yes, PLEASE do more.
thank you! I'm glad you got something out of this!I hope to do another one in the future
Great video. Calm, clear and methodical. I sure hope there are more from you in this video catalogue. Thanks.
This is my first attempt at Designer and while I deviated by a long way from the tutorial, I will go back and do this whole lesson another day. I would like to add my creation to my photos, so now I need to learn to do this.
Most comprehensive tutorial, ever!!!!!!
You make my day, thank you for sharing !!!
Thanks for your work
Today I learned how to properly take advantage of Kerning and Tracking
That was an amazing tutorial! Thank you so much for your knowledge!
Thank you. Excellent patience, confidence, pace and continuity. Very helpful.
Sauve, your tutorial has made my mind to migrate from Illustrator to A. Designer. That was so cool. Thanx
I like your style of teaching Luc. It fits me to a tee. Keep up the good work. Now if I can just remember all the shortcuts...
Thank you! I really tried to break down each design into simple steps. I hope you're able to take this and make something awesome!
Really enjoyed this !
That was Awesome..!! Ive been using ALL affinity products for a while now but never really got my head onto Artboards.. It always seemed to confuse me. Seeing a workflow like that made it so much more understandable and easy to follow... Brilliant info, so thanks for your Knowledge and taking time to do this.
Thank you! I'm glad you got something from this. When I first discovered Artboards I didn't really understand how to use them, but they quickly became an important part of my process.
huge fan of your work
Thank you so much, Luc! I'm switching from Illustrator and this video was very helpful!
Very enjoyable and informative, thank you!
I needed it, it comes at the right time. Thanks to Luc Sauve and Affinity. I hope there will be others. Sincerely
I'm glad you liked it and I hope to be back with more videos! Is there anything in particular you're looking to learn?
I use more Photo & Publisher, so I'm a bit lost in the complex manipulations intertwining, curves, shapes and texts.
So I take it all with pleasure. CZcams also allows me translations, which makes my life easier in technical terms. Your personal You Tube site is a little empty but I would gladly follow you. Good day
Thanks a lot. I was very glad ti follow and practice with this session. God bless u
great to understand the professional workflow
Awesome design and tutorial!
thank you!
Very informative, can’t wait to use my new found knowledge from your video!
Thank you!
Thank you for sharing your insight - really useful
Great instruction video... very clear and succinct, thanks
I'm glad you enjoyed it!
Wow that's amazing
I learnt, organization, some techniques and exporting files... Very helpful
Thanks. That was very informative.
Thank you for watching!
That was very inspirational. Thank you a Lot!
I'm happy to hear you enjoyed it!
Thank you. Very well done tutorial.
Thank you!
I usually adjust the baseline to my type looks better. I wish we had fill shape for text and a blend tool so we can have an easier work flow.
Waaaoooo! THANK YOU LUC FOR DOING THIS AND THANK YOU AFFINITY! 👏🏻❤
Thank you for watching! I hope you found some value in the video!
@@Luc_Designs A Lot Buddy!!! Do more in your channel please. 🤓👏🏻
@@disickwashere I hope to do more with affinity, but shorter videos on my own channel is something I've been thinking about! I also plan on doing more educational content on my Instagram page
Nice so familiar with Illustrator is nice to know how do do this in Affinity Designer. So nice to of found this channel to help with the transition.
Thanks to Affinity and Luc for this presentation. I thoroughly enjoyed it.
Just a note, I haven't found, as yet, a complete brand identity process using all 3 apps. Is that in the works? Or can you provide a CZcams link showing a branding process? Thanks
Good teaching!
Hi Luc,
I'm new to using the "Affinity Suite" we recently purchased.
Your video, just now, helped me with designing a 45th Anniversary embroidered patch for one of our customers. We will be using this patch design to be embroidered on the left shoulder of each of the jackets they're purchasing from us.
"Thank you"! This video answered several questions I've been struggling with, and your video answered each one!
Thanks Again,
Jim Dasher
Spectrum Graphics
Seattle metro
Glad you found this helpful!
Excellent.
I just bought the software so I’m trying to learn as much as I can lol. Paused this halfway to ask: why is it important to convert to curves?
Thank you sooo much❤❤ I'm really struggling to find good material for logo design in affinity designer.... To have the working files available and be able to follow.. This is my wish coming true! Great tutorial!!
Glad you enjoyed this!
Tnx Luc... you work very structured. Creating new artboards for every next step makes it easy to undo a mistake indeed. Great tip (for a newbe like me...)
Thank you! I always try to work in a non-destructive way. It's really nice to be able to go back and make changes quickly. I'm glad you liked the video!
@@Luc_Designs The ultimate non destructive option for this would have been to use Boolean Operations :( ( You'll see what i mean when you click on the "Add" while pressing Alt )
@@strawberriesandcum Yes! this is a great feature
Great Job done, why did you not add final items on same artboards ?
Very easy to follow! Thanks!
thank you! I really appreciate the feedback. This was my first time shooting a long form tutorial, I really tried to make the video easy to follow
@@Luc_Designs I hope you do more ;)
@@MarcelZeboHommes I hope so too!
Simple and plain.
Duplicate with option key too, or Command J.
Thanks for the new updates! But when are you going to implement AI quick selection tools/background remover/etc... and an autotracer?
I was hoping for 2.1.
OK, so I have attempted multiple times to follow this instruction step by step, and for some reason, at certain points cannot achieve the same results. For instance, with the "subtract" tool, it doesn't leave the "cutout" of the shape, it just subtracts the design in totality, leaving the solid green background underneath. I have watched this multiple times trying to watch in case there was some action done not mentioned in the narration, but cannot see the difference. Not sure what exactly to do, but nevertheless, cannot achieve this result.....
Hi, are you using the Shape Builder tool as shown from 12:05 in the video? If you need help with specific tools, please check our our official tutorials here: www.youtube.com/@AffinityDesignerOfficial
I'm struggling with learning this with a background in engineering/CAD. How do you know things are parallel, symmetric, perpendicular etc. without constraint tools? For example the second dot created at 27:28. What is telling you that those two are the same distance away? I feel like this would drive me crazy.
If you select the dropdown menu next to Snapping (Magnet icon on the top menu) you can set up snapping candidates, you can also turn on the grid from View > Grid. This should be a good place to start!
Great Tutorial, but I did not understand what the 3x PNG in the export means. Does is export the file as a png file 3 times or is it a quality issue?
Hi @Meow Fox, it makes the exported image 3x the resolution that it is on the artboard - in this case, 1080 x 1080 to 3240 x 3240. It also multiplies the DPI of the image as well.
@@Affinitybyserif Thanks!
Please, RTL text support. Please.
Hi, is it possible to download 30 days trial for Affinity Designer? I can't seem to find the link anywhere. Many thanks
Hi, you can get the free trial of our Universal License which includes Affinity Designer if you go to affinity.serif.com/designer/ and scroll right to the bottom of the page. Hope this helps!
Hi, Many thanks for your reply. The free trial is for Pro version and I only need Affinity Designer. Is there no trial for Affinity Designer only? or should I download the Pro? Thanks
I am going to look for a tutorial on Affinity Publisher as well, only by you.
I wish the commands were given for Windows as well. Otherwise, great info.
Could have used boolean operations for this :(
This is what I'm looking for a long time. Thak you so much for tutorial.❤❤❤
I'm trying to draw the house plan but drawing with the right measurements is really time consuming compared to software like autocad. Then some fundamental snaps like the "perpendicular", "half", etc. are missing. and then even the snaps given by the virtual extensions of the lines are missing. At the moment I use the designer to make some logos and illustrations but it seems wasteful to me not to copy from software that has been used for 2D design for thirty years. They copied the Illustrator genre not knowing they could do much more
This is an awesome tutorial. However at 33:31 you say that we need to "expand the stroke" but you don't explain what that is or why. I went to other videos to figure it out, but no one bothered to explain. I feel that if someone is at the level that they still need a tutorial like this, then they are going to need the "what it is" and "why you need to do it ". Please don't give the usual "I didn't want to make the video too long" excuse. Leaving out important explanations makes for a frustrating moment that detracts from the purpose of the video. Would you please explain what it is and why you do it. Thanks
Very fair point! I don't have an excuse for that, I would have had no problem making the video a little longer to explain this point, I just didn't think of it, that's on me. I can explain my thinking now and keep these kinds of things in mind next time. Expanding your strokes isn't a must do, but it's something I recommend whenever you are completely done a design. This is mainly to reduce the amount of editable layers in the final file, similar to converting text to curves. This reduces the likelihood of the design getting altered when you share the vector file with a client or printer. Not that they would do anything intentionally, but if they opened the file there is a lot less that can go wrong if text is converted to curves and strokes are expanded. For example, if someone opened the file and scaled the design theres a good chance the strokes wouldn't scale and this would mess up the design even if it's subtle weight change. I hope that makes sense, i appreciate your feedback and I apologize for missing this detail.
@@Luc_Designs I wanted to ask why you would convert to curves before exporting, but this answered that question. Great video, thanks you.
@@johannlatsky7389 That's something I'll try to explain better next time!
Wow dude, you sure do take the long way around.
Please don't forget to add Windows shortcuts next time
My bad, that's a great point!