Trim Router / Palm Router Design Base Jig

Vložit
- čas přidán 26. 07. 2018
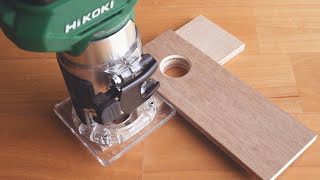
- Today I am making a new router base for my palm router to make some designs on things like cabinet doors, wood panels or other similar items.
In this video, we'll be using both a 1/4" and 1/8" Spiral Router Bits.
#################
Woodworking Jigs Playlist : • Woodworking Jigs
Mini Router Table for a Trim Router: • Make a Mini Router Tab...
Making a Trim Router Edge Guide Jig (Palm Router Edge Guide):
• Making a Trim Router E...
#################
**** Read the Full Article here on Make a Trim Router Design Base Jig - goo.gl/kkRsq3
**** Subscriben to my Woodworking Channel here - / knecht105
** Like me at Facebook: goo.gl/DLgvoa
** Visit the website: www.woodworkweb.com
** Follow on Instagram - / colinknecht
** Follow on Twitter: / woodworkweb - Jak na to + styl


Pretty slick. By adding and removing spacers of different widths in different sequences you could get an overlapping design that I think would dress it up quite a bit.
Thank you Fred and thank you Colin for this great tip 😉👍🏼👍🏼
This is the exact design etched into my kitchen cabinets. I've been trying to figure out the best way to copy it when replacing a couple of doors. This is it! Thanks!
Some of my more experienced woodworking friends were impressed with the finished product. Keep up the innovation. You make me look better than I should.
So simple even I could do it. Thanks.
You're Welcome!
Same here! I don't know why I was expecting it to be more complicated.
I bought a Bosch 1300 router. The "manual" is amazingly basic - I would have preferred a far better guide . Thank goodness for guys like you that teach guys like me what can be done.
Thank you so much for sharing this. It's splendid. I just bought a new compact Dewalt router. Making geometric patterned cuts with it would be an ideal way to put the router to work. So thanks again.
Instablaster.
Wow , I never knew it could be so simple to do and it works so well. Thanks for sharing it.
I've seen many videos of this. I want to make a jig like this for my router.
You are Genius ser! This is exactly what i looking for!!! Thank you!
Yes. The gentleman is a genius
Es gibt sie noch! Leute mit Ideen! 🌟🌟🌟🌟🌟
More than one tip Colin. Love the jig but equally the use of none slip material under the rule. I can't count the number of times mine has slid half way through drawing or scribing a line. At 62 I continue to learn. Thank you.
Thank you Collin 😊 I'm going to use this today on my cinema 🎥 theatre build/job
Thank you, i didn't knew i have OCD, not ending does lines helped me finding that about myself.
Thank you for the lesson, hopefully your kindness will be rewarded
انا نجار من المغرب 🇲🇦 👍
أعجبني الفيديو بالتوفيق إن شاء الله
أنا أعيش في بريطانيا وأجمع أكبر قدر ممكن من الخشب - أحب الأشياء! :o)
Thank you very much for that beautiful bit of work. It opens up a grand vista of possibility.
Muy bonita idea . gracias. Desde Bolivia .
Отличное исполнение приспособления!!! Простое, но какое классное решение!!!!!!!! Молодец!!!
Very very good, congratulations
From Curitiba / Brazil 🇧🇷
ਬਹੁਤ ਵਧੀਆ ਤਰੀਕਾ
ਆਸਾਨ ਹੈ ਅਤੇ ਐਕੂਰੇਟ
Great idea. So simple. I’d add a small chamfer on the bottom of the plastic plate. It’ll help clear the dust and ensure that the plastic edge runs clean inside the frame.
Thanks you 👍👍👍
Thank you for “burning an inch” when measuring. A surprising number of young machinists and carpenters I work with or mentor don’t know about this practice.
I'm a beginner woodworker and have been doing that a lot since you can't see anything accurately in that first inch (or couple centimeters in my case). Didn't know it even has a name!
@@patrikwihlke4170 uiuuuu
Brilliant idea thank you so much for sharing God bless you
Amazing idea👍👍👍👍
from Philippines 🇵🇭🇵🇭🇵🇭🇵🇭
awesome! I had been wondering how to do a cut like this on a cutting board project... this helps immensely!
Hope it helps! Thanks for watching!
That was brilliant. I'm definitely going to make one. Thanks
Un *Verdadero MAESTRO* en la Web...
*BUEN TRABAJO*
Un Cordial saludo desde la tierra del amor, paz y felicidad.
España.
شكرا على التوضيح فعلا نستفيد ونجد صالتنا من خلال ما تقدمون
Good work
That so looks like my parents 1968 kitchen cabinet doors ❤️🇨🇦
Muy bueno amigo. A pesar de que no hablo tu idioma puedo entenderte perfectamente todo, es muy didactico y te agradezco el tiempo y esfuerzo para grabar estas clase de videos, se aprende mucho.
Saludos desde Caracas, Venezuela.
The simple solutions are always the best. Thanks for sharing
Very very good! I'm going to make one of these here in Brazil. Thanks for lesson!
Just goes to show you that even an ingenious hacker can be shown a thing or two. Awesome trim router base. I have some doors coming up that I have to build and I think I'll use that method. Need to buy a trim router now, dang it! Any reason to buy tools is a good excuse! Thanks for showing us!
You're welcome! Thanks for watching.
cool jig
Thank You!
Cám ơn thật nhiều ông quá thông minh. Chia sẻ hữu ích giúp công việc này nhanh chóng hơn .
Muito obrigado pela dica aqui no Brasil ñ vi vídeos mostrando essa base muito legal obrigado mais uma vez tudo de bom pra você e para sua família
Greetings from Mexico muchas gracias señor.
Great idea used to use the same things myself but this will do away with all other corner jigs 👍☘️
Muy buen trabajó maestro.con todo detallado Gracias ..por su enseñanza.
Send an ATTABOY to Fred. Pretty cool.
I wondered how using a dimension other than 4" radius might effect the final carve out. I suspect a smaller dimension will move the carve out line closer to the edge of the finished panel. A larger dimension will create a carve out closer to the center. Hmmmm! Also, a four sided baseplate will create a square pattern parallel to the edges....5 sided?, 6? You could use up a lot of acrylic playing with this.
Don't forget Fred's ATTABOY.
Hii
You don't need to use accrylic for prototyping you just use 1/2 plywood untill you get your design right and then you can make the accrylic one
Perfeito! Excelente trabalho!!!
I never thought it was that simple thank you for sharing your Idea with us.
You're welcome. Thanks for watching!
That's a clever use of the non slip mat, keeping the ruler in place while you scribe
Thank You, Matthew!
Matthew Leigh - I guess that was a bonus tip - no extra charge.
And thanks to you for pointing out the purpose of that to a newbie like me. I was wondering about why he did that. Might have figured it out later. Or not.
Cheers!
If you find yourself needing a non-slip ruler often, pick up a cork backed ruler. They do a great job of not slipping while using them as a straight edge cutting guide and you can get an 18" one at WalMart for $3.
Excelente. Tienes un nuevo suscriptor y Like. Gracias y saludos desde Perú.
that worked pretty darn slick.
Thanks for sharing!!
You're welcome! Thanks for watching.
Adam Craig Outdoors b
Muy Buen Video.
*¡¡¡ BUEN TRABAJO !!!*
i fing love geometry and wood. the last shape i would imagine to get that pattern
Adorei vr muito fixe,aprende-se todos dias,valeu pelo vidio.
Thanks!!! Very helpful,i'm gonna try it
Thumb up from Russia
Thank You!
Muito bom , gostei muito da ideia parabéns.,😀😀
To find the triangle without a bevel, use a straightedge and draw a line down the middle of the circle. Use a compass and with the center point and bisecting line at the circumference (radius) as your distance swing the compass from the intersecting circumference point to the left and right on the circle. Those two points connect to the tip of the circle and bisecting line.
Muy ingenioso, saludos
That's a neat little jig Colin! Thanks for sharing it with us.😎👍JP
You're welcome! Thanks for watching.
😎
Cool, its basically a spirograph for a trim router.
Basically, yes! Thanks for watching.
Excelente !
Brilliant topic!!👏👏👏👏
It's a wonderful idea. Thank you for sharing.
You're welcome! Thanks for watching.
멋집니다 잘 보고 갑니다!!!
Amazing idea, but the first option litle faster to do for the same results. But i go make one to, thanks from Germany
thank you my friend simple job nice
Once again you amaze me. I love that idea. Will be using it, hopefully real soon. Thanks.
You're welcome! Thanks for watching.
very clever. I need to make some door fronts - now I have a plan!
I like the way you are teaching ! Regards from good old germany!
वाह अंकल जी क्या आईडिया सीखाया आप धन्यवाद
An adjustable version of this would be an interesting thing to design
Very simple but very effective.....im going to try this myself thank you ! Keep up the great vids
Thank You!
excellent easy mod, thanks colin!
Off to the shop to have a play with this idea!👍👍👍👍👍👍👍👍👍👍👍👍
Thanks, that is great!
Wow galing naman
СПАСИБО!!! Это гениально!!!
Muy ingenioso, si fallo un poco la medida,no importa, el muestra el ejemplo,uno ya lo puede hacer bien.Felicidades buen trabajo.
Obrigado pela dica, muito legal.
That was so cool. When you are done it looks a lot more difficult to make than it was. I'm thinking about adding that to my kitchen cupboard doors.
Awesome 👍
Thats very good gig thankyou
parabéns gostei muito amigo ficou top
Tanks friend, you are a genius
Cara você é muito inteligente
Very cool jig Colin. Love what you can do with them. Many thanks, very useful video! Graham 🇬🇧🇬🇧
Does the panel set in side the frame
Thank you very much , I lern some thing from you.
Such a simple jig , wish I would have thought of it sooner, . Thanks for the info!!!
You're welcome! Thanks for watching.
No ! Thanks for your insight and tips for making me a better woodworker
Neat little, easy to make jig. 👌
Thanks for sharing, mate 👍
Thank You, Bill!
Another handy jig Colin! thanks for sharing
Cheers, Bram
Beautiful good. Idea thank you
Muito bom, parabéns me ajudou muito em meu projeto ( Brasil) São Paulo
Great
That's a very clever design especially for a beginner like me.
Thank You, Lambert!
Simple but a brilliant and creative idea👍👍👍👍👍👍👍👍👍👍👍
Да вы гений 😀
What a great idea 👍
You have great videos, especially for beginners. Very thorough instructions. East to understand. Thank you.
You're welcome! Thanks for watching.
hello good afternoon teacher good job I liked it
Te quedó buenísimo !!!
Awesome Colin, thanks, my friend.
You're welcome! Thanks for watching.
Awesome! Thanks!
Love your vids. Very clear how-to-dos w/o ego. Thanks
You're welcome! Thanks for watching.
Great tool, thanks for the idea