Just kerf(small cut with saw) the backside about an inch deep(or more if you need) and PUSH, instead of PULL(i.e. the OPPOSITE of what you're doing)...easier to lean on a kerfed stud and screw than pulling and reaching and you often are seating the kerf back onto solid bearing and you can then toe a 3 in drywall screw through the kerf cut to prevent it from reverting back. Good luck
Don't forget to factor in that most "kiln dried framing lumber" is still about 20% moisture content, so when it dries out further in the house it will shrink and cause drywall pops. Another way to get a straight and flat wall is to mark all the crowns in your stud lumber and install them in all the same direction. This will prevent the wavy wall you would otherwise get.
You're solving one problem, but create another. You now have a hollow side and a cupped side. Depending on how bad this is you may need to pack and plane. Or use this method anyway.
Or you could have simply knocked the boards into place if it is an alignment issue and if it is a warping or size issue, a quick paper shim or hand-planer will smooth it out without essentially cutting it in half and then trying to replace the some of the strength with side braces. Also, using center braces will help prevent future warping (and may be required as fireblock depending on where you are at).
What he’s talking about works really well for leveling bowed or concave floor joists. It can also work during a remodel, to correct a bowed or concave wall due to wood drying out. However, it’s not practical to use this method during framing because it would simply take to long.
Yer Scott's channel is great. Here I've seen people cut and then screw. As you've removed material with the cut and then pull it together it takes it the opposite way
All we do here In Colorado is cut like he did then screw it in at an angle and that straightens it or hit it with hammer on the bottom. Or if it’s not to bad then we staple 1-4 cardboard shims to make it even. My job is also to sand the plywood floor to even it out.
Here in Australia we have another method which I believe take less time and effort, we just pack the side that need to stick out and we just shave down the other side if needed, less time and effort I guess.
This is a really a nice technology. But it doesn`t work in case if another side of the wall is already covered with drywall or cement board. Can you advise, please how many mm. of studs deviation is acceptable for further cement board sheeting and tiling by 600*600mm porcelain tiles, please? Thank you
In your case we would make the call on what looks good to the eye. Every wall is different. It's going to take you a bit of time but you can use plaster to correct somewhat.
Really hate to cut the stud in half like that. OCD framer here what I do site down every stud before I start. Any with a crown I put to side for my doubles. When they land doubles together put the crowns opposite each other work it down as you're nailing and they become perfectly straight
I hate cutting studs too. I like straight walls and not dealing with drywall pops. I agree with you on how you do the king studs. Thanks for your comments
remember put the crowns opposite each other start at one end nail them together flush all the way down they will be perfectly straight. Some old timer showed me this about 25 yrs ago. Guess I'm the old timer now. 😅 also use your crown studs in kitchen crown outside the kitchen. Makes shiming cabinets perfectly straight a breeze.
I did not understand all of that. Somehow those short pieces of wood nailed to the side make the stud (that he cut a slice most of the way through) to be straight?
This is insanity, though I understand what drove you to it. Checking only the waist-high horizontal line along the studs conveniently assumes that the midpoint of each of those studs is where the warp will be worst, which often isn't the case (I see DF with S-bends on a regular basis). It also ignores the equally-likely concern that, just as the framer didn't notice or care that some of his /studs/ were 3/16" out of plane, so could his top or bottom /plates/ have been warpy. If your walls look sufficiently flat after only the treatment you show here, it may be that the studs weren't out enough to matter to begin with (of course your gyp will push and pull to improve planarity to some extent anyway), or that you're not coming back after the painters have gone and applying strong sidelight -- not your subcontract - to reveal the dishes and humps that a critical inspector might find under demanding specs. By then, it would be the painter's headache...
DF is terrible for studs as it warps the most eventhiugh it has most strength. I am not a framer and dont have to deal with crowned studs. I just make sure I always choose no heart and straight studs from the get go. You'd be surprised how much less flex your structure can be and the garbage that you have to deal with down the road. I agree about the slicing... I'd really still thinking about a thin wedge instead of simple sistering, else you just have a useless stud taking up space but provides no structure.
You can still cut your stud on a load bearing wall, you need to add an equal sized stud on one side instead of the 1x3 ... this way you will have full bearing and a straight wall
nice tip ,But with all that work and material ,why not just use metal studs (actually they are not that perfect also ,but they sraiten when drywall applied). I live in country where we use only metall. Its much better then wood for sure ,but in some countries wood just cheaper. Metall is way better ,light ,thin ,straight ,less and cheaper tools to assemble etc. PS. wood will distort aniway in year or two ,thats why most builders dont bother to straighten it.
+zCATAHAz Thanks for your tip on metal studs. We use metal a lot here in Canada on Commercial jobs. I would say the majority of builders here in Canada build with wood partitions because of the price and the speed. To comment to your last point about wood distorting: When walls are straightened and then sheathed on both sides the studs are locked into place which drastically reduces further twisting and crowning. Metal studs are a great product, I believe one day they will become main stream in a lot more places around the world.
+Greenmark Builders Actually a read some calculations on internet and metal is about 10-15% more expensive (depends on area of cause) ,so if you will use it on some walls (like in bath ,for tile) its gonna be about same price. And I didnt figure out from your video - you should put all crowns on one side of your wall. You make nice videos ,sould really consider to try make some tv show ,I like your attitude. :)
Thats for sure ,but its very thin and could be insulated way better ,more insulation so less thermal leak. Its pretty same to wood ,and we are talking about inner walls here ,so metal is all around better ,but its just more expensive then wood in some countries...
In extreme climates where the interior is being heated or cooled substantially compared to the outside conditions, metal doesn't work for exterior-wall framing. End of story. It might be workable on interior walls, but using them on exterior walls is why commercial buildings are frequently a thermal disaster compared to residential. Metal studs can only be used on an exterior wall if they are completely isolated from the thermal system. Insulating them is, in the words of one scientist, "a thermodynamic obscenity" because they are going to render the insulation almost entirely ineffective.
I have a situation similar to your video except that my project isn't new construction, it's a load bearing exterior wall with a window. 4 ' up from the floor the studs start to crown towards the exterior and only on 3 studs, I've been trying to solve this problem and am ready to call in a pro, any last minute tips or ideas before making the call?
+Scott Hanson I'm sorry to hear about your news. If you have siding on your home you may be able to unclick the siding and remove plywood from outside. Whatever you do it is likely going to be a big job for you. When you are dealing with cutting support studs and jack posts I would be cautious because you don't want to do more damage to your home in the long run. Here in Ontario if you cut a supporting stud you need to add a full load bearing stud next to it. If you call in a contractor you might be able to feather out the worst area with a plaster compound depending on how much money you want to spend. I hope everything goes well for you.


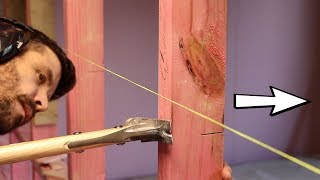


1:32 Looks like that stud just collapsed
Ever heard of shim and shave? It solves these issues with MUCH less stud impact. Hardly requires cuts, mainly just planes.
That's a way of going about it. We do this process for jack posts that can't be cut. This is very time consuming and is not easy to do.
I’m here from dad challenge podcast ! Can’t wait to see more content☺️
Thanks for checking us out Mariam. I’m no Josh but I’ll do my best to entertain you:)
Just kerf(small cut with saw) the backside about an inch deep(or more if you need) and PUSH, instead of PULL(i.e. the OPPOSITE of what you're doing)...easier to lean on a kerfed stud and screw than pulling and reaching and you often are seating the kerf back onto solid bearing and you can then toe a 3 in drywall screw through the kerf cut to prevent it from reverting back. Good luck
A wall has two sides...so basically he did what you are saying
@@thedcp No, I believe he's saying to cut the bowed side so that the stud collapses down on the kerf (pushing away from the bow).
Don't forget to factor in that most "kiln dried framing lumber" is still about 20% moisture content, so when it dries out further in the house it will shrink and cause drywall pops. Another way to get a straight and flat wall is to mark all the crowns in your stud lumber and install them in all the same direction. This will prevent the wavy wall you would otherwise get.
Installing the crown in the same direction does help a lot, I should have mentioned that we do this as well. Thanks for your comment
You're solving one problem, but create another. You now have a hollow side and a cupped side. Depending on how bad this is you may need to pack and plane. Or use this method anyway.
@@N1rOx planing is not acceptable on inside walls... you fix the problem on one side of the wall but it persists on the other side...
@@detrimundo not acceptable to whom? It's common practice in the industry lol
Should of filmed the staining process. That finish looks like it turned out great.
Or you could have simply knocked the boards into place if it is an alignment issue and if it is a warping or size issue, a quick paper shim or hand-planer will smooth it out without essentially cutting it in half and then trying to replace the some of the strength with side braces. Also, using center braces will help prevent future warping (and may be required as fireblock depending on where you are at).
What happens when you get to the other side of the wall? At least the bow has been corrected . Center braces yes indeed also.
What he’s talking about works really well for leveling bowed or concave floor joists. It can also work during a remodel, to correct a bowed or concave wall due to wood drying out. However, it’s not practical to use this method during framing because it would simply take to long.
Keep in mind when you sheet both sides of the wall the drywall sandwiches the studs and essentially helps alighn the wall.
Drywall does not align walls. Drywall will conform to the wall. I have a house I bought full of warped and bowed drywall to prove it.
In New Zealand we do the same thing but we cut horizontally cut going 40-60mm into the stud then placing a wedge into our cut to straighten the stud
I saw it on Scott brown carpentry video. Nz CZcamsr
Evil Nachoz yeah bro he’s the man
Yer Scott's channel is great. Here I've seen people cut and then screw. As you've removed material with the cut and then pull it together it takes it the opposite way
The chiropractor told me that spinal vertibrae were out of place, now I know the truth, this stud just needs a small cut a some bracing and I’m set.
lol
All we do here In Colorado is cut like he did then screw it in at an angle and that straightens it or hit it with hammer on the bottom. Or if it’s not to bad then we staple 1-4 cardboard shims to make it even. My job is also to sand the plywood floor to even it out.
Here in Australia we have another method which I believe take less time and effort, we just pack the side that need to stick out and we just shave down the other side if needed, less time and effort I guess.
you can fix it from one side only. But how to add timber to the opposite side??? :)
@@alexanderchuyko4889 they sell bundles of cheap 3mm packing strips.
Good tips! Thanks for the video.
Your better off center blocking the walls...keeps the studs from twisting and warping
This is a really a nice technology. But it doesn`t work in case if another side of the wall is already covered with drywall or cement board. Can you advise, please how many mm. of studs deviation is acceptable for further cement board sheeting and tiling by 600*600mm porcelain tiles, please? Thank you
In your case we would make the call on what looks good to the eye. Every wall is different. It's going to take you a bit of time but you can use plaster to correct somewhat.
@@GreenmarkBuilders Does it mean I can correct already cement sheet surface with plaster or use plaster as studs filler? Thank you
Really hate to cut the stud in half like that. OCD framer here what I do site down every stud before I start. Any with a crown I put to side for my doubles. When they land doubles together put the crowns opposite each other work it down as you're nailing and they become perfectly straight
I hate cutting studs too. I like straight walls and not dealing with drywall pops. I agree with you on how you do the king studs. Thanks for your comments
remember put the crowns opposite each other start at one end nail them together flush all the way down they will be perfectly straight. Some old timer showed me this about 25 yrs ago. Guess I'm the old timer now. 😅 also use your crown studs in kitchen crown outside the kitchen. Makes shiming cabinets perfectly straight a breeze.
I did not understand all of that. Somehow those short pieces of wood nailed to the side make the stud (that he cut a slice most of the way through) to be straight?
This is insanity, though I understand what drove you to it. Checking only the waist-high horizontal line along the studs conveniently assumes that the midpoint of each of those studs is where the warp will be worst, which often isn't the case (I see DF with S-bends on a regular basis). It also ignores the equally-likely concern that, just as the framer didn't notice or care that some of his /studs/ were 3/16" out of plane, so could his top or bottom /plates/ have been warpy. If your walls look sufficiently flat after only the treatment you show here, it may be that the studs weren't out enough to matter to begin with (of course your gyp will push and pull to improve planarity to some extent anyway), or that you're not coming back after the painters have gone and applying strong sidelight -- not your subcontract - to reveal the dishes and humps that a critical inspector might find under demanding specs. By then, it would be the painter's headache...
DF is terrible for studs as it warps the most eventhiugh it has most strength. I am not a framer and dont have to deal with crowned studs. I just make sure I always choose no heart and straight studs from the get go. You'd be surprised how much less flex your structure can be and the garbage that you have to deal with down the road. I agree about the slicing... I'd really still thinking about a thin wedge instead of simple sistering, else you just have a useless stud taking up space but provides no structure.
great tip thanks bud !
why not replace the stud
if is not structural you don't need to worry about cutting the stud. you may run into the new stud twisting in the future.
Jesus just put the drywall on
Liiiight buuuulb!!!👍
Obviously don't use this method on load bearing walls?
You can still cut your stud on a load bearing wall, you need to add an equal sized stud on one side instead of the 1x3 ... this way you will have full bearing and a straight wall
Happily subscribed man! Hoping to learn a thing, or two, or 300! :)
nice tip ,But with all that work and material ,why not just use metal studs (actually they are not that perfect also ,but they sraiten when drywall applied). I live in country where we use only metall. Its much better then wood for sure ,but in some countries wood just cheaper. Metall is way better ,light ,thin ,straight ,less and cheaper tools to assemble etc. PS. wood will distort aniway in year or two ,thats why most builders dont bother to straighten it.
+zCATAHAz Thanks for your tip on metal studs. We use metal a lot here in Canada on Commercial jobs. I would say the majority of builders here in Canada build with wood partitions because of the price and the speed. To comment to your last point about wood distorting: When walls are straightened and then sheathed on both sides the studs are locked into place which drastically reduces further twisting and crowning. Metal studs are a great product, I believe one day they will become main stream in a lot more places around the world.
+Greenmark Builders Actually a read some calculations on internet and metal is about 10-15% more expensive (depends on area of cause) ,so if you will use it on some walls (like in bath ,for tile) its gonna be about same price. And I didnt figure out from your video - you should put all crowns on one side of your wall. You make nice videos ,sould really consider to try make some tv show ,I like your attitude. :)
Metal a conductor. and would be a straight path outside -> inside wall. Then you have to start thinking about thermal breaks.
Thats for sure ,but its very thin and could be insulated way better ,more insulation so less thermal leak. Its pretty same to wood ,and we are talking about inner walls here ,so metal is all around better ,but its just more expensive then wood in some countries...
In extreme climates where the interior is being heated or cooled substantially compared to the outside conditions, metal doesn't work for exterior-wall framing. End of story. It might be workable on interior walls, but using them on exterior walls is why commercial buildings are frequently a thermal disaster compared to residential. Metal studs can only be used on an exterior wall if they are completely isolated from the thermal system. Insulating them is, in the words of one scientist, "a thermodynamic obscenity" because they are going to render the insulation almost entirely ineffective.
Just buy a planer, shave it down put the level on it and your ready to go !!!
if that works for you great.
never... that only addresses the problem on one side of the wall... what happens when you drywall the other side?
@@detrimundo you fill in the other side with shims to fill in the gap.
@@GreenmarkBuilders it does and it will save you a lot of time. Your doing it the super long way.
or just go to metal studs :)
We install what the plans call for. Metal studs are great but are rarely designed in residential houses where we live.
I have a situation similar to your video except that my project isn't new construction, it's a load bearing exterior wall with a window. 4 ' up from the floor the studs start to crown towards the exterior and only on 3 studs, I've been trying to solve this problem and am ready to call in a pro, any last minute tips or ideas before making the call?
+Scott Hanson
I'm sorry to hear about your news. If you have siding on your home you may be able to unclick the siding and remove plywood from outside. Whatever you do it is likely going to be a big job for you. When you are dealing with cutting support studs and jack posts I would be cautious because you don't want to do more damage to your home in the long run. Here in Ontario if you cut a supporting stud you need to add a full load bearing stud next to it. If you call in a contractor you might be able to feather out the worst area with a plaster compound depending on how much money you want to spend. I hope everything goes well for you.
A planer?
lol deficiency boy!! youre like me we retune everything too
nice. but remember respect the wood.
+BesrkTheBeast
Don't worry, it was all done in love lol.
ill subscribe if you take off the hardhat and dont wear a v neck shirt for the rest of your life.
Scott brown carpentry does it way better. This is just stupid