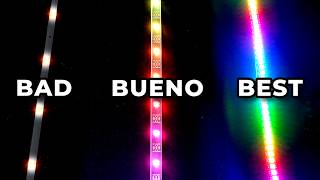
Animated LEDs for Beginners!

Vložit
- čas přidán 15. 06. 2024
- Get my book on this topic: www.kamuicosplay.com/product/...
Support our CZcams channel: / kamuicosplay
Want to get started with animated LEDs, triggers and sound effects? This video is for you!
Let me know if you have any questions! 😁
Svetlana
1. Set up the Feather M4 Chip and download Circuit Python: learn.adafruit.com/adafruit-f...
2. Install the Mu-Editor: codewith.mu/
3. Download the CircuitPython library bundle: circuitpython.org/libraries
4. Add the following files to your lib folder: adafruit_bus_device (directory), adafruit_lis3dh.mpy, neopixel.mpy
5. Check out the Circuit Python Animation Library: learn.adafruit.com/circuitpyt...
6. Copy&Paste Code: www.kamuicosplay.com/python/
Recommended Products for this project:
LED Foam: amzn.to/3u3gorK
Wire: amzn.to/3ma5gz8
Wire Stripper Tool: amzn.to/42fWTsp
Soldering Fume Extractor: amzn.to/3On6IPD
LED strips: amzn.to/3HosZc2
Soldering Iron: amzn.to/2IhJpV8
Lead Free Solder: amzn.to/3gAaYt9
Resistors: amzn.to/2sEyCzF
Slide switch: amzn.to/388tDHQ
Helping Hand: amzn.to/38rmReX
Heat Shrink Tubing: amzn.to/2JQiLa0
Feather M4: amzn.to/429TcV2
PropMaker Featherwing: amzn.to/4b8ax5c
Speaker: amzn.to/3vKVAFX
Lipo Battery 6600mAh: amzn.to/2vyVm65
Our CZcams filming equipment:
Canon R5 DSLR: amzn.to/3S5Kumq
Canon RF 24-70mm F2.8L IS USM: amzn.to/3vNcofy
Camera screen: amzn.to/47DUtVK
Sound: Rode Smartlav+: amzn.to/2VtYTfU
Rode Wireless Go: amzn.to/2KvAD6Z
Rode NT-USB: amzn.to/2XW7klX
Smartlav+ to transmitter adapter: amzn.to/2yD59ct
Artlist: artlist.io/artlist-70446/?art...
Lights: Studio Lights: amzn.to/2VR0lYS
All Amazon links are affiliate links that we get paid for if you buy a product. You can support us by using these links. Thank you!
Video edit by @GeekingJay
___
► Socials:
www.kamuicosplay.com/
/ kamuicos
/ kamuicosplay
/ kamuicosplay
/ kamuicosplay
#LEDs #tutorial #coding


You are the Bob Ross of cosplay. You make it all look so straight forward and easy.
True 😊
Hey there! Thank you for this awesome video :D
About the helping hand: if the "crocodile teeths" are damaging your boards, you can put a heat shrink tube on both parts to soften the grip!
A project that I am currently working on uses a raspberry pi zero. It's a microcomputer which you can use to power LED's as well. The cool thing is that you can remotely feed it commands using an app on your phone. So that way you can change your LED's on the go!
Thanks a lot, you guys. I've only made one light-up prop so far, and it was just with basic store bought christmas lights and very simple. I've been wanting to do some more complicated builds and I think you've given me enough to get started. Thank you very much for all the work and love you put into your builds. Your passion for your art is amazing. And... Corgi!
Thanks so much! Really happy to hear you enjoyed the video! Wish you all the best for your next build! 😊
@@KamuiCosplayone thing that's been puzzling me for quite a while now is how much paint can you apply to LED foam before the lights can no longer shine through? I'm nervous about painting the foam for this reason.
czcams.com/video/bd8zVxl0Nic/video.htmlsi=1y61lfNGchRjn1KO
I got the book at Christmas, this video is a nice addition to help me understand! :D I was worried to mess up the soldering :')
Thanks so much and hope you’ll like the book and the video! I‘m sure you are great at soldering! 😊
Days before I attempt my cascading led project for my Rapunzel wig- Kamui drops this. SHE READ MY MIND- I was legit so confused on how I’d do this but this legit is so helpful😭 now to find the money to do so 💀
I want to thank you for the wire stripper tool!!
it is the first one I have ever had that actually works!!
Thank you for the video. Showing the computer side of it really helped me.
Corgi! Also, great tutorial as always. Definitely would be great to use in conjunction with your tutorial book!
Thank you for this! Definitely needed a tutorial and a supply list ❤
this is super helpful, I'm soo intimidated by working with leds, but this video demystified it pretty much for me :))
TY fot the updated tutorial. I've watched the other tutorials dreaming of the day I could afford LEDS. well that day is here.
I just started planning my 2024 dragon themed Halloween Masquerade ball gown. 🐉👗🎃
But 1 giant gloomy cloud stood in the way: I had no idea how to design the lighting and electrical system for the fire and lava elements. 🔥🌋
Thanks to this video, that gloomy cloud is gone!!! Only excitement remains. 🤩
Perfect timing! Thank you!
(Just joined, too. Excited to support the channel!)
Thank you for this super informative video right in time to improve my latest Evelynn cosplay ✨️
Great video, you do make it sound so easy!
Brilliant video. Thank you!
Super nice work. I'm really Impressed! Congratulations. I will love to do this kind of work. Greetings
Thanks Svetlana. I almost get it. When I get around to actually trying this, I'll review.
❤
Hi Benni. 🙂
I was going to use one of your older videos for LEDs in the very near future. Thank you for putting this out! It's exactly what I'm looking for. I'm making an attempt at the Broken Vessel from Hollow Knight and I wanted to do a nice pulsing light effect inside the infected bubble.
Super happy you enjoyed the video and good luck with your project! 😊
Thank you so much! This video was super inspiring and I’m going to try my own LED project!
Yay, really happy to hear that! 😊
Thank you so much I am learning loads today
I’ve always been so intimidated by leds 🙈 ai hope I can try it out soon. Thanks for your videos.
That Nova cosplay is amazing!!! 👌😍
Awesome video!
Thanks so much!
Absolutely MARVELOUS !!!
IM SO GLAD SHE MADE THIS VIDEO !! Shes so cool, im so gonna take this and run with it!! Thank you kamui!!
Thank you and happy crafting! 😊
Man I'm so glad you did a video on this finally, this will inspire myself to learn :D
Always happy to help! 😊
Great video! Look into a pinecil, so much easier to solder with.
Hello everyone, good viewing🐼
thanks again for an amazing tutorial
You would like the adjustable solder iron. Seem to work better than the fixed types.
So cool how this video just came out I'm just waiting for my RGB rings to arrive to wire up my majora's mask following from your new led book it's going to be my first cosplay outfit I go to a con in 😁
Great tutorial.
Love this sort of thing... Subbed here.
Awesome update
Great video, I have the book also, it really helps a lot! Question: can the chip be used for movement also? I want to create a mask that opens and closes and lights up and it would be great if i can do it with this same chip. Thanks for the video.
Pretty cool! I've been looking for the easiest ways to program addressable LED strips lately. This guide looks quite nice. :) Personally I'm more of an Arduino nano / STM32F103C6T6 type guy since these boards are MUCH cheaper and still quite powerful (as controlers, you still need something else to drive the LEDs with high enough current though)
Thanks so much! I actually worked with Arduino previously, but they stopped supporting custom chips from Adafruit. In addition, it’s quite difficult to run several animations at the same time. I personally prefer Circuit Python now as it’s much more easier to install, program and include in cosplay projects! 😊
Thank you!
It was very helpfull!
🙂
Please make an late roman Berkasovo style helmet, I'm very curious about how you make such a big helmet crest/comb! 😊
Mir war vorher nie aufgefallen das du aus Deutschland kommst.
Schönes Schritt für Schritt Video!
Schönes Video. Gut erklärt. Danke 🙂
Danke für das Lob! 😊
I was just hoping you’d post an update to this! Must be fate 😊
Hey, awesome tutorial.
Theres a little mistake at 23:20. You said you can lower the brightness by setting it to 1.5, but you meant 0.5
Ossom as always 🎉
Another video and I want to organize my own workshop so bad but I don’t have any money now lol 😂
This is perfect, i need to wire an LED heartbeat effect, any advice?
thanks for your video really helpful! i was wondering if you have 300 LEDS how can you provide much power ? if the prompt need to be connected to electricity , are you using 5v 18 amp?
I am always using an Arduino Nano! Problem with this one is if u need an instand Effect when powering it on, it needs almost 2 Seconds before the Effects starts!
5:36 Interesting video! I have a question... Aren't 0.14 wires too thin? Don't they heat up after a while that the LEDs are on?
Thank you! And no, always used them and they were perfectly fine! 😊
I really love your tutorials and I'm also working on my first LED project now. I wired everything and also entered the code. When I connect my Arduino Nano to the computer all animations work but when I plug it off and switch on the battery (3.7V) the lights only light up without the animation. I wanted blinking purple lights but when I use the battery it only shines purple without the blinking animation. Why is that so? Is 3.7V not enough for animations? I thought it would be enough because Kamui also uses them in her projects.
I found out that you are coming to México :D
Hi Kamui! I am doing an OG sam fisher from the 1st Splinter Cell Cosplay. I have a 3d print of the Goggles and I would love your advice for 3 Green led lights 1 for each cylinder on the goggles. What type of leds would you recommend, Single or strips? And what light diffusing material should I use if any?
Dayum 40 secs ago, we early boooyys
Que bien me gusta ver que está mujer sabe lo que está haciendo y es muy bella también
Thank you this is a very helpful video. Do you have a recommendation for led lights that are more flexible to be use in a flat circle? It looks like the ones you used on this video might be too thick to fold 🙂
Adafruit.com offers also 5mm wide LED strips! 😊
@@KamuiCosplay thank you!!
Probably for the more advanced side of led work, but how would you safely apply this to work under fur? Arcade Ahri from League of Legends has tails that cycle through the rgb spectrum as a prime example. Aside from he KDA skin line, her tails are fur, but some have an ambient glow effect to them.
thays prety awsome
Thank you very much! 😊
Nice and simple! Thanks.
Is there a limit of LEDs which this chip can handle?
Millions.
Wow... I subbed so fast 😅
Have you ever thought about renting a shop in madeira...im sure tourist and locals would be interested in this stuff.
Actually no. We are super busy with content creation and making books and patterns. Having a physical shop wouldn’t make any sense for us. 😅
@@KamuiCosplay funchal has some beautiful shop units.. if need a unit to meet buyers or demonstrate its definitely worth considering in the future.. but I understand mo problems😮💨
Very interesting, really, I want to cover my table with carbon fiber and put a sign underneath with some LEDs, I haven't yet mastered the art of epoxy
Do you have any recommendations for a way to connected different parts of an armor cosplay? for example, shoulder pads to the bracers? Is there a connection you prefer?
Yes! I'm using servo connection plugs!
amzn.to/3uaED7c
How would you carry the battery on aeroplanes? They dont allow power batteries in baggage right? How do you plan to remove the battery for travel?
Heeyyy Svetlana and others!! Is this set suitable for any other programable led WS2812 strips?
I know you use adafruit and like it, but what about other chip sets? Like Arduino, raspberry pi, etc.?
Hello Rana, I have been following you2. Last year her teaching clips were very good. But I'm Thai. Makes it difficult for me to understand when she teaches. I would like to order a beginner's book to teach basics. What books does she recommend? Because if I were to buy it myself, it would definitely be the wrong book. I want the molding of full head armor, arm guards, and full body armor (male). Please reply to my comments. You can send me a link to each piece in the comments. Thank you in advance. Keep making good clips😁😁. I'm following you (even though I don't understand).
Hello, do you have a link or anywhere I Can find the 40mm speaker at 3:38 , I'v been looking for this for a while and cant find one.
what if I want a set of pixels to turn on one at a time and once on stay on until the whole circuit is switched off?
perhaps I can send you a short vid of the back of my Cylon Centurion costume where I have a matrix I built (but not using these tools)
Hello Svetlana, Benni and the CORGIS! I'm starting to restock my electronics supplies for the year and considering the Adafruit Feathers rather then the generic Arduino clones I've been using. You showed the Feather M4 and the Propmaker Featherwing, which looks like a great combo but I've just seen on the Adafruit site the Adafruit RP2040 Prop-Maker Feather which seems to be a decent combo on a single board.. what are your thoughts?
Oh I need to be honest with you: I only follow tutorials myself and the ones I used had the Feather Wing + Feather M4 combo. I am personally really happy with this setup and will stick with it. You might find the RP2040 more useful though! 😊
@@KamuiCosplay 😁 No worries! We're all learning! I'll get the M4 and FeatherWing and also an RP2040 board and see how they work.. Keep up the excellent work!
@@Rogue-productionsCoUk I'm using that board for my projects and its been a great experience. The terminal connectors are great for getting things going without soldering to the board right away and the I2C port it comes with I've found very handy for attaching additional small input sensors like decibel meters and environmental sensors to make props and costumes respond to whatever is happening around you. My current project uses a decibel sensor connected to the propmaker to have LEDs respond to crowd noise levels.
Ok but how recharge that props when already created? you charge whole prop or you pull out battery from it?
Just curious as to why you moved away from the Adafruit Protrinket and PowerBoost with the arduino coding?
I hope you find this helpful and not critical- the "r" in "iron" is silent, so you'd say "soldering eye-n" ❤
Corgi ❤
I have a question what is your reccomendation use for a button for led
I need help with a simple Soft on Soft off Led circuit! I wanna do a mantis cosplay with two 3v leds with a simple button switch that will slowly power them and slowly turn them off.. Im a complete beginner and dont know the terminology to actually be able to research and put all the pieces together.
coooooorgi
grade erst gemerkt das ihr deutsch seid :O eine frage könntet ihr vllt das odachi+scheide von Alpha crimson weave aus punishing gray raven anschauen ob das möglich wäre?
How do you charge the battery?
hi beautiful. great video
#9:00 -- please set the PCB correctly at the connectors before soldering. like shown it is a predetermined breaking point .. that's bad work. (not the joints, the behavior) also
#9:40 -- pre-tin the wires before conntecting.
#13:40 -- keep open wires shorter.
Sehr geehrte Frau Swetlana,
können Sie bitte das Cosplay von Kandakia aus dem Spiel Genshin Impact erstellen. Ich denke, Sie werden es großartig machen.
Im Voraus bessten dank.
Deinen fan Andrey.
Corgi!
Does someone know if this is possible with an esp32 and wled?
Hi ! I am trying to use your tutorial but at 15:30 mine doesn't lights up and I don't see it on my computer either. Do you know why and would you have a solution ? Thank you a lot !
Did you already tried different USB cables? They come sometimes only with a charging functionality, but cannot transfer any data.
Corgi!!
i cant find the adafruit_bus_device (directory), i need to created be my self?
Is it possible to do this without a laptop but rather an iPad?
Can you do yuji new amrs in jjk Please
What about resistors? How and where do you put them?
No resistors required! 😊
ah many thanks!!!
Boys and Girls, where you buy NEOPIXEL LED STRIPS IN EUROPE? In my Country (Lithuania) i can't find, only other manufacturers with WS2812 led strips... Help
Your link for the Lipo battery's don't work, it just links to a Adafruit Pro Trinket LiIon/LiPoly Backpack Add-On.
Those feathers micro controllers are kinda overkill just for leds
Your inspiration has been amazing! Benny is definitely a great secret weapon, I have learned SO much from his videos.
@KamuiCosplay Is there a reason you choose to use the Feather M4 with the PropMaker wing instead of using the Feather RP2040 Prop-Maker board? I recently made a large hammer using the Feather RP2040 PropMaker. It was a great experience and I'm curious if there is something specific you prefer about your setup.
I have herd about huge week long events in Europe have you herd about this
Why did you have to make the mask do that laugh tho😭
isn't led 7 in both groups? shouldn't it be 0-6 and 7-13?
Corgi~~
no me funcionan 🥲 al principio reconocia los chip mi pc ahora no y parapadea 3 veces el led del feather m4
4:19 OH MY PKCELL
Step one: wrap Svetlana in seran wrap. No? Rats!
👋🏻🇸🇻