Double Thick Single Crochet Potholder - Free Crochet Pattern by Yay For Yarn

Vložit
- čas přidán 2. 08. 2024
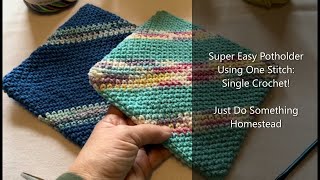
- Free pattern! This easy-to-make crochet potholder is double thick to protect your hands, counters, and table. A pretty, yet practical gift that will last for years. I make these for gifts and people always love them. I like to use cotton yarn because it is insulating and machine washable. Unlike some yarns, cotton will not melt when you put hot pots and pans on it.
CLICK HERE for the free written pattern and photo tutorial!
yayforyarn.com/free-double-thi...
This pattern is intended for your personal use only. You may not share it, copy it, sell it, give it away, or mass-produce the finished product. However, you may sell the finished items on a small scale, as long as you convey in your item description that you used a Yay For Yarn
pattern.
Yay For Yarn Copyright© 2015 - Current. All
patterns and photos are owned by Yay For Yarn.
See my favorite knitting and crochet tools and supplies here:
www.amazon.com/shop/yayforyar...
Disclaimer: The product links above are affiliate links. If you make a purchase through one of those links, I may receive a small commission.
------------------------------------------------------------------------------------------------
SUBSCRIBE for more free patterns, tips, and tutorials!
Follow Yay For Yarn on the blog:
yayforyarn.com/
Follow Yay For Yarn on Facebook:
/ yayforyarnbymgg
Follow Yay For Yarn on Pinterest:
/ yayforyarn
Follow Yay For Yarn on Twitter:
/ yayforyarnbymgg
00:00 Introduction
00:35 Materials
01:54 Start Of Tutorial
05:07 38th Row Done
08:50 Finished Product
09:30 Outro - Jak na to + styl


⭐ VIEW the FREE Written Pattern for the Double Thick Single Crochet Potholder ⭐ yayforyarn.com/free-double-thick-potholder-crochet-pattern/
WATCH NEXT ➡ Textured Pullover - Free Sweater Crochet Pattern czcams.com/video/aBGRSK5hPhE/video.html
Thank you very much! I'm making slippers for my friend's mom and still have some left overs, so I'm going to make a couple of these as bonus. I love your adorable voice, your perfect teaching pace, and your hands are beautiful. 😄👍👍
This will be my first potholder 🙂
I have been crocheting for a couple of years now
Thank you for the well demonstrated video
You're welcome, Teresa! I hope your potholder turns out great!
Thank you. It's beautiful.
You are welcome!
Wonderful video! So simple and easy. Thank you!
Thanks! So glad you liked it!
Aha! Nice lil twist on an old school "classic" pattern. good for those who want a completely square potholder. fun twist. MERRY CHRISTMAS~
Thanks, Kathleen! I'm glad you like it!
I really like your tutorial! I like sewing the seam at the top instead of the middle of the back, like in other tutorials. Thanks for posting!
Thank you Debbie! I am glad you like it!
:)
debbie frank would like to get aprinted copy
Hi Peggy. The written instructions are here: yayforyarn.com/free-double-thick-potholder-crochet-pattern/ .
Excellent video! I like your voice, and could understand this. Thank you!
Thank you, Jeanne! I'm glad you enjoyed it!
Like this pattern
I enjoyed this video and plan to make some 😀
Hi Valentina! I am so glad you enjoyed the video! I hope your potholders turn out great!
Great pattern. Thanks :)
Thank you, Kira!
You have a lovely voice. The pattern is easy.. Thank u. Have a blessed day.... ☺
very easy to follow. this pattern kind of confused me a little. i am going to try it! i am living in a homeless shelter and get very bored and i like to be productive during my spare time. thank you! really enjoyed this.
You are welcome, Alyssa! I am so glad you are enjoying the video. Please let me know if you have any questions about the pattern. I hope your potholders turn out great!
i love your crochet videos can you make different types of potholders. .?
Thank you, Lydia! Yes, I plan on making more tutorials for different types of potholders in the future. Thanks!
Great idea...I have lots of cotton. May put heat n bond inside to reflect heat? Thanks
Hi Linda! If you want to insert something inside to reflect the heat, I would suggest using Insul-Brite: amzn.to/2D6Phy1 It's a heat reflective polyester batting that is made for potholders and hot pads. If you decide to insert something like that, I would also suggest some stitching to hold the layers together so the insert doesn't get wadded up in the wash. Hope this helps!
When you finish and leaving the 2 foot length and whip stitching what 2 loops you going thru on each side thanks old video
After the beginning 2 rounds you do 4 sc in a single chain at one in and 2 sc in a single chain at the opposite end, do you do this for the remaining rounds to form corners? Thanks..
Hi Joyce. The increases are only on the first round. They are at the ends of the foundation chain to help turn so you can work down the other side of the chain. All following rounds are worked straight, without any increases or decreases. Hope this helps! Thanks!
I keep coming up short on stitches no matter how careful I am. I cannot figure out where I’m going wrong
Hi Nancy. Did you have the correct number of stitches in the first round? If you haven't accidentally skipped any stitches in the later rounds, perhaps you may have missed a chain stitch or two? Hope this helps! Please let me know if you have any more questions. I am happy to help!
can you use a 100% acrylic yarn for the project? Blair
Hi. Because this is a potholder and is going to come in contact with hot items, I do not recommend using acrylic yarn for this project. Acrylic is a synthetic fiber and will melt if it comes in contact with something very hot. If it melts, it may melt onto your counter or tabletop, or onto your cookware. For a potholder, it is best to use a yarn that is 100% cotton or 100% wool. Both of those fibers are natural fibers and can withstand quite a bit of heat. Hope this helps! Thanks!
Hi, I am a beginner crocher. Why do you have to keep the stitch marker on? Is it just to keep count of how many rows you want?
Hi Christy. The stitch marker is to mark where the beginning / end of the round is. Because we are working in a continuous spiral, there needs to be a marker to show where the beginning / end of the round is. That also helps to keep the work straight (not getting smaller or bigger) because it allows us to count the stitches in a single round to make sure we have the correct number of stitches. If you just worked in the continuous spiral without a marker, you could unknowingly lose or gain stitches if you accidentally skipped or added a stitch. You wouldn't be able to count the stitches in the round without knowing where the end of the round is. So, the shape of the resulting potholder could turn out skewed, not square at all. The marker also helps make sure we count the number of rounds correctly. By working up to the marker to complete each round, we can know we are counting full rounds. That makes it easier, because we can know that (for example) we have completed 27 whole rounds. If there wasn't a marker, we may have only completed (again, for example) 26 and 1/2 rounds, but wouldn't be able to tell that if we didn't know where the end of the current round is. Hope this helps! Please let me know if you have any more questions! Thanks!
ok, thanks so much for the explanation! Hope mine turns out like yours! So Pretty! Mine is curving in on the ends and I think I'm on the 4th round! Keeping my fingers crossed! haha
You are welcome! The work will naturally twist and curl in the beginning, but as you keep going it will flatten out. I hope your potholder turns out great!
I would like this pattern if you could get the correct count to make it square and not more of a rectangle
Hi Kathy. If the pattern is worked at the correct gauge, the potholder should come out square. The finished measurements for the potholders in the photo are 8 inches by 8 inches. Hope this helps! Let me know if you have any questions.
Thank you :)
You are welcome!
I'm a beginner crocheter. What does worsted weight mean? Thank you for the tutorial 😊
Hi. Worsted weight refers to the thickness of the yarn. Yarn is classified into different categories of thickness. Worsted Weight yarn is a medium weight (medium thickness) yarn. On the yarn label, you will see a little symbol that looks like a ball of yarn with a number on it. This symbol is usually found on the part of the label that tells what fiber the yarn is made from, how much yarn in the ball, etc. This symbol tells what weight the yarn is. Worsted weight yarn is #4, so the yarn ball symbol will say "4" on it. So, if your pattern calls for #4 or Worsted Weight yarn, you need to use yarn that is labeled as #4 worsted weight so the pattern will turn out correctly. If you use yarn from a different weight (or thickness) category, your gauge will not match the pattern and the project will not come out the right size. That being said, the weight or thickness classification of a yarn just means it falls into that particular category. Yarns that all fall into the same thickness category will still vary slightly, they will not all be exactly the same thickness. When following a pattern, you don't have to use the exact same yarn the designer used, just make sure your yarn matches whatever yarn weight category the pattern requires, and any other qualifications specified in the pattern. For example, this potholder pattern in the video above requires 100% cotton yarn because many other fibers will melt when they come into contact with hot items. However, if a certain fiber type is not required in the pattern, you can use a different fiber, as long as it is the same weight as the yarn the pattern calls for. Hope this helps! Thanks!
I am on round 4 and it seems to be curling...all my stitches are correct. Is this normal and will it straighten out?
Hi Pam. Yes, it will usually curl quite a bit in the early stages, but as you continue on, it will straighten out and lay flat. Hope this helps!
Thank you
im using a G hook and my potholder comes out 1" bigger why?
Hi. Even if you used the same size hook that I did, every crocheter is a little different. Some crochet tighter or looser than others. This is why hook size is always a suggestion, not a hard and fast rule. The important thing is to choose a hook size that gives you the correct gauge. By adjusting the hook size you use so your stitches come out to the size the pattern calls for, you ensure the finished object will come out the same size as the pattern. For a potholder, the exact gauge is not critical, since it doesn't have to fit something or someone. If you are doing something like a sweater, it is very important to get the right gauge for the pattern to make sure it fits the person. If your gauge is larger than the pattern calls for, you may end up using more yarn than the pattern calls for. For your potholders, as long as you have a little extra yarn beyond what the pattern requires, you can stick with the hook you are using and just end up with the slightly larger size. I hope this helps!
Do you put the stitch marker on the 72 stitch on each row right? Mine is staying in the same spot.
Hi Shaelyne! When you reach the end of the round, you move the stitch marker into the current loop on your hook. Then, when you work the next stitch, the stitch marker ends up in the top of the first stitch of the round. Because we're not turning after each round, the beginning of the round will naturally slant gradually to one side. Does that help?
A little
Is there a way to make it smaller?
Could you add stitches to make it bigger?
Yes, Barbara! You can just add more chain stitches to your foundation chain and make it as large as you like. Hope this helps!
Thank you for this pattern!
You're welcome! I am so glad you like it!
The diagonal version takes less time to make and uses less yarn. It also has a bit more visual interest.